- 1. Record your computer screen and webcam simultaneously.
- 2. Allow you to customize screen capture and frame rate .
- 3. Powerful editing tools and effects to enrich your video clips.

How to Use Google Image Resizer

Google Web Designer device is a program for making intelligent HTML5 sites and advertisement standards. It is an independent software for Windows, Mac, and Linux. Without a doubt, Google Web Designer is a decent plan device to work outwardly without playing with the code. The robotization highlights of GWD allows you to plan without agonizing over shows as the GWD plans and movement illustrations can run on any gadget. We should investigate the highlights of GWD that makes it ideal for making HTML5 plans and liveliness promotions.
Part1. What is Google Web Designer?
GWD (Google Web Designer) can be considered a basic apparatus to foster cross-screen viable substance. This GUI based Google apparatus is easy to utilize in any event, for fledglings while empowering experienced engineers to burrow further. The liquid format permits clients to utilize rates when setting top, left, width and tallness styles. At the point when the size and position of components are set in rate, they can contract and develop with the compartment while keeping the general design unaltered. The apparatus can be utilized to make advertisements and standards that work on all versatile and work area gadgets. You can include different parts to your promotions like iFrames, maps, picture displays, YouTube recordings and tap region highlights. You can redo your substance to respond to activities like shaking and pivoting on cell phones.
Part2. How to Resize Images and Videos in Google Web Designer
At the point when the size of your photographs matters, you frequently need to surrender their quality. Be that as it may, with Simple Image Resizer you don't need to make this trade-off! You can resize your photos and pictures without changing their quality. There is no compelling reason to introduce any extra application on your PC to simplify Image Resizer take care of its business. You just peruse go to www.simpleimageresizer.com and transfer the pictures you need to recoil. The record designs upheld by Simple Image Resizer incorporate JPEG, JPG, PNG, BMP and GIF. Google Web Designer is viable with all major Operating Systems (OS). In addition, from our experience, it's anything but an asset hoard, which numerous different designs altering applications can be. The underlying download is exceptionally light and when you dispatch the installer, it'll get some more information. Generally, the application just requires minutes to introduce, even on an unobtrusive web association.
When introduced Google Web Designer and can undoubtedly look 5 changed regions:
- The device choices bar shows choices for the as of now chosen apparatus. For instance, when the text instrument is chosen, the apparatus choices bar shows textual style and text format choices.
- Fundamental device board to make objects, text, zoom, etc.
- The timetable allows you to make movements utilizing keyframes. In Quick mode, the activity is caused by situation by-scene; in Advanced mode, you can energize every component independently.
- A Panel to the right that incorporates a few components like tones, properties, parts, CSS editorial manager, Events, library and Ad Validator .
- Lastly to the middle the fundamental space of work.
1. Using the Selection Tool
With the Google Web Designer, you can Stretch or Shrink the Image with Your Mouse. To do that, let’s follow the steps below:
Step 1: Open the Google Web Designer apparatus on your PC. Snap the Selection device from the toolbar on the left half of the screen. Ensure the "Change Control" checkbox is checked in the instrument choices bar at the highest point of the screen.
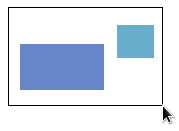
Step 2: Select the picture you need to resize and Drag one of the control focuses on the sides or corners of the determination box.
Step 3: The width and stature of the component will show during resizing. Hold the Shift key while hauling to keep up with the first angle proportion of the picture.
2. By Customizing the Image
To customize your image i-e to edit the width and height dimensions, you need to refer to the Properties panel, as shown here:
Step 1: To resize a picture utilizing the properties board in Google website specialist, Snap the "Choice Tool" in the toolbar on the left half of the screen.
Step 2: Select the picture you need to resize. In the "Properties board", change the width and stature esteems.
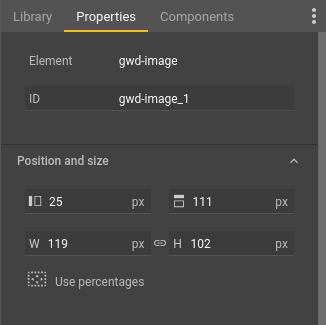
Step 3:To keep up with the first viewpoint proportion, ensure the Constrain angle proportion button is chosen.
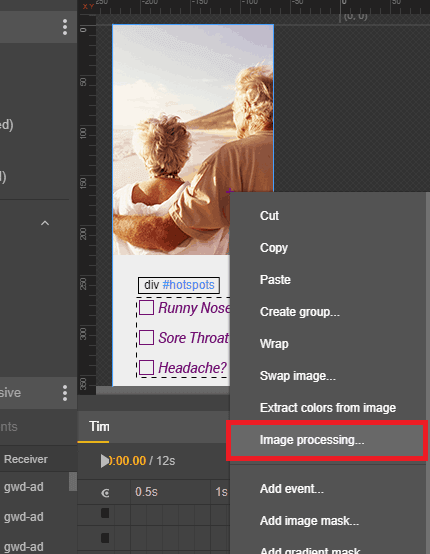
Part3. How to Scale and Align Images
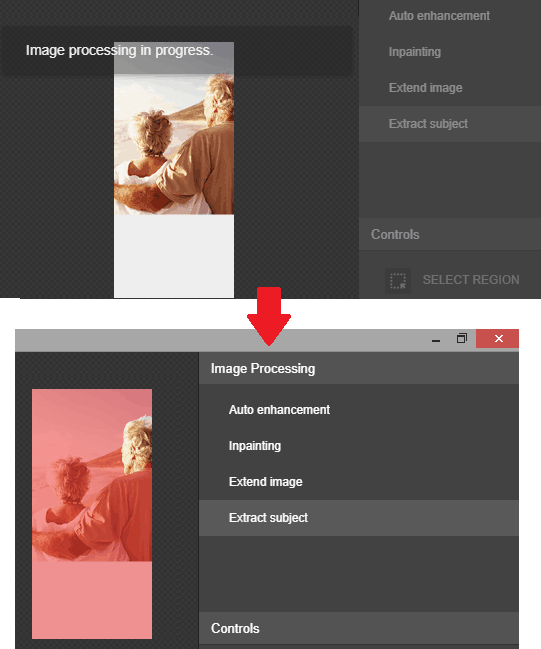
Step 1: You proceed to download the most recent rendition of Google website specialist from here. From that point forward, start a task and afterwards right snap on any picture and pick the picture handling choice. That's all there was to it.
Step 2: After you select the picture handling choice, you will be diverted to another UI. Here you can upgrade the picture utilizing the different instruments that it offers. The fundamental picture handling instruments that it has included are:
Auto Upgrade: For auto-fixing tone and different boundaries.
Inpainting: For fixing mutilated segments in pictures.
Broaden Picture: For resizing along any aspect.
Concentrate Subject: For featuring a subject in the picture.
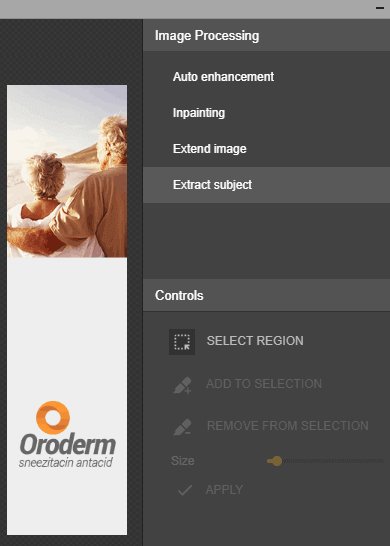
Step 3: You simply select any apparatus from the above list that you need to utilize and make the comparing alters in the picture. You would then be able to save the progressions in the actual picture and afterwards continue with the other work in your task.
Step 4: Thusly, you can utilize these straightforward and helpful picture handling instruments in Google Web Designer. It is exceptionally easy to utilize and at this moment there are just four of them. Yet, I trust later on refreshes, they add some more. Best of all, to make changes in your pictures you don't host to depend on a third get-together software. You would now be able to do this inside Google Web Designer itself.
Part4. Google Image Resizer alternative- Wondershare DemoCreator
Google website specialist is an application made by Google that permits you to plan and foster HTML5 web content through a straightforward Graphic Interface. There are many acceptable screen recorder applications accessible for Windows, with each attempting to be better than the other. The vast majority of the screen recording software has fundamental capacities like recording, altering, and live documentation. Be that as it may, a decent application must-have highlights like region choice, sound blender, webcam catch, recording clock, social product, and amazing video altering devices like change video speed, change the boundary, and that's only the tip of the iceberg. One such software we found is Wondershare DemoCreator.
Google Web Designer has normal instruments of drawing, text, 3D articles, liveliness, among others, when you wrap up planning your web content the application consequently creates the HTML5, CSS and JavaScript code. With DemoCreator software, you can record video while utilizing your PC and take ongoing screen captures for additional altering. You can catch the whole presentation or any part of the screen and save it as a video recording. It permits clients to make definite and unmistakable recordings and let clients record their recordings with outline rates going from 15-120 edges each second.
Steps To Resize Image and Video with DemoCreator
The supervisor accompanies some quite extraordinary highlights. You have a choice to alter the recorded video or the current video. You can add, quiet, or confine the sound for isolated altering, and you can manage video cuts by dragging the clasp edge to the Marker point. Likewise, you can resize, pivot, trim, crop, or resize the video.
You can likewise change the properties of the video, for example, show characteristics, change video speed, change the boundary and length, and so forth One of the most incredible altering highlights you find is adding a cursor impact and explanation impacts. These are an assortment of text, shapes, and pictures accessible that can be utilized to add visual prompts onto the video.
1. How to Resize Video/ Image by Cropping
Step 1: Download and Import Images
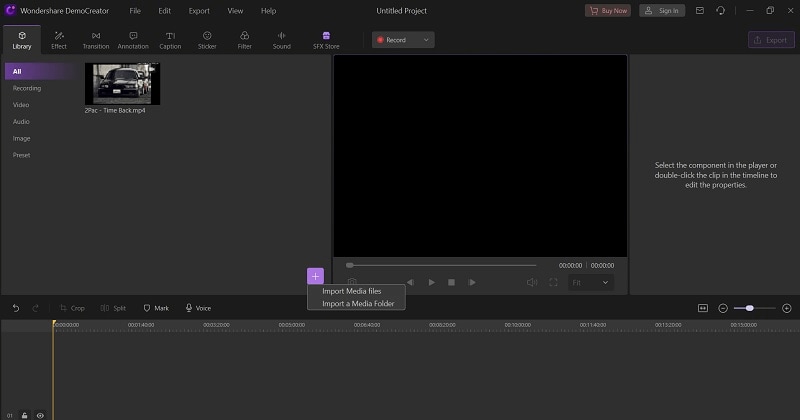
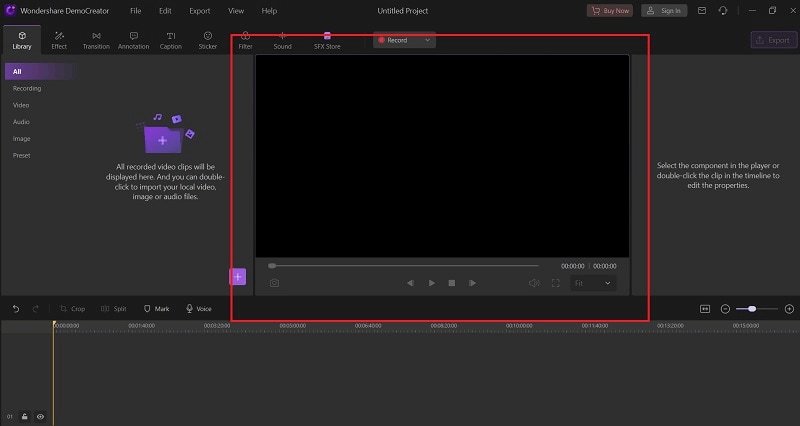
The first step to do so is downloading and installing the masterpiece from the official sources, and after that launch, it from the Start menu of your PC and go into the Video Editor functionality of DemoCreator.
As you’re into the Editor section, hit the Import button to select your Image files to import right away. Wondershare DemoCreator is open to numerous file formats of images including JPG, PNG formats to import of your own choice. After you’ve made a selection, proceed with the selection.
 Secure DownloadSecure Download
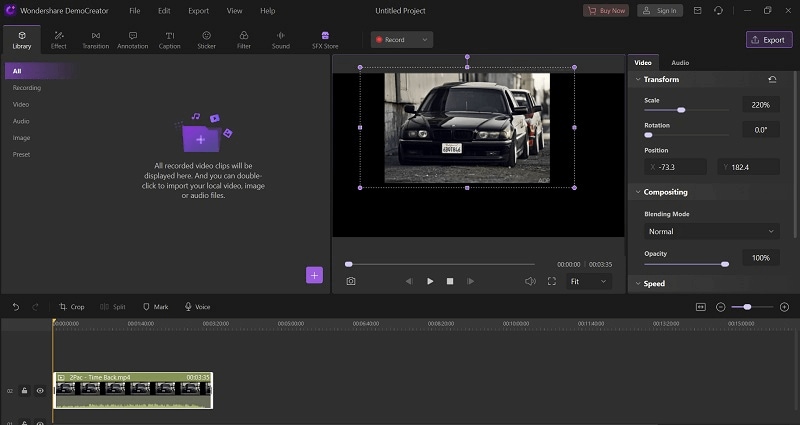
Step 2: Drag the Files to the Timeline
In the next step, hit the imported file with your mouse click and drag it right inside the timeline to edit them for the next steps:
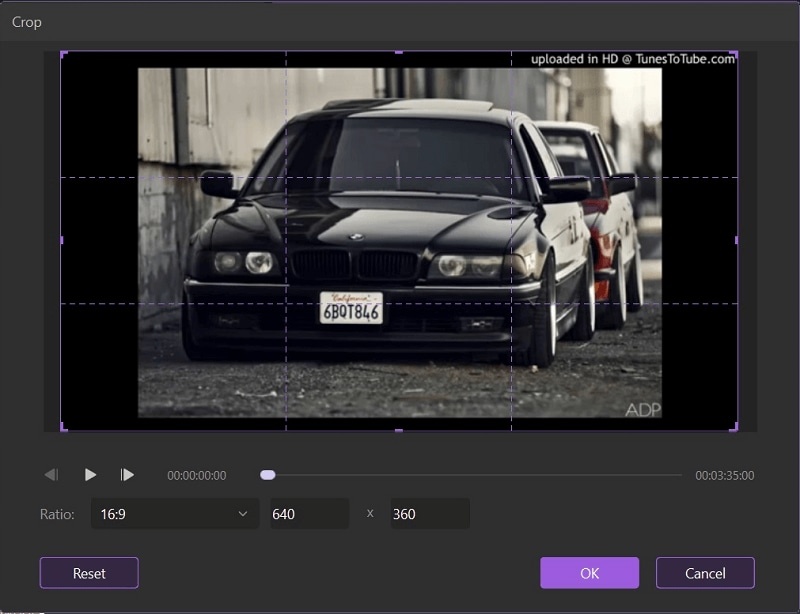
Step 3: Crop the Images
Now as you’ve successfully dragged the images to the timeline, you can use the crop option inside the timeline but for that, you need to adjust the files inside the timeline. Select the Crop video option by right-clicking on the image file and selecting the Cropping option as shown below:
2. How to Resize Video/ Image by Dragging in Canva
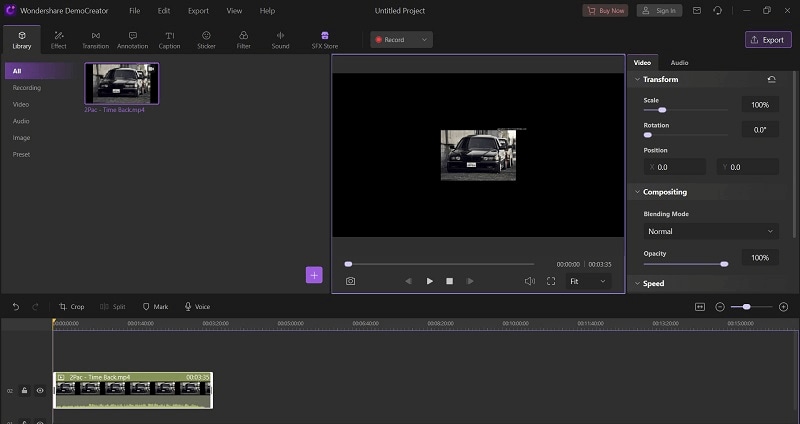
Now if you want to resize or crop your Images or videos inside the Canva of DemoCreator editor, the steps are really simple. All you need to do is after dragging your imported files inside the timeline, the Images/Videos can be visible to you inside the Canva as shown here:
To perform the resizing inside the Canva, you can simply drag your Image/Video endpoints with their according positions inside the timeline as shown here:
Lastly, unclick on the file to save it automatically.
3. How to Set the Video Resolution by File-Project Setting
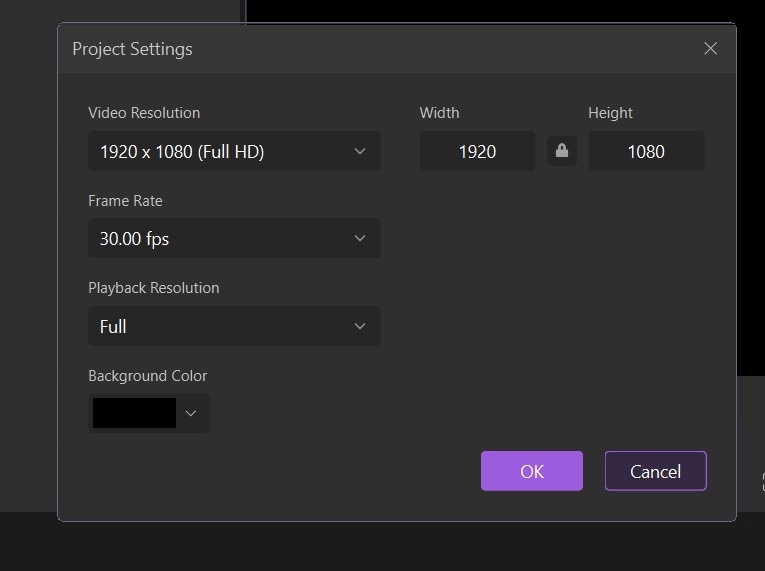
Now to resize or crop your images/videos with DemoCreator, you can also go for the project settings if you want to perform the resizing operation more accurately. Refer to the File menu at the top of the editor as shown here:
- Select the Project Setting from the list and now you’re left with the Project settings window where you can add the resolution to resize or even crop your media files with full accuracy and precision.
4. How to Set the Resolution, Frame Rate and Bit Rate When Exporting
Lastly, if you want to Save or Export the resized Image, follow the steps below:
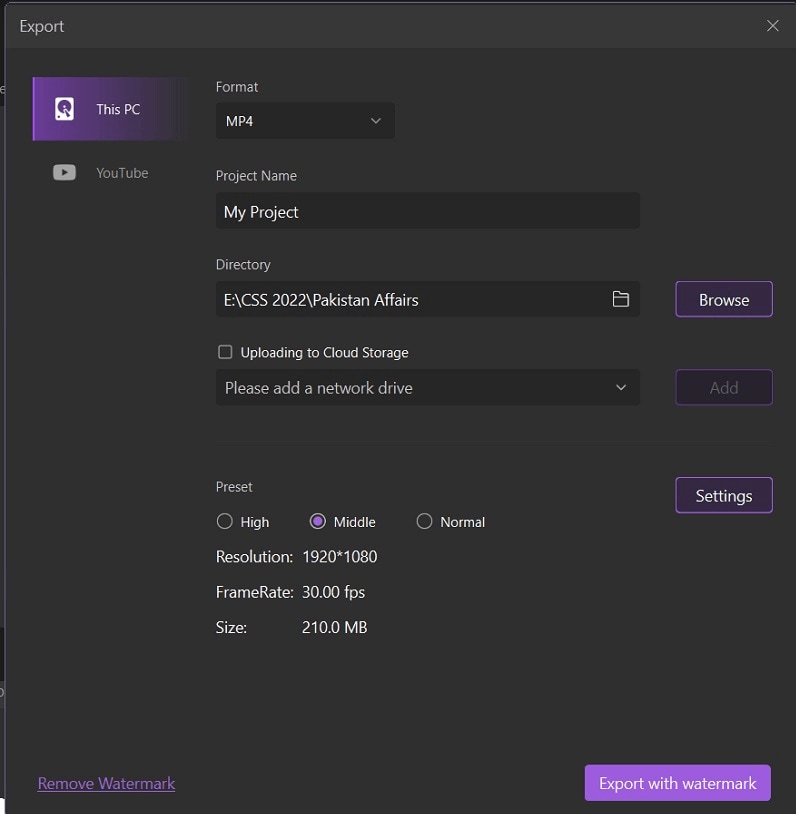
- After you’re done cropping your Images, now is the time to save directly the edited file by following the export steps below. With DemoCreator, you can also opt for sharing your output file with your specified Image format directly to your system. Here’s how:
- Head towards the Export button and from that, if you want to save to your PC, then customize the output setting and personalize your Image output file settings including file name, and hit the save button directly. From here, you can also upload your file to viable platforms like OneDrive and Google Drive, hit the sharing option and specify your platform as shown below:

The Best Video Resizer and Editor
Secure DownloadSecure DownloadPart5. Conclusion
Google Web Designer is somewhat of a well-known application that a lot of engineers utilized for making energized HTML5 content. Also, with the option of picture handling, I think many individuals will be benefited and I truly like the decision of the picture handling devices that are remembered for the product right now it just has to that are additionally identified with the upgrade from the pictures and we trust they add some more later on refreshes. On the endnote, you can always have this DemoCreator recommendation from us to try it out with full precision. Let’s resize the images or even videos with the desired values and numbers on the go.


