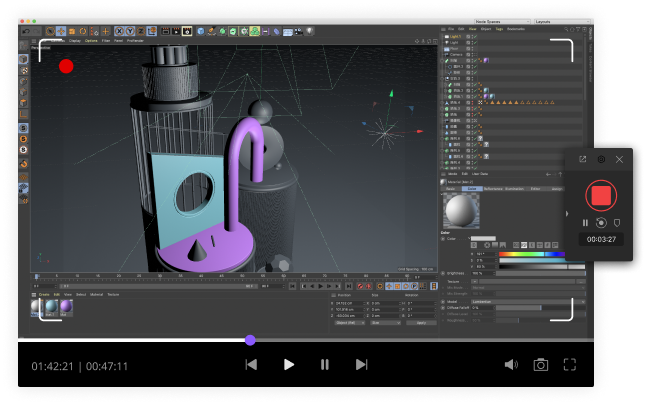
- 1. Record your computer screen and webcam simultaneously.
- 2. Allow you to customize screen capture and frame rate .
- 3. Powerful editing tools and effects to enrich your video clips.

How to Add a Watermark to Your Gameplay Videos [4 Ways]
Most people who record their gameplay upload their videos to sites so that others can learn from their tutorials, see what games are like before they purchase them and get hints and tips. A lot of people also get revenue from the videos they post so want to ensure that others do not take their videos and claim them as their own taking revenue away. This is why they learn how to add watermark to their videos so everyone knows the original owner should it be taken. The watermark is a special still image that is put over your video. It is able to cover the whole screen, the corner or middle. You choose whether you want it to be a solid image or transparent which means that it won’t affect the video visibility underneath. You can choose the add watermark function to add either text or a logo depending on your preference.
In this article, we will show you how to add a watermark to your recorded gameplay videos in 4 ways.
- Part 1: How to add a watermark to gameplay video with Wondershare DemoCreator
- Part 2: How to add a watermark to gameplay video with Action!
- Part 3: How to add a watermark to gameplay video with Wondershare DemoCreator
- Part 4: How to add a logo in your YouTube account
Part 1: Adding Watermark/Logo to Recorded Gameplay video with Wondershare DemoCreator
Wondershare DemoCreator Screen Recorder Software is perfect for gameplay recording because of its ability to record the frames at up to 120 fps. Besides the recording feature, you can also edit your recorded gameplay video footage with ease. To add watermark, logo, or images in DemoCreator is easy, you just need:
 Secure Download
 Secure Download
- Import both your gameplay video and the watermark image to the timeline;
- Adjust the border of the watermark image, such as the border color, opacity, and size;
- You can also add text and overlays effects as your watermark if you like.
Download Wondershare DemoCreator now and record and edit your gameplay video footage now.
Part 2: How to add a watermark to gameplay video with Action!
You can get record in high definition and add a watermark to your gameplay with Action! game recorder. It costs just $29.95 and has numerous features to help you to make the most of your recording as well as protects it from theft with the add watermark capabilities.
Step 1: To add watermark to your video you will first have to open and run the program.
Step 2: Go to settings and ensure that the ‘use overlay graphics’ is enabled. Choose the file that has your logo or text to protect it from theft

Step 3: Set the position you would like it to be and run the recording of your gameplay to finalise and see your logo or text.
Step 4: To add a watermark to protect your gameplay video but not get in the way of the action you will have to first import the gameplay video.
Step 5: Select the option to add video and watermark files then add them both to the timeline.
Step 6: Adjust the watermark to your favoured specifications and save it so that you can upload it when you are ready.
Part 3: How to add a watermark to gameplay video with Wondershare DemoCreator
As well as being a great tool for editing your video gameplay DemoCreator can also be used to add watermarks so that theft of your videos will be less likely and obvious. This will help you to protect your copyright and is also a great way to promote yourself.
Step 1: Import your files to the primary window by using the Import button.
Step 2: Edit your gameply with caption, game sticker, game intro and outro with DemoCreator resources if you like.
Step 3: Export your video and add watermark in your video.
Tips: Besides video watermarks, DemoCreator also provides other video editing functions like adding background music, photos, special effects, etc.

The Best Screen Recorder & Video Editor
 Secure Download
 Secure Download
Part 4: How to add a logo in your YouTube account
Step 1: Open up your web browser
Step 2: Go to YouTube.com and log into your account as usual
Step 3: The thumb image that can be found in the right hand side top corner when pressed will open up a menu
Step 4: In the menu select the icon that looks like a small gear
Step 5: Select ‘view additional features’
Step 6: The menu on the left will have a link titled ‘Branding’.Here you have to click the ‘add watermark’ link
Step 7: Select the image you want to add as a watermark from your computers files and press save
Step 8: Choose whether you want the watermark at the beginning, end or throughout your video
Step 9: Don’t forget to click ‘update’ as this will enable you to save your new settings
Step 10: When you go to Video manager you will see that the watermark has been added to your chosen video.
For a video tutorial visit:
Conclusion
By adding a watermark to your video’s you can protect your revenue and views as it will show that anyone stealing the video does not have permission to share it. You could take it further and prosecute, however because you have add watermark to your video’s it should be enough of a deterrent to stop it being taken and shown on a different YouTube account. There are a few solutions to add the watermark that don’t cost a penny, however to get the best editing solution and add watermark to your gameplay it is better to pay the money for better quality. If you want to get an advanced edit then Filomora comes highly recommended.


