How to Set Up Chroma Key OBS?
Chroma keying is widely used for live streaming. In today’s time, this technique is also used by online video game streamers who want to chroma keying themselves in their live streaming sessions and create even more explicit content for the viewers.
The live streaming software packages are equipped with chroma-keying capabilities. This post will be of extreme help to you. In today's post, we will cover how to achieve this effect while using chroma key obs settings.
Part 1. How to set up chroma key settings in OBS
If you are thinking about how to set up chroma key obs? Then, let us say that this process is pretty straightforward and requires a little time to do so. However, you must be ready with your equipment and lighting setup beforehand so that you don't have to adjust them every time you go on a live session. To know how to use chroma key obs studio, follow the below mentioned simple steps.
Step 1: After installing the OBS, open it on your system and from its main screen, hit on the Plus icon located below the sources box.
Step 2: Now, From the available options, click on the Video Capture Device and then name it whatever you want to keep tracking the sources.
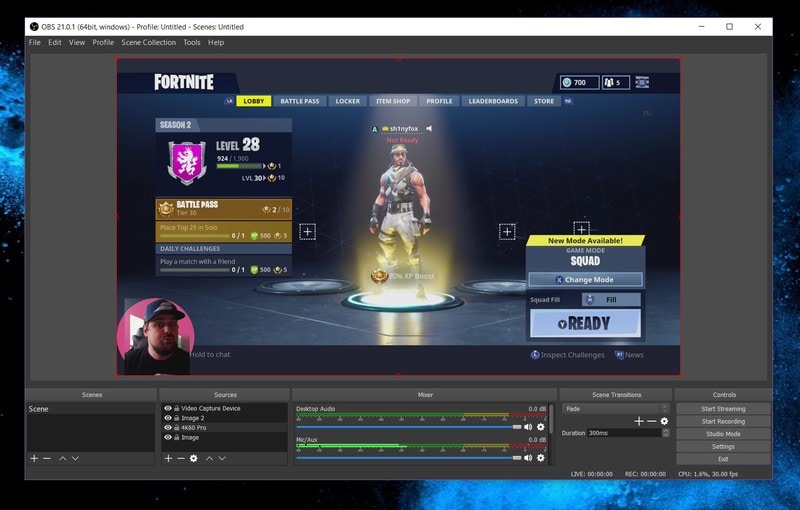
Step 3: In case your webcam is already installed, it should get auto-populated. In case, it is not installed, or if you have many cameras then select the right camera manually.
Step 4: After this click on Ok and then from the source box, right-click on the video capture device. Then, click on Filters from the menu that will appear on the screen.
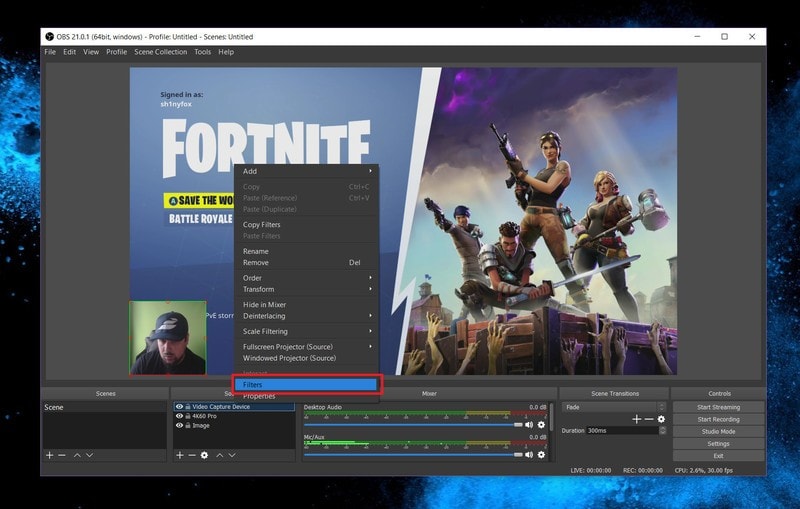
Step 5: Now, a pop up will appear, click on the +/plus icon from below the Effects Filters box and click on the Chroma Key from the given options.
Step 6: In this step, select your screen color followed by adjusting the smoothness and similarity bars until you get the expected settings. These adjustments are customizable and vary from user to user based on factors like screen distance, light and green screen quality.
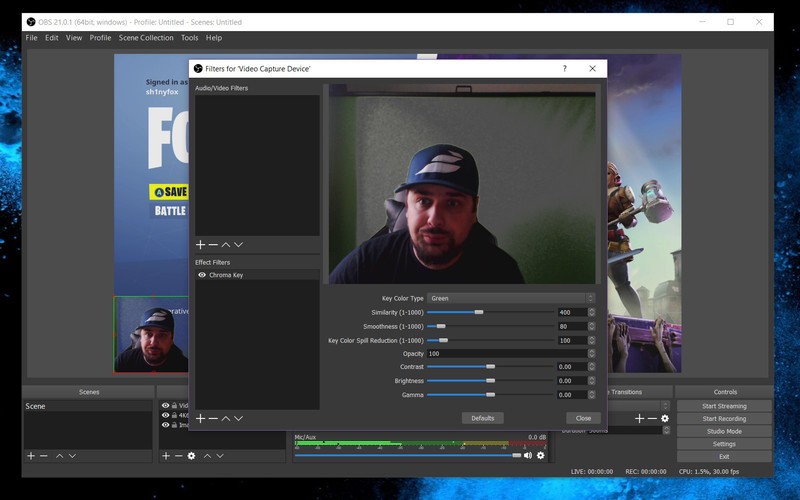
Step 7: At last, save the settings and get ready to stream.
Part 2. OBS Alternative to Apply Green Screen on Videos
1. What is a green screen?
A greenscreen is a background against which a video is made, which can be thereafter superimposed to an individually shot background. This visual effect process is also called Chroma keying or color keying or just keying.
The green screen technology is the core of the chroma key effect that lets the filmmakers individualize the bright green background and the actor or props to provide a separate background in the post-production altogether.
Well to apply a green screen on video, you don't necessarily have to use only OBS. Some other software tools such as Wondershare DemoCreator can also help in achieving the same purpose.
 Secure Download
 Secure Download
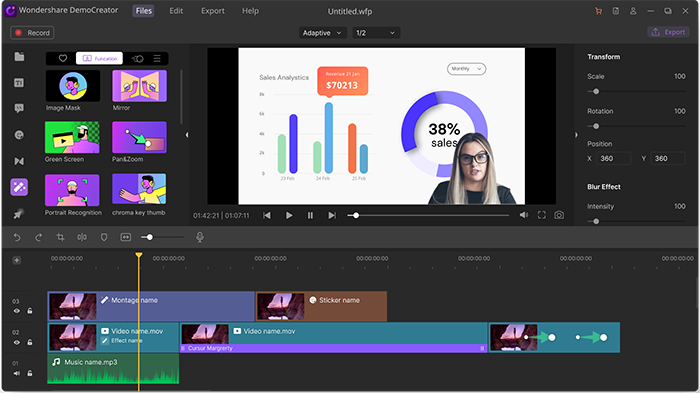
Wondershare’s DemoCreator is a user-oriented software that features screen recording capabilities and a video editor to provide green screen effects. This professional and high-quality tool has an interactive interface and power-packed features, which makes it a potent green-screen tool.
The whole purpose of using this tool is to make green screen editing easy. With this tool, you can also create professional demos and videos for your online channel without putting in much effort.
2. Step to create a green-screen video using Wondershare DemoCreator:
Step 1: Download and install WonderShare Democreator on your computer system from their official website. You can download this tool for free and wait until the installation is completed. The software will take a couple of seconds to get installed, after which you need to run it on your system.
Step 2: After downloading and installing DemoCreator, open it on your system and select the Import option to import the green screen videos. This import process will be done in a few seconds and when the files are uploaded, they will be shown on the left side of the files section, represented by a folder icon. After this, your files will be ready for editing with a green screen.
Step 3: Now, you will need to edit the green screen video. To do the same, drag the greenscreen video file along with the background media file to the timeline at the bottom of the screen. After this, activate/enable the green screen effect from the Effects tab followed by dragging to the complementing greenscreen video. You can choose to add animation, effects, text, sound, transition effects and so on to your video. Then, edit the chroma key with the DemoCreator’s chroma key.
Now, you can review your clip by hovering the mouse on the media thumbnail. To see the complete video, double click the thumbnail. After editing the video, you can additionally add new audio and delete the original one for individual editing. Also, you can perform the crop, split, trim, resize, rotate and other such options from the properties windows on the right side of the video viewer.
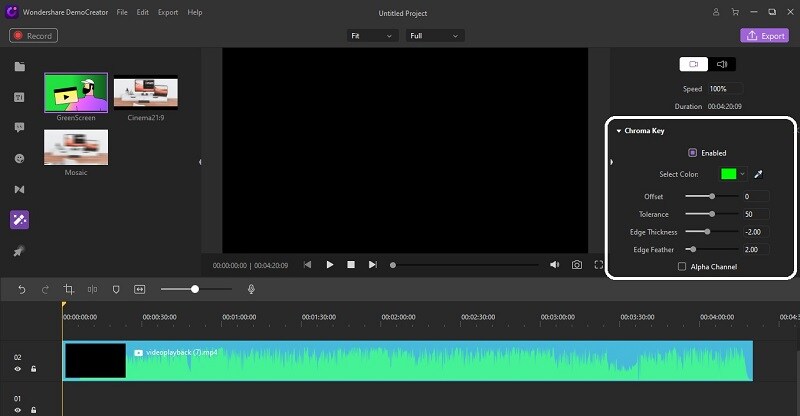
Step 4: Now, when your video is ready, you can click on the Export option from the top right of the screen. On doing so, a pop up will appear to let you customize the settings like encoder, resolution etc. After this, you can directly export your video to social media platforms such as Youtube or Instagram.
Part 3. How To Make A Green Screen Look Better
A green screen is one of the most powerful tools in videography. This is a simple process that is easy to set up and when it is combined with a chroma key, it becomes undoubtedly amazing. But, to get the best out of using this, you need to get familiar with some tips that will help you ace the greenscreen.
- Light levels
Lightning plays an imperative part in making or breaking the greenscreen, therefore, you must pay close attention to it. Your lighting should be the same in both the background and foreground. In case, the background is bright but the foreground is muted or bland, it will spoil the illusion due to no cohesiveness in the background and foreground.
- Shadows
To get the best out of the green screen effect, your lighting should be soft and even. If there are shadows and uneven light in the foreground footage, it will show different shades of greens on the greenscreen which might not be good for post-production or longer run. The greenback ground should look the same and in a single color for the process to work smoothly. Therefore, make sure that the subject is a couple of feet in front of the screen while filming and it should also be well-lit.
- Camera distance
Another vital thing to make the greenscreen look better is the camera distance. It is essential that both the foreground and background depth of the field should match. Else it makes the composite image look weird to humans while immediately distracting them.
- Stability
Stability also cannot be missed when talking on the greenscreen. Therefore, to make the greenscreen look better, your camera must be positioned in a stable place. Any sort of vibration and shaky camera in the foreground will impact the stability in the background as well. Likewise, zooming in or changing the focus will also contrast the stability of the background.
- No green
Apart from considering what has been mentioned above, it is also extremely important to keep green clothes and props aside. The green clothing can spoil the greenscreen scene, therefore, it is suggested to avoid using green things.
- High shutter speed
The reason to set a high camera shutter speed is to avoid motion blurring. In case your subject is stationary, it is recommended to keep the shutter speed twice your frame rate. Also, if you are shooting at 24fps, set the shutter speed to 1/48. However, if there is a lot of motion in front of the green screen, set the shutter speed to 1/80 to 1/100. But, keep in mind when to change the shutter speed and when to not as it can impact the image exposure.
Conclusion
Green Screen streaming is not something new, rather it's been long used in filmmaking to keep the viewers engaged. You too can use this technique for your online streaming by following the simple steps to set chroma key obs and important tips given above that will help you avoid some common mistakes.
