- 1. Record your computer screen and webcam simultaneously.
- 2. Allow you to customize screen capture and frame rate .
- 3. Powerful editing tools and effects to enrich your video clips.

How to Combine Multiple Clips In A Sequence With Adobe Premiere

The recording that comes from the camera is never going to be by and large what you wanted straight off the bat. Altering is tied in with building and utilizing simply the absolute best shots in your video by parting them into more modest pieces. Just as eliminating undesirable minutes, you can likewise apply impacts, advances, and shift the speed or bearing of a clip. It essentially makes the recording more reasonable so you can shape it into whatever you want. When you're chipping away at a long task, altering individual video and sound bites individually can be a tedious and drawn-out process. Additionally, with individual sound and video cuts, one wrong maneuver and your whole venture can move out of sync, making your magnum opus seem as though an awful unknown dialect name.
Part1. Why Do You Will Need to Combine Clips?
Fortunately, Adobe Premiere Pro has inherent loads of provisions to assist with making your after-creation misfortunes somewhat less, all things considered, sad. By combining video and sound bites utilizing a couple of basic deceives, you can accelerate your media alters, keep your Timeline coordinated, tidy up terrible sound, and even make split-screen impacts in a snap. Perhaps the most ideal way of consolidating video cuts in Adobe Premiere Pro is a strategy called settling. Settling permits you to consolidate a progression of video cuts into one short succession, which would then be able to be utilized as a solitary clip and "settled" once again into your essential or "expert" grouping.
Part2. How to Merge Video Clips with Adobe Premiere
Debut is an amazing altering apparatus, and perhaps its most noteworthy strength is its unquestionably versatile arrangements, particularly the Multicam. You may have no clue about what a Multicam is, and that is OK since you will become familiar with concerning what makes them so extraordinary, and how they contrast with the "consolidate cuts" included.
probably Premiere Pro is liked by a large number of clients. Individuals easily make and alter recordings with its help. All the more as of late, some say that Premiere Pro appears to just join sounds with video as opposed to combining a few independently recorded recordings. Is that so? Not. It empowers you to function admirably with an assortment of video/sound organizations and codecs on the two Windows and Mac. Positively, just the altering capacity isn't sufficient to take it to stand apart among its companions. Additionally, these like joining, making, catching recordings, adding titles, and applying channels with different impacts can be acknowledged with Premiere Pro.
Steps to Merge Video Clips with Adobe Premiere :
The main benefit to blending cuts through the settling strategy is that you can, in any case, alter your combined clips separately by getting to the optional "settled" grouping
- Import it into Premiere Pro by hitting Cmd+I or Ctrl+I, or going to File > Import.
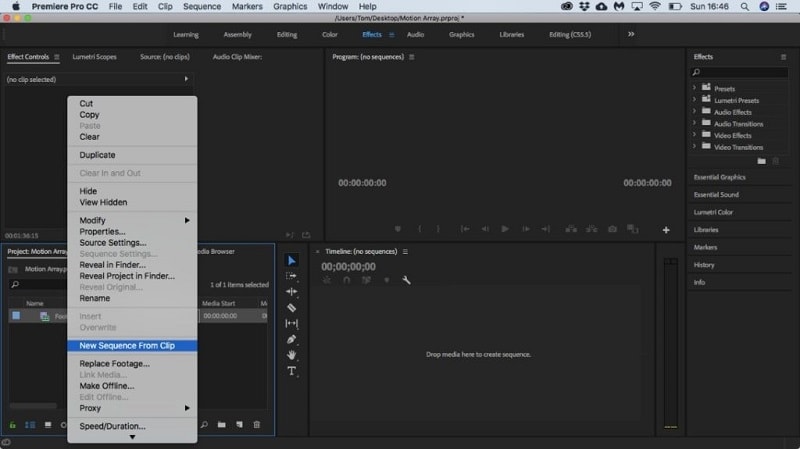
- If you as of now have a current grouping, drag the clip onto the course of events. If not, right-click and select New Sequence from Clip. Presently you'll consider the recording to be one single square.
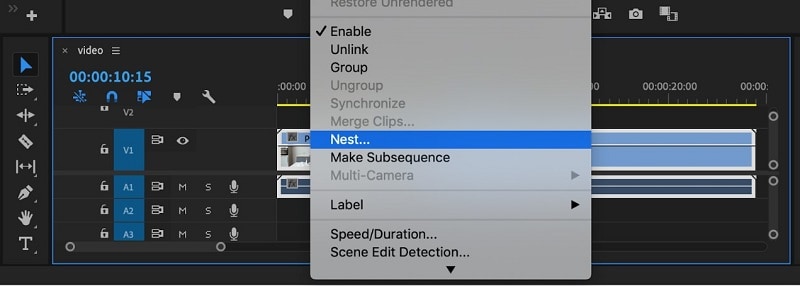
- Add the first clips you need to converge to your principal Timeline and select the clips. Right-click on the chosen cuts and pick "Nest… " starting from the drop menu that shows up.
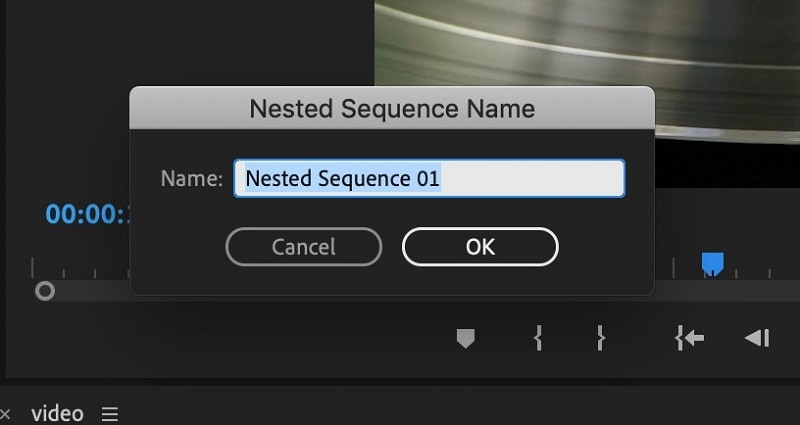
- When incited, pick a name for your new arrangement and hit “OK.”
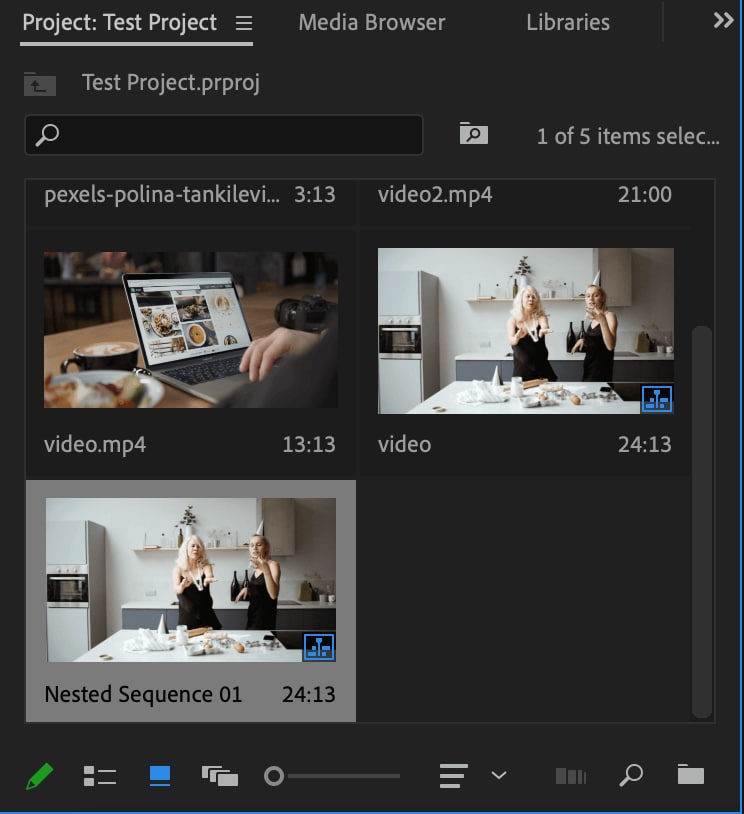
- The new settled arrangement will supplant the singular clips in your fundamental succession and be altered as a solitary clip.

- You can likewise alter your settled succession by opening it one of two different ways: Find and double tap on the succession in the Project board (you can do this by finding the arrangement name you picked
7. Double-tap on the settled succession cut in your fundamental grouping. Whenever you've opened up your settled arrangement, you can add or alter individual clips inside the grouping. Any progressions you make here will be combined under the settled grouping on the fundamental Timeline.
Part3. Why and How to Create A Sequence with Adobe Premiere
What you can't do is change an arrangement's preset whenever it is made. Consequently, you need to set it up right at the initial time. In any case, you need to reorder altered clips into the right grouping. you need to recollect these three "rules" when you apply a preset to your arrangement. For the most part, to get things "spot on," you ought to pick one of these principles to follow while picking a preset.
- The succession preset should coordinate with the greater part of your source film. This is the most ordinarily kept guideline.
- Your preset should coordinate with your objective yield.
- Your arrangement should coordinate with your undertaking size. For instance, for 640x360 recordings, make a 640x360 preset.
Steps to Create A Sequence with Adobe Premiere:
Here's how to make a grouping.
- Navigate to the Project board in your undertaking.
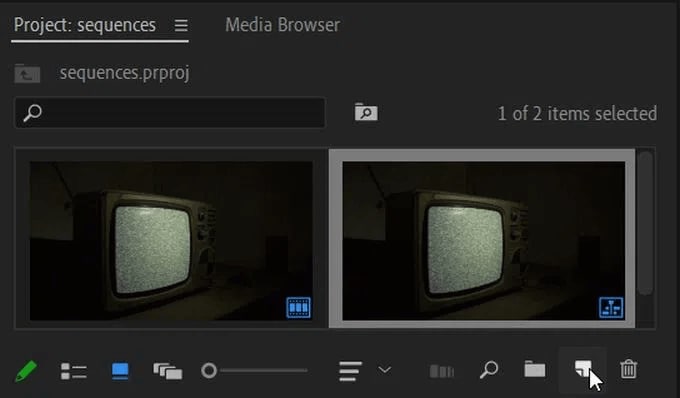
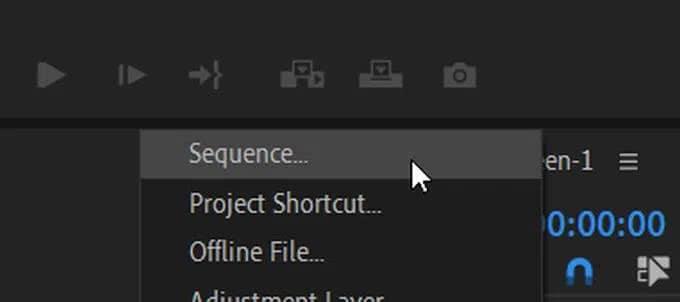
- Right snap, select New Item, and pick Sequence.
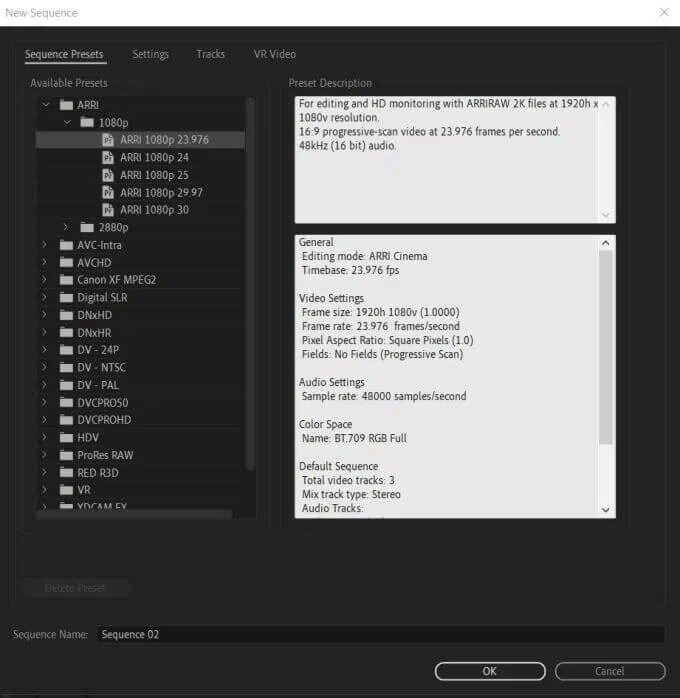
- In the New Sequence window, select the preset that most intently coordinates with the camera you used to shoot the video in your undertaking. Select OK.
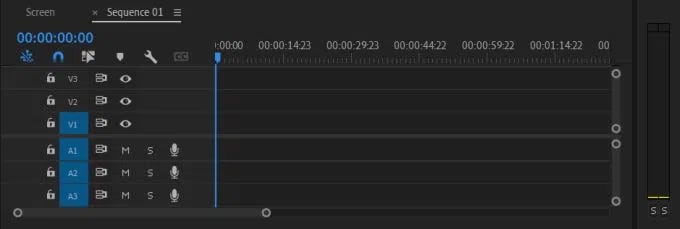
- The new arrangement ought to show up in the course of the events board. You would then be able to add new recordings to this arrangement.
Part4. How to Fit The Clips Or Photos’ Resolution To Sequence’s Setting.
In case you don't know what sort of arrangement settings to pick, it's OK to pick any of them. If the clip you add doesn't coordinate, you can have Premiere change the succession settings to consequently coordinate with the clip.
- Find the clip you need to make another grouping inside your Project board.

- Click and drag the clip into the New Item choice.
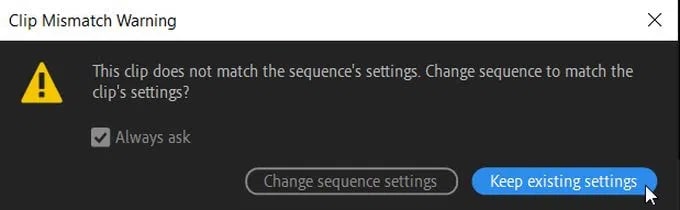
- A new grouping will be made utilizing the clip's settings. This is a straightforward and fast way of making another arrangement with succession settings coordinating with your clip. Once in a while, however, you should keep a similar arrangement setting when you add a clip, and you can do this by choosing Keep Existing Settings when you see the spring up window.
Part5. A Simple Way to Merge or Combine Videos on Windows or Mac
With blended clips, you can consolidate one video source, and as numerous sound sources as you need. This implies in case you were recording with one camera and different sound sources, like a blast receiver, a lavalier, and the on-camera sound, you can consolidate all of that sound along with one wellspring of video. This is particularly significant assuming you need to utilize the incredible DemoCreator instrument as an alternative to Premiere Pro to pick the easiness point you need to see and surprisingly cut between them during live playback.
With DemoCreator, you’ve got that legacy of simply managing and combining your videos without any pro-level knowledge of editing techniques. As in the case with Premiere Pro, if you were shooting with at least two cameras, chipping away at a scene with many characters without a moment's delay, or directing a meeting or recording a music execution, you would not have the option to consolidate those video cuts together. But in compliance with the DemoCreator approach, your two cameras’ clips can merge even if they’re shot with different resolutions and different aspect ratios. That is the place where DemoCreator needs to come in. Let’s get to know how you perform that operation hassle-free.
Part6. Combine Your Videos in 4 Simple Steps using DemoCreator
DemoCreator strategy is frequently used to make "tiled" or "split-screen" impacts. It has become exceptionally well known with the ascent of "virtual conferences" like ensembles or groups that record distantly and afterward join their recorded recordings into one single casing. It can likewise be useful for multi-cam tasks, for example, syndicated programs or digital recordings to show more than each point in turn. Here are the steps you need to perform after installing this free-to-download product.
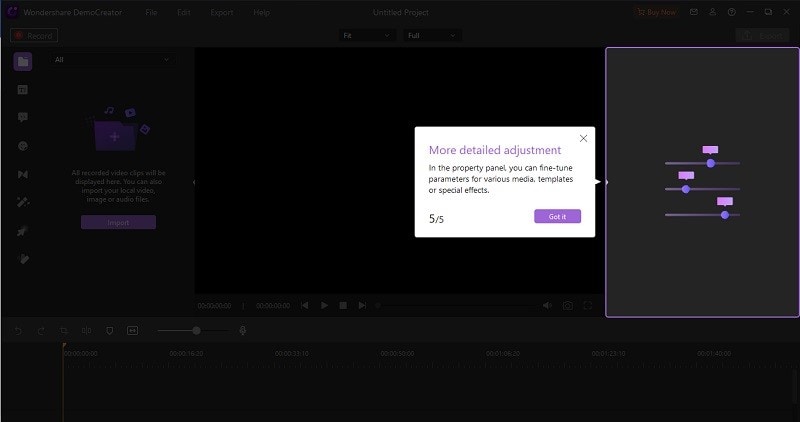
Step1. Import your video clips with DemoCreator
If you haven’t’ downloaded it already, you need to do is download and install this software to your PC so you can use it on various occasions and for various purposes like screen recording to recordings editing. To do that, follow the links below to download this software. As soon as the download finishes hit the launch application to execute the installation process so you can follow the default steps to get this software in your Windows application in a ready-to-use form.
 Secure DownloadSecure Download
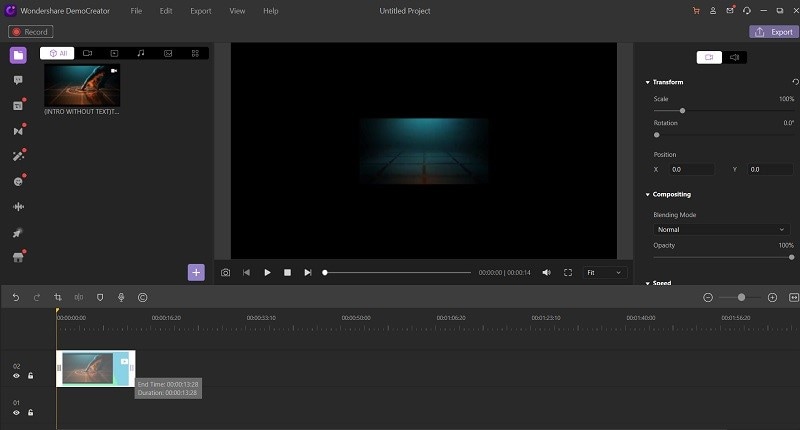
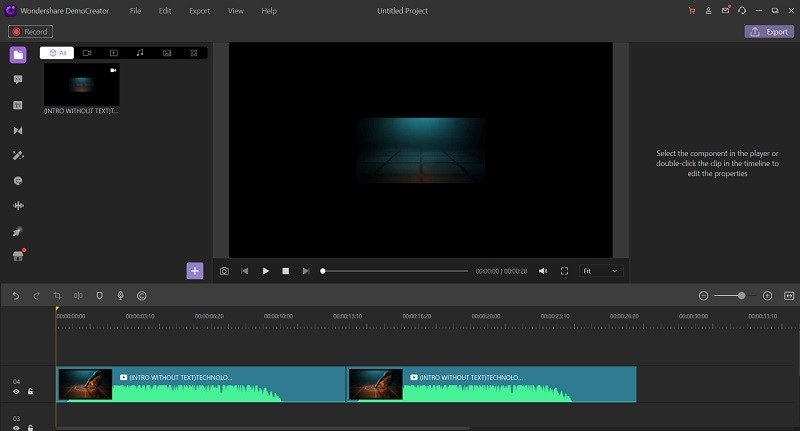
Step2. Drag the clips to the timeline to merge the videos.
In the next step, drag your files to the timeline which you’ve just imported and then drag them one after the other to merge them accordingly.
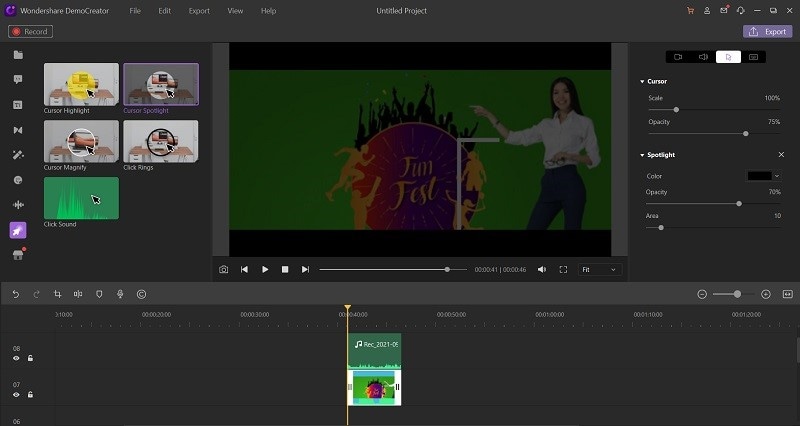
Step3. Crop the video or set the aspect ratio
If you want to set up the dimensions of your output video, then you can do it inside the timeline as well. By selecting the videos altogether, you can crop as well as set the aspect ratio on the go.
Step4. Export with multiple formats
Just as you’ve performed the AI-based webcam recording inside the recorder. It is being recorded well-accordingly and now you need to stop and save your video to your required destination.
You can also use the post-production editing functionality to further enhance the combined videos effectively. For instance, if you want to export the recordings, hit the Export button at the top of the video editor interface and be with it. Furthermore, if you want to share your videos on a social platform like YouTube, then hit the YouTube menu bar from the list and sign in to your channel to share it handily.
Part7. The Video Editing Features You Can Do with DemoCreator
In addition to combining video clips, there’s much more you can do with the DemoCreator video editing platform. Here’s the insight into such notable features it offers.
Trim Videos
You can trim your videos without much stress. Right inside the timeline by utilizing the Trim option from the properties.
Rotate Videos
If you want to rotate your videos, simply click on the video file and rotate it to a certain angle as shown inside the editor section here:
Flip Videos
You can flip your videos to the opposite side by using the Flip option inside the editor as follows:
Chroma Key (Green Screen Effect)
To use this notable feature, visit the Effects section and drag and drop the Green Screen effect from the list to the timeline. Now you can customize it accordingly.

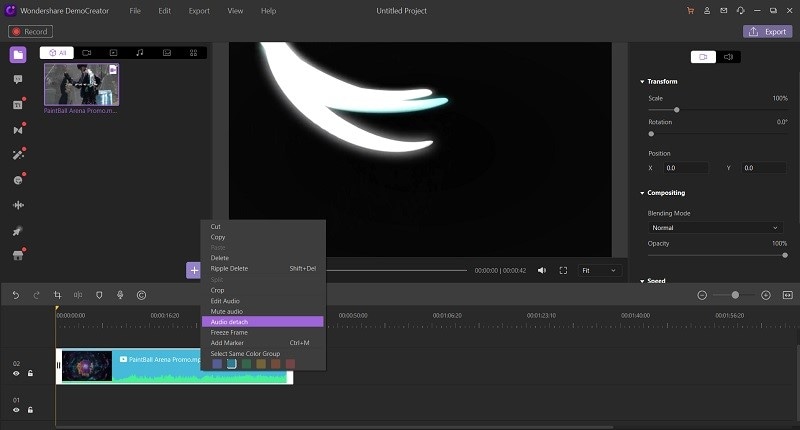
Remove Audio From Videos
If you want to take your audio out from the output file, simply right-click on the video file and select Detach Audio from the list as shown here:
Adjust Video Brightness, Contrast, Etc.
You can perform these basic operations right from the editor situated at the right side of the UI as shown here:
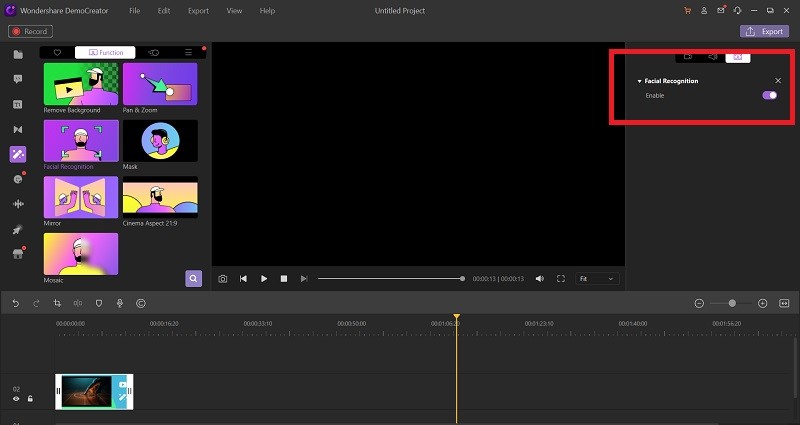
AI Recognition Background Remover
If you want to use the AI background remover, then visit the Effects > Advanced and select the appropriate effect from the list. Drag it over the video file and you’re done!
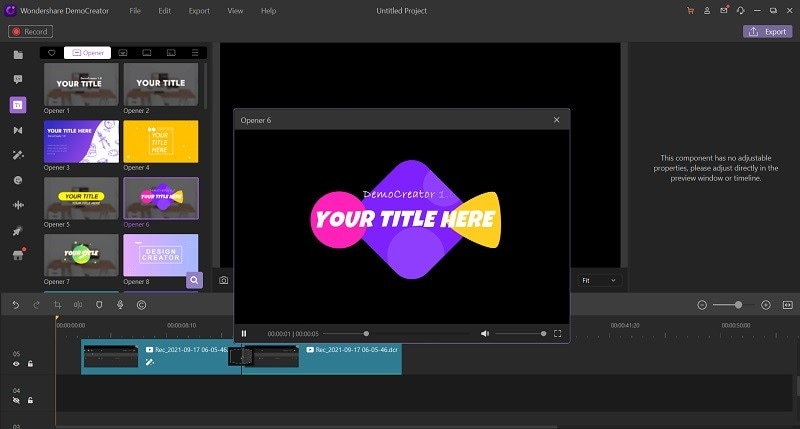
Text Effect
You can also add numerous varieties of text animation tools to your video texts. To begin with, go to the Captions menu bar to add your favorite captions effect from the list.
Video Transition Effect
DemoCreator is packed with numerous transition effects to make your combining video task more appalling and eye-catchy. For that, visit the Transition effects menu and be with it.
The All-in-One Screen Recorder & Video Editor
- Record desktop screen,audio and webcam simultaneously
- Edit videos quickly with a wide range of professional tools
- Built-in plentiful video effects
- Export to MP4, MOV, MKV, GIF and multiple formats
Conclusion
Not all creations are made equivalent with regards to being exact with recording sound and video, numerous editors need to have that sort of versatility in their work process to change things sometime later. This is particularly evident on the off chance that you work on non-account projects where you may be finding what video cuts sync to which brief snippets as you come. Presently, up until now, we've covered joining video and sound bites in a straight manner for the motivations behind simpler altering or further developing sound quality. It's an ideal opportunity to dive into a considerably more inventive method of consolidating video cuts: blending numerous clips into one casing.


