- 1. Record your computer screen and webcam simultaneously.
- 2. Allow you to customize screen capture and frame rate .
- 3. Powerful editing tools and effects to enrich your video clips.

Large Mouse Pointer for Low Vision

If you record demo videos for your audience. You must increase the size of the cursor. Because visible cursors help the user in understanding your video better. Not all people have perfect eyesight, there are many users on the internet who have low vision. For those users, it’s difficult to understand the video, if the cursor is small.
In this article, you will get to know the benefits of a large mouse pointer for people having low vision or any eyesight abnormality. Furthermore, how to magnify the cursor point for better understanding and the process of enabling it will be discussed step by step.
Part1. Why Will You Need to Use A Screen Magnifier?
Using a large cursor of your choice will help understand the videos better, rather than leaning over the computer monitor and craning their necks trying to locate it and find a "pointer lost”. There are many perks of using a large mouse pointer.
- First of all, it catches the attention of the viewer very quickly.
- Secondly, it provides a tiring free time to the reader because the unclear or vague screen would exhaust the mind of the viewer in no time.
- Thirdly, people having eyesight abnormality or low vision would benefit from the magnifying effect of the cursor which would help them in better comprehension of the material.
- Last but not the least, the magnifying effect of the cursor will enable the user to memorize the content on the screen more quickly because it grabs the focus of the reader to that specific spot.
 Secure DownloadSecure Download
Part2. How to Magnify Some Part by Clicking on It?
Listed below are the few easy methods and steps of magnifying the cursor on the screen. With the help of the Demo creator, you can enable the spotlight feature easily.
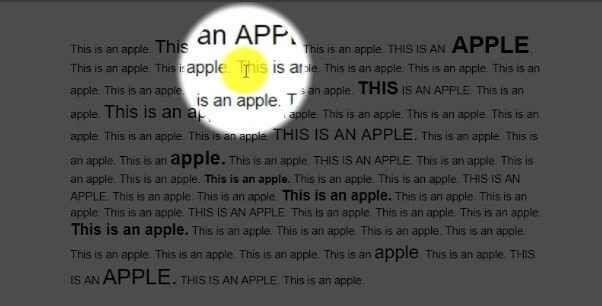
The spotlight effect will highlight the content and make it more visible to the viewer.
Whereas, the magnifier effect will magnify the area around the cursor and allow the viewer to get a clear picture of content.
1. Cursor Spotlight
There are two methods of using the spotlight.
Method 1
Step 1: Enable screen drawing tool and use the spotlight tool when recording
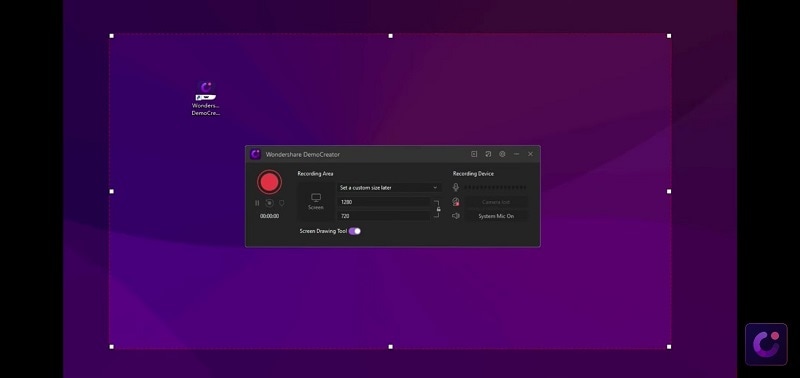
Step 2: You can hold the mouse button to use it and change the spotlight area by sliding the mouse control which is pretty easy.
Method 2
Step 1: Drag the video clip on the timeline after screen recording
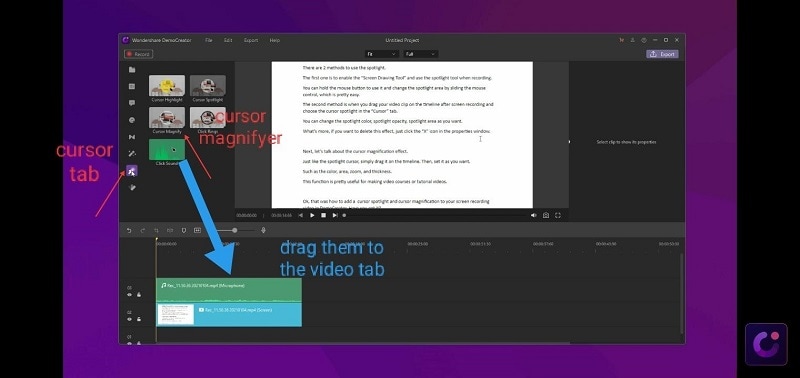
Step 2: Choose the cursor magnifier from the cursor tab and drag it to the timeline.
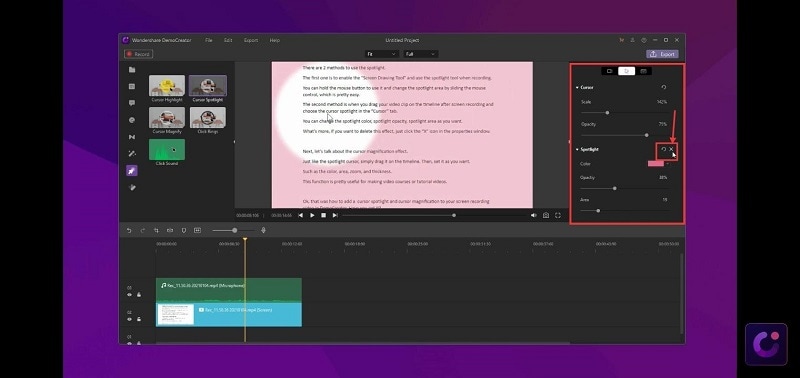
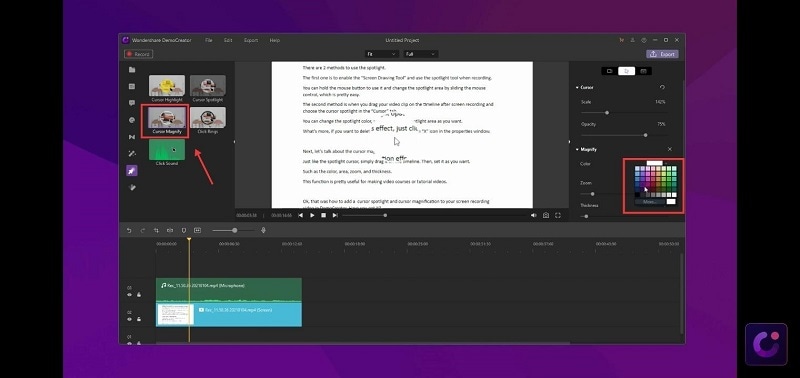
Step 3: You can adjust the spotlight opacity, spotlight color, and spotlight area according to your need.
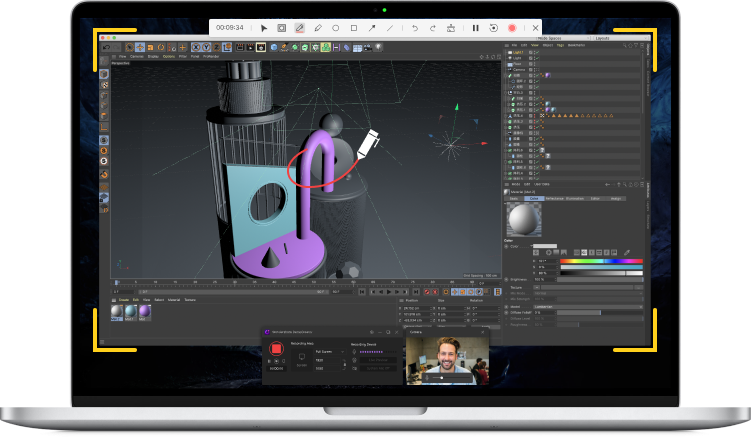
Step 4: If you want to delete this or any other effect you can click the "X" icon in the properties window at the right side of the screen as visible in the picture given below for illustration.
Secure DownloadSecure DownloadPart3. How to Use the Cursor Magnifier?
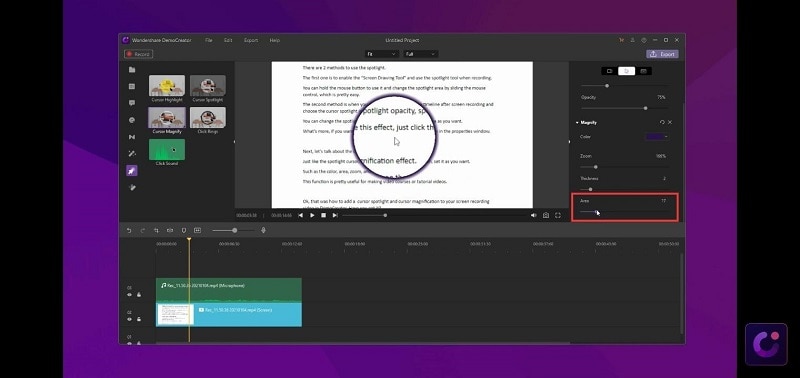
Just like the spotlight cursor, the magnifying effect is also easy and simple to use. You have to drag it on the timeline. Then set it as you want.
With the Cursor magnifier effect you can zoom in or out and the thickness of the circle around the cursor.
This function is pretty useful for video editing and tutorial videos. So here is how to add cursor magnification to your screen recording video in demo creator.
Adjust the Parameter of Magnifying Effects
- Color:
The editor can also choose the magnifying effect as per his choice. I think this is a great option for people having low vision or other eyesight abnormalities. It allows the user to choose the outer/inner color of the cursor circle.
- Zoom:
The editor can also zoom in or out the magnifying area of the cursor according to its feasibility and comfort. There are texts or figures which aren’t easily visible. I think this option provides a great benefit to the reader.
- Thickness:
There is also an option available for making the circle of the cursor thick or thin as per the requirement for more focus.

- Area:
The editor can also expand the area of the cursor circle according to the comfortability
Part4. What Other Cursor Effects You Can Apply to Highlight Your Low Vision?
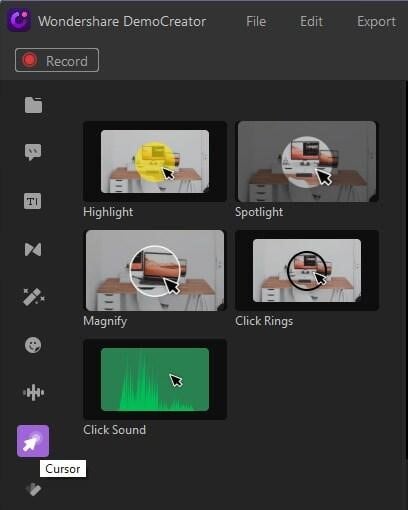
The picture given below shows different effects an editor can apply in the video. There are four more effects that can be applied.
These are cursor highlight, spotlight, click rings, and click sound. The highlight effect will highlight the area around the cursor by putting the color in the circle around the cursor.
Rings around the cursor will enhance the visibility of the cursor as sometimes the arrow is due to the speed of the cursor. The sound effect will produce a sound that will attract the attention of the viewer
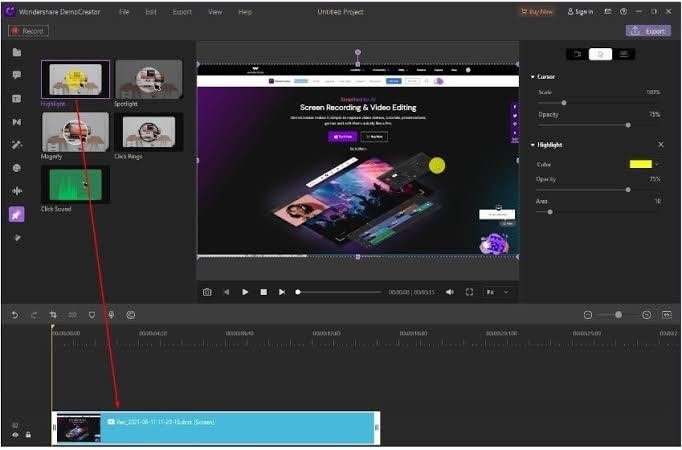
For their application, the editor must select the cursor effect and drag it to the clip of the video. Adjust the cursor settings under the cursor tab in the properties window.
In this tab, the editor can use the scale slider to change the size of your cursor, opacity, and color of the cursor. All these effects are super easy to use and handle.
The All-in-One Screen Recorder & Video Editor
- Record desktop screen,audio and webcam simultaneously
- Edit videos quickly with a wide range of professional tools
- Built-in plentiful video effects
- Export to MP4, MOV, MKV, GIF and multiple formats
Conclusion:
DemoCreator is one of the best video editing tools which is free of cost and available online. It provides a vast variety of effects for video editing and makes it easy for the editor.


