- 1. Record your computer screen and webcam simultaneously.
- 2. Allow you to customize screen capture and frame rate .
- 3. Powerful editing tools and effects to enrich your video clips.

How to Resize an Image for Windows 10: 5 Smartest Solutions

From uploading your images on online forms to reducing their size before e-mailing them to someone, there could be so many reasons for resizing an image. While it is extremely simple to resize an image, there are times when it can affect the overall quality of our data. That’s why, to make it easier for you to resize an image for Windows 10, I have come up with this guide. Here, I will list 5 feasible solutions to resize your images on Windows 10 like a pro.
Part 1: Why you might want to Resize your Images?
Ideally, there could be all kinds of reasons for resizing an image on Windows or any other platform:
- The original quality/size of the image might be too large, and you wish to optimize it.
- A lot of users would like to resize their large images before sending them via an email to someone (since email provides have a restricted size limit for each mail).
- You might want to upload some images to a web portal (like an online form) that can only accept images of specific dimensions.
- Some social media users also resize their images before posting as certain platforms only accept photos in predetermined aspect ratios.
- Besides that, you might wish to resize your images for editing, optimizing, or any other purpose.
 Secure DownloadSecure Download
Part 2: What you Should Know Before Resizing an Image?
Before you resize an image for Windows 10, you should know that it can have certain limitations. Let’s say you have an original image in the 600x600 dimensions, and you have forcefully resized it to 2000x2000 pixels.
Since the original image only has 600x600 pixels, they will now be stretched as your picture would be oversized. As a result, it can lead to pixelated images, or the original quality of the photo might deteriorate.
Secure DownloadSecure DownloadPart 3: How to Resize Images in Windows 10: Inbuilt and Third-party Solutions
If you want to resize an image for Windows 10, then you can try the following native or dedicated desktop/web applications:
Method 1: Try the MS Paint Application to Resize any Image
For all those who are looking for an instant solution to resize an image, MS Paint would be an ideal solution. To resize an image, you can just open your picture with MS Paint and use its inbuilt tool. While it provides instant solutions, the quality of your image might be compromised in the process.
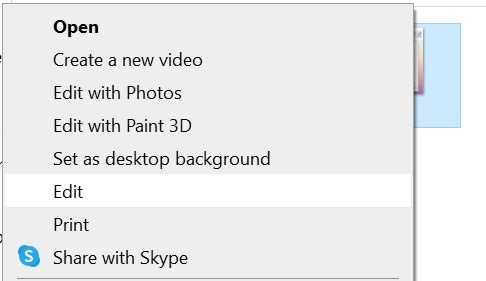
Step 1: Open the Image on MS Paint
At first, just locate the image that you wish to resize, right-click it, and open it with MS Paint on your Windows system. You can also click on the “Edit” button on its context menu to automatically load the image on MS Paint.
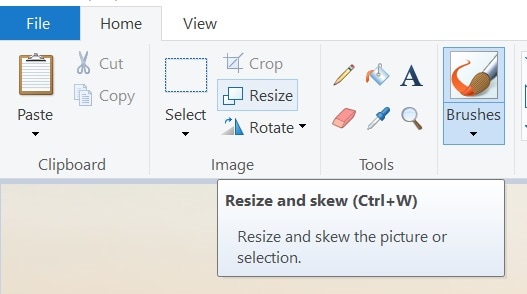
Step 2: Select the Resizing Tool
Great! Once the image is opened on MS Paint, you can just click on the “Resize” option that is available on its main toolbar.
Step 3: Resize and Save your Image
This will open a new pop-up window where you can enter the percentage for the resizing operation. You can also go to the “Pixel” option here to manually enter the horizontal and vertical pixel density for your photos.

After you have resized your photo, you can just go to its Menu > File > Save As option to export your image on your system.
Method 2: Use PicPick to Resize any Photo on Windows 10
PicPick is another popular desktop application that you can use on Windows 10 to make minor edits to your pictures. Since its user interface is quite smooth and is similar to MS Paint, you won’t encounter any issue using it. To learn how to resize an image for Windows 10 via PicPick, just follow this drill:
Step 1: Load the Image to Edit on PicPick
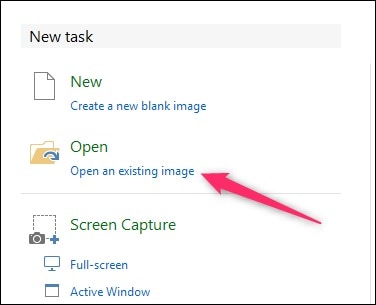
You can start by installing PicPick on your system and just launch it whenever you want to resize an image. Now, go to its File > Open feature to load any image or just drag and drop a picture on its interface.
Step 2: Select the Resizing Tool
After you have loaded the photo on PicPick, you can go to its toolbar and click on the Resize > Image Resize button.

Step 3: Resize and Save your Image
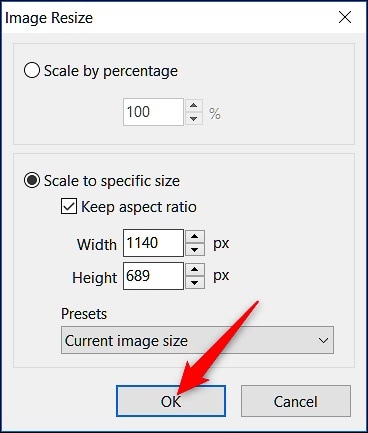
As a new pop-up window would be launched, you can choose to resize an image by its percentage or aspect ratio. If you select the “Aspect Ratio” tab, then you can manually enter the number of pixels for its height and width.
Later, you can go to its Menu > File and just save the resized image on your Windows system.
Method 3: IrfanView: For Free Single or Batch Resizing Solutions
In case you are looking for more features to resize an image for Windows 10, then you can also use IrfanView. It is a freely available desktop application that can be used to view your images and resize them. The best part is that IrfanView can be used to resize a single image or edit multiple images via its batch processing features.
Step 1: Load the Image on IrfanView and Choose to Resize it
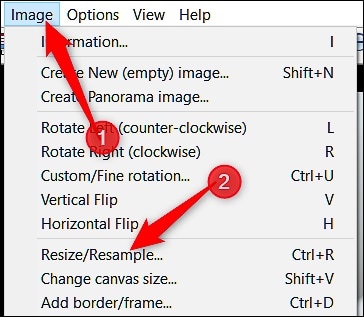
You can start by launching IrfanView on your system and open any image on it. Afterward, you can go to its Menu > Image and select the “Resize/Resample” option.
Step 2: Resize your Images in Different Ways
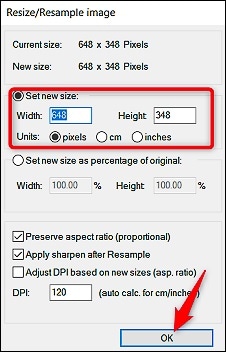
As a new window would be opened, you can manually set a preferred size for the image. Ideally, you can enter specific values for the image’s width and height in pixels, centimeters, and inches.
Step 3: Resize Multiple Images on IrfanView
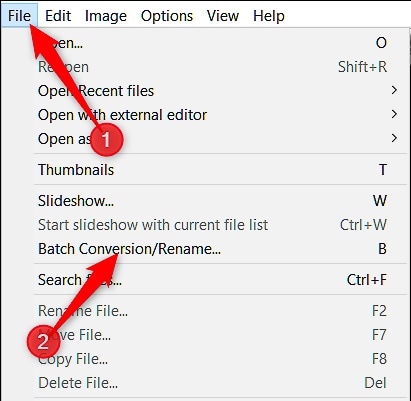
To resize multiple images at once, you can go to its Menu > Image and click on the “Batch Conversion” option.
From here, you can go to the “Resize” field, load multiple images, and set their new parameters manually.
Method 4: Go to BulkResizePhotos for Online Batch Processing
Lastly, if you are looking for an online solution to resize multiple images at once, then you can head to the website of BulkResizePhotos. Since it is an online tool, it can resize images for Windows 10, Mac, Linux, or any other platform without installing. All you need to do is go to its website, load your photos, and select their parameters for resizing.
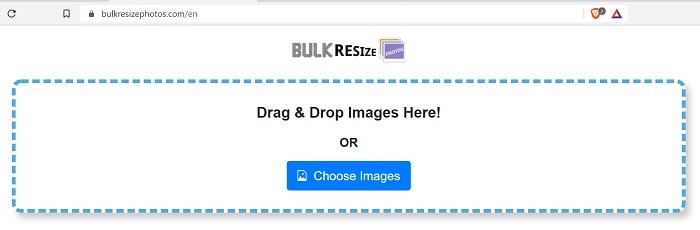
Step 1: Load the Photos from your System to BulkResizePhotos
To start with, you can just go to the website of BulkResizePhotos on any browser and just drag-and-drop your photos. You can also click on the “Choose Image” button to manually load your images.
Step 2: Resize your Loaded Images Online
Once your images are loaded, you will get the following interface on BulkResizePhotos. Here, you can go to the “Image Dimensions” option to manually enter the width and height for the image in pixels.
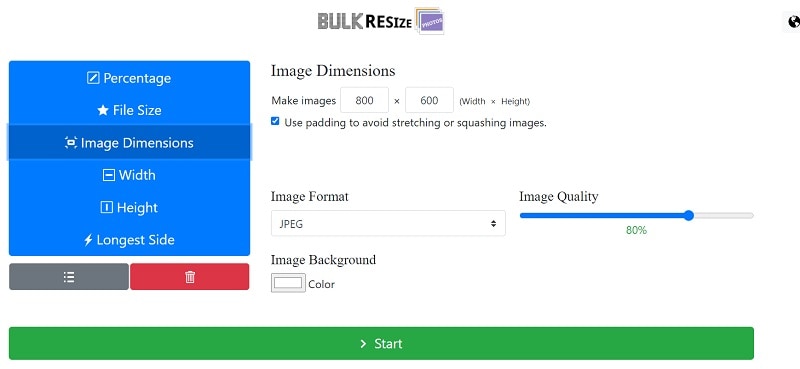
You can also choose to resize the image based on its percentage and other parameters from here. Simply click on the “Start” button after entering the relevant values to commence the resizing process.
Step 3: Download the Resized Images
In no time, the online application would resize your images and will let you know once the process is completed. It will also display the original size of the image and its resized value.
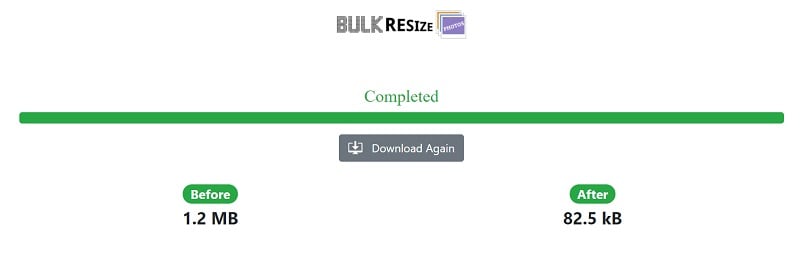
You can now just click on the “Download” button to save the resized image on your system from the website of BulkResizePhotos.
Part 4: How to Resize an Image on Windows 10 via DemoCreator?
If you are searching for a smart solution to resize an image for Windows 10, then you can also try Wondershare DemoCreator. The application is super-easy to use and offers advanced features to help you resize your images while retaining their quality.
Developed by Wondershare, DemoCreator is a popular screen recorder and video editing tool, but it can also provide image editing options. Once you load an image on DemoCreator, you can crop it, set its aspect ratio, remove its background via AI features, and even export it as a GIF. Here’s how you can use image optimization and editing features in DemoCreator.
Step 1: Load the Photo to Edit on DemoCreator
At first, you can just launch Wondershare DemoCreator on your system and select the “Edit Video” feature from its home. As the editing tool is launched, you can just go to its File > Import Media Files option to locate and load your photo.

You can also just drag and drop your photo from Windows Explorer to the interface of DemoCreator.
Step 2: Crop, Resize, and Edit Your Photos on DemoCreator
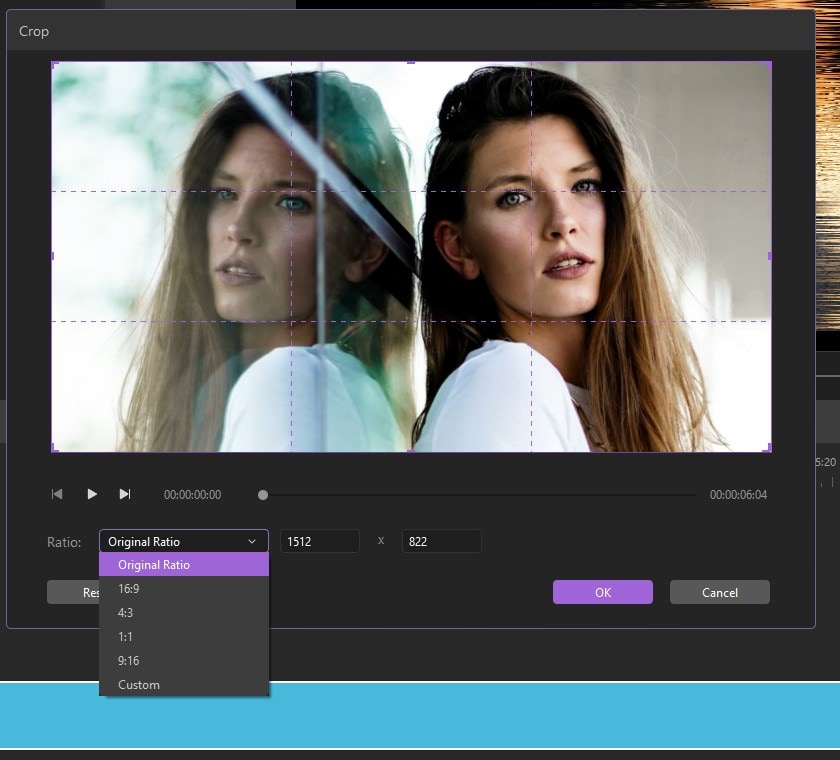
Great! Once the photo is loaded on DemoCreator, you can drag and drop it to the timeline at the bottom. Now, right-click the image to get its context menu and select the “Crop” feature to open a new window. Here, you can manually move and resize the frame to crop your photo however you like.
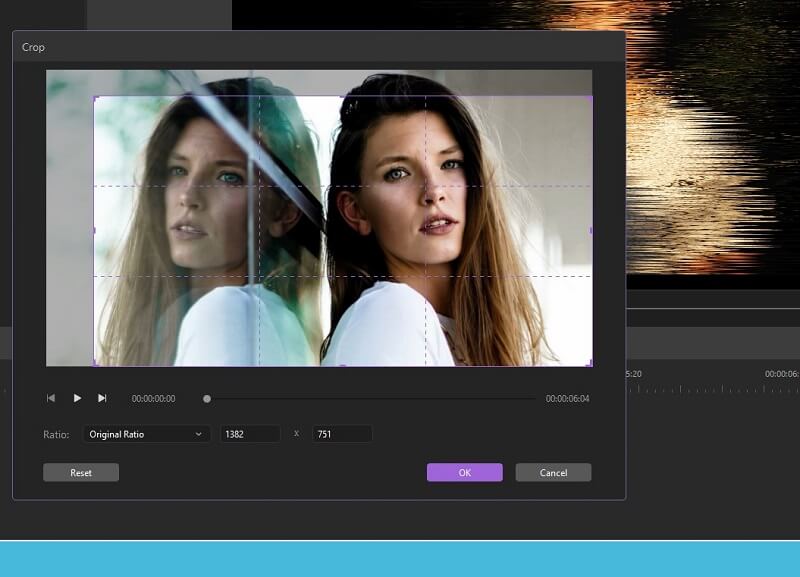
On the cropping interface, you can also go to the Aspect Ratio option from the bottom and select any preferred ratio to resize or adjust your image.
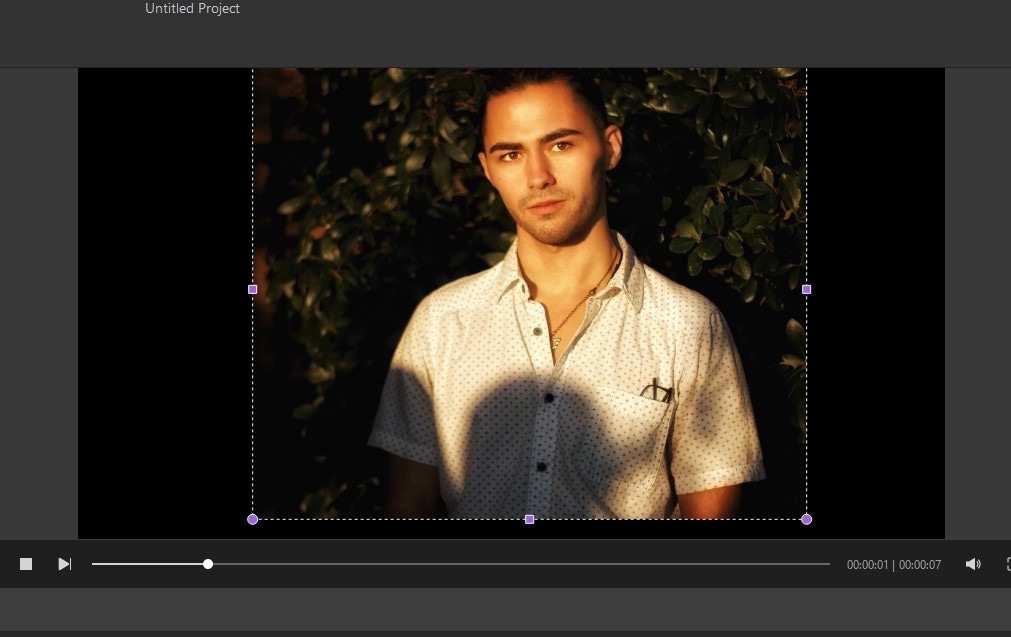
You can also just drag and drop the photo to the preview canvas on the right. From here, you can manually adjust the position of the photo on the screen.
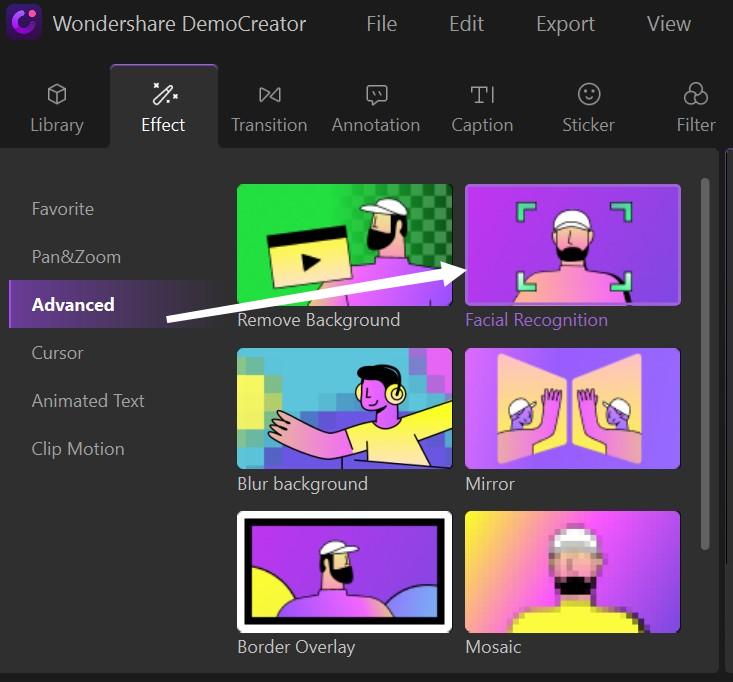
There are tons of other optimization effects that you can apply to your photos. For instance, you can go to the “Effects” section on DemoCreator on the side. Here, you can explore several AI-integrated effects like face recognition, background removal, masking, and more. DemoCreator also has integrated green screen editing effects to remove the background of a photo that is clicked on a green screen backdrop.
Step 3: Export and Share your Edited Media File via DemoCreator
That’s it! Once you are done editing your photos, you can just click on the “Export” button from the top. If you want, you can also combine the edited photos into a single file and export them to video or GIF formats as well.

The All-in-One Screen Recorder & Video Editor
- Record desktop screen,audio and webcam simultaneously
- Edit videos quickly with a wide range of professional tools
- Built-in plentiful video effects
- Export to MP4, MOV, MKV, GIF and multiple formats
Part 5: Conclusion
There you go! As you can see, there could be so many ways to resize an image for Windows 10. To make things easier for you, I have listed both online and desktop solutions that you can follow to resize any image. Furthermore, you can try the inbuilt feature of Windows 10 to resize an image or use any third-party application. Though, if you want to get better results and explore numerous other features related to image optimization, then using a tool like Wondershare DemoCreator would be the best solution.


