How to Turn Google Slide to Video
Education has gone hybrid soon after the pandemic, so the teachers have transformed their teaching styles that align with virtual teaching. Google Slides is one of those tools used in virtual teaching.
This conversion of Google slides to video is not limited to education only; you can record your presentation on sales turnover, your next marketing strategy, audience insights, etc., to show it to your manager and other colleagues in the office.
Besides this, Businesses are also using Google slides videos to make awesome explainer videos, company’s culture videos, marketing videos, and demo videos to talk with their audience about themselves daily, their company, their product and service, their culture, and their workforce, etc.
Influencers, public features, and content creators also use Google slides to video to develop awesome video content for their audience and educate them on their interests and niche topics.
This article will cover all the things you need to read before converting your google slides to video. Let’s dive right in.
Steps to Turn Google Slide into Video
Google Slides can be converted to video; in this section of the article, we will explore how to make Google slides and turn them into a video with some editing and other features to make it look engaging and eye-catching.
Prepare Google Slide Presentation
Now comes the first step of converting Google slides into a video, here you need to prepare effective, knowledgeable, and interesting Google slides, here is how:
Create an Amazing Story Board
The quality of a presentation is determined by the story it contains. If your presentation does not provide your audience with "food for thought," they are less likely to remember it and less likely to take action.
The presentation design is inextricably linked to the content used in the presentation. As a result, begin with a fascinating topic and its scripts. A strong story can not only assist your audience in understanding the complexities of the presentation's topic and make it more engaging and exciting.
Make Chunks of the Presentation
One of the most straightforward strategies for creating a better presentation is to avoid cramming all of the material onto a single or even a few slides.
Make sure the presentation is spaced out over several slides so that the audience can digest all of the information in quick bursts before moving on to the next topic.
Begin with a Preset Template
If you have a limited time, you might begin with a preset template offered by Google slides instead of making slides from scratch as it will consume enough time; you can utilize this time in recording and editing that video.
Choose the template that resonates with your topic, and if you are making it for a business, the look and feel of the template should align with your brand. With some modifications, you can prepare unique slides to speak on.
Edit Your Slides
To edit your slides, use the master slides tool for modifications, customize slides layout, take advantage of image masking, use unique backgrounds for slides, bookmark key text, draw attention with a dark background, insert images and make it transparent, resize and rotate, edit theme colors, add a GIF or a meme, use transitions, use text boxes, add a drop shadow to the texts, and use an interactive Q&A tool.
Record Your Google Slides Presentation
Once you have created a wondrous and compelling Google Slides presentation, it's time to step ahead and do two tasks together delivering or speaking on Google Slides and recording your presentation.
You might have become worried about how to accomplish both tasks together alone without the need of an assistant, but calm down as we will help you in every step, from speaking to the recording of the slides.
To record your Google slides presentation, you will need to have a robust third-party screen recording and editing software like the Wondershare DemoCreator; the software, because of its friendly interface and intuitive features, is popular and used by teachers, content creators, and businesses worldwide to meet all their video needs.

Wondershare DemoCreator is screen recording software that has several features in addition to recording. Its built-in tools include the screen recorder, webcam recorder, audio recorder, game recorder, video editor, and video effect library.
It allows you to edit your video clips, record the content of your camera, record sound, utilize a green screen to change the background of your videos, and export your projects to a variety of formats.
Record your Google slides
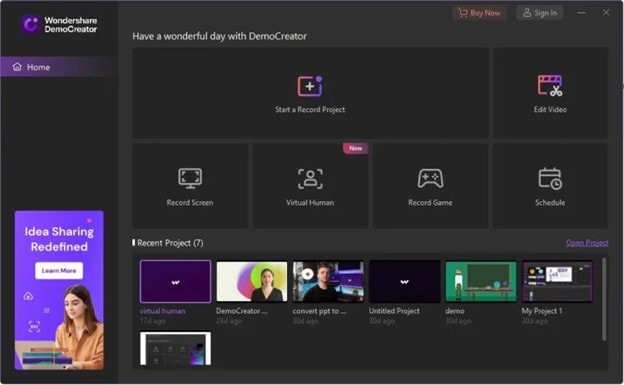
Download the Wondershare Democreator on your PCs and then launch the software; on the interface, you will find different options; click on the “Record Screen” option.
A new window will pop up where you can adjust the recording area, microphone and webcam settings. Set the capture area. Choose to record the whole screen, customize the capture area, and other settings. Choose other inputs to record along with the screen, including webcam, microphone audio, and system audio.
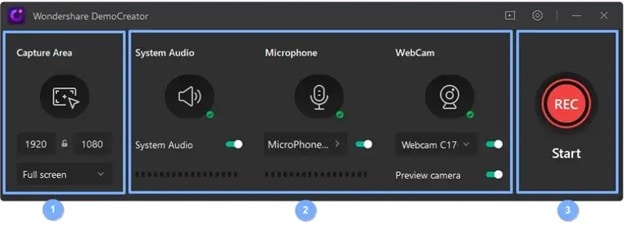
Under the camera recording, you can set up the webcam mirror direction and the AI face recognition. Once you are done adjusting the settings, click on the F10 key or press the Red button to start the recording.
If you have gone for “Screen+Webcam” recording mode, you can also use “Drawing Tools” on your screen to highlight, circle, and write important things.

To enable the Screen Drawing tool, press the shortcut “Shift+Ctrl+D” at once.
Finish the recording
When you are done with delivering Google slides, click the DemoCreator Recorder in the taskbar, then the end recording button. Press F10 to start/stop a recording and F9 to pause/resume a recording. Boom! You have now converted your Google slides into a video.

How to add Effect to your Video?
Once you've stopped recording videos, Wondershare DemoCreator takes us directly to the Video Editor. It is convenient because you can make revisions before you save/export.
We will add some effects to the video to give it a more transparent and eye-catching look in the editing part. Here, you can also add your logo or YouTube handle as a watermark to protect your content.
Trim Video Clip
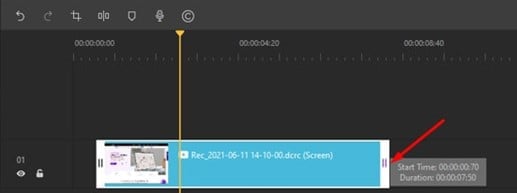
Trimming helps us remove the unnecessary parts of the video, especially if the video is in small chunks or clips. To trim a specific clip, click on it and then take the cursor to the edges of the clip; now, drag the cursor forward or backward to remove the unwanted part.
Crop Video
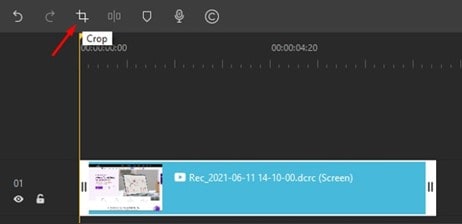
First, select your clip and then click the Crop option to crop a video. Then resizing the visible area would be beneficial. To do so, click and drag the resize handles. Then, to crop your movie, click OK.
Adjust video speed
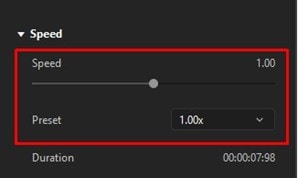
To speed up or slow down the video, select it in the timeline and adjust the speed in the properties area to achieve the desired effect.
Add Captions
To introduce Captions in your video, on the top, switch to the captions tab and choose from the wide variety of captions. The Categories include Opener, lower third, subtitle, and End credit.
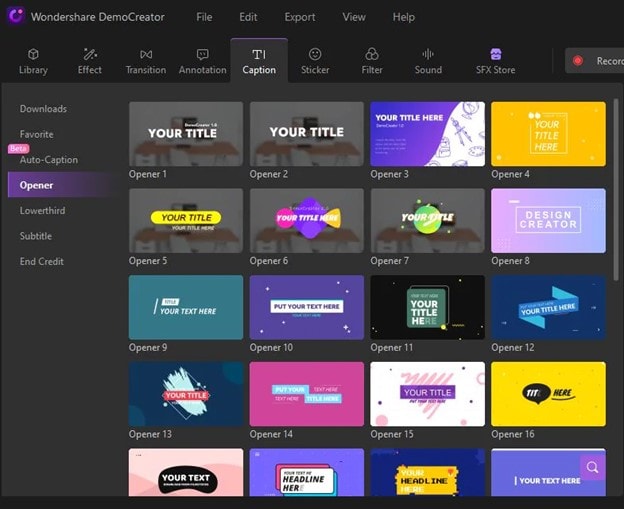
Choose the Caption effect and drag it to the video where you want the caption to appear. You can adjust the font size, font style, and color in the properties section.
Add Annotations
When creating a lecture or demonstration video, annotations are vital. DemoCreator has a capable annotation feature that lets you add a chat box or text to any point in the timeline of your video.
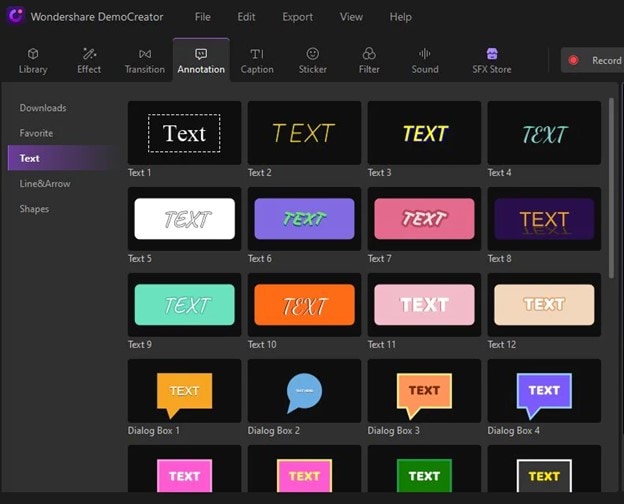
The categories here are Line&Arrow and shapes. Choose your favorite Annotation effect and drag it to the timeline where you want it to appear.
Introduce Stickers
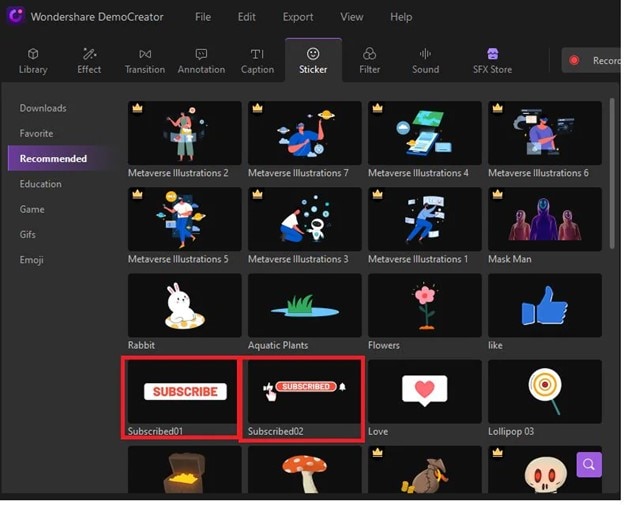
DemoCreator empowers you to add colorful stickers to your video. You have to go to your window screens and select the "Stickers" tab at the top, where you'll find a wide range of unique stickers.
The Categories of stickers include education, game, GIFs, and emoji. You can also add like, subscribe, and share stickers as a call to action.
Add Voiceover
You can add Voiceover to your video to give some additional information; click on the Voice Over icon available in the toolbar and record your Voice, then add it where you need it in the video.

Add Cursor effects
Switch to the cursor effect in the upper corner of the toolbar. You can add three effects: Cursor Highlight, Left Click Rings, and Left Click Sound. Select the cursor effect you want to add to the video and drag it to the timeline.
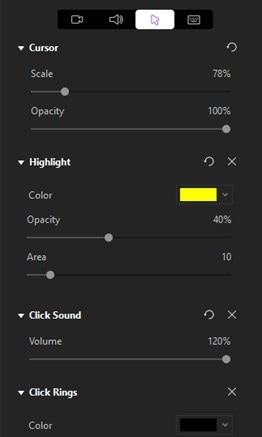
Go to the Cursor tab under the Properties Window and adjust the cursor settings. The scale slider on this tab allows you to modify the size of your cursor. You can also adjust the highlight color for your convenience.
Add Transitions
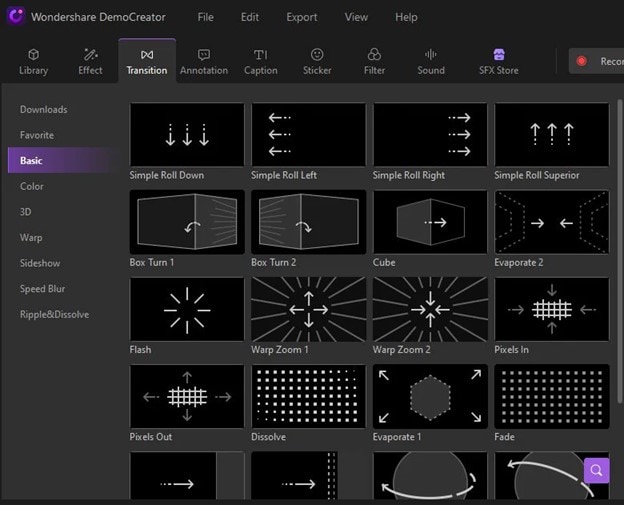
Transitions are a great way to give a video a professional touch, mainly if it is composed of many clips. You can also add transitions between the clips and events at the start and end of the video.
Wondershare DemoCreator offers tremendous transition effects; the categories include Color, 3D, Wrap, Slideshow, Speed Blur, and Ripple&Dissolve. Among the categories, choose the most convenient transition effect and then add it between the clips and at the beginning and end of the video.
Publish Video and Share
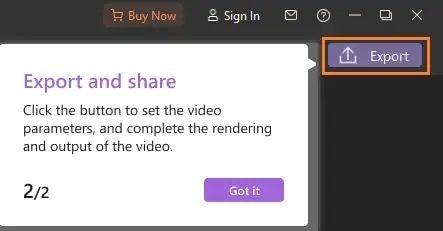
Once you are done with editing Google slides to video, it’s time to export it to YouTube on your personal computer. Click the Export button in the top right corner of your screen and follow the customization instructions.
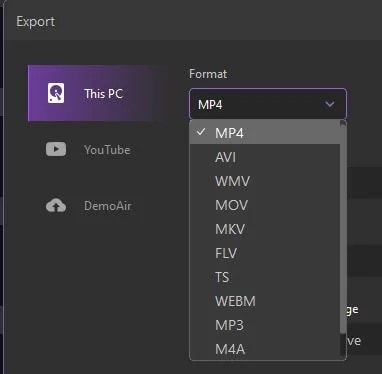
DemoCreator now supports the following output formats: WMV, MP4, MOV, AVI, GIF, and MP3. You can also change the encoder, resolution, framerate, bitrate, etc.
Export Video to YouTube
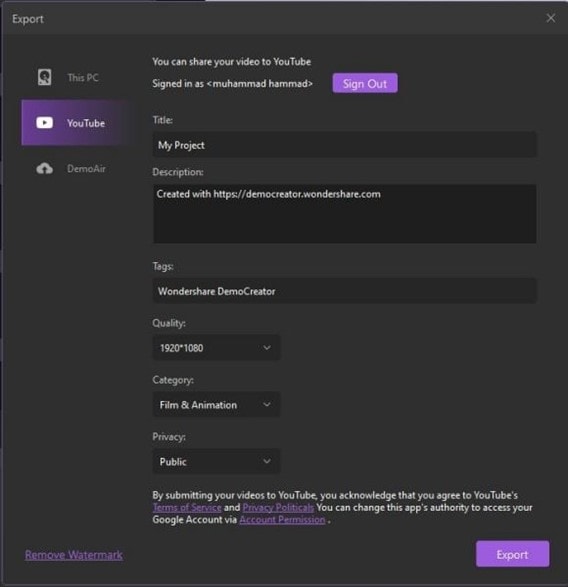
You can export your videos directly to your YouTube channel using DemoCreator. Within the Export box, click the YouTube navigation bar. Sign in to your YouTube channel and easily share your videos with a single click. Enter the video's title, description, and tags. Afterward, click on the upload button.
Fast Export
The FastExport feature is available to all subscribers and allows you to quickly export your video to your computer without dragging it on the timeline. Users who do not want to modify the video with DemoCreator's editing tool will appreciate Fast Export.
To use this option, take these steps; navigate to the media library, right-click to access the various choices, choose Fast Exposure, and choose the media you want to export.
Conclusion
Google slides can be turned into an educational or business purpose video with the help of a robust and loaded with intuitive features software like the Wondershare DemoCreator.
After preparing the informative google slides, you need to record them using the DemoCreator and, in the end, give them a professional look by adding some cool features of DemoCreator like Captions, Annotations, stickers, cursor effects, voiceover, and transitions.
Using these features, you can turn your google slides into an exciting video that will hold the viewer's attention throughout the video. You can also directly export your video to YouTube with the help of DemoCreator.


