
In this article, we are going to teach you how to make an employee training video in just five easy steps using Wondershare's DemoCreator. But before we get into the steps, let's go over why we may need an employee training video.
In this article
Part 1: Why Make Your Own Employee Training Video?
Whether you want to train a current or onboard a new team member, making a training video can be a lifesaver. Rather than explaining the same thing over and over again, just make an instructional video. Your employees can re-watch your video as many times as they need and get the information that they require.
Many believe that making a training video is too difficult, but that's simply not true. Once you have the right tools and knowledge to use them, making a training video is a piece of cake. So, without further ado, let's go over the five steps that you can use to make an effective employee training video.
Part 2: How To Make an Effective Training Video in 5 Easy Steps?
Step 1: Consider if You Should Create a Storyboard
A storyboard is a tool that helps you map out and pre-plan your video. Storyboards don't have to be a detail-rich game plan. They can be something as simple as doodles on a notepad or a series of screenshots that visualize what you're going to display.
Having a framework, a script, or talking points before making your training video is always beneficial. Pre-planning your videos ensures that you remember all the vital components. You can also easily make corrections and changes to your script as you go along.

Step 2: Record Your Computer Training Session
DemoCreator offers two tools that are excellent for making employee training videos. Let's have a look at both of these tools in detail.
Solution 1: “All-in-one” Recording Mode
The first tool is the “All-in-one Recording mode.” This tool allows you to record any window on your computer screen. The all-in-one recording mode is perfect for when you just want to record your screen without including camera footage. Of course, you can record “screen only,” “audio only,” “your portrait only," or all of them. With this tool, you can make your employee training videos in a matter of a few clicks. Just follow these steps:
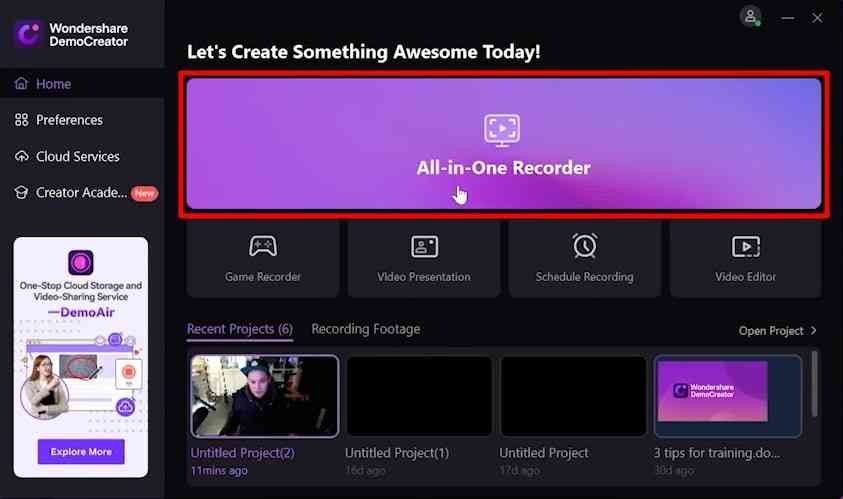
Launch Wondershare DemoCreator and click on the “All-In-One Recorder." The next screen allows you to set the settings for this recording. Select the area that you want to capture; it can be a window, your whole screen, or a selected screen area.
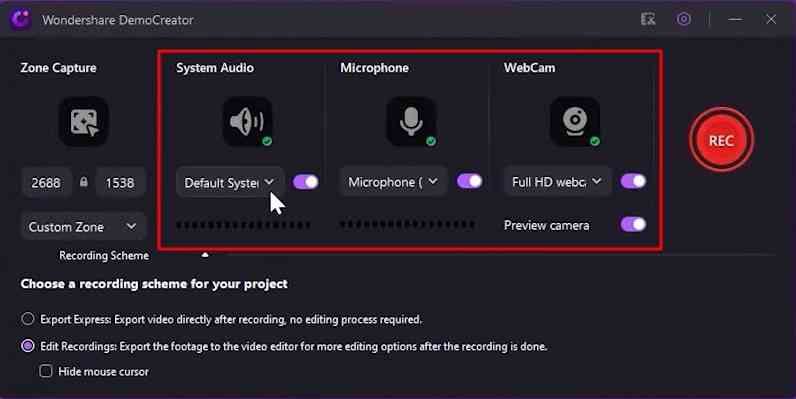
Select the audio and microphone inputs that you wish to include in your video. The “System Audio” consists of sounds that you play on your computer during the recording session. The “Microphone” is used to add your voice to the video in real-time. If you want, you can also include footage from your webcam in real-time.
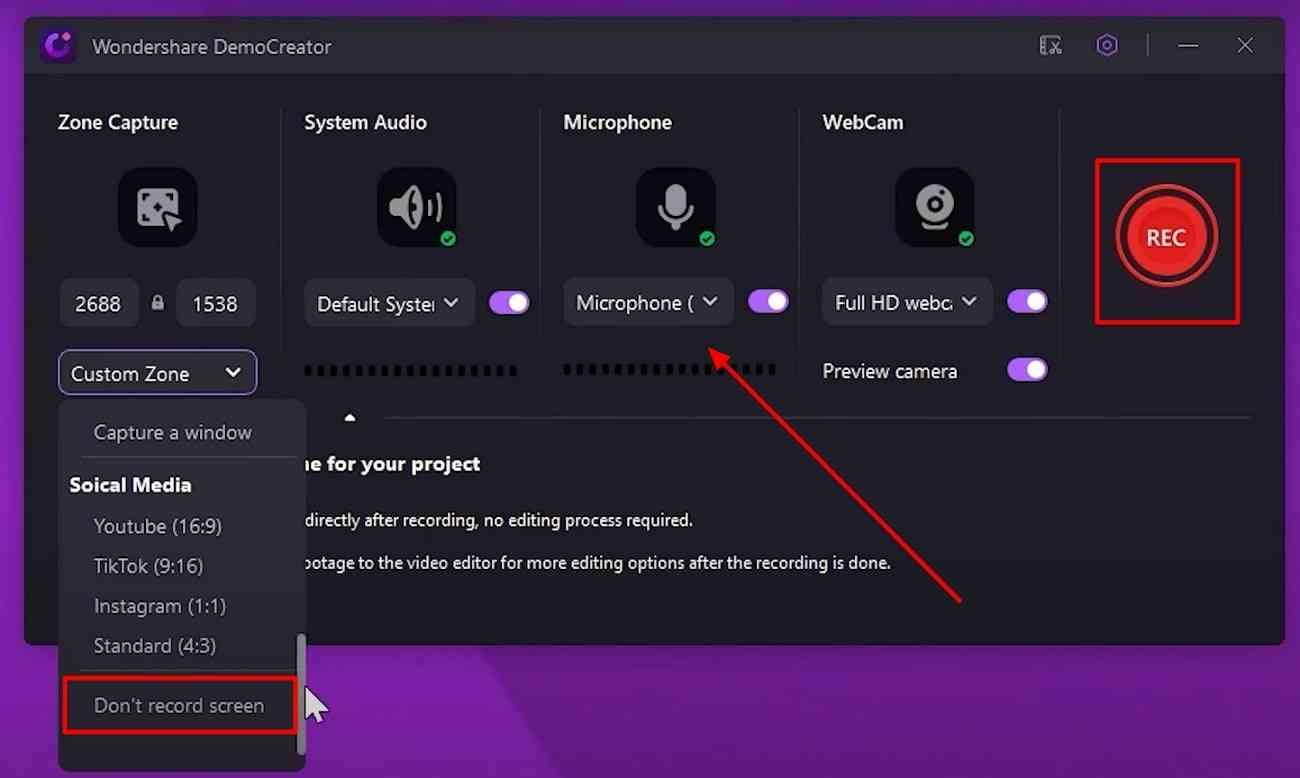
What if you want to record your audio and portrait only during the process? For that, you just need to choose “Don't record screen” in the “Capture Area” option and turn on the “System audio,” “Microphone," or WebCam” recording buttons. Next, press the “Record” button or “F9” button to start recording. When you're done, press the “Stop” or “F10” buttons to finish recording.
Solution 2: DemoCreator “Video Presentation” Mode
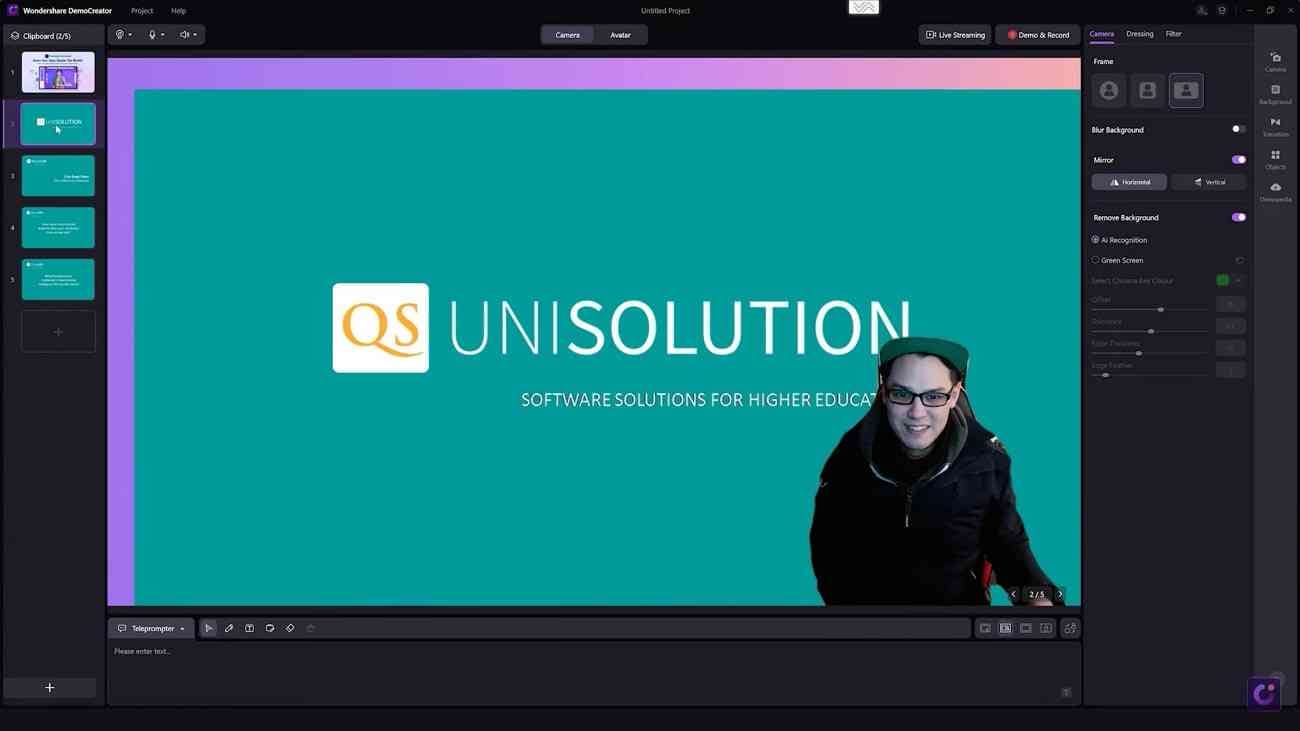
The “Video Presentation mode” helps you make any kind of video presentation. It allows you to import entire slideshows in PPT format. You can add images, videos, audio transitions, text, shapes, and much more to make your video much more polished and professional. You can even add real-time footage from your webcam or desktop screen. The video presentation mode offers many additional creative effects and features, which we will discuss in detail.
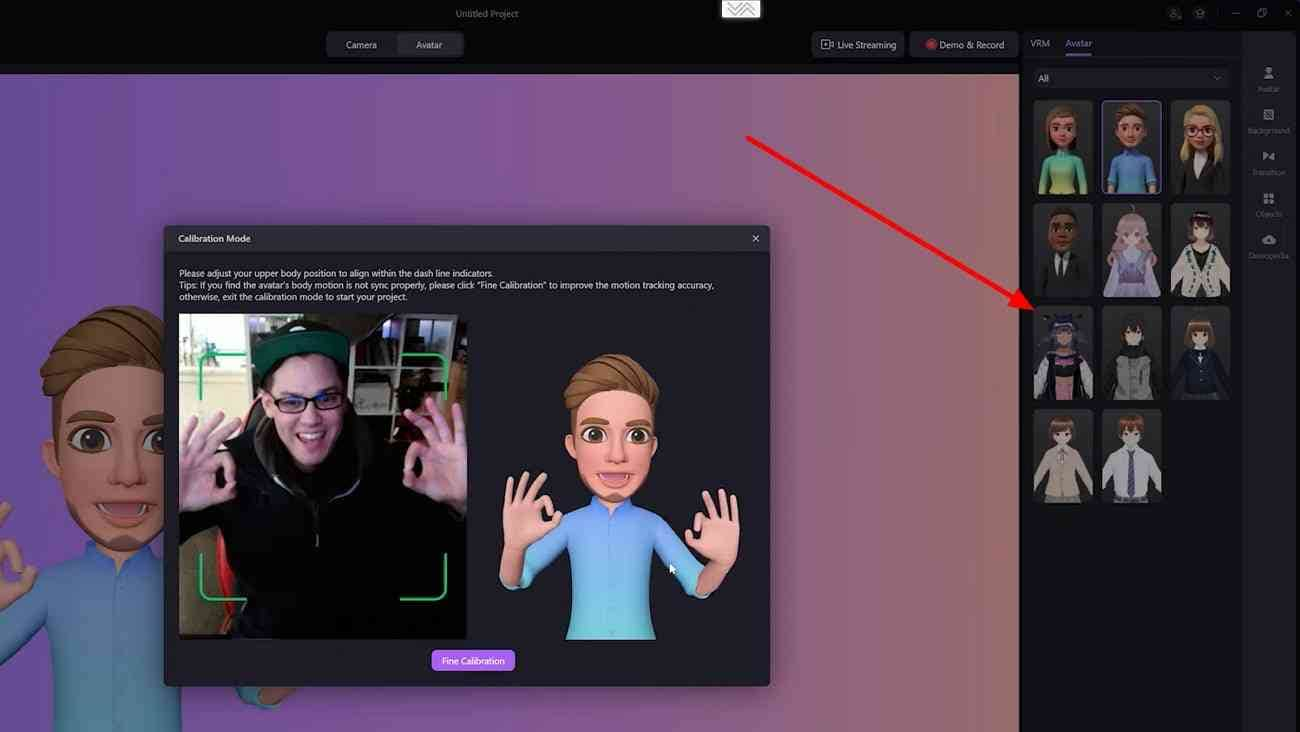
Virtual Avatars
You can enable your webcam and select an “Avatar” from DemoCreator's vast library of pre-made VTubers. The avatar or VTubers will mimic your speech in real-time, making your video much more enjoyable.
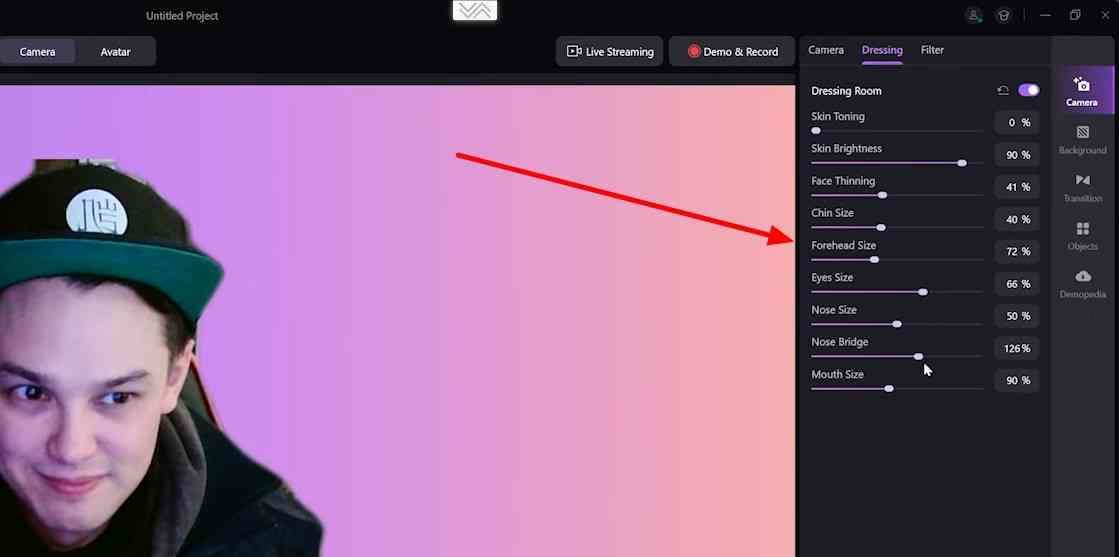
Camera Effects
You can add effects to your webcam footage in real-time. For example, you can use the “Beauty Face Effect” to capture a portrait, which is automatically adjusted to provide you with the best picture. DemoCreator also supports many virtual cameras like OBS, Nvidia Broadcast, and Mmhmm.
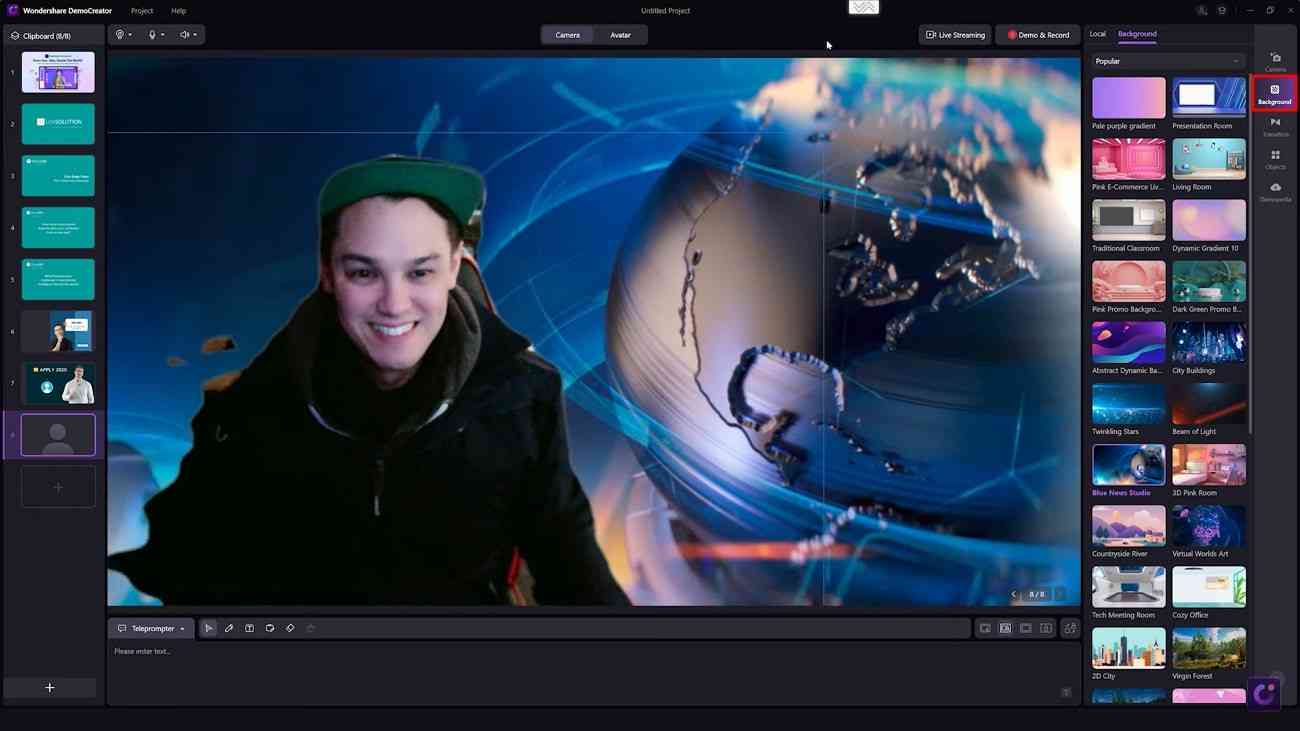
Virtual Backgrounds
Upload any image or video to create a custom background that brings your video to life. You can also choose from DemoCreator’s extensive stock images and video library.
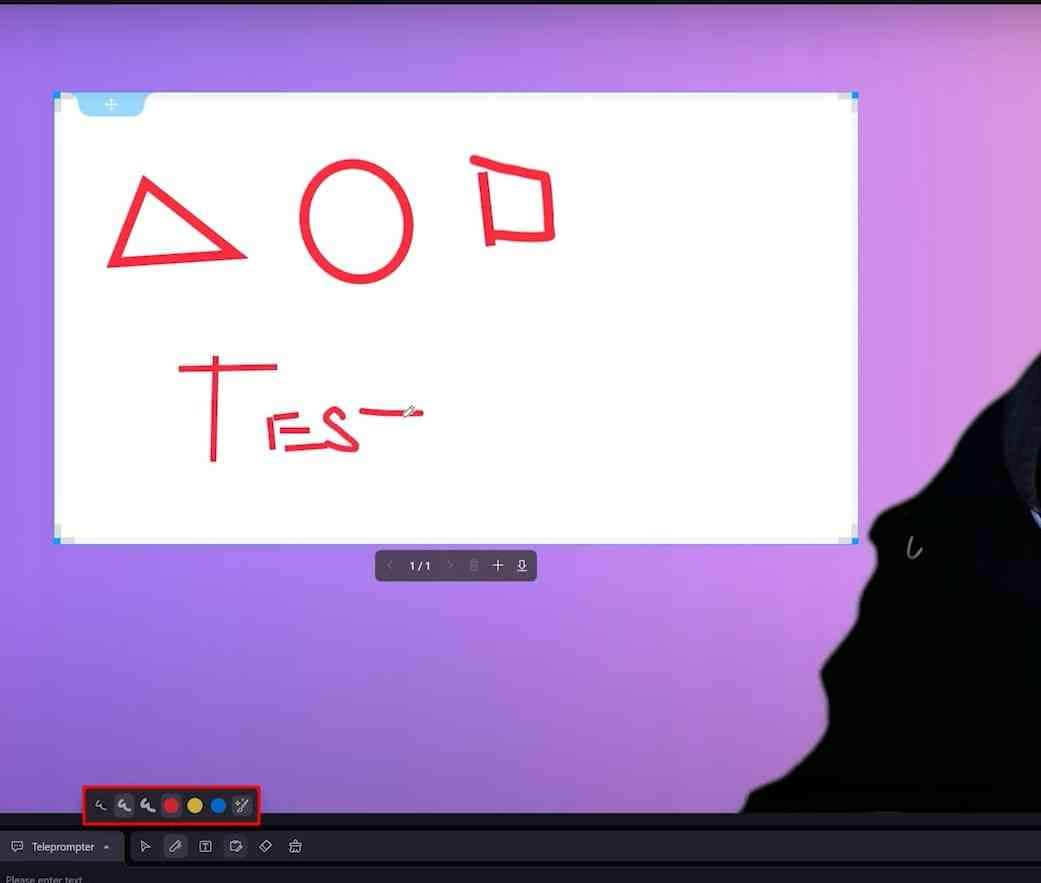
Epic Pen Whiteboard
DemoCreator features a real-time screen drawing pen and whiteboard. With this tool, you can add a live freestyle drawing to your video and make it much more elaborate. So, these are just a few of the fantastic features DemoCreator offers that allow you to create jaw-dropping training videos for your employees.
Step 3: Post-Recording
Once you hit the “Stop” button, your recording will be automatically uploaded to your media library and opened up in the DemoCreator video editor. From here, you can save your video as it is or edit it and add more media.
Saving Your Video
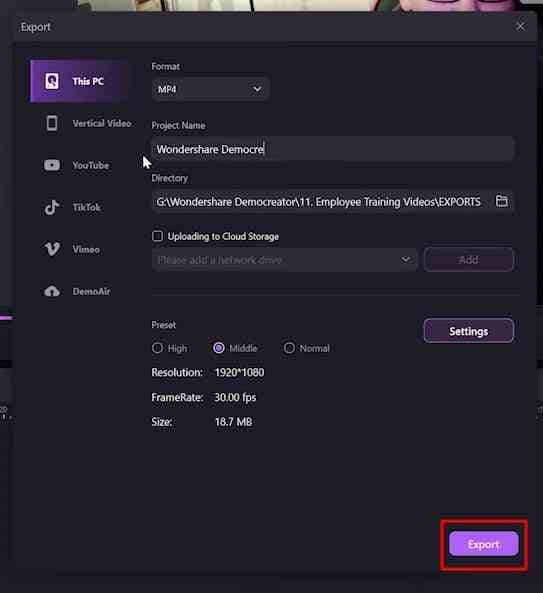
To save your video, click the “Export” button in the top right corner, add a name, set the format, and select the destination where you want your video to be saved. DemoCreator also allows you to set the video settings like encoder, frame rate, resolution, and more.
Importing Media
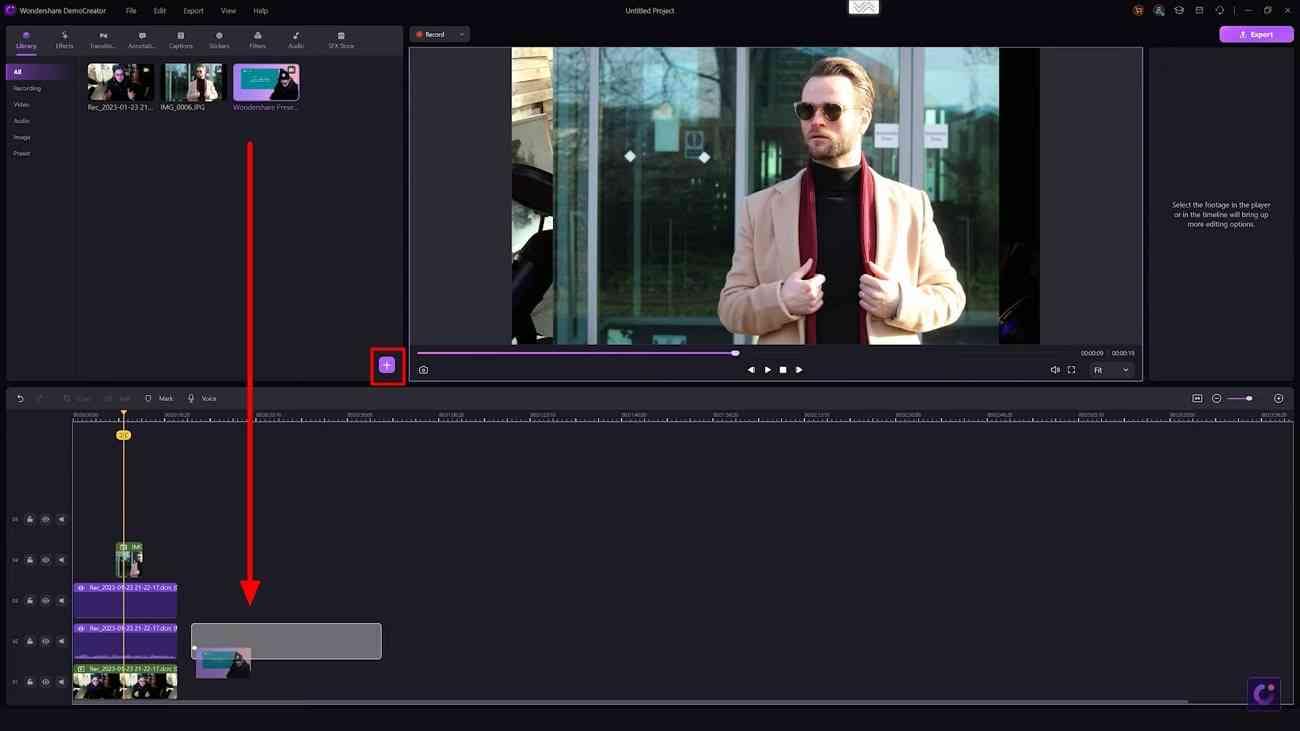
You can use the import option to add more media, such as images, audio, and videos, to your tutorial. Click the “Import” button located in the “Media Library Panel” and choose “Import Media Files” or “Import a Media Folder” to add media. If you plan on creating an employee training video with multiple parts, you can record separate segments and then combine them using the import option.
You can also add pre-recorded outros and intros. The best method is to save the media content that you want in your video to a single folder and then import that entire folder to the editor. Once your media has been imported, you can use the “Drag and Drop” controls to organize your files swiftly.
Step 4: Edit Your Training Videos
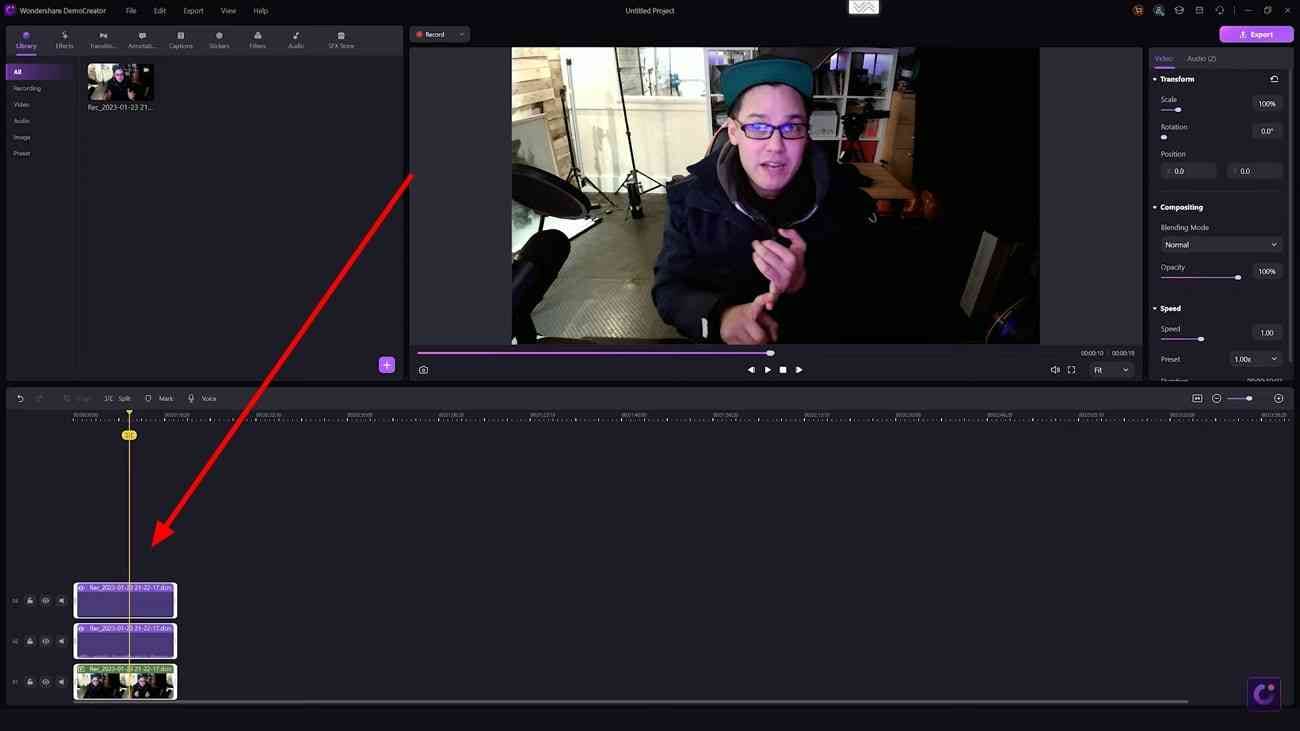
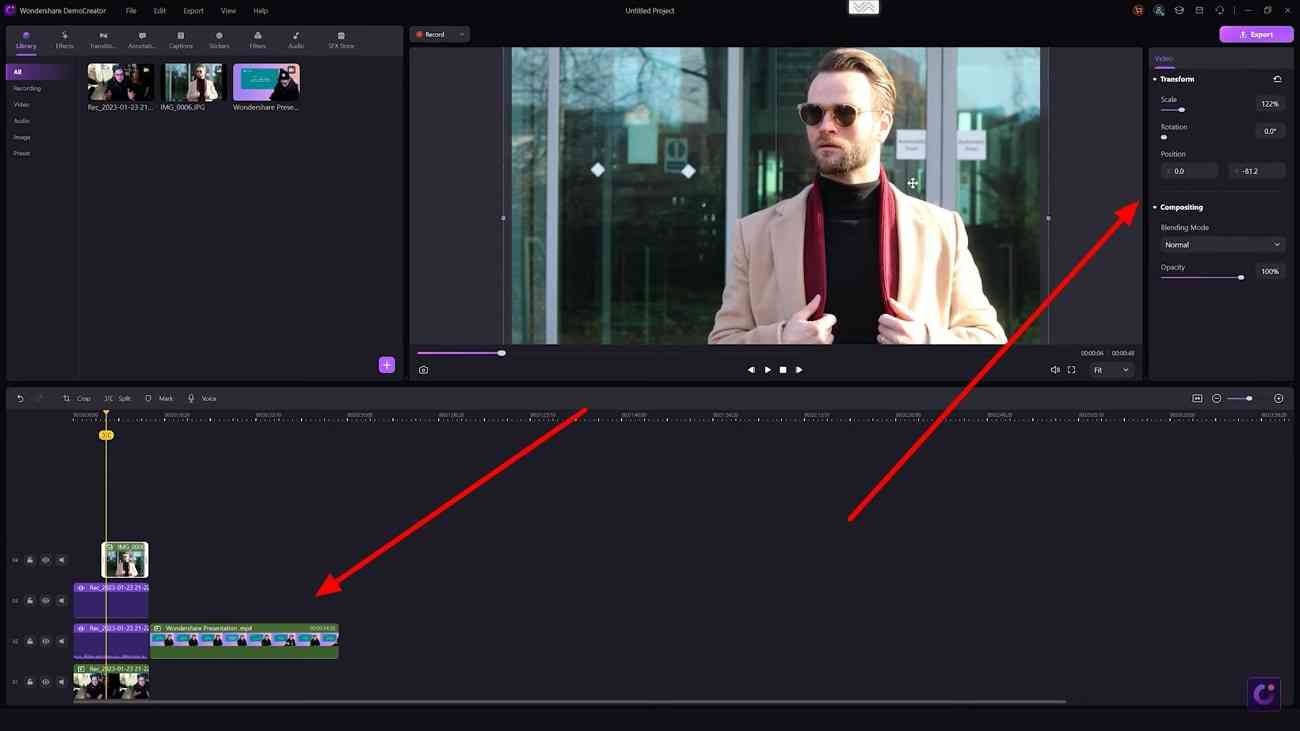
If you feel your videos need some brushing up before exporting, use DemoCreator's built-in editor to perfect your video. Drag files from the media library panel to the timeline, trim out the unnecessary parts, align your audio to your video, and compile your media files in an order that makes sense. You can crop, rotate, or change your video speed as needed.
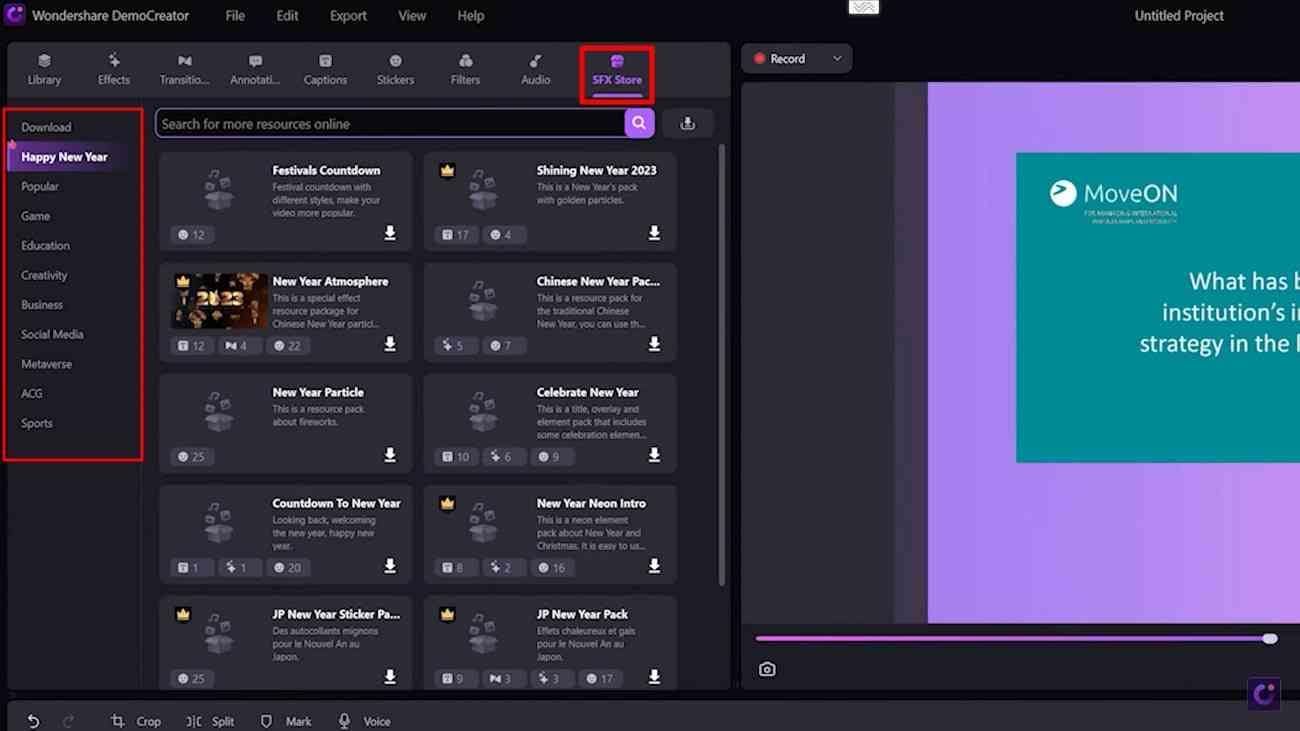
SFX Store
DemoCreator offers an “SFX Store” with numerous video effects packs and templates. Open the “SFX Store” tab from the toolbar in the video editor and browse through the various categories and collections of video effects packs. You can click the play button to preview the template and the download button to add it to your editor.
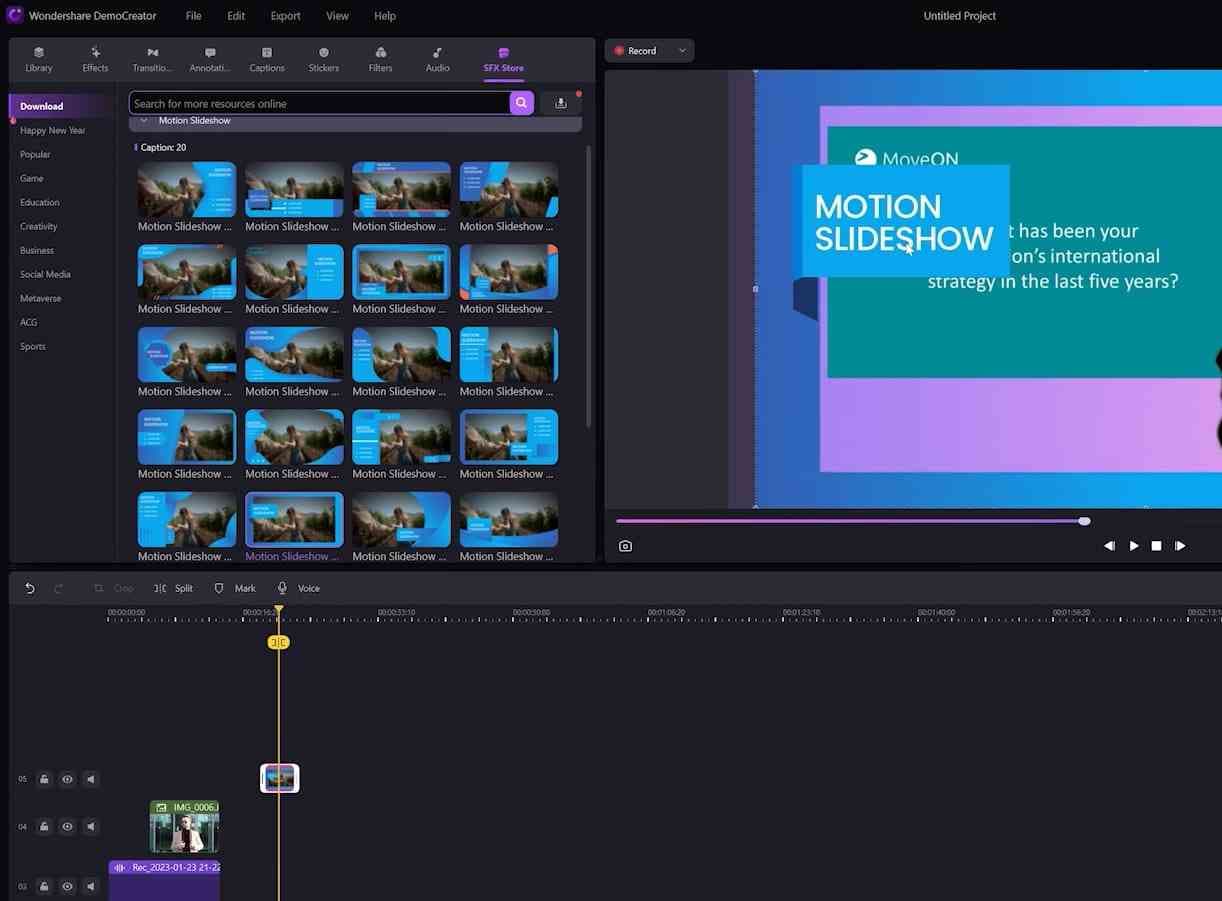
Example: The Motion Slideshow Effect Pack
The motion slideshow effects pack has five different transitions and 20 lower-third animations perfect for creating employee training videos. Search the SFX store for motion slideshow, click, and download the effects pack. The effects pack should appear in the “Download” section in the SFX store tab. Simply drag and drop elements from the pack to your timeline to add them to your video.
Step 5: Share The Training Videos With Your Employees
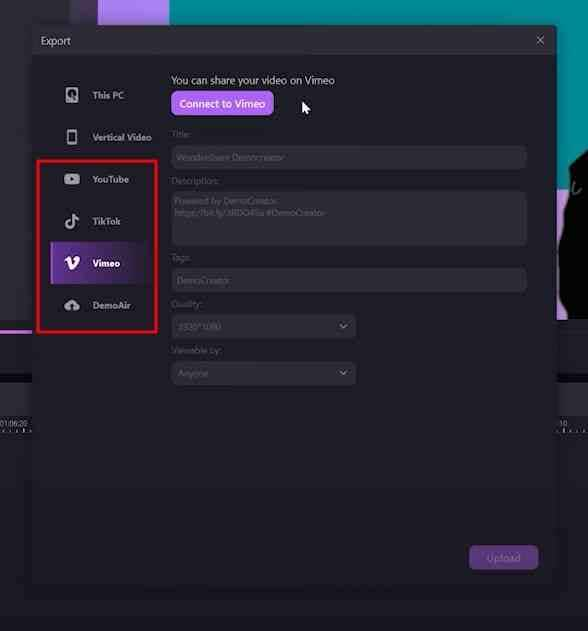
Once your video is complete, all that's left to do is share it with your employees. There are many ways to do this. Click on the “Export” button on the top right to view the exporting options. The first option, “This PC," allows you to save your video locally to your computer. You can choose the format, the video setting, and the location where you want your video saved.
Then, you can share it with your employees using whatever channel you prefer. An easier option is to use the social media export integrations offered by DemoCreator. You can instantly upload your video to YouTube or Vimeo from within DemoCreator and share the link with your employees. The third option is to upload your video to DemoAir. Then, you can share the link with your employees, similar to the social media methods.
Conclusion
You've learned everything that you need to create your very own employee training video rather than paying someone else a lot of money to do it for you. To recap, we discussed two of DemoCreator’s power pack tools, the “All-in-one Recorder” and “Video Presentation” modes. Both of these tools allow you to create practical employee training videos within minutes.
DemoCreator also provides advanced editing options and allows users to share their videos in several ways. Overall, DemoCreator has proven to be the best app for creating employee training videos due to its capabilities and easy-to-use interface.