
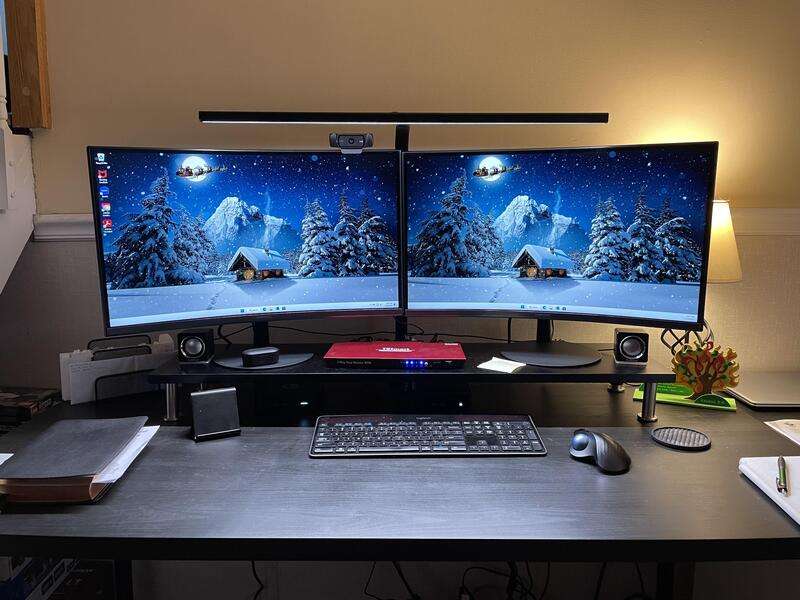
Have you ever wanted to record what’s on your computer screen? That’s called screen capturing. People use it for various reasons, like saving important information or sharing tutorials. But what if you have two screens? It gets tricky. That’s where screen capture of multiple monitors comes in.
In this article, you will learn how to tackle this challenge. Whether you’re a gamer, teacher, or office worker, this guide got you covered. Stay tuned to learn simple ways to record multiple monitor screens simultaneously. Let’s make multi-screen recording easy and accessible for everyone!
In this article

Part I: Screen Capturing With Wondershare DemoCreator
When it comes to screen capturing multiple monitors, third-party tools offer many options beyond what your basic computer provides. One such gem is Wondershare DemoCreator, a user-friendly software that opens up a world of possibilities. Let’s take a closer look at how DemoCreator can revolutionize your screen-capturing experience.
DemoCreator is a powerful yet simple tool designed for all kinds of users. Whether you’re a seasoned professional or just starting out, its intuitive interface makes screen capturing a breeze. With DemoCreator, you can record your screen with ease and precision, capturing every detail with crystal clarity.
Key Features
Here are the key features that DemoCreator offers:
- Dual Screen Capture Feature. One of the standout features of DemoCreator is its ability to capture multiple screens simultaneously. This makes it the perfect choice for users with dual monitors who want to capture both screens at once. With DemoCreator, you can easily switch between screens or capture them both simultaneously, giving you ultimate flexibility and control.
- Easy Recording. DemoCreator makes recording your screen a piece of cake. With just a few clicks, you can start capturing your screen and creating stunning videos quickly.
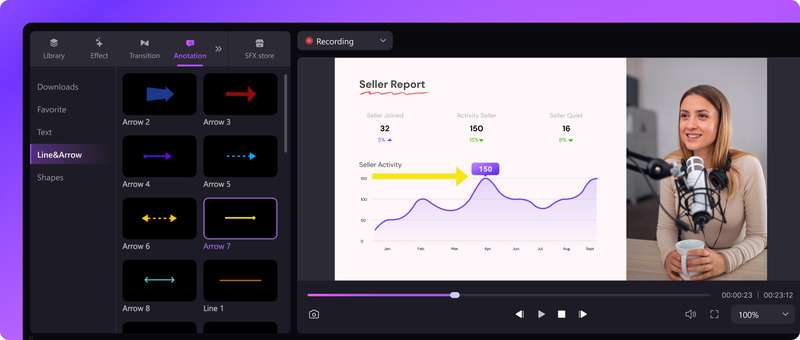
- Editing Tools. Once you’ve captured your screen, DemoCreator offers anumber of editing tools to help you polish your videos to perfection. The possibilities are endless, from adding text and annotations to trimming and merging clips.
- Customizable Settings. DemoCreator puts you in the driver’s seat with customizable settings that let you tailor your recording experience to suit your needs. Whether you’re recording a tutorial or a gaming session, you can adjust the settings to ensure the best possible results.
How To Record Multiple Monitors Using DemoCreator
Check out how easy it is to record multiple monitors with DemoCreator below:
Step 1: Download and install DemoCreator on your PC. Once done, launch the software and choose New Recording.
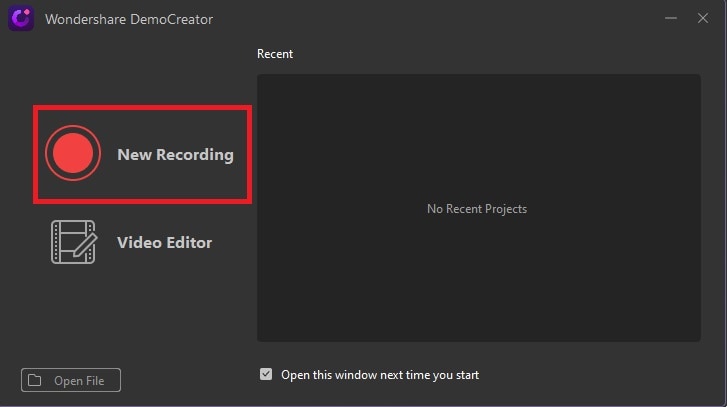
Step 2: In the window that comes up, choose the fitting option for you, then click REC to start recording.

Step 3: Next, navigate to the recording panel and adjust the recording area to record on two or more monitors. You may also adjust the range of views on your screen with DemoCreator before you record. Additionally, you have the option to activate the screen drawing tool, which enables fluid real-time screen annotation.

Step 4: Once you’ve finished adjusting your screen’s settings, click the REC button to begin the screen recording.
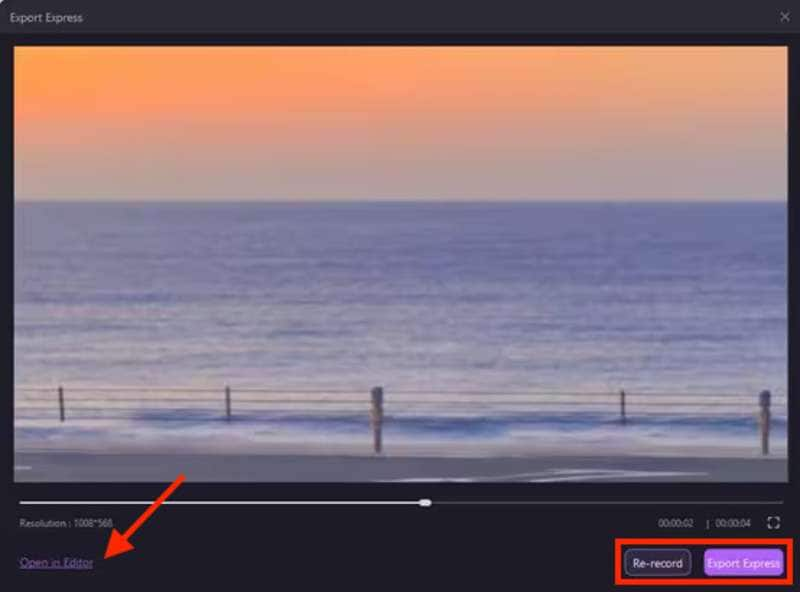
Step 5: If you have selected the Export Express workflow option, you will be taken to a new window where you can directly save your recorded video. Simply click the Export Express button. You may also choose the Re-record button if you want to restart recording again.
Tip: If you want to edit your recording but mistakenly chose Export Express before, you may still edit your video by clicking on the Open in Editor button.
Step 6: If you previously selected the Edit Recordings option, you can edit your video first before saving. Once the editing is complete, click the Export button at the upper right corner of your screen.
DemoCreator is a versatile and powerful tool that makes screen capture a breeze. Whether you’re recording tutorials, gaming sessions, or anything in between, DemoCreator has you covered. Its intuitive interface, customizable settings, and dual-screen capture feature make it the ultimate choice for anyone needing a reliable multiple-screen recorder.
Part II: Screen Capturing With Print Screen Key
If you’re looking for a straightforward way to record multiple monitors, the print screen method can also be an option for you. This section will walk you through the process step by step.
How To Print Screen With Dual Monitors
Learn how to easily print screen on your Windows PC with the steps below:
Step 1: Located on your keyboard, usually labeled as PrtScn or Print Screen, this key captures a screenshot of your entire desktop, including both monitors. Click on it.
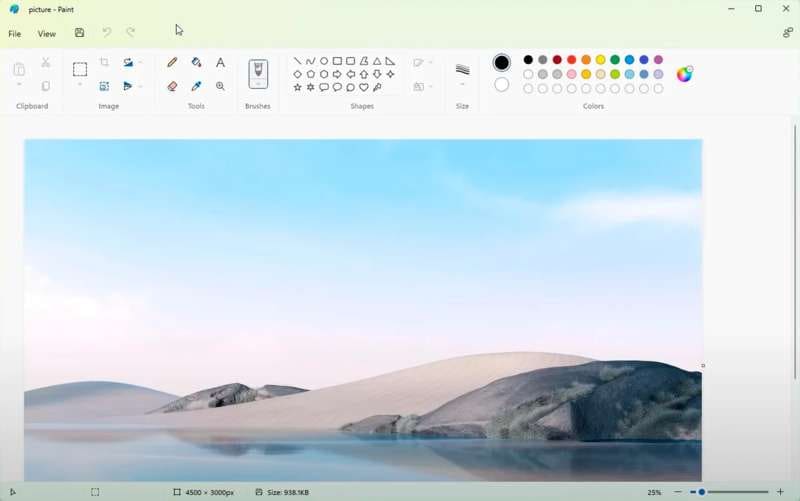
Step 2: Once you’ve pressed the print screen key, open Paint or any other image editing software of your choice.
Step 3: In Paint, press Ctrl + V to paste the screenshot you captured using the print screen key.
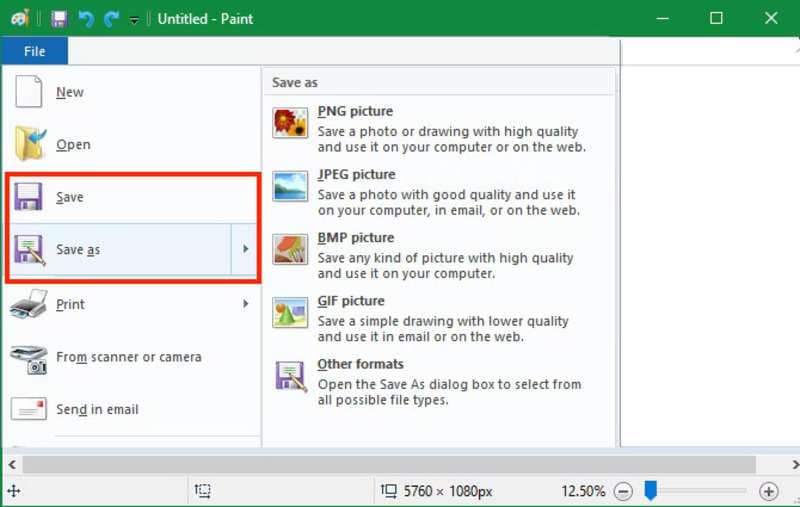
Step 4: Finally, save your screenshot as an image file to a desired location on the computer. Click File and choose Save in the drop-down menu.
Tip: If you want to be able to choose which format to save your image into, click on Save as instead to open the available image format options.
While the print screen method is simple and easy to use, it does have its downsides. Namely, you’ll need to capture each monitor separately and paste them into image editing software like Paint. This can be a bit tedious if you’re working with multiple monitors regularly.
Part III: Screen Capturing With Windows Snipping Tool
When it comes to built-in screen-capturing tools, Windows Snipping Tool is a popular choice for many users. In this section, you’ll explore how to use this handy tool to screen record multiple monitors effortlessly.
How To Print Screen With Dual Monitors Using the Snipping Tool
Here are the easy steps on how to capture multiple monitors using the Windows built-in Snipping Tool:
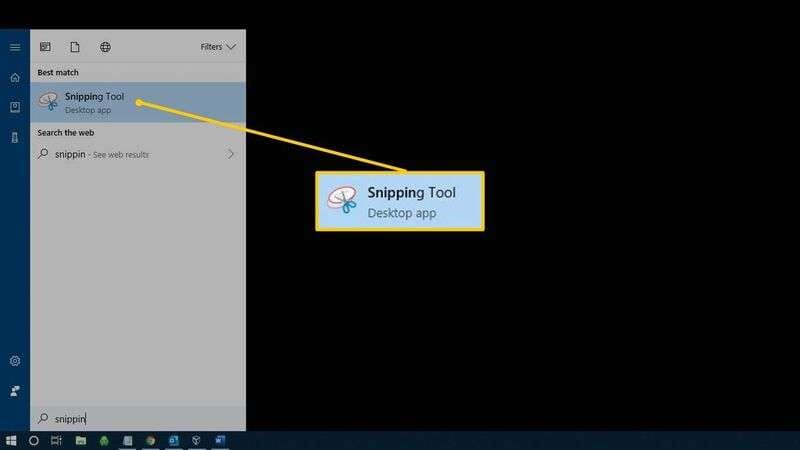
Step 1: Find the Snipping Tool by searching in the Windows search bar or navigating through the Start menu.
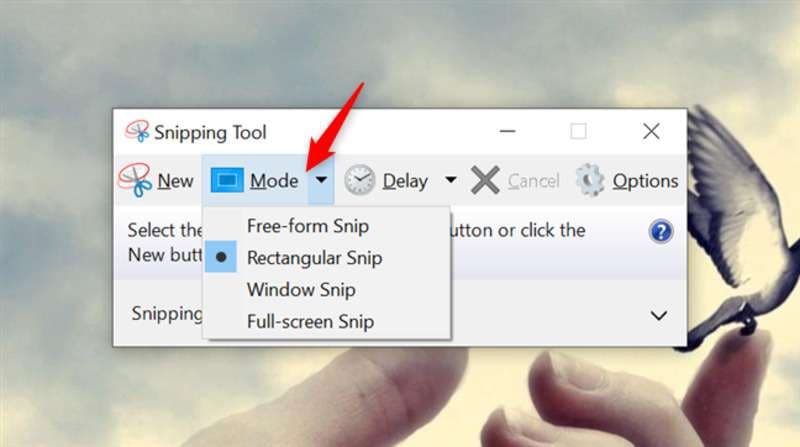
Step 2: Once the Snipping Tool is open, click the Mode tab and select the type of snip you want to take. You may either choose Free-form Snip, Rectangular Snip, Window Snip, or Full-screen Snip.
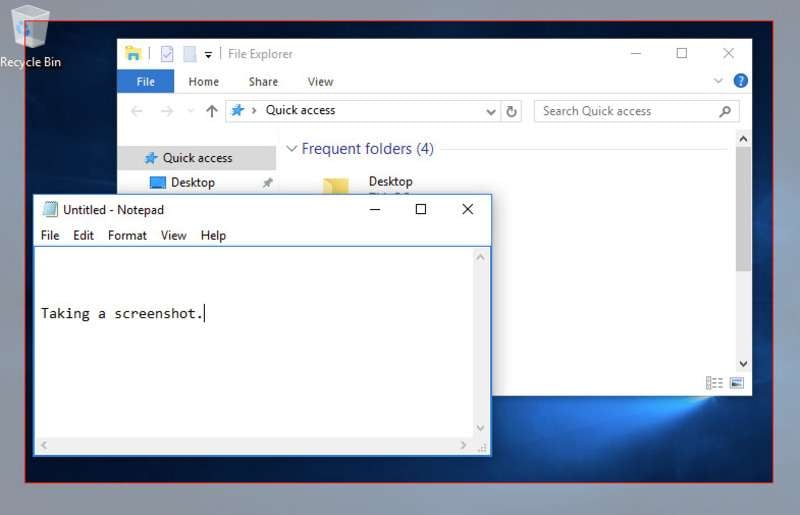
Step 3: Use the snipping tool to capture the content on your dual monitors by dragging the cursor to select the area you want to capture.
Step 4: After capturing your screens, save the snip as an image file or copy and paste it into another document or application.
While the Windows Snipping Tool is convenient, it does have its downsides. Sometimes, the quality of the captured images may be compromised compared to other third-party screen-capturing tools. However, it’s still a handy option for a quick and simple way to screen capture multiple monitors.
Part IV: Tips for Quality Multiple Monitor Screen Capturing
Capturing screenshots across multiple monitors can be a breeze with the right tips and tricks. This section will share some key reminders to ensure you get the best results when you screen record multiple windows.
- Ensure Consistent Resolutions. Before you start capturing, make sure that the resolutions of both monitors are the same. This ensures uniformity in your captured images and prevents any distortion or mismatched proportions.
- Check Graphic Driver Settings. Take a moment to check your graphic driver settings to ensure optimal color and image quality. Adjusting settings like brightness, contrast, and saturation can help enhance the overall appearance of your captured screens.
- Use a Reliable Tool. Invest in a reliable screen capturing tool like DemoCreator, that supports multiple monitors and offers advanced features like simultaneous recording. Look for user-friendly options with customizable settings to streamline your capturing process.
- Post-editing Matters. Don’t underestimate the power of post-editing. After capturing your screens, take the time to edit and enhance them further if needed. This could involve cropping, resizing, adding annotations, or adjusting colors to ensure your final images are polished and professional.
By following these simple tips, you can easily elevate your multiple monitor screen capturing game and produce high-quality screenshots. Whether you’re recording tutorials, presentations, or gaming sessions, these reminders will help you achieve impressive results every time you record multiple monitors.
Conclusion
Mastering screen capture on multiple monitors is achievable with the right tools. DemoCreator emerges as the top recommendation, offering intuitive controls and dual-screen capture capabilities. While alternatives like the print screen method and Windows Snipping Tool exist, they may lack quality and convenience.
Remember to maintain consistent resolutions, check graphic settings, and consider post-editing for polished results. With DemoCreator, recording multiple monitors becomes seamless, whether you’re a content creator, educator, or professional. Elevate your screen-capturing game today and unleash the full potential of your multi-monitor setup.
