Combining Videos in 6 Complicated Solutions

Combining videos on your computer, smartphone, or online isn’t as complex as it seems. In fact, if you are aware of basic terminology, and understand the concept of resolution and framerate (frames per second or FPS), you can easily learn how to combine videos, regardless of the platform, application, and/or device you are using. Keeping this in mind, the following sections explain how to combine two videos (or even more) while working on your favorite device.
Part 1: [Laptop Solution] Combine Videos on Windows/Mac
Some of the most efficient apps that you can use to combine video clips on a Windows or Mac laptop are listed below along with the process of getting the job done:
1. DemoCreator (Highly Recommended)
Developed by Wondershare, which is one of the leading software solution organizations, DemoCreator is a one-stop tool for almost all your screencasting and post-production requirements. Simply put, in addition to being able to record your Mac or Windows computer screen, Wondershare DemoCreator has a built-in video editor as well that enables you to merge media clips, manage audios, split and crop the footages as needed, add effects, stickers, and transition effects, and do much more.
 Secure DownloadSecure Download
The process to combine video files with Wondershare DemoCreator is explained below:
Step 1: Import Source Clips
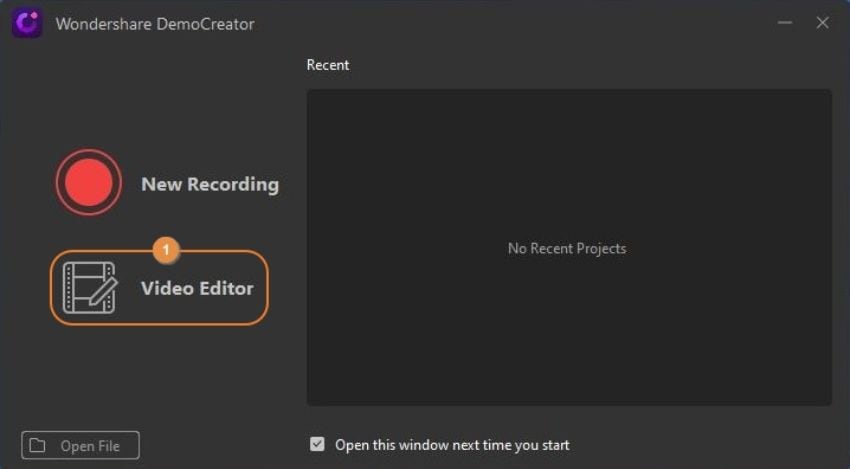
Initialize Wondershare DemoCreator on your Windows or Mac computer, click Video Editor on the welcome window, click Import from the Media pane, and select and import the source footages that you want to combine to the program.
Step 2: Add the Media Files to the Timeline
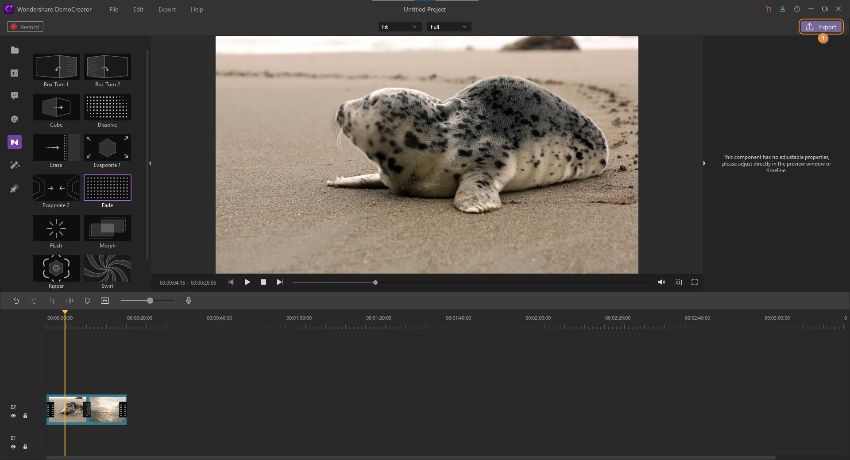
Next, select all the imported clips, and drag them to the Timeline at the bottom. Alternatively, you can also add each media individually if they are to be placed in a particular sequence. Optionally click the Transitions icon from the left bar, and choose and add the transition of your choice to the beginning of the first footage in the Timeline itself, between them, and at the end of the last clip to make the produced video look more professional.
Step 3: Export the Video
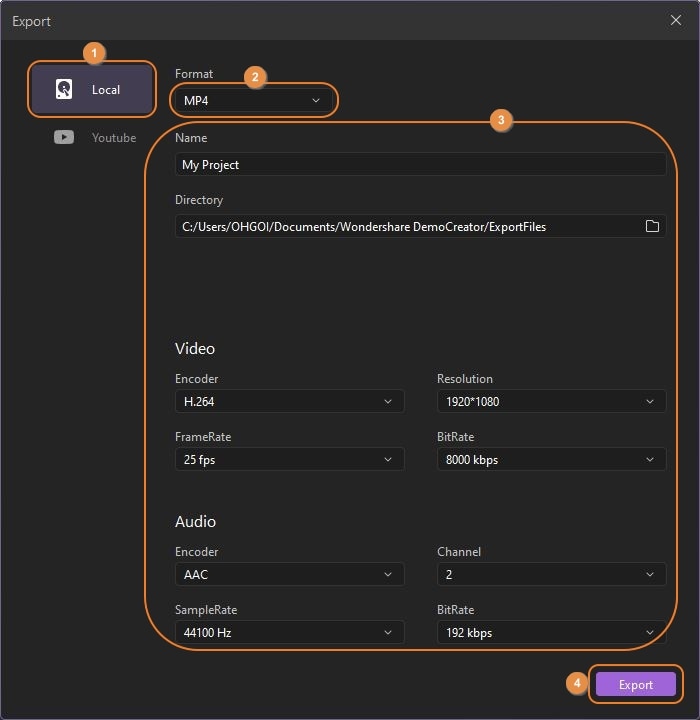
Click Export from the top-right corner, check and confirm if Local is selected in the left pane of the Export box, choose your preferred export options from the right, and click Export to combine videos using Wondershare DemoCreator.
2. Filmora
Filmora is yet another post-production application developed by Wondershare. While DemoCreator is for vloggers, beginners, and amateurs, Filmora is mostly used by professionals who are in the production industry. Because of the simple UI and highly advanced tools and options that Wondershare Filmora is equipped with, the application gives tough competition to some of the well-recognized programs like Adobe Premiere Pro, Final Cut Pro X (FCP), etc.
You can learn how to combine videos with Wondershare Filmora by following the instructions given below:
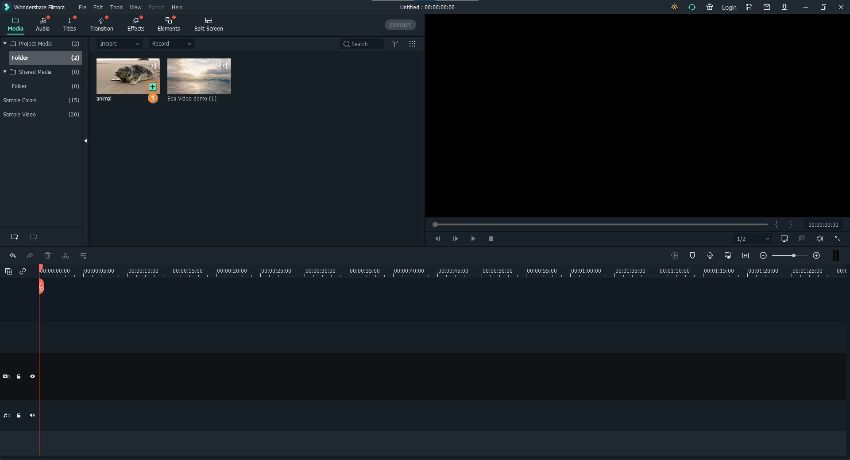
Step 1: Import Source Media Clips
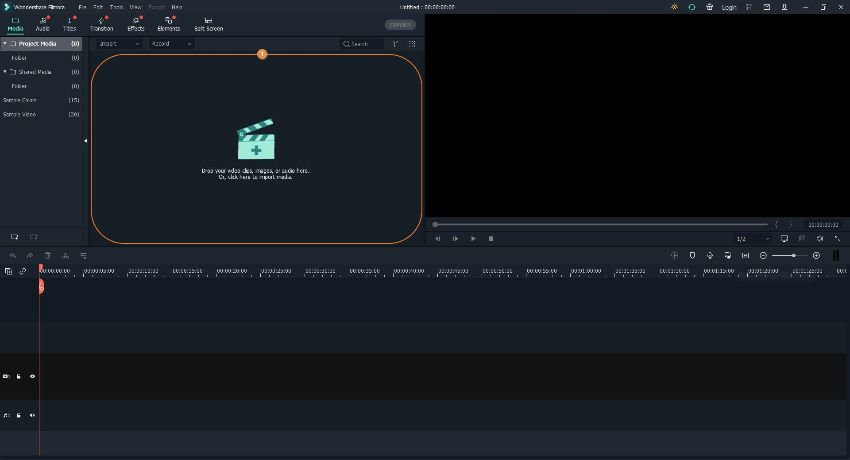
Launch Wondershare Filmora on your Windows or Mac PC, click anywhere inside the Media box, and import all the source video clips that you want to merge.
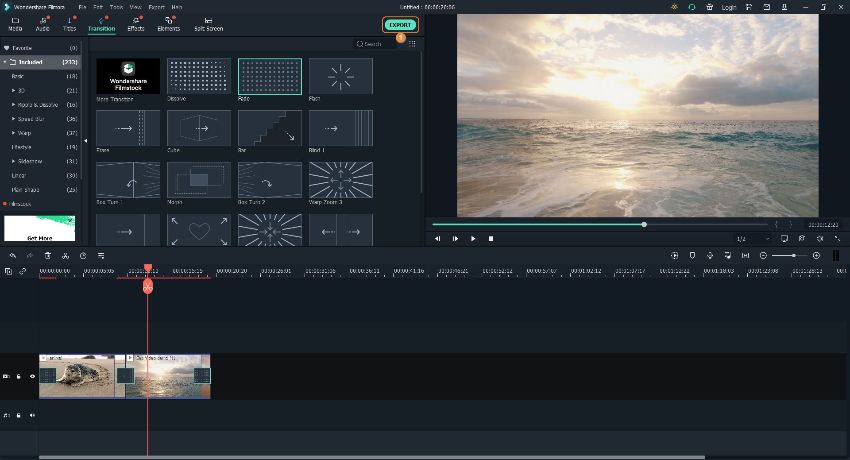
Step 2: Add Videos to the Timeline
Hover mouse to a footage in the Media box, click the + (Add) icon that appears at the bottom-right corner of the thumbnail, and click the button under the Match to Media or Keep Project Settings option on the confirmation box that appears to set the project preferences as needed. Repeat the is process to add more clips to the Timeline. Optionally go to Transitions on the standard toolbar at the top, and choose and drag your preferred transition effects to the starting, between, and ending of the video clips as needed.
Step 3: Combine Videos
Click EXPORT from the top-center of the interface, on the Export box, ensure that the Local tab is selected, choose your preferred output format from the list in the left, define the output preferences in the right window, and click EXPORT from the bottom-right corner to combine videos with Wondershare Filmora.
3. How to Combine Videos in One Screen
Being a highly advanced and robust post-production application, Wondershare Filmora even lets you add a Picture-in-Picture effect to your videos. To do so:
Note: In order to make the effect look professional and especially less messy and cluttered, it is strongly recommended to use maximum two videos for the Picture-in-Picture effect.
Step 1: Import Two Videos to Filmora
Follow the instructions given in Step 1 of Part 2 to import two videos to Wondershare Filmora.
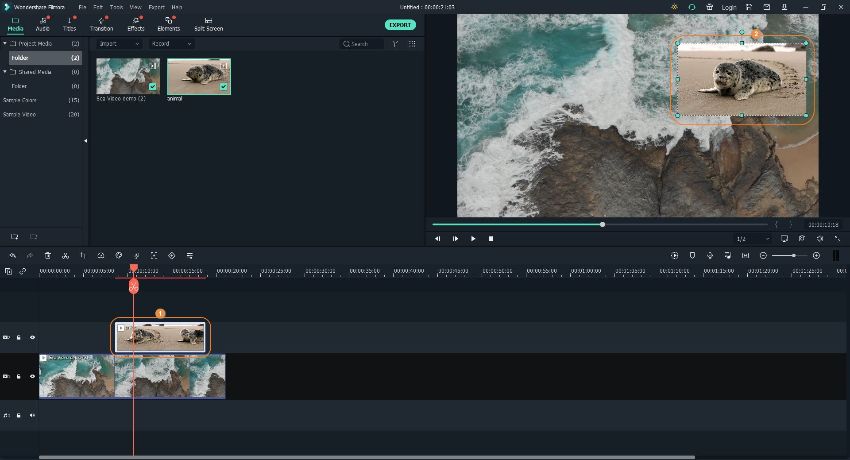
Step 2: Add Clips in Different Layers
Add the first video to the Timeline using the method explained earlier. Next, drag the second video from the Media box, and place it above the layer holding the first clip in the Timeline. Position the second clip to the frame you want to start the Picture-in-Picture effect from.
Step 3: Create Picture-in-Picture Effect and Export the Video
Place the Skimmer (Playhead) on the frame that has both the clips, select the upper layer in the Timeline, and use the scaling handles in the Preview window to reduce the size of the video. You can even place the video window to your preferred location by dragging it in the Preview window itself. Finally, use the process explained earlier to export the media.
4. Things to Note When Combining Video Clips
Although it is easy to combine video clips using any of the tools suggested above, there are a few tips that might come in handy to produce a professional-looking film, such as
- Make sure that the videos that you are about to combine have the same resolution. Having a mismatch in the resolution might make the output look distorted and poorly created
- Feel free to use transition effects when two different scenes are to be combined. Transitions can be skipped while showing an object or a person from varied angles in the same scene
- If any of the clips don’t have sound, you should either add one to it, or remove the audio from the rest of the footage, and then use a single track throughout the combined movie to make it look unfragmented.
Part 2: [Mobile Solution] Combine 2 Videos on iPhone/Android
Although the level of freedom that you experience while working on a laptop or a desktop computer is incomparable, if you don’t have access to a PC, you can combine videos even on your iPhone or Android smartphone. The two widely used apps on the smart devices running the iOS and Android operating systems are discussed below:
1. iMovie
iMovie is a proprietary of Apple Inc. and is available for both iOS and Mac operating systems. As for iOS, the app lets you split, crop, add text to, etc. on the imported footages. You can even create Hollywood-style trailers using the built-in templates. To learn how to combine videos on iPhone with iMovie, you can follow the process given below:
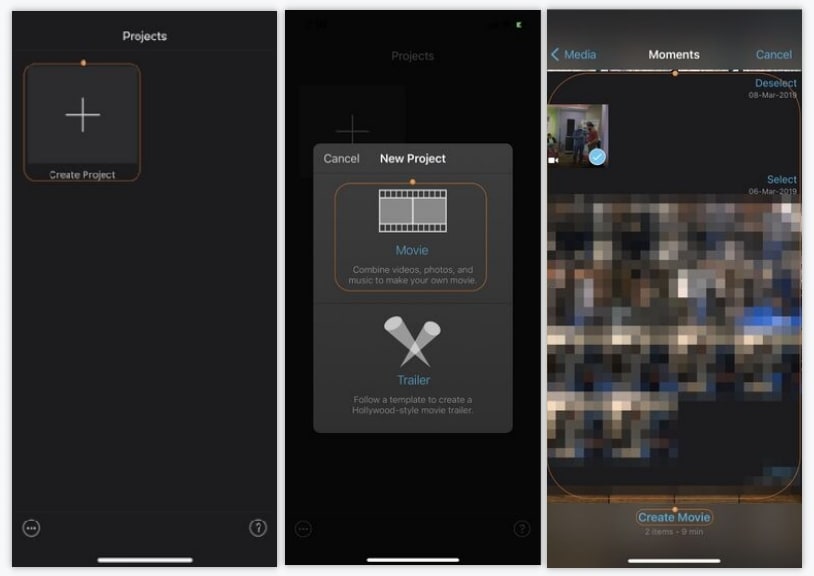
Step 1: Import the Videos to Combine
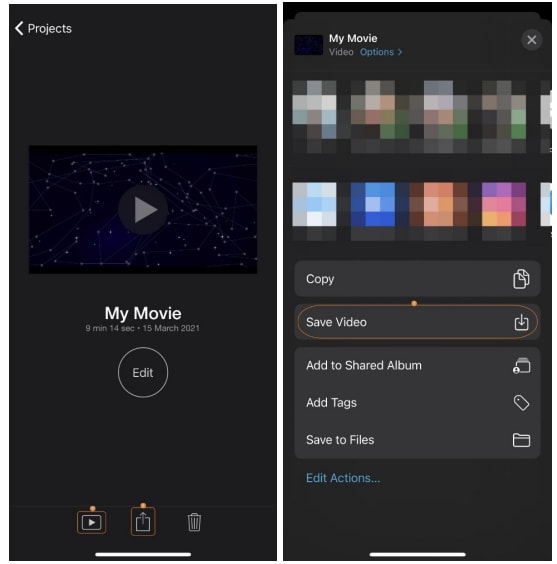
Start iMovie on your iPhone, tap Create Project from the Projects screen, tap Movie on the New Project box, on the next window, tap to select the videos that you want to combine, and tap Create Movie from the bottom.
Step 2: Get to the Export Window
Tap Done from the top-left corner of the screen to get to the Export window.

Step 3: Preview and Share
Tap the Preview icon from the bottom of the screen to see if the expected output is acceptable. Next, click Share, and on the next screen, tap Save Video to combine videos on iPhone.
2. Video Merge
This is probably one of the simplest apps to combine two videos on an Android smartphone. Video Merge offers an intuitive interface that makes your media merging experience fairly easy. The app can be downloaded from Play Store and used for free. However, to unlock advanced functions, you must purchase its Pro version. To use Video Merge to combine 2 videos, you can follow the instructions given below:
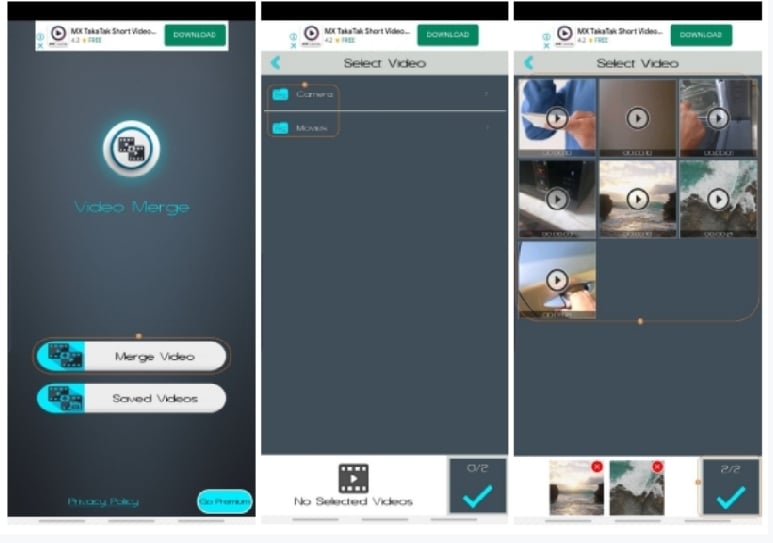
Step 1: Select the Source Videos
Open Video Merge on your Android smartphone, tap Merge Video, go to the Camera or Movies container on the Select Video screen, tap to select the videos from your device’s internal storage, and tap the OK icon (with a check mark) from the bottom-right corner of the screen.
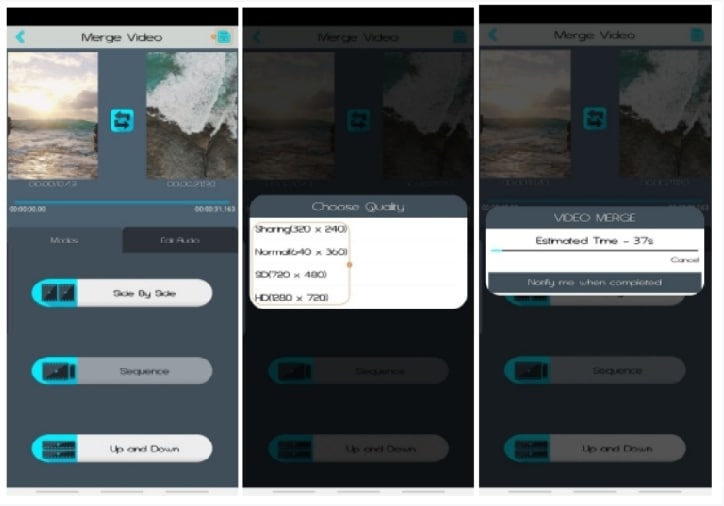
Step 2: Choose Combining Pattern
Tap your preferred merging type on the Select Pattern screen (Sequence is selected here for illustration).

Step 3: Combine the Videos
Tap the Save icon from the top-right corner of the Merge Video screen that comes up next, and tap your preferred resolution from the list on the Choose Quality box to combine videos on Android.
Part 3: [Online Solution] Combine Video Clips Online
If you don’t want to install any software on your PC, and do not wish to have an app on your smartphone either, the easiest way to combine videos is by using online solutions. These web resources merely need a browser such as Google Chrome, Mozilla Firefox, etc. and an active Internet connection. Everything else is taken care of by the servers of the websites. The two most efficient portals to combine video clips along with the process to do the job are listed below:
1. Clideo
Clideo is a web app that eliminates the need of having a post-production tool installed on your PC or smart device. The portal is capable of performing almost all the video editing tasks with ease right on your Internet browser, thus significantly reducing the overhead on the local hardware resources. You can combine videos using Clideo by following the steps given below:
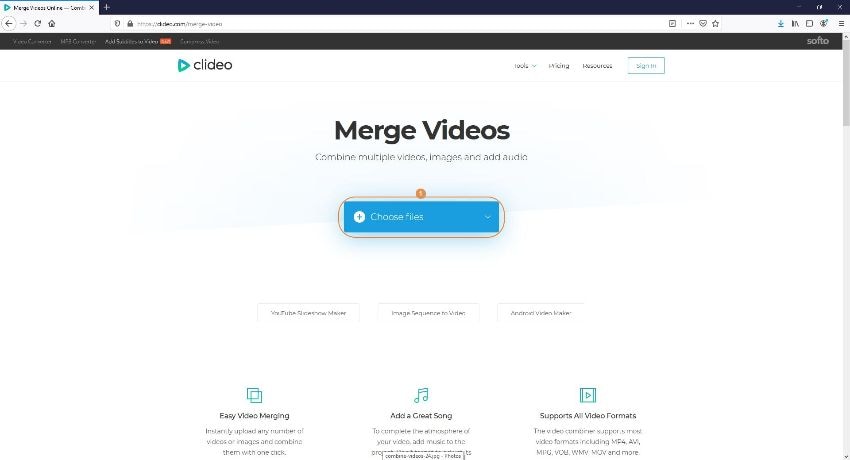
- Click Choose files
- Select the source videos from your local hard drive (or hover mouse to the arrow to pick the source videos from Google Drive, Dropbox, or URL)
- Click Merge from the bottom-right corner to combine videos online with Clideo.
2. Kapwing
Kapwing is another online solution that enables you to resize the videos, add subtitles to them, trim the clips, and much more. Furthermore, Kapwing is also useful for the people who remain active on social media as it allows them to loop the clips, and even create memes with ease. You can learn how to combine videos with Kapwing by following the steps given below:
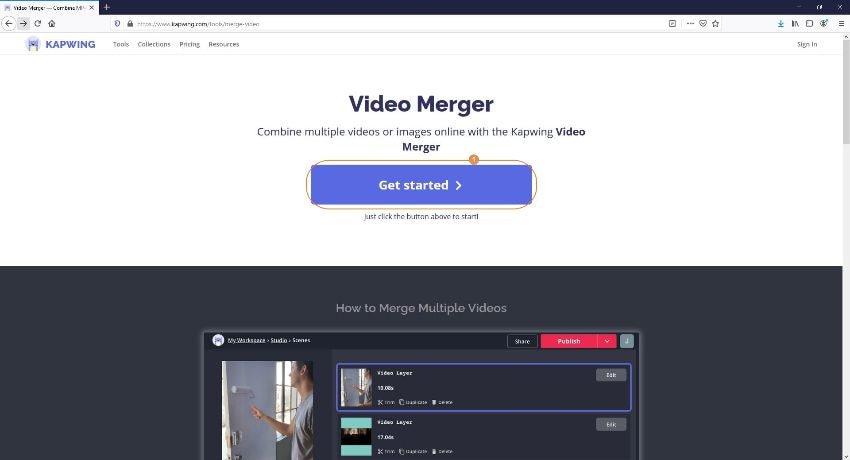
- Click Get started
- On the next page, click anywhere inside the Click to upload area
- Select and upload the videos you want to merge from your computer to the portal
- Click Export Video from the top-right corner of the page to combine videos
- Download the merged video when the process completes
Conclusion
It is pretty easy to learn how to combine videos regardless of the platform or device you are using. While the laptop-oriented approach gives you more freedom when it comes to using the features like drag-and-drop, mobile users can get the job done even while they are commuting, relaxing on a sofa, or even while lying on the bed. The online approach is slightly different from the above two. Even though it requires a desktop or laptop computer, the local hardware resources are the least used in the process.
Depending on your requirements and the level of precision you are expecting from the output after you combine videos, the most recommended method would be to use a laptop and an efficient PC program like Wondershare DemoCreator. On the other hand, if you are looking for a solution that you can use at your convenience even while you are on a move, a mobile app would be a good approach. Likewise, if you don’t want to install any app on your computer or smartphone, and don’t want to put any overhead on the hardware resources either, using an online solution would be your best bet.


