- 1. Record your computer screen and webcam simultaneously.
- 2. Allow you to customize screen capture and frame rate .
- 3. Powerful editing tools and effects to enrich your video clips.

How to Change Cursor Size for Tutorial Video Recording

Mouse cursors are one of the most underrated aspects of a computer screen. These small arrow-shaped icons help us navigate through the entire system and provide visual directions. Without them, it would not be possible to click and open an application. Even though a keyboard is equipped with some go-to shortcuts, it can never beat a cursor in terms of functionality.
This article will focus on why you need to enlarge a cursor and how you can do it in just a few simple steps with Wondershare DemoCreator. Read on to learn more about this amazing software.
Part1. The Need to Change Mouse Pointer Size for a Tutorial Video
The mouse cursor is a crucial component in recorded videos and tutorials. They are functionally the most important unit that has multiple roles to play. The cursors make an excellent presentation pointer that can be used to highlight or emphasis a particular point. Besides, their ever-changing movements and distinct click sound keep the audience engaged towards the tutorial. It grasps the viewer’s attention both ways- visually and auditory.
The mouse cursors are especially very important when demonstrating a multiple-step video. With each step, the cursors signify the order of the entire process.
For these very reasons, the mouse pointer must be considerably large and noticeable for the audience. It should be prominent so the audience can easily track it in a mixture of letters and pictures. An easily distinguishable mouse pointer would enable the viewers to follow it and understand each step thoroughly. They can easily keep a note of the pointer’s actions.
We have discussed why it is vital to have a noticeable mouse cursor, but is there a way to do this? Read on to learn two tricks of doing this- with Microsoft and Wondershare DemoCreator.
Microsoft Cursor Enlarger
Microsoft has in-built mouse cursor settings that allow users to customize the cursor size, color, speed, and much more. Follow the steps to enlarge your cursor with Microsoft-enabled settings.
- Type ‘Mouse Settings’ in the Windows search bar to open the general mouse settings.
- On the right side of the screen, two links will be present. Tap on Adjust mouse and cursor size.

(The first link: Adjust mouse & Cursor size deals with a brief cursor setting while the second deals with an in-depth cursor and pointer adjustments.)
- A new window will open. Move the cursor size slider to enlarge your mouse pointer. To further enhance the cursor prominence, you can also change the default cursor color.
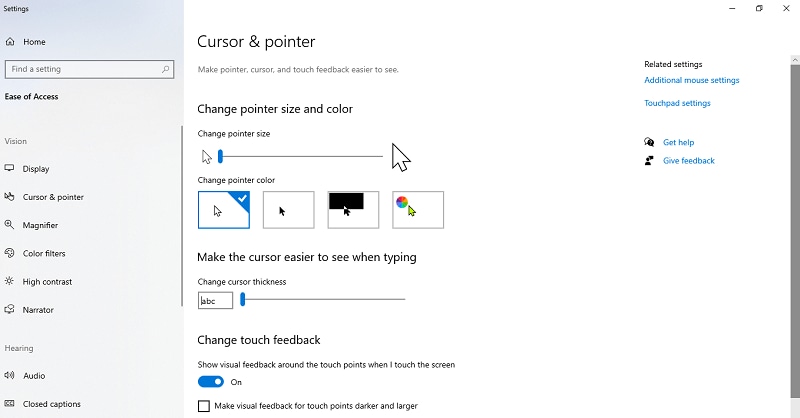
Once selected, the cursor will automatically change to your defined parameters. After you are done recording, open the settings and resize your cursor to default back again.
Even though Microsoft allows its users to enlarge their cursor, it has to be noted that the cursor becomes difficult to manoeuvre with an increase in size. A person who is used to working with the default-sized cursor will face trouble managing the larger cursor. With the cursor being potentially important, the entire tutorial can be ruined due to the discomfort met.
Wondershare DemoCreator
Wondershare is a fast and free video editing software that integrates tool functionality to bring out amazing results. This application is a professional solution to all your video editing problems and lets you remain one step ahead of other demonstrators. Whether you are a newbie or tech-savvy, the interface is super-easy to understand and work with.
DemoCreator has various tools and effects that can help the user in making the cursor more noticeable. Let us see how can we resize/enlarge our cursor with DemoCreator.
- Launch the Wondershare DemoCreator on your PC.
- Choose ‘New Recording’ to start recording the PowePoint Presentation or select ‘Video Editor’ and go to File, and import a video pre-recorded with DemoCreator and add the video to the timeline.

- Go to the Toolbar tab on the left and select the mouse pointer-shaped icon to open Cursor Effects.
- The Cursor effects will appear on the right of the toolbar tab. Select a Mouse Cursor effect and drag and drop it over your video in the timeline.

- The cursor settings will open in the property window on the right. Use this to define the parameters for highlight and cursor size.

From the cursor settings, move the scale slider to resize the mouse pointer. You can also change the opacity percentage to change the transparency or opaqueness of the cursor. From the highlight settings, move the sliders to change the highlight area size, opaqueness, and color.
If you only want to change the cursor size and not add a cursor highlight effect, slide the highlight opacity and area to zero.
 Secure DownloadSecure Download
Part2. Mouse Cursor Effects
Wondershare offers a wide range of tools, and among them are the mouse cursor effects. Let us see some cursor highlighting effects that we can use along with changing the cursor size.
1. Mouse Cursor Highlight
This is the primary cursor effect that works to highlight the mouse pointer. The effect adds a coloured, semi-transparent circle around the mouse cursor that makes it more noticeable in the herd of words and images. The highlighter turns the mouse into a pointer that can be used while demonstrating or teaching a presentation.

Mouse Cursor highlight is an excellent way of keeping the audience engaged and captivated towards the video. The default color for the highlight is yellow; however, the user can customize it according to preference by using the cursor settings in the Property window.
2. Mouse Cursor Spotlight
The cursor spotlight effect works similar to the highlight effect; however, the words are highlighted instead of the mouse pointer. It dims the entire screen and adds a spotlight on the area around the cursor. The spotlight follows the cursor’s location hence can be used as a pointer to focus on an area of interest.
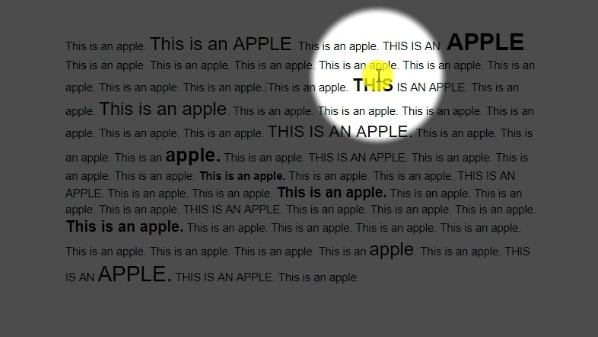
The spotlight area can be adjusted by changing the area size from the highlight settings. You can also alter the background and ring color.
3. Mouse Cursor Magnify
The mouse cursor magnifier acts as a magnifying glass and enlarges the text in its range. The effect dims the entire screen, and a magnifier appears in the area around the mouse pointer. As the pointer is moved across the text, the words, shapes and images in its range enlarge to produce a magnified image.
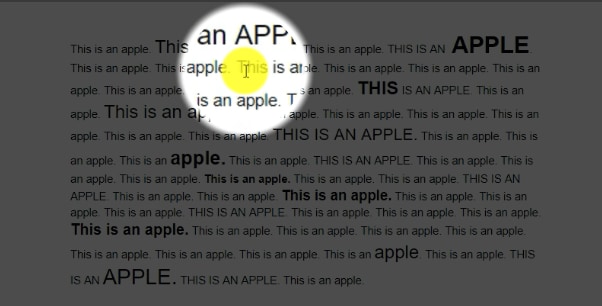
The mouse cursor magnifiers keep the audience interest piqued and provides a more detailed view of the text. Magnifiers are indeed a great way of going into small details. By calibrating the cursor settings from the property pane, you can change the magnifying area, zoom-in percentage and background color.
4. Mouse Click Rings
The click ring effect is a way of imitating the mouse clicks on the screen. When the mouse button is clicked, a series of concentric circles originate from that position, indicating the click. The mouse click rings attract the user’s attention and aid in locating the position of the click.

Mouse Click Rings can be paired with the mouse click sound and cursor highlighter effect to further enhance the visibility of the mouse pointer. You can adjust the settings in the property pane and choose a click ring color.
5. Mouse Click Sound
This is a simple effect that imitates the mouse cursor click sound. Whenever the mouse is clicked, a click sound can also be heard in the video too. The effect adds a realistic effect to the tutorial and also keeps the audience engaged. Mouse Click Sounds are especially very useful when recording a tech-related tutorial. It allows users to track the mouse cursor action and stay engaged in the video.
6. Adjusting the Parameters
Cursor settings open in the property window by default whenever an effect is added to the video in the timeline. The settings menu is divided into different portions, each dealing with a different aspect of the effect.
The cursor settings allow you to increase the cursor size and cursor color. By moving the opacity slider, you can also choose to change the transparency or opaqueness of the cursor.
The highlight menu deals with the cursor highlight settings. By default, the highlight color is yellow; however, you can change it from here. The highlight radius and opacity can also be increased or decreased.
The click ring and click sound settings are only available with the click effects. The settings allow you to change the ring color and audio level of the click sound.
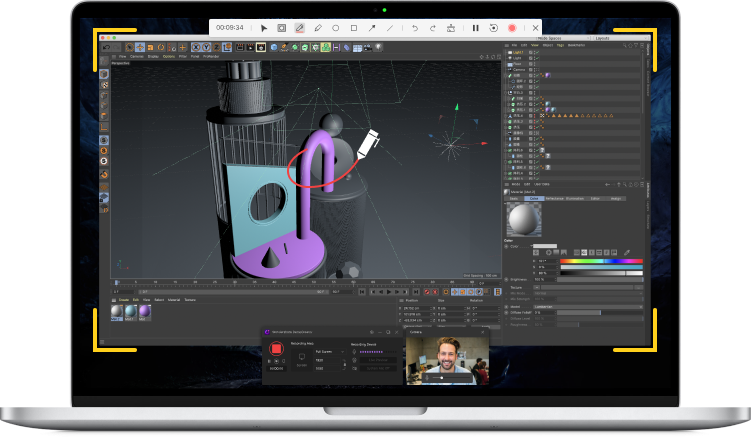
The All-in-One Screen Recorder & Video Editor
- Record desktop screen,audio and webcam simultaneously
- Edit videos quickly with a wide range of professional tools
- Built-in plentiful video effects
- Export to MP4, MOV, MKV, GIF and multiple formats
Bottom Line
Wondershare DemoCreator is indeed a professional fix to all your video needs. It offers a user-friendly interface paired with a variety of unique effects and tools. The software has five impressive cursor highlighting options that can make the cursor stand out among the text and diagrams. With a cursor resizing option, you can further enhance the prominence of the cursor and make the tutorial more understandable for the audience. Since the cursor can be resized after recording the tutorial, you would not have to face any discomfort while handling an oversized mouse pointer. Download DemoCreator today and try it for free!


Other Popular Articles From Wondershare


