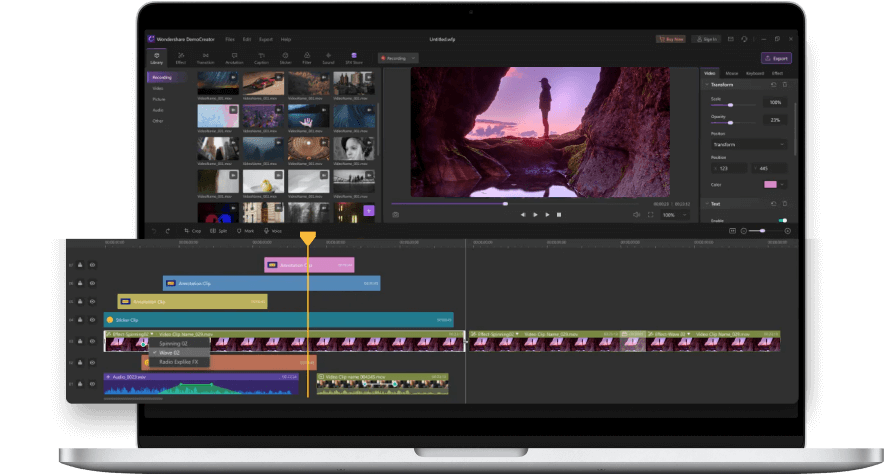
Wondershare
DemoCreator
- 1. Record your computer screen and webcam simultaneously.
- 2. Allow you to customize screen capture and frame rate.
- 3. Powerful editing tools and effects to enrich your video clips.


How to Add a Highlighter to Your Mouse Pointer in Windows 10

Mouse Highlighters are of great convenience, especially in these times of online working. With a distance of hundred kilometers and the connection depending entirely on a mere internet, it is difficult to convey the point clearly.
This is why people tend to record videos so the receiver can thoroughly understand the point. However, with everything limited to a screen, it is not so easy to explain each step. A common problem that demonstrators face is cursor visibility or lack of a proper pointer for presentations.
Don’t worry! We have found the ultimate solution to your problem- A Mouse Pointer Highlighter. A mouse highlighter will not only help you make the cursor more noticeable but acts as an excellent pointer for PowerPoint presentations.
The visible halo around the cursor will make it distinguishable in the dump of words and pictures so the audience can easily track it.
A proper pointer aids in improving the quality of the demonstration and will also help keep the audience engaged and attracted. You can quickly get the information across and make them understand each part stepwise.
Part1. Getting A Mouse Highlighter in Windows 10
The question is where to get a mouse pointer in Windows 10, and does Windows have an in-built mouse highlighter? Microsoft has officially abandoned the introduction of any new cursor effects to the settings and has left the responsibility to third-party applications. There are as such no highlighters but a feature hidden deep into the Control Panel- the mouse indicator. This is a simple effect that pulses to show the cursor’s location when the ctrl key is pressed.
Besides this, you can also use the third party created applications to add the mouse cursor effects. Depending on the developing party, the application can be a simple add-on or a complex one with advanced mouse cursor replacement options.
Here, let us see the two ways of adding a cursor highlight with Microsoft.
In-built Pointer Locator
Typing ‘Mouse Settings’ or ‘Mouse Properties’ in the Windows search box will not take us where we need to go and only opens the general settings. This feature is hidden deep into the Control Panel, so follow the steps to open the correct settings.
- Type ‘Mouse Settings’ in the search bar to open the general mouse settings.
- Scroll down, and you’ll be presented with two links. The first link takes you to the page where you can alter the cursor size, color. Click the second link-Additional Mouse Options- to open the Control Panel for mouse pointer settings.

- From the upper tabs, click the Pointers Options tab to open the pointer settings. At the bottom of the screen, a check box labeled Show Location of Pointer When I Press the CTRL key will be present. Check the box and click OK.

After the meeting is over, open the settings again, uncheck the box and click OK.
Microsoft Mouse Cursor Highlight
This is another way of highlighting the cursor using third-party applications from the Microsoft store. The application we will use is Mouse Pointer Highlight, a fast and free application available at the Microsoft store. Read on to learn how to add the cursor effects with it.
- Install the Mouse Pointer Highlight from the Microsoft store. The application will be added to the Start Menu.
- Double-tap on the app to launch, and a window will open.

Define the parameters for your highlighter. You can change the highlighter radius, color and also decide a display time for the ‘click’ highlight. The user can also choose to enable/disable the click highlight.
- Once done, tap on Apply Settings. Now the cursor will have a highlight according to the specified parameters.
- Until the program runs, the cursor remains highlighted. After the meeting is over, close the application, and the cursor will return to its default shape.
These are the two ways of adding a cursor highlighter in Microsoft. However, both have their limitations and must be constantly kept running to keep the cursor highlighter activated or press the CTRL key to locate the cursor.
Therefore, for a care-free video recording and hassle-free cursor highlighting, a good video editor like Wondershare Democreator can be the fix.
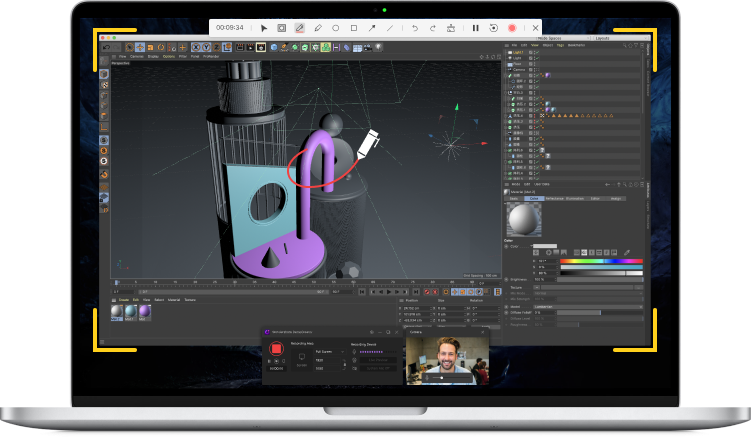
Adding Cursor Effects with Wondershare DemoCreator
Wondershare DemoCreator is an easy solution to all the cursor highlighting problems when giving a presentation or recording a demonstration. DemoCreator offers a variety of mouse cursor effects along with other editing tools that can make your video a hit. So without further ado, let’s learn how to add effects with DemoCreator.
- Launch the Democreator application on your PC.
- Choose ‘New Recording’ to start recording the Powerpoint Presentation
Select ‘Video Editor’ and go to File, and import a video pre-recorded with DemoCreator. Add the video to the timeline.

- Go to the Toolbar tab on the left and select the mouse pointer-shaped icon to open Cursor Effects.
- The effects will appear on the right of the toolbar tab. Select an effect and drop it onto the video.

- After adding the effect, the cursor settings will open the Property Window on the right.

Use this menu to specify the parameters for your chosen effect. By default, the highlighter is paired up with all the effects. You can drag the highlight scroll to zero to remove it while another effect is in working.
From the menu, you can also increase the cursor size and its opacity. Besides, change the highlighter and ring color for different effects.
 Secure DownloadSecure Download
Part2. Mouse Cursor Effects
Wondershare has five amazing cursor effects that allow you to enhance the cursor’s shape and make it more prominent for the audience. Here is a brief introduction to all of them and how they can help you improve your video.
1. Mouse Highlight Effect
Mouse Highlight Effect is the most basic effect available that adds a colorful halo around the mouse cursor. The default color is yellow however can be customized from the property pane on the right. Besides this, the area of highlight and transparency of the halo can also be adjusted.
The mouse highlight effect is a simple way of making the cursor distinguishable among all the words and diagrams. It keeps the viewers engaged and enables the viewers to track the pathway of the cursor actions easily. It acts as a presentation pointer and helps the tutor focus on a particular area of interest.

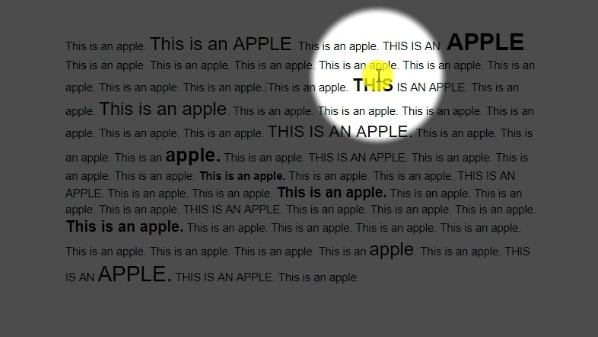
2. Mouse Cursor Spotlight Effect
This is another effect that adds a spotlight on the text rather than on the cursor. It dims the entire screen and adds a spotlight on the area around the cursor. The effect works just like the spotlight in concerts, emphasizing a particular point of focus. The spotlight area can be increased or decreased using the cursor settings, and the background color can also be changed.
The spotlight cursor acts as a fantastic pointer allowing the tutor to focus on only the important things. By keeping a certain screen area lightened, the audience stays engaged and thoroughly focuses on the screen.
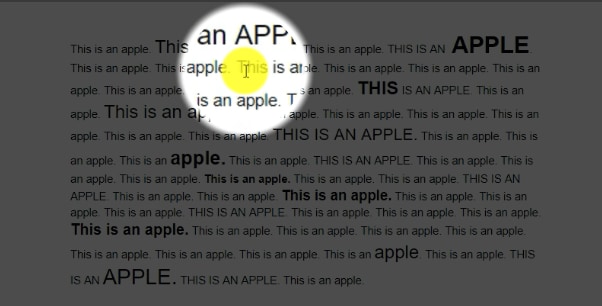
3. Mouse Cursor Magnifier
The mouse cursor magnifier is a simple yet very effective tool to explain a point/diagram in detail. The magnifier acts like a magnifying glass enlarging all the text and images in its range. The tool can help you zoom in to tiny details of a diagram and explain it well to your audience.
The user can increase or decrease the zoom-in area from the settings menu and change the magnification percentage. A higher percentage means a bigger and in-depth look.
4. Click Sound Effect
For a realistic tutorial, click sound effects are a great add-on to your video. The effect adds a click sound every time the cursor is clicked. This feature is especially useful when dealing with a multiple-step tutorial as it aids in defining the cursor actions and allows users to keep track of all the steps. Besides, the audio keeps users engaged in the video.
5. Click Ring Effect
Like the click sound effect, the cursor Click ring effect can be added to animate the cursor clicks. Whenever the mouse is clicked, a series of concentric circles appear from that position indicating the click. Besides attracting the user’s attention, it helps in defining the click location.
This feature can be used standalone or paired up with a highlighter and click sound to further make the mouse pointer more distinguishable and easy to track.

The All-in-One Screen Recorder & Video Editor
- Record desktop screen,audio and webcam simultaneously
- Edit videos quickly with a wide range of professional tools
- Built-in plentiful video effects
- Export to MP4, MOV, MKV, GIF and multiple formats
The End
Wondershare DemoCreator is a fantastic way of adding mouse cursor highlight to your presentations. The software is fast and free and equipped with five amazing cursor effects to choose from. Unlike the Microsoft cursor highlighter, democreator is hassle-free and a quick solution to all the cursor highlighting problems. The effects help in highlighting the cursor and making it more trackable for the audience. Besides, they help you add real-time effects like the cursor click sound to make the demonstration more realistic. Try it now!


Other Popular Articles From Wondershare


