How to convert ppt to video(Easy Guide )
Are you wondering whether it's worth converting your PowerPoint presentations into video slides? The answer is a resounding "Yes"—and sometimes "No," depending on your needs. Microsoft PowerPoint is a powerful tool for creating presentations on various topics, from school projects to product launches.
While presenting live with a projector can be effective, sharing your PowerPoint file via email or messaging apps poses challenges. Many recipients may not have PowerPoint installed, leading to accessibility issues. Even if they do, mobile versions can cause formatting problems and slow loading times.
This is where converting your presentation into a video becomes invaluable. Videos ensure that your audience can easily view your content without technical barriers, allowing for seamless sharing and feedback. Plus, all your carefully crafted effects, sounds, and animations remain intact.
In this article, we'll guide you through each step of transforming your PowerPoint presentation into a captivating video.
How to Make a Video Presentation with DemoCreator?
As we have discussed before, PowerPoint presentations can be turned into video presentations or video slides with the need for robust video editing and recording software like the Wondershare DemoCreator.Take your video presentations to the next level with the powerful new features in DemoCreator! We've added innovative tools to streamline your workflow and make creating engaging, professional-looking videos easier than ever.
 Secure Download
 Secure Download
Wondershare DemoCreator is a one-stop shop for all video requirements. It has a screen recorder, webcam recorder, voice recorder, game recorder, video editor, and video effect library built-in. This screen recording software assists students, instructors, freelancers, and gamers take their idea-sharing to the next level.
The intuitive features of DemoCreator enable it to meet the needs of teachers, vloggers, and inexperienced gamers who want to create presentations, lessons, games, and much more. The easy and intuitive interface lets you configure the resolution, frame size, and frame rate, after which you can apply the final touches using the inbuilt video editor.
Let's explore how to make a video presentation from a PowerPoint presentation;
Get ready for Your PowerPoint Presentation
The First step includes creating a compelling, knowledgeable/interesting, and eye-catching PowerPoint presentation.
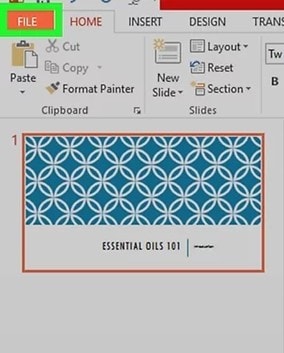
Once you are done creating the PowerPoint slides, click on “File”, available on the top left of the ribbon, to save your PowerPoint presentation.
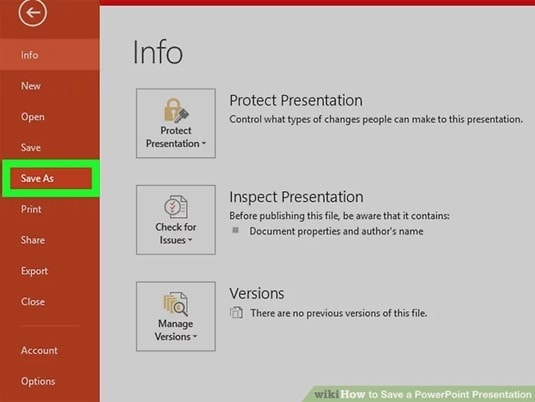
A menu will expand; click on the “Save as” button.
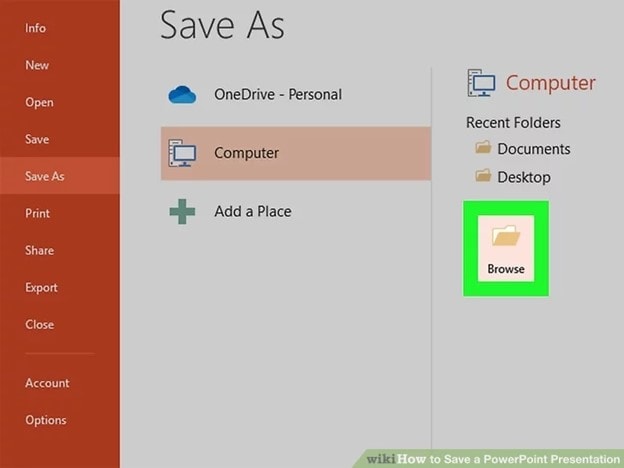
Now, click on “Computer” and then click on “Browse” to save the PowerPoint presentation to the desired folder.
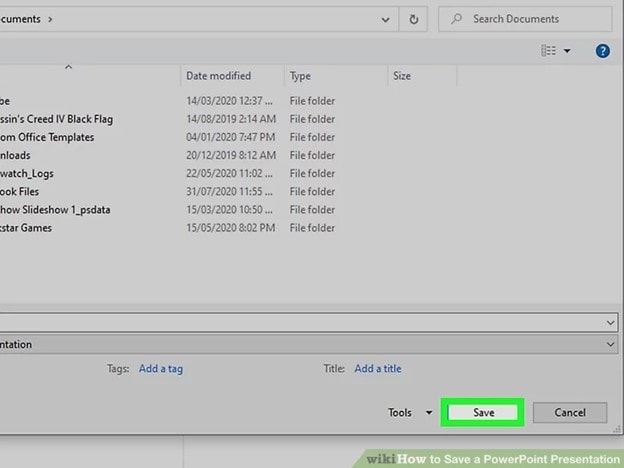
Type a name for your PowerPoint Presentation and click on the "Save button."
Open DemoCreator and Import Your PowerPoint to DemoCreator
Now Microsoft PowerPoint tasks are accomplished, it's time to move forward toward Wondershare DemoCreator. Download DemoCreator and launch it on your PCs; on the interface, you will find different options; click on "Video Recorder".and choose Video Presentation.
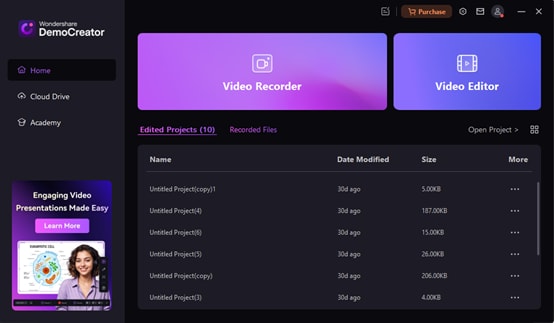


Then you can create a new project or import your PowerPoint presentation. We also have a rich variety of templates. Explore DemoCreator's library of professionally designed templates tailored to various presentation styles, including product introductions, educational content, corporate training, and more. Choose a template, customize the content, and bring your ideas to life quickly and easily.

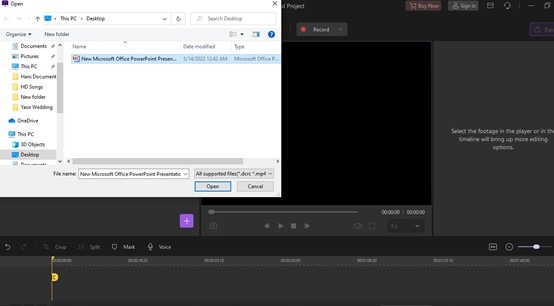
Now choose the PowerPoint presentation file located in your folder, select it and click on “Open.”
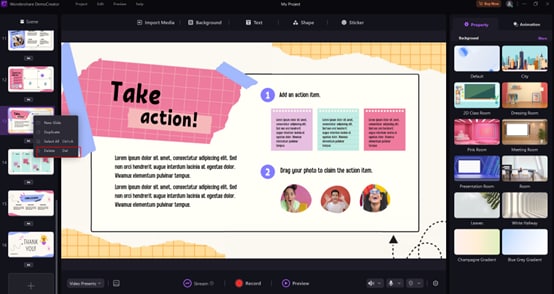
If you want to delete some pages, select it and right-click to choose delete.
At this point, you can drag and drop your files onto the timeline, and then you can start your video.
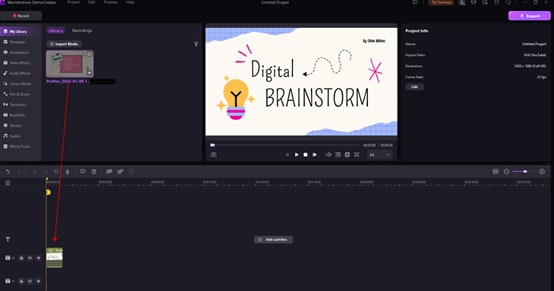
Now finally, you can start editing your presentation video.
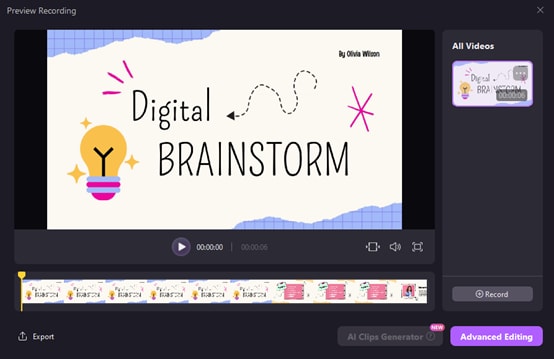
Edit your Video Presentation
The Wondershare DemoCreator empowers you to crop the video, modify the playback speed, and add comments, symbols, and effects to make the content you're sharing online more entertaining and understandable.
In addition to your voice, which allows you to communicate more simply, you may utilize various annotation tools, such as captions, speech bubbles, overlays, arrows, and other colorful elements, to help you transmit the messages most essential to you.
At the end of the process, you may export the recorded movie in several formats such as MP4, MOV, and GIF and utilize the program to share it on your favorite social media quickly; you can even export it directly to Youtube.
Let's discuss all these features and editing procedures in detail;
Crop Video
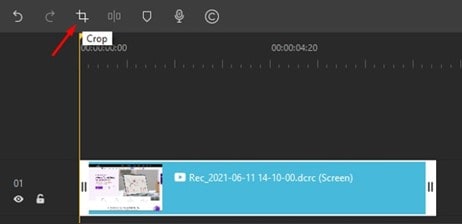
First, select your clip and then click the Crop option to crop a video. Then enlarging the visible area would be advantageous. Click and drag the resize handles to do so. Then click OK to crop your video clip.
Adjust video speed
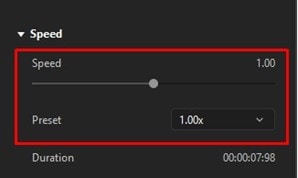
To speed up or slow down the video, select it in the timeline and adjust the speed in the properties area to achieve the desired effect.
Trim Video Clip
Trimming allows us to cut out the sections of the video that aren't necessary, mainly if the video is composed of many clips. To trim a specific clip, click on it, move the mouse to the clip's edges, and then drag the cursor forward or backward to eliminate the unwanted part.

Add Stickers
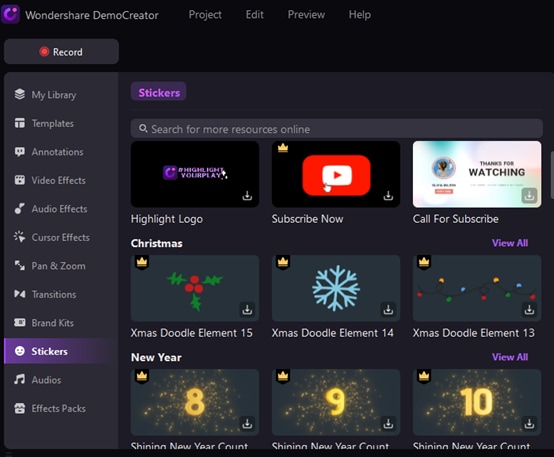
DemoCreator gives you the ability to add vibrant stickers to your video. You must go to your window screens and click the "Stickers" option at the top of the screen, where you will find a variety of exciting stickers.
Education, games, GIFs, and emoji are among the sticker categories. You can use stickers of “like, subscribe, and share” as a call to action.
Add Annotations
Annotations are essential when preparing a lecture or demonstration video. DemoCreator includes an annotation feature that allows you to add a chat box, speech bubbles, or text to any point in your video's timeline.
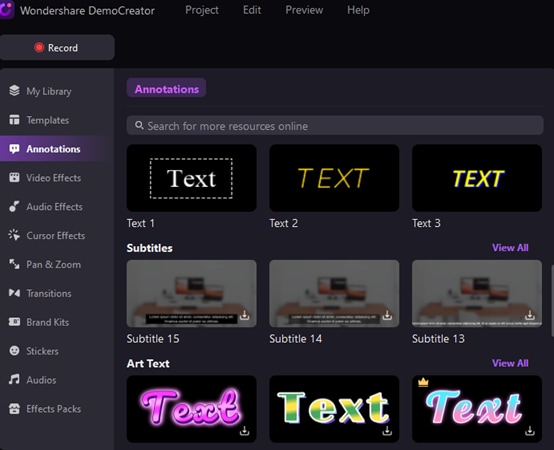
The categories here are Line&Arrow and shapes. Choose your favorite Annotation effect and drag it to the timeline where you want it to appear.
Add Transitions
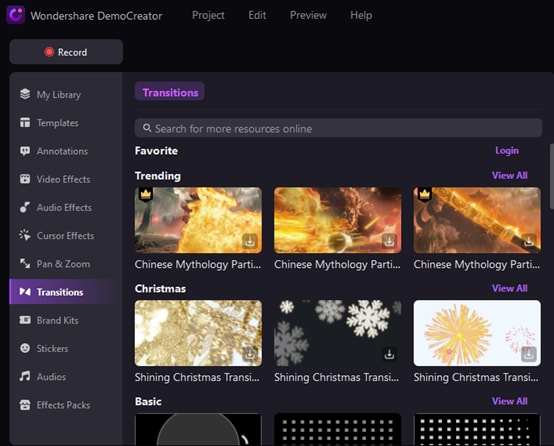
Transitions are an excellent method to give a video an amazing feel and to please the client, mainly if it comprises several clips. You can also add transitions between the clips and events at the beginning and end of the video.
Color, 3D, Wrap, Slideshow, Speed Blur, and Ripple & Ripple&Dissolve are just a few transition effects available in Wondershare DemoCreator. Choose the most appropriate transition effect from the categories and place it between the clips and at the beginning and conclusion of the video.
Add Voiceover
You can add Voiceover to your video to give some additional information; click on the Voice Over icon available in the toolbar, record your voice, and add it where you need it.

Add Cursor effects
In the upper corner of the toolbar, select the cursor effect. Cursor Highlight, Left Click Rings, and Left Click Sound are the three effects available. Drag the cursor effect to the timeline you wish to use in the presentation video.
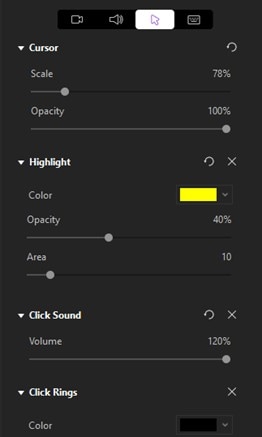
Adjust the cursor settings on the Cursor tab of the Properties Window. This tab's scale slider allows you to change the size of your cursor. You can also change the highlight color to suit your needs.
Export to the desired Format
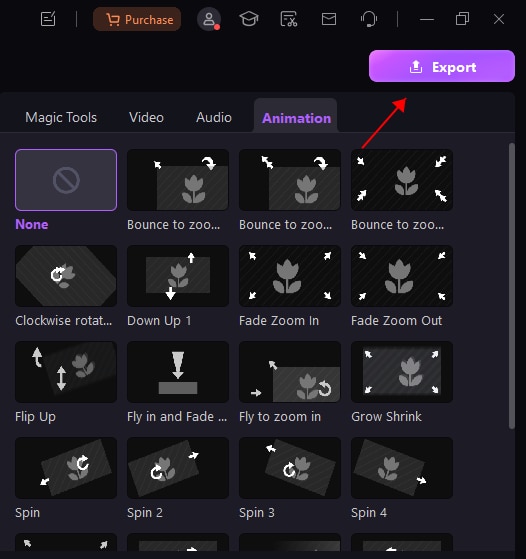
Now it's time to export your Presentation video to the desired format on your computer, or you can also export the presentation video to YouTube once you've finished editing it. Follow the customizing steps after clicking the Export icon in the top right corner of your screen.
DemoCreator now supports WMV, MP4, MOV, AVI, GIF, and MP3 as output formats. You can also modify the encoder, resolution, framerate, and bitrate, among other settings.
Export Video to YouTube
DemoCreator allows you to upload your videos directly to your YouTube channel. Click the YouTube navigation bar in the Export box. Sign in to your YouTube account and share your videos with only one click. Fill in the title, description, and tags for the video. After that, press the upload button.
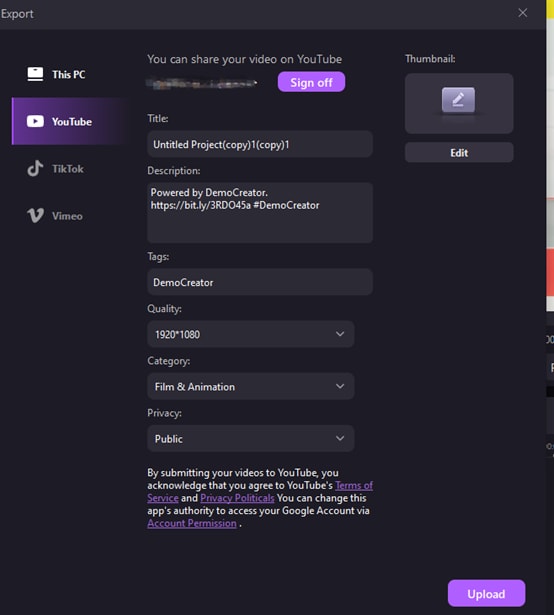
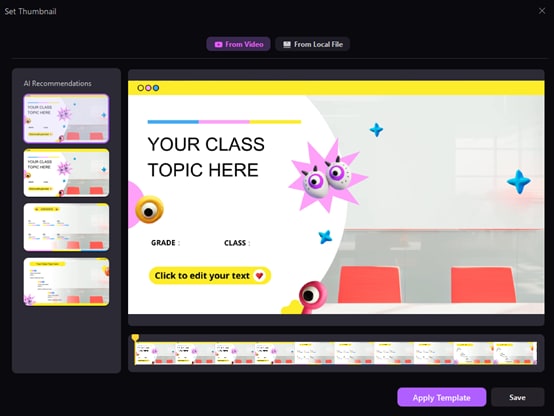
It is worth mentioning that you can also use it to automatically generate attractive YouTube video thumbnails. The AI intelligently recommends frames as video covers, which you can freely edit or use our cover templates. It's very convenient and quick; you don't need to switch programs and spend more time creating thumbnails. Download and use it immediately! Perhaps you want to know how to create high-click thumbnails.
 Secure Download
 Secure Download
Conclusion
A video presentation is when you make a presentation in a video and use it to share a concept readily. The video presentation is a technique to draw students', managers', business clients/partners', and colleagues' attention, answer their questions in an engaging and accessible manner, and create a stimulating environment.
The video presentation is simple to access, understand, and remember. Once you've turned your PowerPoint presentation into a video presentation, you may rest assured that your work will always be safe and accessible.
Time and money are saved by using video presentations. Creating video presentations is a smart move in which clients/customers are given too much information in a few slides. And you may quickly get the stuff that is described in the slides.
We have explored every step employing which you can turn your PowerPoint slides into a smooth and high-quality video. The steps are easy, and with DemoCreator's user-friendly interface, anyone without any prior experience in video editing can turn slides into compelling videos.


