
PowerPoint Presentation for Demo Teaching

Since screen recording captures our visual and auditory senses to grasp viewers' attention, it must be high quality.
It could be a challenging task for you, but the latest technology has provided software that can help you to create high-quality videos quickly.
Through this article, you will get to know all the answers to your questions related to demo teaching.
Why will you need a PowerPoint presentation video?
Demo teaching is used to give demonstrations of different teaching strategies. A demo teaching is an imitation lesson that you teach to another teacher's class or a group of superintendents. A demo lesson resolves to show how well ready you are to teach a lesson, how you extant yourself, and how you engross pupils.
It's no covert that videos are an appreciated way of collaborating data. A well-placed content can take your presentation to the next level. While many presentation software programs may not sustain unified video addition, you really can't have enough money not to make this a significant deliberation when creating your buying choices.
According to E-marketers, YouTube will transport $1.13 billion in video ad income this year, or 19% of the US digital advertising commercial market. Any CMO would approve that video is the most influential digital marketing tool accessible. Along with this, astonishingly, most businesses don't use video in their presentation.
PowerPoint makes this stimulating, and sending great accessories with entrenched video records can also be a pain. No auctions and deals policymaking ever want to be in terrain and circumnavigate to a slide with a big red X on it.
A new infographic from Wyzowl displays that only 10% of individuals recall what they hear. Reading doesn't assist much also since only about 20% of people memorize what they read. But equally, 80% of people recollect what they see and do. And it's more than just that. They also learned that visuals are treated 60,000x faster than text, and 93% of communication is nonverbal.
Objectives:
What are our objectives? How does your class attitude with admiration to these objects? It is to control the record information and services of your students.
Is there a healthier way to attain your trimmings? If there is a more realistic way to reach your resolution, swap the demonstration method with the more actual one.
Do you have admission to all the essential supplies and paraphernalia to make the demonstration? Have a checklist of necessary equipment and material. It may include written materials.
Are you conversant with the arrangement and gratified by the projected demonstration? Outline the steps and prepare your demonstration.
How to make a presentation demo video with DemoCreator
There are many recording software out there for windows pc, but DemoCreator is the best of them. Its reliable and free software provides multiple features.
Before we discuss the detailed features of DemoCreator, know that it's accessible to video recording software and serves as a vital tool for professional visual content creators.
It's an all-in-one software that makes it an ideal option for Windows users. Wondershare DemoCreator lets you capture live visual content and an already recorded visual clip.
Also, the software comes with eye-catching recording features with audio editing options, such as audio fade in and fade out, audio denoise, and more.
DemoCreator:
 Secure DownloadSecure Download
It is a screen capture tool that allows you to record with a webcam and edit and export it in any format that suits your device. It is web-based software and provides free updates.
Features of DemoCreator webcam recorder:
- Record with microphone:
It lets you record your video with audio by using the microphone.
- Record with virtual webcam:
You can present virtually by using this software.
- Record with the camera:
It allows you to record video with a webcam.
- High-Quality Videos
It provides you with high-quality videos to engage and attract the audience.
- Voice changer
It allows you to sound like someone else by changing your voice
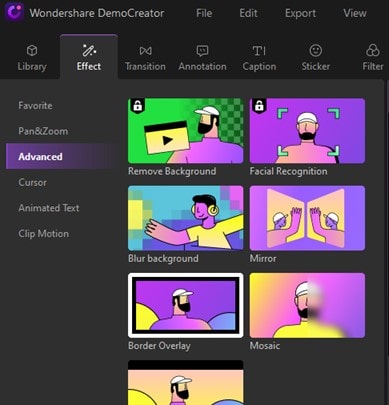
- Change Background
It lets you change your background using green screen technology, as it’s required to produce a good quality video.
- Remove noise
You can also remove noise from the videos; irrelevant sound because it can make content worse. It's better to remove the unwanted sound.
- Cut/trim
It allows you to split, cut, crop, and trim the video and keep the desired video clip.
- Voiceover
You can also voiceover your videos to add instructions according to the content so that your audience can understand what you’re up to.
- Add Closed Captions
You can add closed captions for a better understanding of the audience. Adding captions is an effective way to convey a message to the viewers.
- Add Annotation
It enables you to add annotations such as dialogue boxes, arrows, sketch animation, and shapes to your captured video.
- Add Stickers
DemoCreator also prepared a variety of stickers for you, such as animation effects, gestures, background, social media, etc.
- Add transitions
It lets you add transitions such as erase, evaporating, fading, etc., to attract the audience and add a natural effect to the video.
- Control speed
It lets you control the video's speed and increase or decrease it.
- Multiple formats
It enables you to export your created content in many formats that suit your device, such as MP4, WEBM, AVI, etc.
- Record multiple screens simultaneously.
It enables you to capture multiple screens simultaneously.
- Draw on screen
DemoCreator allows you to draw on the screen to make your viewers understand specific points.
- Zoom and pan
You can use zoom and pan effects in this
- recording tool.
- Templates
You can use a variety of animation templates to make your videos interactive.
- Add PowerPoint file
By using an advanced feature of DemoCreator, you can also add your PowerPoint file and record a demo.
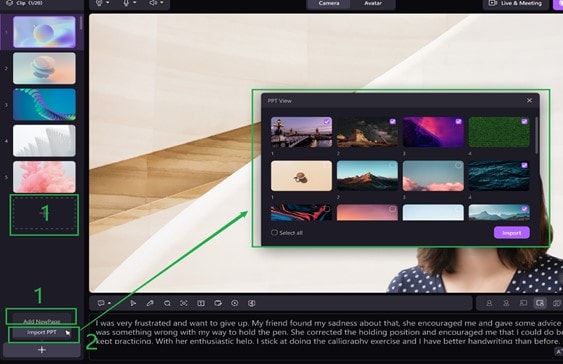
Add PowerPoint presentation for Demo Teaching:
DemoCreator is soon going to introduce its new feature through which you can record Demo projects as well. Explaining PowerPoint presentations during Demo has also been made accessible by this software.
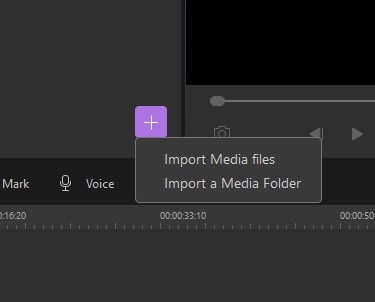
- You'll have to open DemoCreator and click on “Demo Project.”
- Click on the + icon to import the PowerPoint presentation from Pc.
- After adding a file, record your demo video.
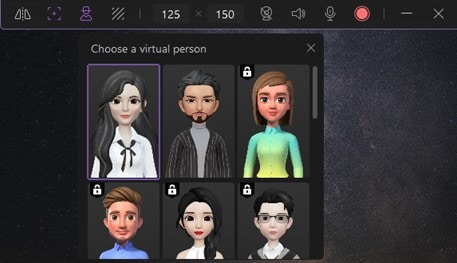
- If you don't want to appear in your demo video, you can also add an avatar.
- If you don't want to show your background to the audience, it allows you to change it.
Demonstration of teaching on a teaching strategy
The demonstration is a teaching technique used to communicate an impression with the help of graphics and illustrations such as flip charts, posters, PowerPoint, etc. A demonstration is a procedure of teaching somebody how to make or do something step-by-step.
The principles that should be observed while using demonstration as a teaching-learning experience.
- Create understanding.
- Welcome your viewers.
- Make them feel at ease with your friendliness and genuineness.
- Encourage their attention by creating your demonstration and yourself stimulating.
- Withstand their thoughtfulness.
- Avoid the COIK misconception (Clear Only If Known).
- Watch for critical points.
How to make a presentation demo video with DemoCreator
To make a presentation demo video, follow the guides step-by-step
- First of all, visit the DemoCreator website.
- Download DemoCreator.
- After downloading, install it.
Record screen:
Open DemoCreator. Click on "Start a new project."
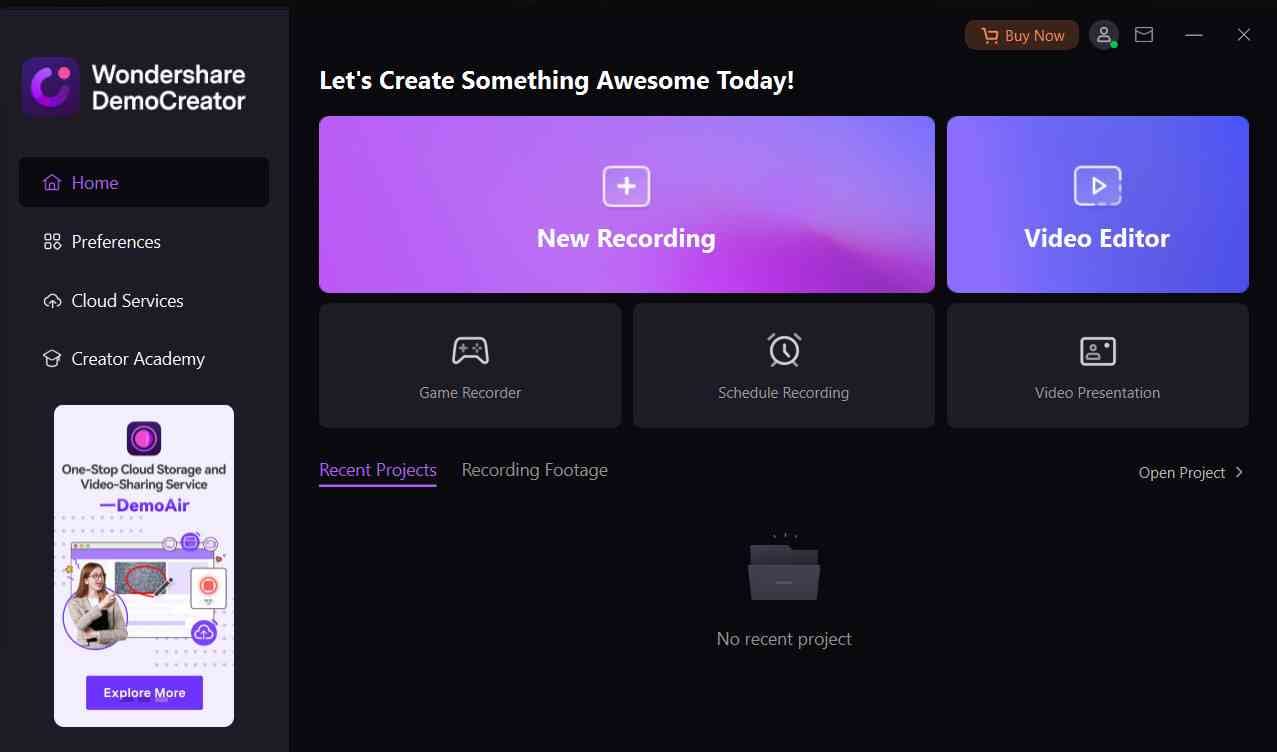
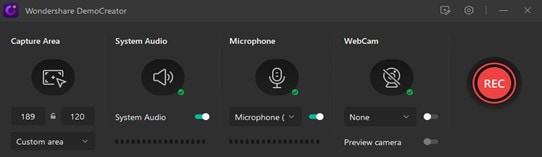
You’ll see a pop-up window. Adjust the capture area by clicking. You can also adjust the area by dragging the big plus sign. Click on the big red icon to start recording.
Add webcam
For this, Enable Webcam. Make sure that it’s well connected to the computer. Click on “Character” Choose the avatar you want to add to your recording.
Frame Rate and Resolution:
To set the Frame Rate and resolution of recording,
- Click on "Settings."
- Select Camera.
- Adjust the frame rate and resolution the way you want.
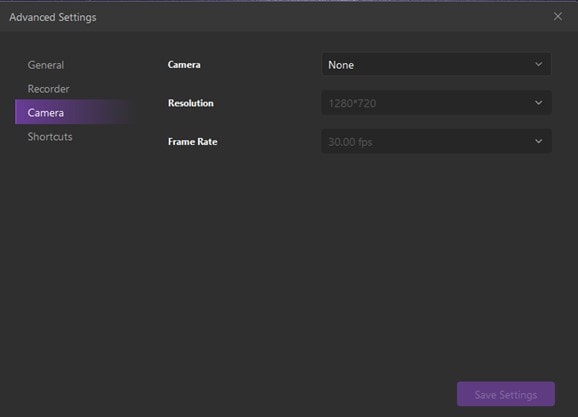
Through DemoCreator, you can adjust the Frame Rate and Resolution of the captured content.
How to edit a video?
Once the recording is over, it will be uploaded to the editor interface.
It has four functional areas.
- Media library
You can import files (images/videos) from your computer.
- Timeline
you can drag files to the Timeline from the media library, where you can cut/split/trim and crop them.
- Preview window
In addition to forward-backward, Play, and Pause buttons, you can also take snapshots from the video. It lets you see the changes that you're making in your content.
- Properties window
From the properties window, you can adjust the following settings,
- Speed
- Denoise
- Compositing
To edit the video,
- Open DemoCreator.
- Click on "Edit video."
- Import files into the media library.
1. Drag the video and drop it to the Timeline.
2. After viewing the video in the preview window, click on “File” above the media library.
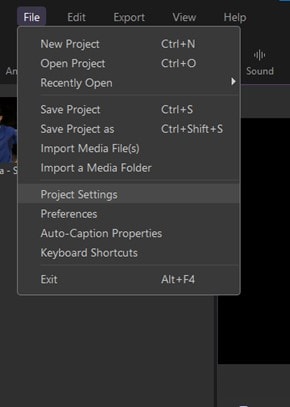
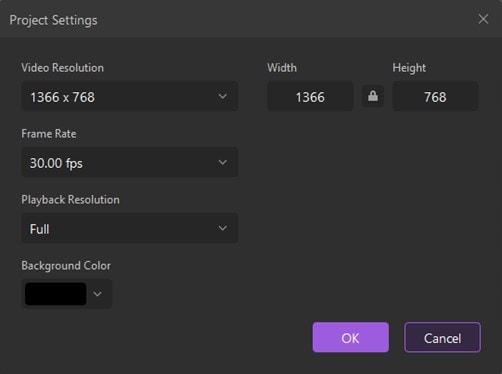
3. Click on "Project settings."
4. A pop-up window will appear where you can adjust settings.
Trim your video
- First of all, right-click the video frame and select Trim.
- Select Play in the Trim Video box to conclude where you want to trim your videotape.
- When you reach the specific point where you want to want to cut, select, Pause, and use the Next Frame and Previous Frame switches to stipulate exact timing, Do one or more of the following:
- To trim the start of the slide, select the start point (shown in the image below as a green marker). When you see the two-headed arrow, drag the arrow to the wanted starting position for the video.
- To trim the end of the clip, click the endpoint (shown in the image above as a red marker). When you see the two-headed arrow, drag the arrow to the anticipated ending location for the video.
How to combine:
You can combine multiple clips in one video through DemoCreator.
- Drag the first clip to the Timeline
- Then, drag the second clip and place it above the first track.
- Repeat this process, and place all the files you want to combine accordingly.
- Place the videos on the top of the previous clip.
- Use the scaling handles to resize the video clips.
- Then position the video at your preferred location on the screen to adjust.
- Repeat this process.
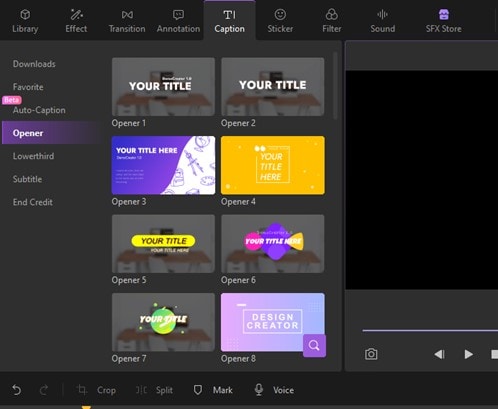
Add captions
You can add captions to the video to better understand the audience. For this, Select "Captions" there. You'll see many options such as subtitles, captions, lower-third, and End credit.
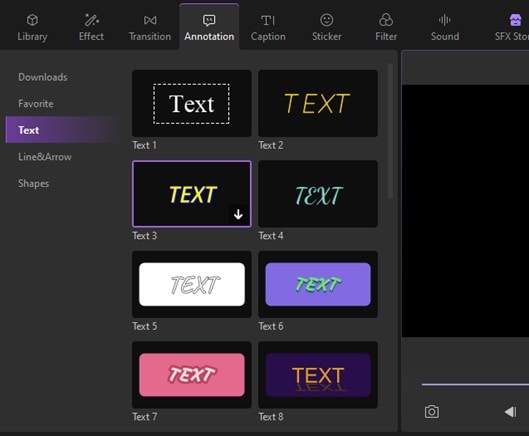
Add annotation
Click on the “Annotation” from the above toolbar. Then add Text, Line&arrow, and shapes.
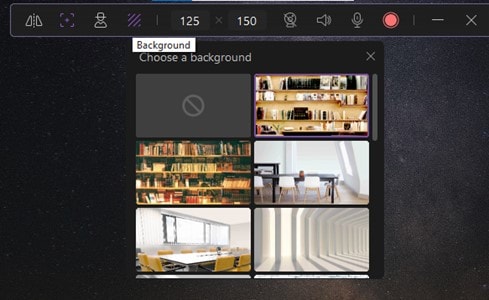
Change virtual background
DemoCreator allows you to change the background. For this, click on the “Background” next to the avatar. Choose the background of your choice relevant to your content.
Add background
In the media library, import the green screen files. Once the files are uploaded, they will appear in the folder on the left side. Drag the Green screen files to the Timeline. Then open the Effects tab and enable the green screen by dragging it to the Timeline.
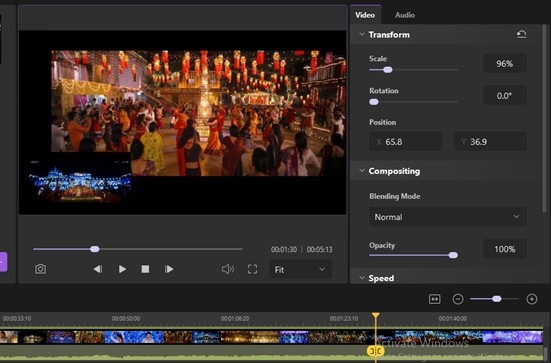
Add a PIP effect
You can find the webcam recording and screen recording are in different tracks. Drag the webcam recording into the different positions as a PIP (Picture-in-picture) effect.
This function is widely used in in-game videos and tutorial videos to make it vivid.
After finishing the screen recording, the file will be automatically open in the editor interface. Drag the video to the Timeline. Resize the webcam recorded video by dragging it. You can also adjust it from the properties window.

Apply zoom and Pan effect
Zoom and Pan Effect are widely used in PIP videos. After adding the video to the Timeline, click on "Effects."
Then select Zoom and Pan effect. You'll see many options, such as
- Zoom to the bottom right
- Zoom in
- Zoom out
- Pan right
- Pan left
- Original zoom
After that, Drag and drop it to the Timeline.

Audio effect:
Click on "Sound" from the top bar to add audio effects. You’ll see many audio effects such as
- Recommended
- Music
- Nature
- Animal
- Life
- Game
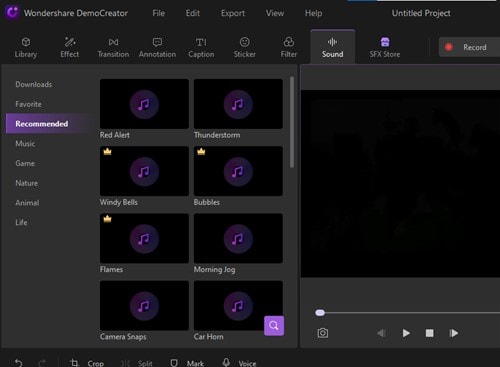
Add the effect of your choice.
Audio changer in DemoCreator:
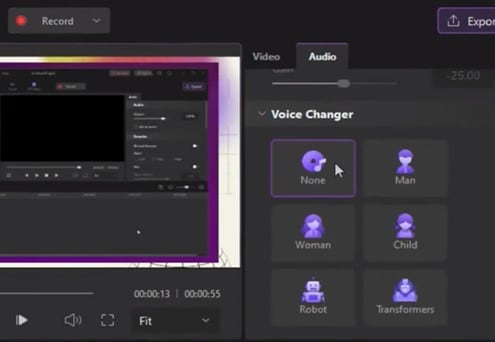
You can also sound like someone else with the help of the DemoCreator.
By using the feature of changing voice, you can make your videos fantastic.
For this, view the properties window. Select “Audio.” Scroll down to see the voice changer. You’ll see many options, such as
- Man
- Women
- Robot
- Child
- Transformer
Audio fade in and fade out:
Fade-in and fade-out options are essential while editing an audio clip. Adjusting fade-out makes the sound softer while fading away until you don’t hear it. Therefore, set the fade-in or fade-out. Drag your mouse over the audio. Push the slider bar to the right or left. Decide the start time and duration you want it to go.
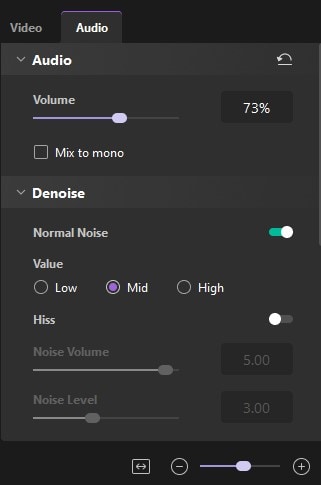
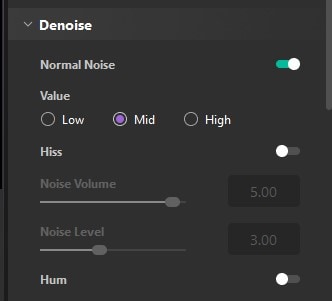
Denoise:
You can also remove the unwanted sound from your video. For this, click on “Audio” from the properties window. From the denoise option, adjust the setting. To adjust the noise level, drag the slider as per your need. There are three values that you can select.
- Low
- Mid
- High
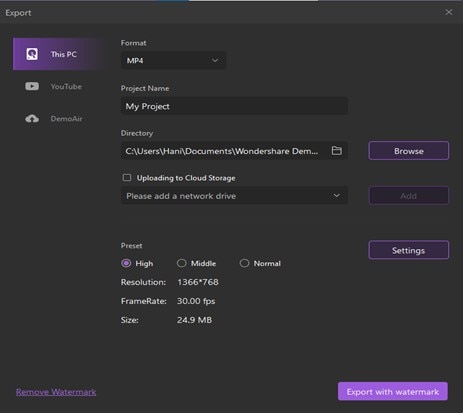
How to export video?
After the editing is over, you can now export your video.
- Click on the “Export”
- A pop-up window will appear.
- Select the desired format to export the video.
- Formats supported by DemoCreator are MP4, MP3, AVI, WEB, MOV, MKV, Etc.
- Choose the name of the project.
- Select the location on your Pc where you want to save the video.
- Also, adjust the Preset, Resolution, FrameRate, and video size.
- You can also export the video without a watermark, but you'll have to buy the subscription.
Upload directly to YouTube:
To upload your created content directly to YouTube, click "Export." Select YouTube. Sign in to select other options as well. Then after adjusting settings, export it.

Uses of DemoCreator:
You can use DemoCreator to
- Make a Presentation
- Record whatever happens on your screen
- Record with Webcam
- Capture game
- Make tutorials
- Record meetings
- Webinars
- Live stream
- Recording any bug
- Video calls
Pros:
- Easy-to-operate software.
- Flexible
- Web-based Software
- It provides free updates.
- No need to learn any skill to sue this.
- Multiple features.
- Export in multiple formats
- Allow users to Record with Webcam and microphone
Cons:
- To use more features, you’ll need to buy its subscription
- After the recording is over, the mic stays on. It can cause a problem for the user.
AI Presentation Maker
Conclusion
Visual content has made easy our digital lives. It helps to increase the business. Most people are creating content to promote their business. Demonstration videos help to provide the instruction on the product before using it.
For creating a demo video, you'll need a recording tool. DemoCreator is the best of all. It's all in one recording and editing tool.
With advancement, DemoCreator will soon introduce a feature of adding PowerPoint presentations while recording demo videos.
Then you can open the recording in DemoCreator to edit it. The program also allows you to share the video directly from the program to YouTube, although you can save the video to your computer. Demo Creator is free and, best of all.
You don't need to require any specialized services to grip this. Record the screen while inspecting videos and save it to watch later.
DemoCreator has made it informal for its users. They can create any content because it is a collaborating way to occupy the spectators.


