How to Convert PPT (PowerPoint) to Video [3 Easy Ways]
PowerPoint is one of the most used ways of creating presentations. The method is not just but helps in covering a lot of points in some slides. For teachers and people who are related to business, converting your PowerPoint files into videos is the best way of demonstrating your ideas in front of so many people.
 Secure Download
 Secure Download
Furthermore, there are times when you cannot be present in the class or in a meeting, so the video will help in making your audience understand what you want to say even if you are not present there.
Other than this, you can also upload your Powerpoint videos on the internet which can help a lot of other people who were unable to attend your presentation. It can be supported by WMV and AVI.
In this article, we will introduce 3 easy and simple ways that you can use for converting your PowerPoint files into a Video. Each method has its pros and cons, so choose the one which suits you the best.
- Method 1: Export PPT to video with PPT Built-in Feature
- Method 2: Use a PPT to Video Converter
- Method 3: Use Screen Recorders to Convert PPT to Video
Method 1: Export PPT to Video With built-in Create A Video Feature:

This feature comes with advantages and disadvantages. The advantages are:
- The best thing about this feature is that it is easy. Everybody prefers convenience over any other thing. This is why they find ways that are easy.
- Another advantage is that you can record your narration directly into the PowerPoint. You do not need to download any other device or app to record your narration.
The disadvantages of this are:
- You cannot edit anything in it. Everything will be recorded and you cannot cut it.
- There is a lack of mouse circles and any other annotations.
- There is only one expert video format.
- The resolution option is limited to three resolution options.
Now how can you use this feature? The method is very easy but for this, you have to have a PowerPoint file first.
Here, I recommend a free PowerPoint template from FPPT.

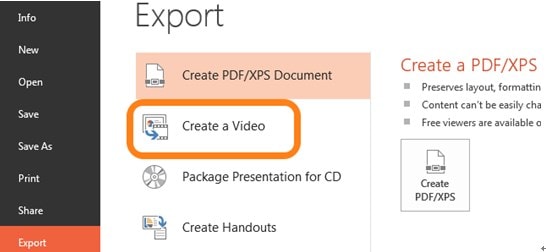
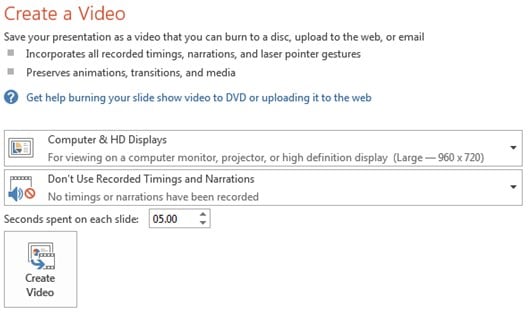
Once you have the file, the next step is to save that file as a “video”. In order to save the file as the video, just click on the option ‘Export”. When you will click this option, you will see a “Create the Video” option. Here you will see the options like “two drop-down menus” and “a time value box”.

The drop-down options will help you in selecting the quality of your video.

You surely do not want to create a video whose quality is compromised during the process. This is why more options will be provided to you to select the size of your video.

The other drop-down menu will provide you with an opportunity to edit anything in the video. This means you can include anything or even omit anything from it.

In order to determine the time of your video, the Time Value box will be at your service. Finally, you will see a “create Video” option. Save it to the location from where you can easily find it.
Method 2: Use Converter to Convert PPT to Video
You can easily control the resolution of the video along with the quality of the audio and video. You can edit it easily which means you can add watermarks too.
Cons: like any other app, this has a free version too, but the free version has certain limitations. For instance, you are not allowed to have an HD video, you also have the time constraints, no editing will be allowed. You have to spend some money if you want the best results.
1. Best PPT to video converter for Windows--- iSpring River
iSpring River is one of the best options for Windows because it is best when it comes to recreating Animated effects which are already in your video, with no compromise on the quality of your images, audio files, and video. Furthermore, all the transition effects will be converted into the video perfectly. Nothing will be changed while converting the PowerPoint file into the video. Your video will be the same as you want it to be.
At the same time, it does have one disadvantage like it is very expensive. It can cost you about $67.
2. Best PPT to video converter for Mac--- Xilisoft
The main features of this software are that it allows people to customize the slides with the help of a watermark, they can also add a soundtrack. It also provides you an opportunity to edit the previous features and add new ones.
Pros:
- Multiple outputs.
- Best video converter to HD videos.
- Features all the editing options
Cons:
- May not handle the large files
- Cannot be easily navigated
3. Best Online PPT to video converter---Online-Convert.com
Online converters are the best thing in the world as it helps in converting your PowerPoint into many video formats along with downloading.
Pros:
- Anyone can easily use it.
- It has the capacity to convert the files which were directly uploaded from the hard drives, URL, or even from Dropbox.
- Not just this, but it also offers multiple options so you can format the output.
Cons:
- All of your presentations are expected to be uploaded on the internet which can start the conversation.
- Since it is an online converter, it can cause a problem for some people while downloading the final results.
Method 3: Use Screen Recorders to Record PPT to Video
The recording quality matters a lot, so in order to keep it the way you want it to be Screen Recorder is the option that you can rely on. It helps in optimizing the video resolution.
To provide your audience a video that lasts long in their memories, Screen Recorder helps in recording multiple materials in your video, this means that you can save music, or any other thing which you think can have an impact on the audience.
1. Wondershare DemoCreator Screen Recorder Software
 Secure Download
 Secure Download
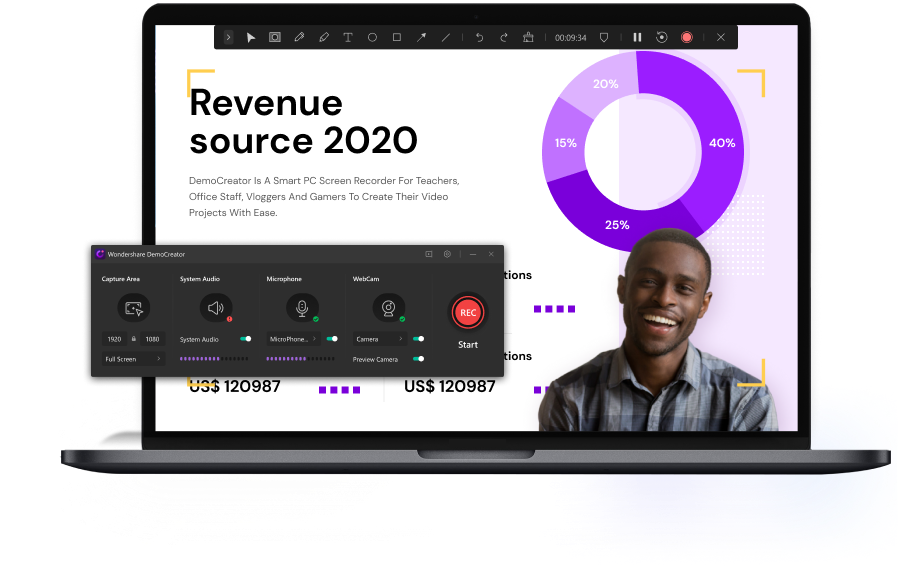
Besides the DemoCreator video editor, the Wondershare team also released the specially designed screen recording software, Wondershare DemoCreator Screen Recorder, which allows you to record your webcam and your screen at the same time.
The main features of Wondershare Filmora Recorder for recording PPT to video include:
- Record the entire screen or just a part of your screen
- Capture video, system audio, webcam, and mic at the same time
- Use the Blur effect to blur the private info or remove the watermark
- Support transitions, PIP functions
Oh, if you want to add some callout or annotations in your PPT, you will be pleased with the Wondershare Filmora Recorder annotation effects as well.
2. Filmora Video Editor
This software is actually very helpful for all the teachers as it features multiple ways and many editing options of creating the video which can have a positive impact on the minds of the students.
Pros:
- Anybody can easily use it or even drag and drop the interface.
- Limitless screen recording along with the recording feature. No Watermark is added.
- To highlight the points there are 4 colors of the mouse.
- Several motion elements are incorporated into this recorder.
- The results are of good quality.
- Easily shares the video on YouTube.
- You can save your video in multiple formats.
Cons:
- Free versions have editing tools.
- You can record the files in mp4 format only.
- Mobile devices are not compatible with this.
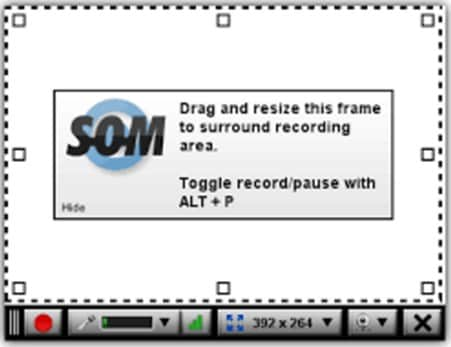
3. Screncast-o-matic

The software is very easy to use as it is supported by Mac and Windows, and it launches it as a Java applet without any installing of other devices.
Pros:
- Easy to use
- It can also be premium free
- Saves your video into the mp4 format.
- Available in Mac and Windows versions.
- Students can also install it on their computers as it is free.
Cons:
- Even if it is available for free, it will create some trouble.
- It will limit the time period of the video to 15 minutes.
- It automatically adds a watermark to the videos.
AI Presentation Maker
However, there is a Pro Version available which helps in unlocking many amazing features.
This is the way that we figured out for converting your PPT to videos, whether you are using an MS PowerPoint which has the create video option or not, you will get the solution to convert PPT to video. Let’s know in the comment below about how you convert your PPT to video.

The Best PowerPoint Recording and Converting Software
 Secure Download
 Secure Download


