
Video conferences on Zoom, Google Meet, and Microsoft Teams are at the heart of most remote jobs of today. Sometimes, you might want to record these video calls to review them later, but only a few video conferencing tools will allow you to record natively.
Nonetheless, if you're doing video meetings on a Mac, you can still record these calls with various external tools, and today's guide will show you how.
Stay around to learn how to record a meeting on a Mac with audio. We'll discuss different recording methods and provide tips for effortless Mac meeting recordings, so let's get started.
| Method | Effectiveness |
| QuickTime Player | Low - While QuickTime Player can record meetings on a Mac, it can't capture system audio unless you install a plug-in and set it up, which is less ideal for recording meetings where you're not the host and someone else is doing most of the talking. |
| Screenshot Toolbar | Low - Mac's Screenshot Toolbar is essentially the same as the QuickTime Player on newer macOS versions since it, too, can't record system audio. |
| Third-Party Video Recorder (DemoCreator) | [Top Pick] High - Simple to install and set up and effortless for Mac meeting recordings, Wondershare DemoCreator is the top choice for anyone wanting to review meetings or take notes. Its built-in video editor is also a huge plus. |
| Browser Extension (DemoAir) | Medium - Recording Mac meetings with DemoAir's browser extension is effortless, but it's only available for Google Chrome. |
| Online Recorder (DemoAir) | Medium - DemoAir's Online Recorder is a breeze for recording Mac meetings, but setting camera and microphone permissions makes it less beginner-friendly than its cousin app, DemoCreator. |
All five mentioned Mac meeting recording methods are beginner-friendly and effortless to use, so your choice should depend on their effectiveness and what you, as the user, value the most in an app.
How To Record Meeting on Mac With Audio - 5 Methods
While video conferencing tools won't always allow you to record meetings on Macs, there are still multiple methods for recording meetings through external apps. These include the QuickTime Player, Mac's Screenshot Toolbar, third-party video recording tools, browser extensions, and online recorders.
Method 1. Record a Meeting on Mac With QuickTime Player
All Mac devices come pre-installed with the QuickTime Player, Apple's proprietary tool for playing video files. However, this app can also create recordings, and its New Screen Recording function can help you record a meeting on Mac.
Here's how to record a meeting on Mac using QuickTime:
- Launch QuickTime Player through the Mac's Applications folder.
- Head to File > New Screen Recording.

- Adjust the volume, tap the tiny Arrow button for options on adjusting the audio input source, and hit Record to start recording a meeting on Mac.

- When you're ready to stop recording, tap COMMAND + CONTROL + ESCAPE. QuickTime will then end and open the screen recording.
Method 2. Record a Meeting on Mac With the Screenshot Toolbar
Another way to record meetings on Mac is with the built-in Screenshot Toolbar on newer macOS versions. Namely, Apple devices running macOS Mojave or later can use the Screenshot Toolbar to record Mac meetings, and here's how:
- Tap SHIFT + COMMAND + 5 to open the Screenshot Toolbar.
- Click Options and then choose the correct microphone device.

- Select between the Record Entire Screen or Record Selected Portion options and tap Record at the right side of QuickTime Player's menu bar.
- Click the Circle button in the Mac's menu bar to end the recording, or hit SHIFT + COMMAND + 5 again.

The main difference between the QuickTime Player method and the Screenshot Toolbar is the video player's compatibility with older macOS versions. Otherwise, QuickTime Player will also invoke the Screenshot Toolbar when you click New Screen Recording on newer macOS versions.
That also means the Screenshot Toolbar has the same recording capabilities and can't record system audio natively.
Method 3. Record a Meeting on Mac With Video Recording Software
Dedicated third-party video recording tools don't suffer from the limitations of QuickTime Player and Screenshot Toolbar. An app like Wondershare DemoCreator can seamlessly record meetings on a Mac with system sounds and mic audio. Namely, it can record screens, webcam footage, system audio, and microphones separately and simultaneously, making it ideal for recording meetings on Mac.
The app is compatible with Intel-based Macs and Apple Silicon devices with M1 and M2 chips, functioning as flawlessly as any native macOS application. It features a modern and intuitive user interface, effortlessly usable and customizable keyboard shortcuts for recording, and a built-in video editor where AI-powered features can take your Mac meeting recordings to another level.
- Record desktop screen, audio, and webcam simultaneously
- Various annotation tools to emphasize important points
- Edit videos quickly with a wide range of professional tools
- Export to MP4, MOV, MKV, GIF and multiple formats

With it, recording Mac meetings becomes a breeze, and you can follow these steps to use it:
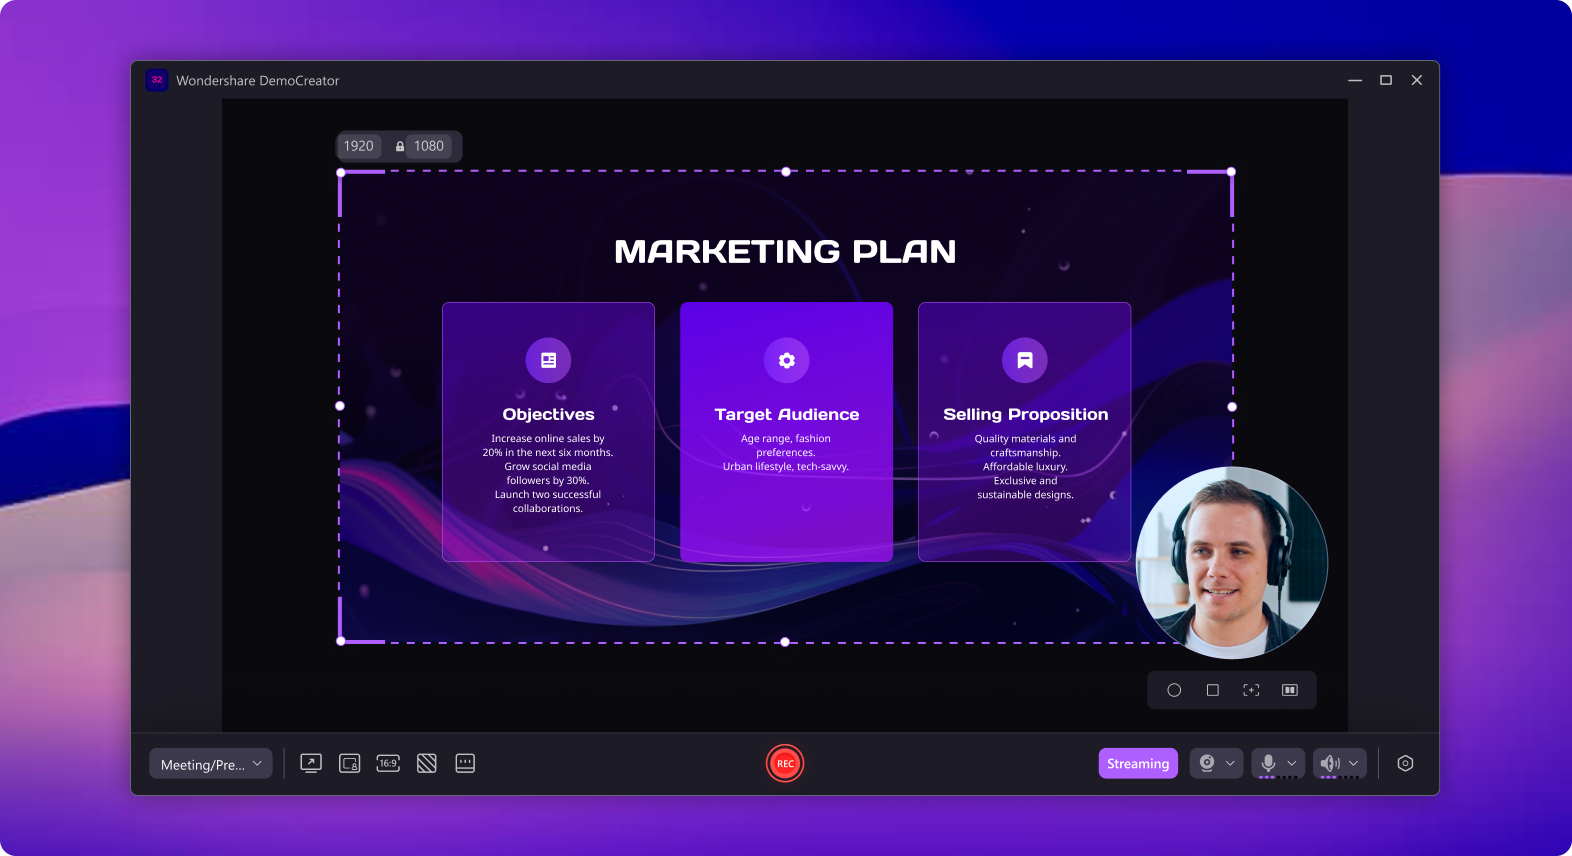
- Download, install, and open the app on your Mac and tap on the All-in-One Recorder.

- You can customize the Capture Area by choosing a resolution preset or clicking the Custom Area option and adding a custom resolution that matches your meeting's screen.

- You can also enable System Audio and Microphone options to record the meeting's sounds.
- If you want to, you can turn on the WebCam option and capture a video of yourself alongside a meeting recording, even if your camera is turned off in a video conferencing app.

- When ready, hit REC or tap OPTION + COMMAND + 2 to record Mac meetings. You can tap the same key combination to pause or resume.
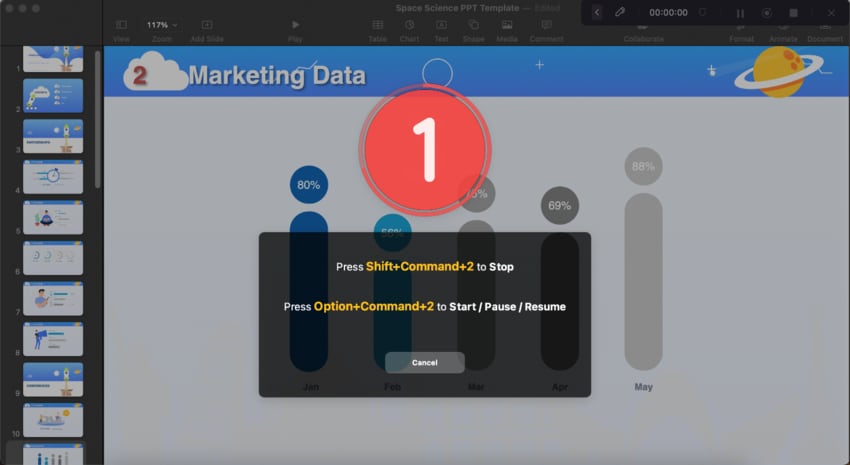
- Once the meeting is over, tap Stop or press the SHIFT + COMMAND + 2 keys.
Depending on the selected Recording Scheme settings, DemoCreator will export the Mac meeting recording or open the Video Editor. The recording of your meeting will also be automatically imported into the Video Editor's Timeline, and you can then apply video effects, annotate, and export the clip.
Method 4. Record a Meeting on Mac With a Browser Extension
If you want to avoid installing third-party video recorders like DemoCreator, you can also use its cousin app - DemoAir, which is available as a Chrome browser extension. This add-on lets users record a meeting on Mac directly from the browser, and here's what you'll need to do to use it:
- Open the Google Chrome web browser on your Mac and head to DemoAir's page.
- Click the Add to Chrome button in the top right corner.

- Follow the instructions to add the DemoAir extension to Chrome through the Web Store.

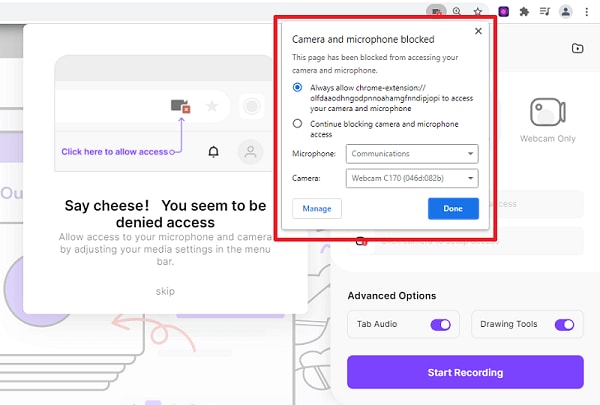
- Once installed, click the DemoAir extension in the top right corner and grant it access to your Mac's microphone and camera.
- You can also right-click the DemoAir extension and pin it if you want to.

- Tap on the extension again, select Desktop, and ensure the extension is using the right camera and microphone under Recording Settings.

- When ready, tap the Start Recording button.
- Once done, tap Stop to end the recording. Alternatively, click Pause to stop it temporarily.
Method 5. Record a Meeting on Mac With an Online Recorder
While it's only available as a Chrome browser extension, that doesn't mean you can't use Wondershare DemoAir on other web browsers. After all, DemoAir also exists as an online recorder you can use with any surfing app, and here's how:
- Launch your favorite web browser, revisit DemoAir's home page, and click the Online Video Recorder option.

- Under Recording Mode, tap Screen Only. Then, select your Mac's microphone under Recording Inputs, give DemoAir's Online Video Recorder access to use it, and click Start Recording.

- Choose Window to share a particular video conferencing app or click Entire Screen to share everything. Remember to tick the Also share system audio box to include audio, and hit Share.

- Tap Stop sharing to stop recording the meeting on Mac when it's over.
Once you stop sharing, DemoAir's Online Video Recorder prompts you to save the recording as a WebM video file and takes you to its preview page. You can then watch the Mac meeting recording, rename it, save it to Wondershare or Google Drive, download it, share it via Google apps, and send it to your teammates through Slack, GitHub, Jira, and other similar tools.
Tips for Recording Meetings on Your Mac Device
Effectively recording meetings on a Mac takes more than just pressing the record button once you've chosen an app that suits your needs. Thus, you should also consider the following elements:
- Environment - Unless you explicitly turn off microphone recording, which isn't an option when participating in a meeting, your Mac will also pick external sounds. Therefore, you should always try to record in quiet spaces with minimal background distractions.
- Screen Captures - If the visual element matters to your goals, you should always try to enlarge the video conferencing app and select only its window in a screen recording tool. Otherwise, you won't be able to see the meeting's participants or their actions once you review the clip.
- Annotating and Editing - No video recording is complete without editing. That's why spending a few extra minutes annotating your Mac meeting recording and making at least basic edits like trims and cuts will save you time when you need to review the recording.
By following these practices, you'll nail every Mac meeting recording you create, making fantastic videos from which you can easily take notes or review later.
Conclusion
Figuring out how to record meetings on a Mac with audio is a valuable skill that can help you create fantastic video content you can quickly review and take notes on later. That's why choosing the right recording tool for your needs is crucial.
While your options include built-in tools, third-party apps, and online recorders, it's worth noting that your Mac's QuickTime Player and Screenshot Toolbar are only suitable for video-only content and mic voiceovers, as they can't record system audio.
That narrows your choices to a third-party video recorder like Wondershare DemoCreator, which can seamlessly record screens, webcam, system sounds, and mic audio separately or simultaneously, and its cousin app, DemoAir, which is available as both a Chrome extension and an online recorder.


