

Yesterday, you received critical project feedback from a huge client in a Teams meeting. Today, you cannot remember half of it. Has something like this ever happened to you?
As more and more of your work-related interactions happen online, learning how to record a Teams meeting on your Mac would be handy. The good news is we can teach you how to do that right now. Keep reading for step-by-step instructions, expert tips, and more.
Table of Content
Is It Possible to Record a Teams Meeting Directly?
Many organizations use Microsoft Teams to keep communications simple and airtight, especially between multiple departments and remote teams. As someone who owns a Mac, you know Teams is a cross-platform collaboration tool not restricted to Windows.
So, whether or not you can use Teams on a Mac computer is not an issue. The question is: do you have the right to record a Teams meeting? That depends on a couple of factors.
In most cases, the only person who can record a Teams meeting is a meeting organizer, and only if she or he has one of the following Microsoft Teams subscription tiers: Office 365 Enterprise E1, E3, E5, F3, A1, A3, A5, M365 Business, Business Premium, or Business Essentials.
Additionally, some organizations extend recording rights to all employees. So, if you work for the same team as the meeting host, you might be able to record Teams meetings. Ultimately, this boils down to the Teams privacy settings established by your company's IT team.
What if your company does not organize the meeting and you are only a guest or an anonymous user? In that case, the only way to record a meeting is with a third-party tool.
Here's a quick summary of Teams meeting recording rights before we go on:
| Who can record a Teams meeting? | |
| Teams Meeting organizer (host) | Yes, if the organizer has the right Teams Business license. |
| Users from the host's company | In some cases, depending on the company's privacy settings and permission rights. |
| Users from other companies | Not directly, but they can use a third-party screen recorder. |
| Guests and Anonymous users | |
Don't forget: When you start recording a Microsoft Teams meeting directly, every participant receives a notification that they are being recorded. That doesn't happen when you use a third-party tool, so it is your ethical and collegial responsibility to disclose your actions.
How To Record a Teams Meeting on Mac - Best Options
Option 1. Record a Teams Meeting on Mac Directly From Microsoft Teams
The easiest way to record a Teams meeting is directly from Microsoft Teams. However, as we have discussed in the section above, only certain users have the permission to do so. If you don't have permission, the Start recording option in your Teams app will be grayed out.
If you do have permission to record a Teams meeting, follow the steps below:
- Go to your Microsoft Teams app to start or join a scheduled meeting.
- Select the … icon next to the Camera icon in the upper right corner.
- In the drop-down menu, click on Start recording.

- When you want to stop recording, click the … icon again and choose Stop recording.
Option 2. Record a Teams Meeting on Mac Using QuickTime (Mac Built-in Recorder)
So, you don't have the necessary user rights to record a Teams meeting, but you must do it anyway. That's OK. As a Mac user, you can access QuickTime Player, a built-in app on your computer that can do much more than play old movies.
Maybe you did not know this, but you can also use QuickTime Player to record your Mac screen. It's a decent (and 100% free) replacement for Microsoft Teams's direct recording option, but it has one downside: QuickTime Player requires a plugin to record internal audio.
No worries. We will show you how to record a Microsoft Teams meeting on a Mac using QuickTime Player from scratch, including setting up a plugin called Soundflower:
- First, head to the official MacUpdate page to download Soundflower.
- Install Soundflower by following the instructions provided by the setup wizard and then restart your computer.

- When your Mac is back on, go to Finder > Applications > Utilities. Click on Audio MIDI Setup.

- Click on the + icon under the left sidebar and select the Create Multi-Output Device option.

- Tick the box in the Use column next to Soundflower (2ch) and untick all boxes in the Drift Correction column except for Built-In-Output.

- In the bottom left corner, click on Settings and select Soundflower (2ch).
- Now, open QuickTime Player and click on the File tab in the top menu bar. Choose New Screen Recording.

- You will see a recording widget with the arrow next to the red Record button. Click on the arrow to choose sound input and select Soundflower (2ch).

- When the meeting begins, click Record to start recording your screen with sound.
- Click the Stop button to stop recording a Teams meeting. QuickTime Player automatically saves all recordings to your Mac's Documents folder, so look there when you want to rewatch the meeting.
If installing and configuring Soundflower seems like an unnecessary step, that's probably because it is. Unfortunately, that is the only way QuickTime Player can record what everyone in the meeting is saying. But is there a more straightforward solution? Of course, there is. Keep reading.
Option 3. Record a Teams Meeting on Mac Using DemoCreator (Recording Software)

QuickTime Player is pre-installed in all Macs but requires an audio plugin to record internal sound. Since you already have to download and install third-party software, that might as well be a proper recording tool that can capture sound and camera in addition to the screen.
One of the best screen recording software for Mac is Wondershare DemoCreator.
- Record screen, audio, and webcam simultaneously
- Various annotation tools to emphasize important points
- Edit videos quickly with a wide range of professional tools
- Export to MP4, MOV, MKV, GIF and multiple formats

DemoCreator can record Teams meetings with sound in only a few clicks, but that's not all. It comes with a Video Presentation mode that you can use to record project updates and onboarding materials, as well as an extensive list of tools for editing and polishing videos.
Here's how to record Teams meeting on a Mac computer with DemoCreator:
- Download, install, and launch Wondershare DemoCreator for Mac.
- Select All-in-One Recorder.

- Set the Microsoft Teams window in the Capture Area and make sure the System Audio is enabled. If you plan to speak during the meeting and want to record your voice in addition to the internal sound, enable Microphone. You can leave the WebCam turned off.

- When you're ready to start recording, click the red REC circle.
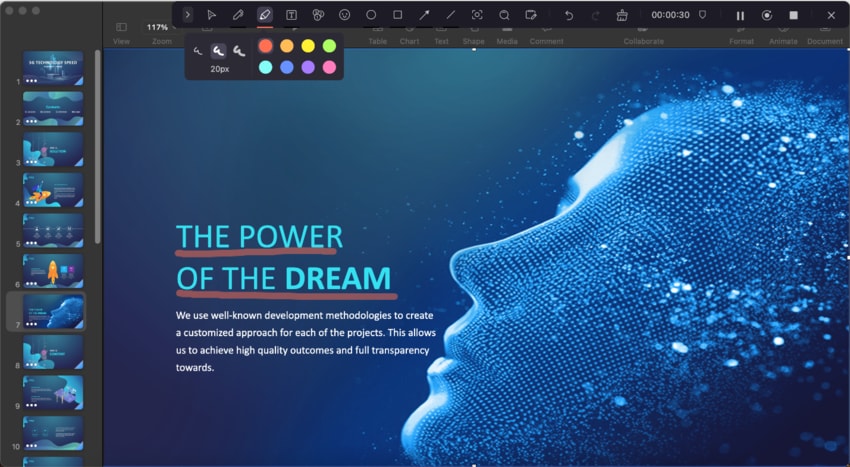
- During the recording, you can use various screen drawing tools to make your point easier to follow.
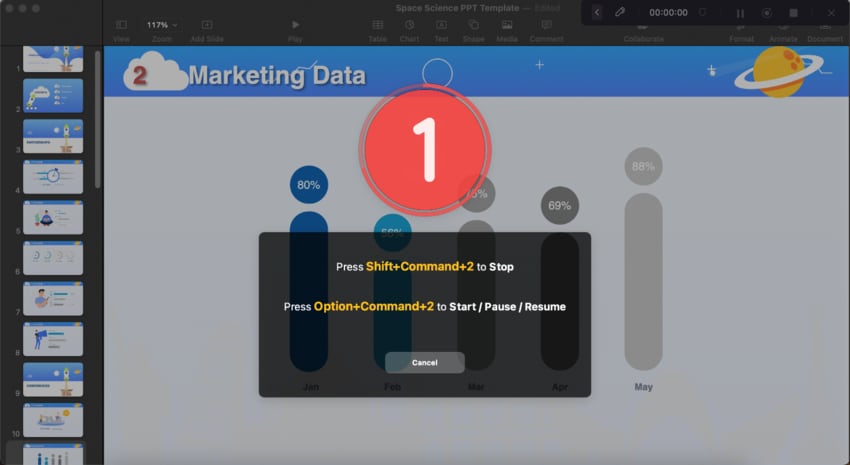
- Use the Shift+Command+2 key to stop recording. You can also click the End button.
When you're done recording, you can export the video as it is or keep perfecting it with Video Editor. For example, you can adjust the volume or use the Denoise tool to clean the audio from distracting sounds in the background. DemoCreator also allows you to schedule recordings, so you can perfectly time it with your Teams meeting and stay focused on the meeting points.
Option 4. Record a Teams Meeting on Mac Using DemoAir (Browser Extension)
Desktop recorders like DemoCreator are the best alternative to recording Teams meetings directly, but they are not always available. If you are joining a Teams meeting from a Mac computer in your office, you probably won't be able to install and download a third-party tool.
In this case, the next best alternative is an online screen recorder like DemoAir (the online version of DemoCreator). If you are a Chrome user with a Google account, you can download and install the extension at home and then log in from your work computer. DemoAir is simple and safe, and you can use it anywhere.
- Go to the official DemoAir webpage, click Add to Chrome, or find Wondershare DemoAir - Screen Recorder in the Chrome Web Store.

- Pin DemoAir to the extension bar so that you can start recording with one click.

- Every web extension with recording functionalities needs permission to use your microphone and camera. When prompted to give DemoAir permission, click on Allow.

- To start recording a Teams meeting, choose Desktop. Under Recording Settings, choose your system sound. Click Start Recording when you're ready.

- When asked to choose what you want to record, select Entire Screen. Enable the Also share system audio and click on Share. Don't choose the Microsoft Teams window because DemoAir can't capture system sound from a single window.
- You can pause or stop recording using the recording widget.

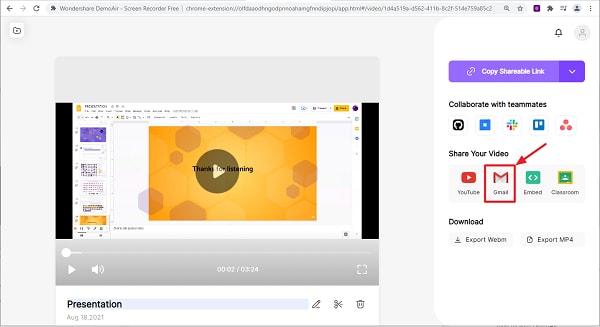
- When you're done, you can download the recording to your Mac. If you're using an office computer and don't save the recording locally, you can upload it to your Google Drive, send it to your Gmail address, or share it with your teammates on Slack, Asana, Trello, and other collaboration tools.
The DemoAir web extension does not have time limitations for screen recording. However, the free version lets you test the tool for only 10 minutes, after which you need to subscribe if you want to record a meeting longer than that.
Tips for Recording Teams Meetings on Mac

Now that you know how to record a Microsoft Teams meeting on a Mac with or without permission, it's time to get yourself ready. Presuming you have everything you need for the meeting, there are a few other things you can do to achieve high quality and ensure optimal results:
- Find a quiet place - Team meetings can get really loud. If you want to catch what everyone is saying but also need to record your microphone, find a quiet corner away from the window and avoid busy places with a lot of people and background noises.
- Perform a test run - Always try a recording tool before clicking the REC button for something important. You don't want to find yourself in a situation where you've unknowingly recorded a meeting without the sound or failed to press the right button.
- Ask for permission - Don't record your colleagues without their permission. Not only is this illegal, but it can also put you in an awkward position with your superiors and the people you work with daily. Recording incognito is never a good idea.
- Share the recording—Always offer to share the recording with other meeting attendees. You can do that whether recording from the Teams app directly or using a third-party tool. Most tools allow you to upload to the cloud and forward a link.
- Use transcription—Another reason to record Teams meetings with a feature-rich tool such as DemoCreator is that it allows you to turn these recordings into learning material for new hires—or yourself. Use a speech-to-text tool to transcribe voice.
Conclusion
Now, you know how to record a Microsoft Teams meeting on a Mac. If you are a meeting organizer or have special permission to record a meeting, use the Teams app's built-in recording tool. In any other case, you must use a third-party screen recorder for a Mac.
If you are attending Teams meetings from your work computer, using an online screen recorder like Apowersoft is the best option. However, this tool can record your screen for only one hour. A more convenient alternative is to use a web extension recorder like DemoAir.
You should opt for a desktop screen recorder whenever possible because these tools provide better security and more recording and editing features. Since QuickTime Player can't capture system sound without a plugin, we recommend recording meetings with DemoCreator.
FAQ
-
How do I allow screen recording on my Mac for Teams?
Follow these steps to allow screen recording for Microsoft Teams on a Mac computer:- Go to System Settings > Privacy & Security from the Apple Menu.
- Open Screen & System Audio Recording and enable Microsoft Teams.
-
How do I record a team meeting secretly on my Macbook?
There are several ways to record a Teams meeting secretly on a Macbook. You can record your screen with QuickTime Player or a desktop recorder like Wondershare DemoCreator. You can also use a web extension or online tool like DemoAir. Remember that recording other people without consent is not ethical, and it is illegal in many countries. -
Can you record a Teams meeting if you are not the host?
Usually, the only Teams user with recording rights is the meeting organizer or host. However, some companies have security policies allowing all their employees to record a Teams meeting they attend. If you don't have permission to record a Teams meeting directly, you can use a third-party screen recorder such as Wondershare DemoCreator.


