Screenflow is a screen capturing and video editing software that allows you to capture activity on your screen reliably. The software allows simultaneous recording; it can capture the screen, microphone, and speakers in parallel.
Features and options are abundant with this software which can be used by instructors, demonstrators, gamers, and people working from home.
This software gives excellent audio/video synchrony and easy-to-use UI, suitable for professionals and novices. It supports almost all popular video formats.
Part1 How to use Screenflow
Here are instructions on setting up and using Screenflow for beginners step-by-step.
●Open up Screenflow, and in the menu on the left, there is a button that says "Start Recording." Once you click here, you'll be given options on what part of your screen what kind of video and audio you wish to record.
●You'll get a Screenflow helper in your taskbar, which will help you start and stop your recording. Here, click on Configure Recording to bring up the New Recording window.
●The Advanced Setting options allow you to define the frame rate and the timeline frame. As a default, you can set the frame rate to the highest and the timeline frame to 30, which works well for most projects.

Pro-tip: If your desktop has several icons irrelevant to your audience, you can "Hide Desktop icons" from the Screenflow Helper. Your icons will be hidden away for the duration of the video, giving an elegant look.
●When you’re ready to record, click on the red “Record” button, the screen will display a brief countdown with details of what is being recorded. From the same Screenflow helper, you can click on “Stop Record” to end and save your recording.
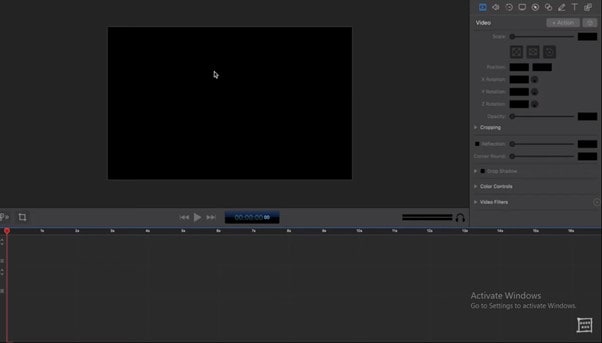
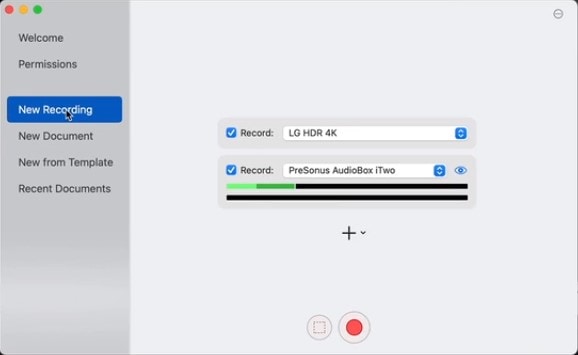
When you open Screenflow, the menu on the left-hand side shows several options. The “New Document” option allows you to create a new project. You start with a blank screen and then add media to that document.
The software allows you to define the frame rate and document dimensions, such as 4K, 1080p, etc.
The "Recent Documents" option allows you to open up recent projects you've worked on. A Stock Media Library also allows you to add stock footage to your screen recordings.
What do you want to record?
When you click on Start Recording, you’ll see several options to help you choose what you want to record:
●Record Desktop will help you record whatever's on your computer screen. You can even click on the big plus sign to add a second display if you're using one.
●Record iOS device allows you to record your iPhone or iPad screen, which you can connect to your computer via cable.
●Record Video helps you record from your Webcam. You can easily create a tutorial where the narrator (you) are visible. This could be your built-in Webcam or any other external device connected to the computer.
●Record Audio will allow you to record sounds from your microphone (built-in or external) and record system sounds. If you wish to record system sounds, you'll need to install Screenflow's audio driver first.
Other than these features, the Screen Recorder allows you to:
●Cast your recording to live on the web
●Add a custom logo to your video
●Zoom in dynamically to any part of the screen
●Customize your recording
●Take screenshots
●Schedule the time of your recording
●Show your mouse cursor in the recording
●Cut and join videos
Who can use Screenflow:
1. Instructors
The screen recorder is ideal for demonstrations and how-to videos where you want. To teach your audience, for example, how to use any software, you can use Screenflow.
You can simultaneously record a narration to explain how and why you are doing certain things, and the software will seamlessly record this.
To elaborate actions on the screen, you can also use your mouse to mark the screen wherever necessary. You can easily edit your finished video by cutting and joining parts of the video or different videos.
2. Marketers
To increase businesses, content has become a need of an hour. People prefer using videos for many purposes, such as
●Training
●Onboarding new employees
●Can share a lot of knowledge in a short time
●Update team time by time
Screenflow helps in completing the above challenging tasks.
3. Demonstrator
If you want to create a demonstration video of something, you can use Screenflow. For example, you can make a demo video of your product to show its features to your audience. Record the screen, edit it and upload it on your social account.
4. Gamers
If you’re a gamer, you can record your skills while playing by using Screenflow. It allows you to capture your screen.
5. YouTubers
You can record any tutorial and edit it with this software. It enables you to capture and edit content effortlessly.
How to edit video with Screenflow:
● Built-in Stock Media Library
Within your Screenflow projects, it allows you to succeed over 500,000 images, video, and audio clips.
● Powerful Video Editing Tools
With Screenflow, you can use many useful tools to edit, such as
●Annotation
●Transitions
●Animations
●Audio
●And more.
● Professional Animations & Motions Graphics
You can add
●Animate graphics
●Logos
●Titles relevant to the video.
● Better Tools for Software Tutorials
To make your editing more manageable, you can use
●Styles
●Templates that relate to your project
● Streamlined Media Management
Through Screenflow, you can organize the media such as
●Nested clips
●Multi-track editing
●Markers
●Color labels
It allows access to your media stored on your PC.
● Closed Caption Support
You can also edit your video by adding subtitles to understand the viewers better.
● Animated GIF and Animated PNG Export
It allows you to create animated GIFs and APNGs from video projects of Screenflow.
How to export video
● More Publishing Options
You can directly publish your video after editing to popular content hosting sites such as
●Imgur
●Wistia
●YouTube
●Vimeo
●And more.
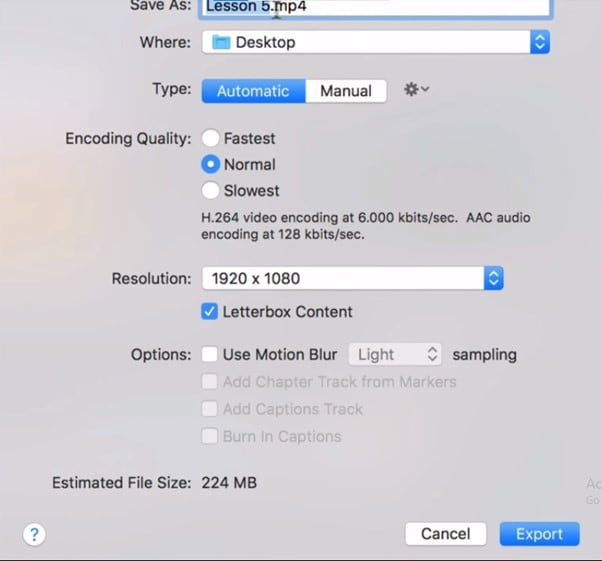
● ProRes, MP4 Encoding & More
For optimum quality videos, you can export the content by using Screenflow.
Highlight of ScreenFlow
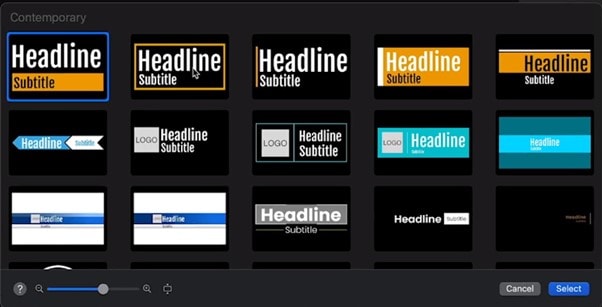
1. Title Library
ScreenFlow offers you the lower third and full-screen title library. You don't need to add these elements by yourself. You don't need to download any additional software. It helps you save time by providing an accessible and customizable library.
2. Simultaneous Screen, Camera, and Mic Recording
No other software offers to capture all screens simultaneously. ScreenFlow allows you to record multiple cameras, microphones, and screens simultaneously. You can capture anything virtually through this software.
3. Multi App Recording
If you want to record independent audio from multiple apps simultaneously, you can use this software. There is no need to redo everything if a notification accidentally comes through; just edit it.
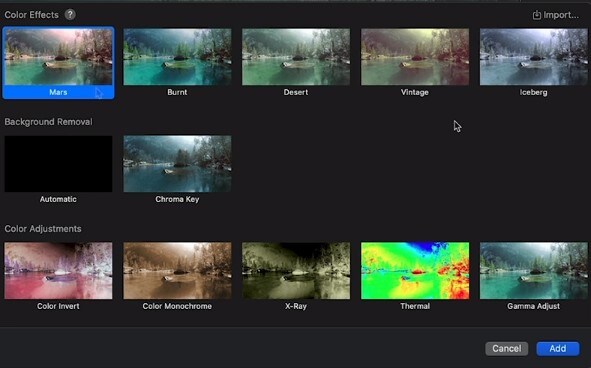
4. Video Filters and Effects
You can use a variety of effects to add to the video. such as
●Color effect
●Re-coloring
●And many more
You can elevate your production value and reflect your brand.
5. Automatic Background Remover
Suppose you don't have green screen technology; no need to worry. ScreenFlow allows you a background removal filter that you can use.
6. Archive Storage
You can archive your recordings as well. For example, if you record a video for 2 hours and edit it in 30 minutes, you want to edit more later. You can archive your video.
7. Major Performance Enhancements
It enables you to make your performance better.
●Render fast movements
●250% smaller camera recording
●Less CPU usage
●Thumbnail creation
●Faster export
8. Even More To Love
It has many other improvements as well, such as
●Customizable toolbar
●Updated layout
●Mouse pointer path smoothing
●Playback canvas
●Contextual clicking
●More editing ability etc.
Part2 Alternative for Screenflow
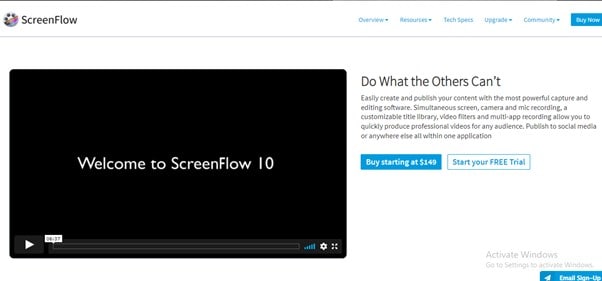
Starting at $149, Screenflow has a high price. This could be a problem for users. We will introduce an alternative software; DemoCreator. It's free and all-in-one software.
Wondershare DemoCreator
It is software with multiple features that you can use to record, edit, and export videos in any format.
Features
●Background
You can add the background by using a fantastic feature; the Green screen technology of the democreator.
●Captions
Related to the video, captions and subtitles can be added.
●Annotation
To better understand the audience, you can add texts, arrows, and dialogues to the video.
●High-resolution videos
It provides high-quality videos with resolution up to 4096*2160
●Audio enhancer
The audio system of this software allows you to enhance your audio by making adjustments.
●Voiceover
You can also voiceover the video so that everyone can understand.
●Record with Microphone
It helps you to record with an external microphone, to add audio.
●Record with camera
You can capture the screen with Webcam.
●Sticker
DemoCreator offers the feature of adding stickers to make your content compelling.
●Transitions
Adding a natural effect in the video enables you to add transitions such as fading, erasing, etc.
●Cursor movements
You can adjust and modify the cursor movements through DemoCreator.
●Multiple-screens
You can use this software to record multiple screens simultaneously with a microphone ad Webcam.
●Screen drawing
You can also draw whatever you want, such as arrows, to point out an important point.
●Zoom in/out
It allows you to use the Zoom in and out feature to highlight a specific video portion.
●Crop/cut
You can cut, trim, and split the video way you want.
●Save in multiple formats.
After editing the captured video, you can save the video in different formats; compatible with your device.
How to record
You can use DemoCreator to capture your screen. We’ll tell you how.
●Visit DemoCreator website.
●Install it.
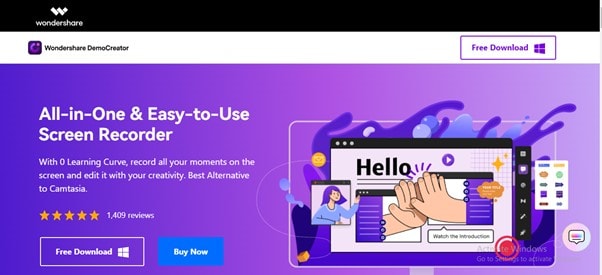
●After downloading, open it.
●To record a new project, click on the "Start a new project."
●You’ll see a pop-up window.
●Adjust the area you want to record.
●You can also customize the recording area but the big plus icon.
●To record the screen with your audio, enable the microphone. Make sure it’s well connected to your computer.
●To record the screen with the camera, enable Webcam. For this, first, connect Webcam to your computer.
●In the end, Click on the “Red circle icon” to start recording.
●To pause the recording, click on it again. You can use the F9 key to pause it. Press it again to resume.
●You can use the F10 key to start or stop the recording.

How to edit
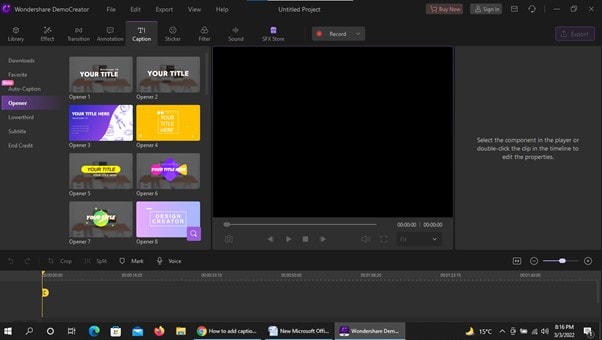
After the recording is over, the captured content will automatically open in the editor interface.
Editor interface has four operating areas
●Media library
●Timeline
●Preview Window
●properties
●Import the images or videos if you want to edit other than captured content.
●Drag it and drop it in the timeline to edit
●You can cut, trim, and split the video in the timeline.
●The video will display in the preview window.
●From the media library, choose the feature you want to add
●Transitions
●Annotations
●Captions
●Subtitles
●Stickers
●Background
●Templates
●And more.
Export setting
After the video is edited, you can export it to your PC and any social media such as
●YouTube
●Facebook, etc
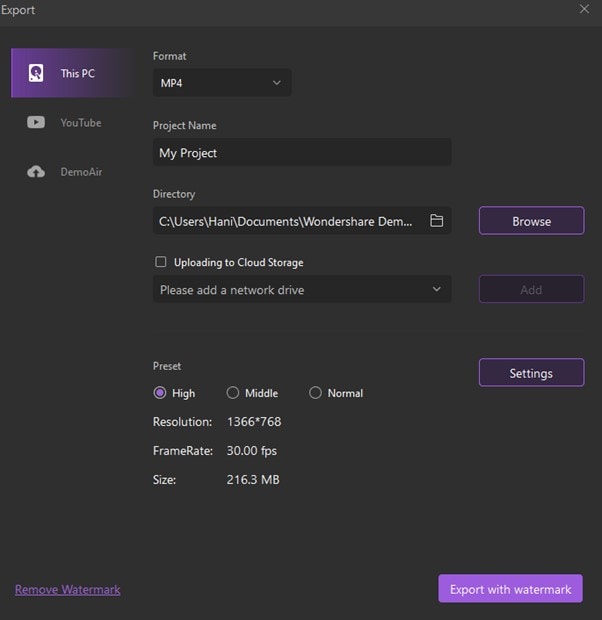
●Click on the "Export" option in the upper right corner.
●A pop-up window will appear.
●Adjust the settings.
●Choose any format that suits your device to save your video.
●Finally, Click on export.
●If you want to remove the watermark, you’ll have to buy its subscription.
Conclusion
The trend of using content is increasing day by day. It helps to attract the attention of the audience. People usually prefer visualization to read long, boring paragraphs.
The way you deliver the information to the people is necessary. So, the video should be creative.
There are many types of videos such as demo videos, tutorials, instructives, etc. You'll need software to capture or edit the videos.
Tons of software are available to record or edit the videos effortlessly. ScreenFlow is the video recording and editor software you can use for this purpose. But it's very expensive, and not everyone can afford it.
DemoCreator is software that has multiple features. One of the main advantages of using DemoCreator is it's free and easy to use. You can use this software to capture and edit your videos.
