Screen capture is among the most useful and convenient tools in modern-day devices, as it allows you to grab a picture or video of your screen’s contents and save it for later use. There are plenty of reasons why you might need to capture a screen while browsing on Firefox.
But did you know that there are several ways to do that? There are also different types of screenshots you can grab on Firefox. This article will tell you all about it and show you how to use different Firefox screen capture methods. Let’s get right down to it.
In this article
Types of Screenshots You Can Capture on Firefox
When somebody says “screen capture,” most people think of a standard full-screen grab. In case you didn’t know, there are other types of screenshots you can use in Firefox:
- Visible area screenshot – Visible area screenshot is what most people think a full-screen grab is. When you grab your screen the way you see it at that moment, you’re not actually taking a screenshot of a full screen. You’re only capturing its visible area.
- Full-page screenshot – The real full-page screenshot includes much more than what’s currently visible on the screen. It’s the most comprehensive type of screenshot because it also captures the invisible content revealed by scrolling.
- Full-window capture – As suggested by its name, a window screenshot is when you capture the entire content of only one window on your screen. In this case, a full-window screenshot would include your full Firefox window, along with bars and tabs.
- Selection screenshot – Good screenshot tools allow you to select the area of your screen that you want to grab and save. This way, you can get a custom-size screenshot of any web page or individual piece of content while browsing content using this browser.
How do you choose the right type of screenshot? That’s entirely up to you. You might find it easier to take a full-page screenshot and edit it later than to use a selection screenshot. Ultimately, all that depends on your needs, preferences, and browsing habits.
Firefox Screen Capture Methods

As mentioned before, there are several ways to take screenshots of your screen while using Firefox. You can take all types of screenshots with some of these tools; with others, your options are more limited. The best of them even allow you to record a screen on this browser.
To help you pick the right screen capture method for you, our team has put together a quick overview of each, along with step-by-step guides for how to use them.
Method 1: Use DemoCreator to Record Firefox Screen
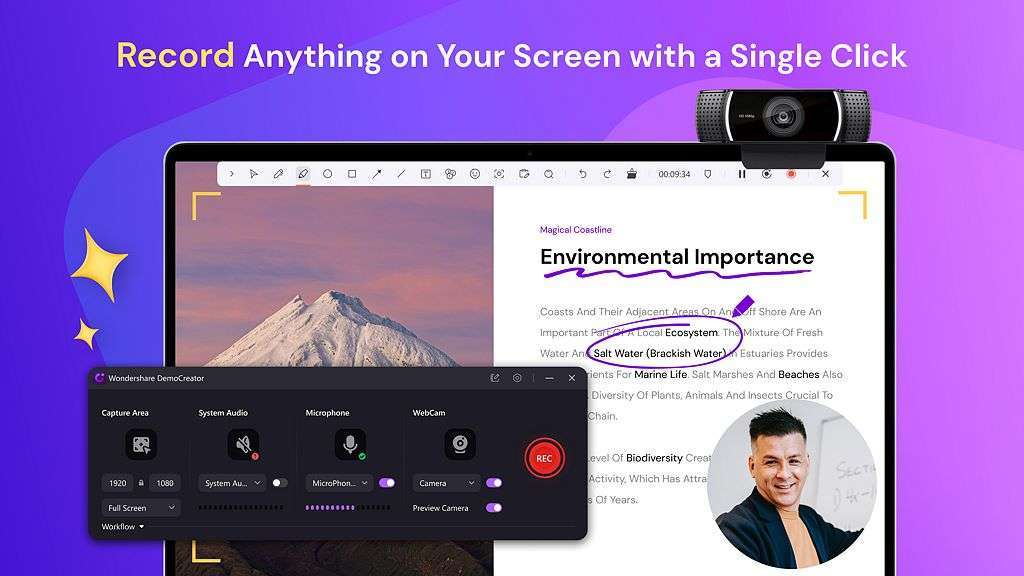
DemoCreator is a one-stop video recording and editing tool that includes everything you need to create podcasts, presentations, and other video content. You can also use it as a Firefox screen recorder – to grab and edit custom recordings quickly and easily.
Below, we’ll describe how to customize and schedule screen recordings with DemoCreator. There’s also a screen drawing tool that you can use while recording. We’ll show you that, too. After you finish recording, you can add annotations, creative effects, etc.
How to Use DemoCreator Firefox Screen Recorder
Step 1: Download Wondershare DemoCreator from the official website and install it on your computer.
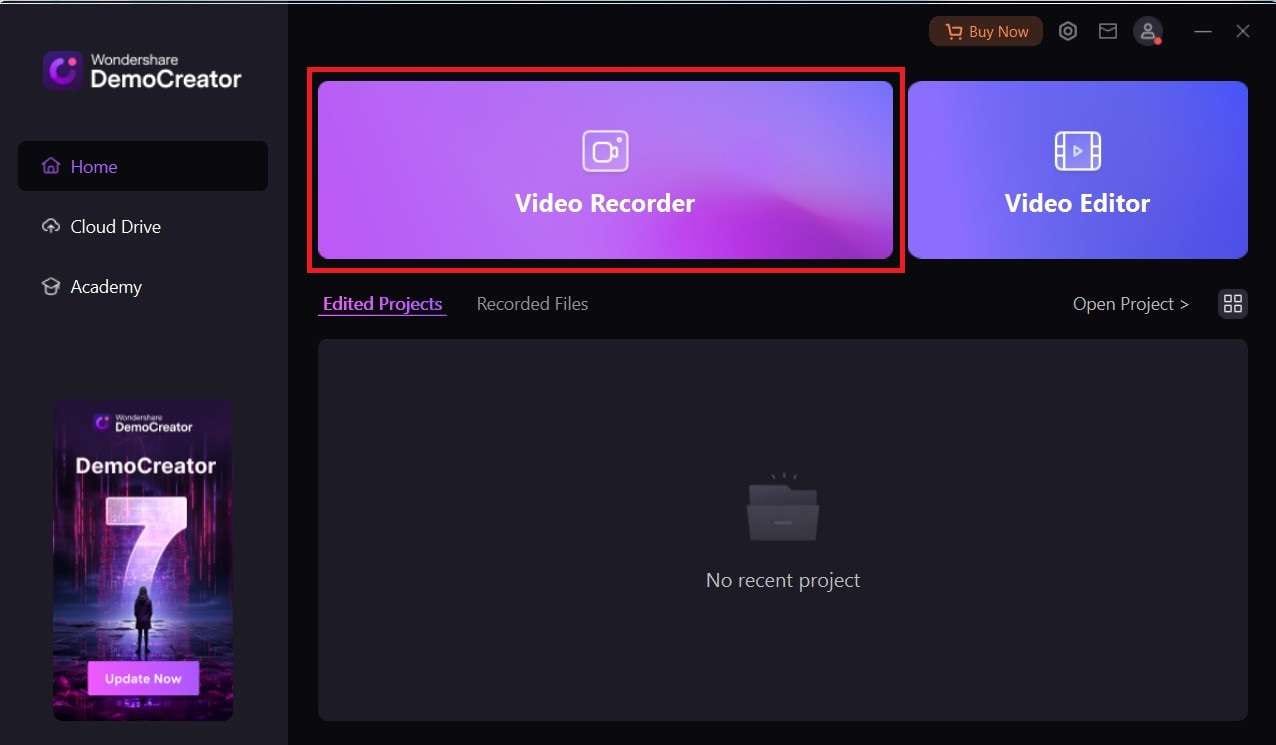
Step 2: DemoCreator will launch automatically after installation. Select Video Recorder.
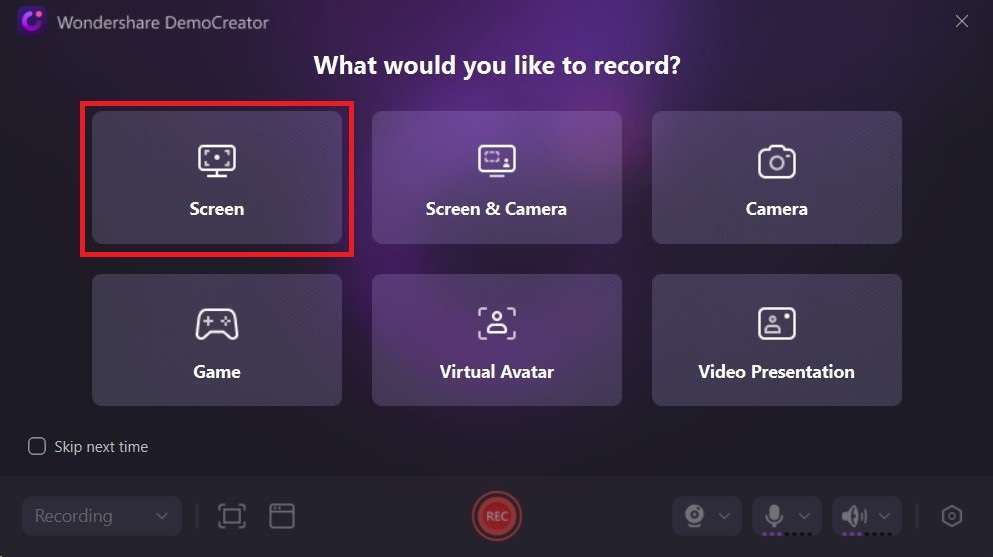
Step 3: DemoCreator has six recording modes: Screen, Screen & Camera, Camera, Game, Virtual Avatar, and Video Presentation. To use the Firefox video recorder, click on Screen.
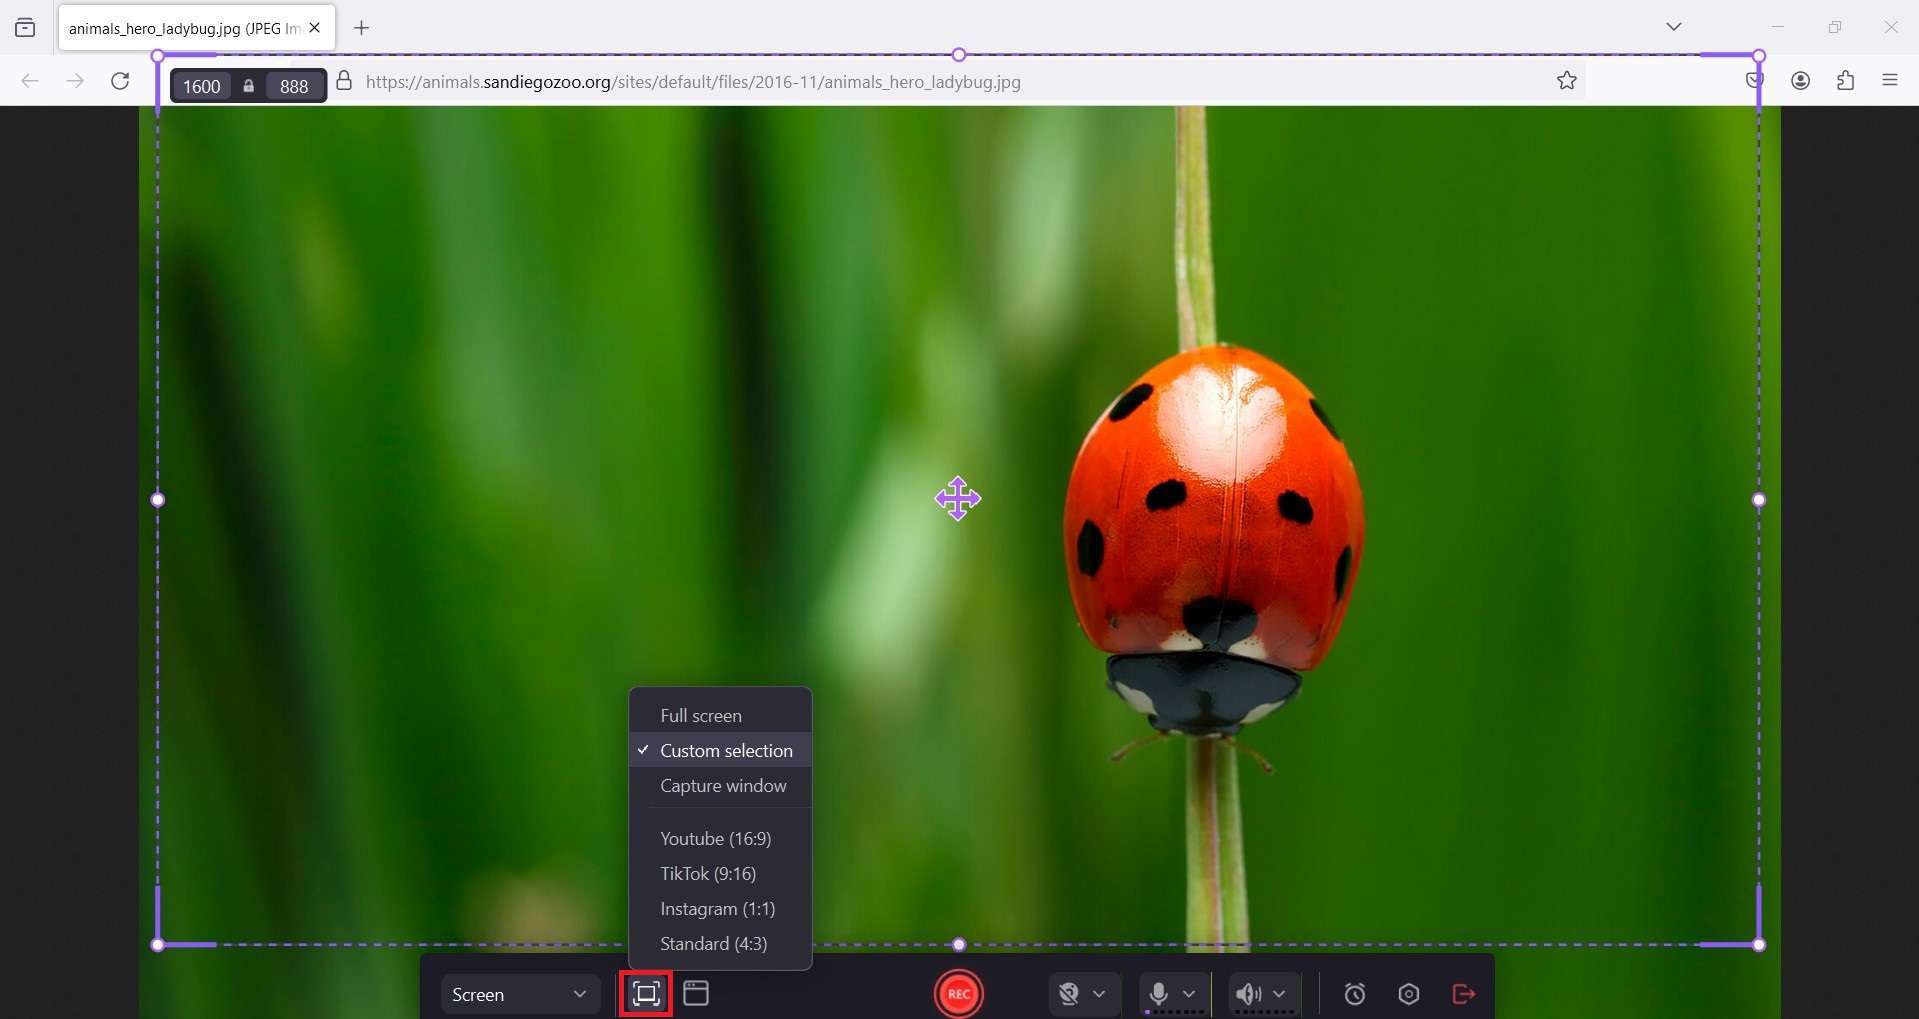
Step 4: You can customize the Capture Area before recording your screen. You can record your fill screen, capture a window, or make a custom selection. DemoCreator also offers out-of-the-box Capture Area settings for YouTube, TikTok, and Instagram videos.
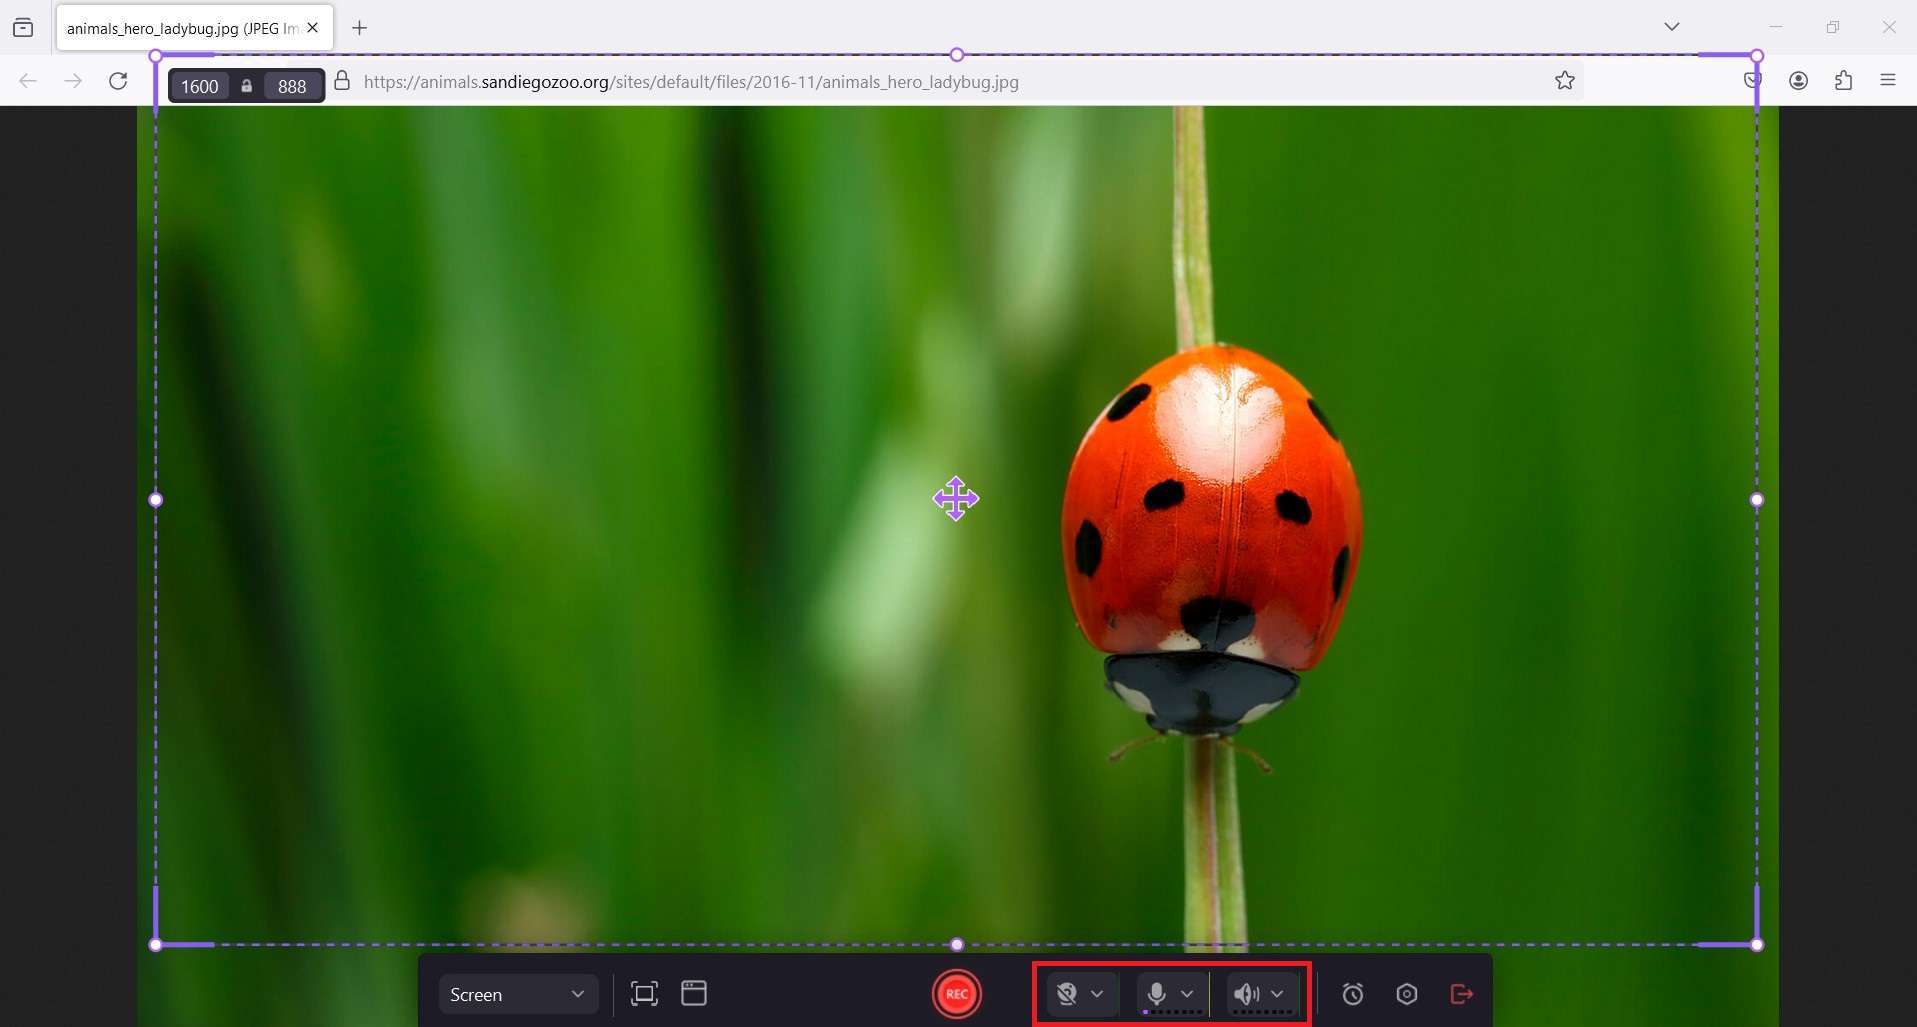
Step 5: DemoCreator’s screen recorder is set by default to capture both video and sound, but you can change that by turning the microphone and speakers off. You can also enable a camera if you want to record your commentary together with the screen.
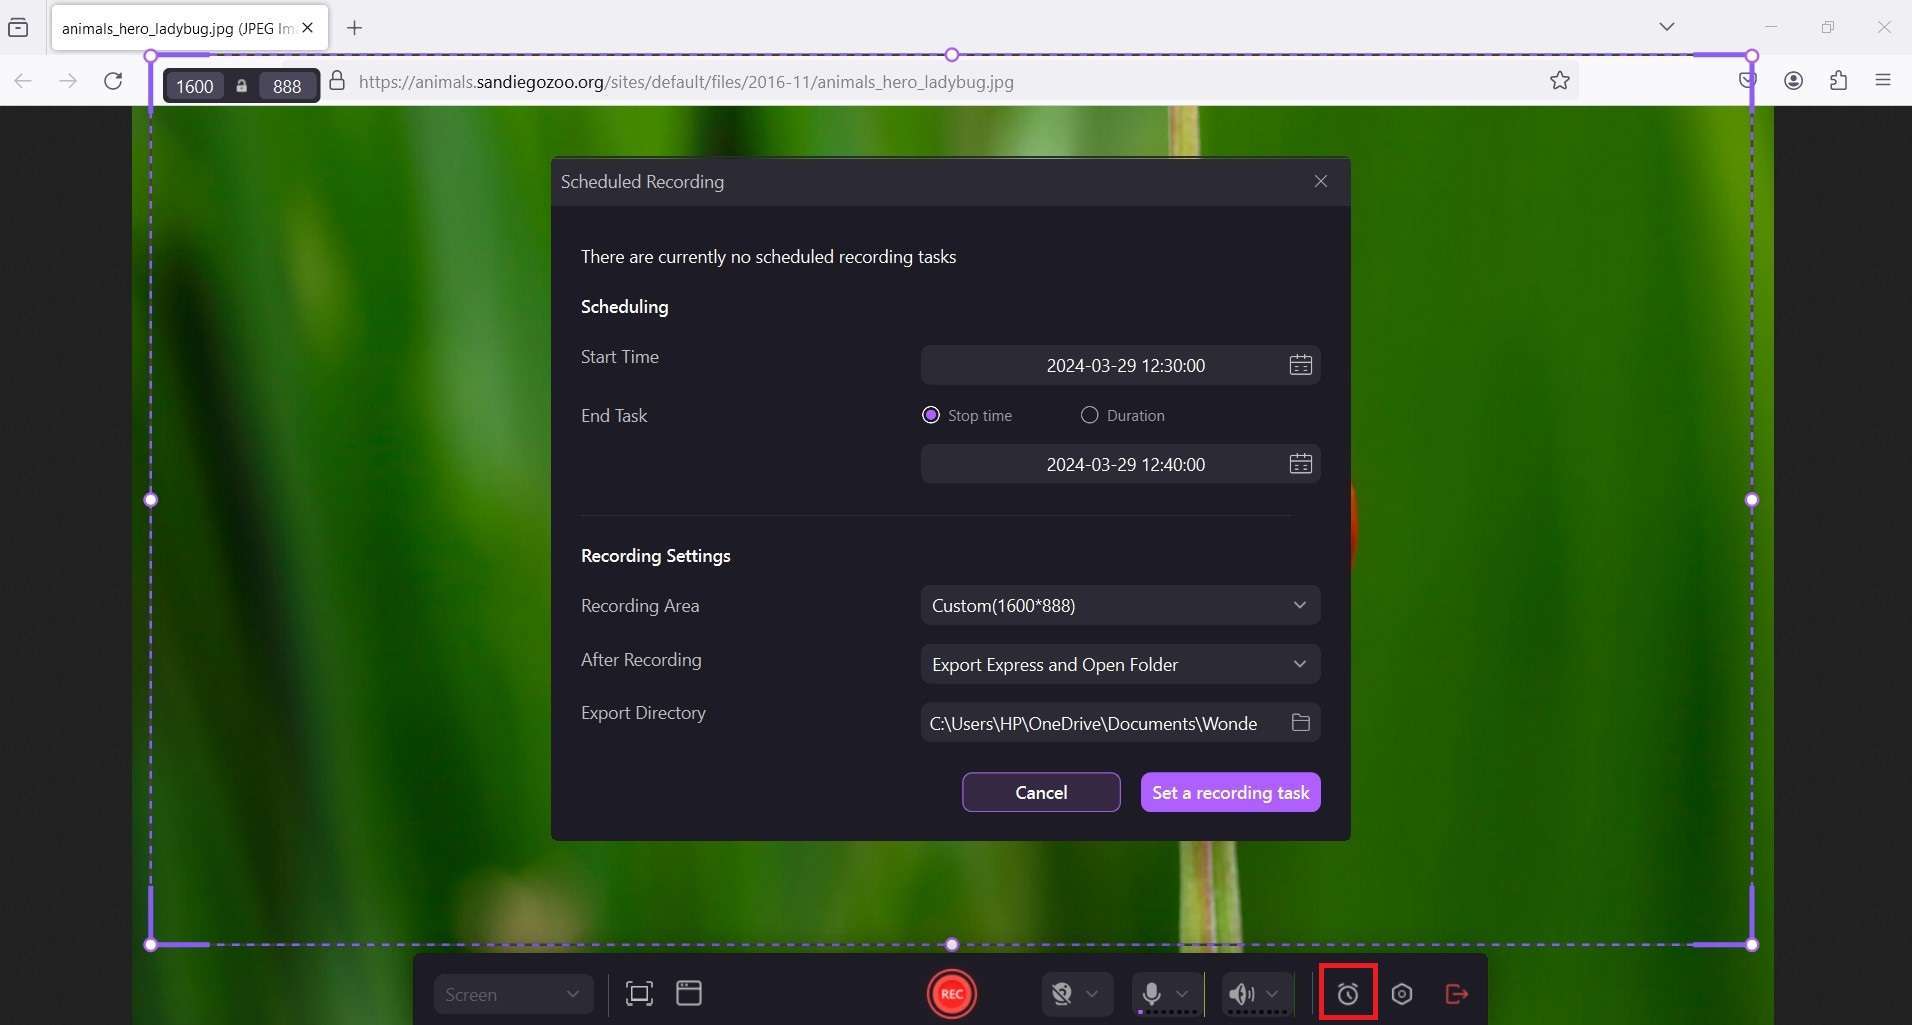
Step 6: If you want to schedule a recording, click the Stopwatch icon and set up the desired Start Time, End Task, and more.
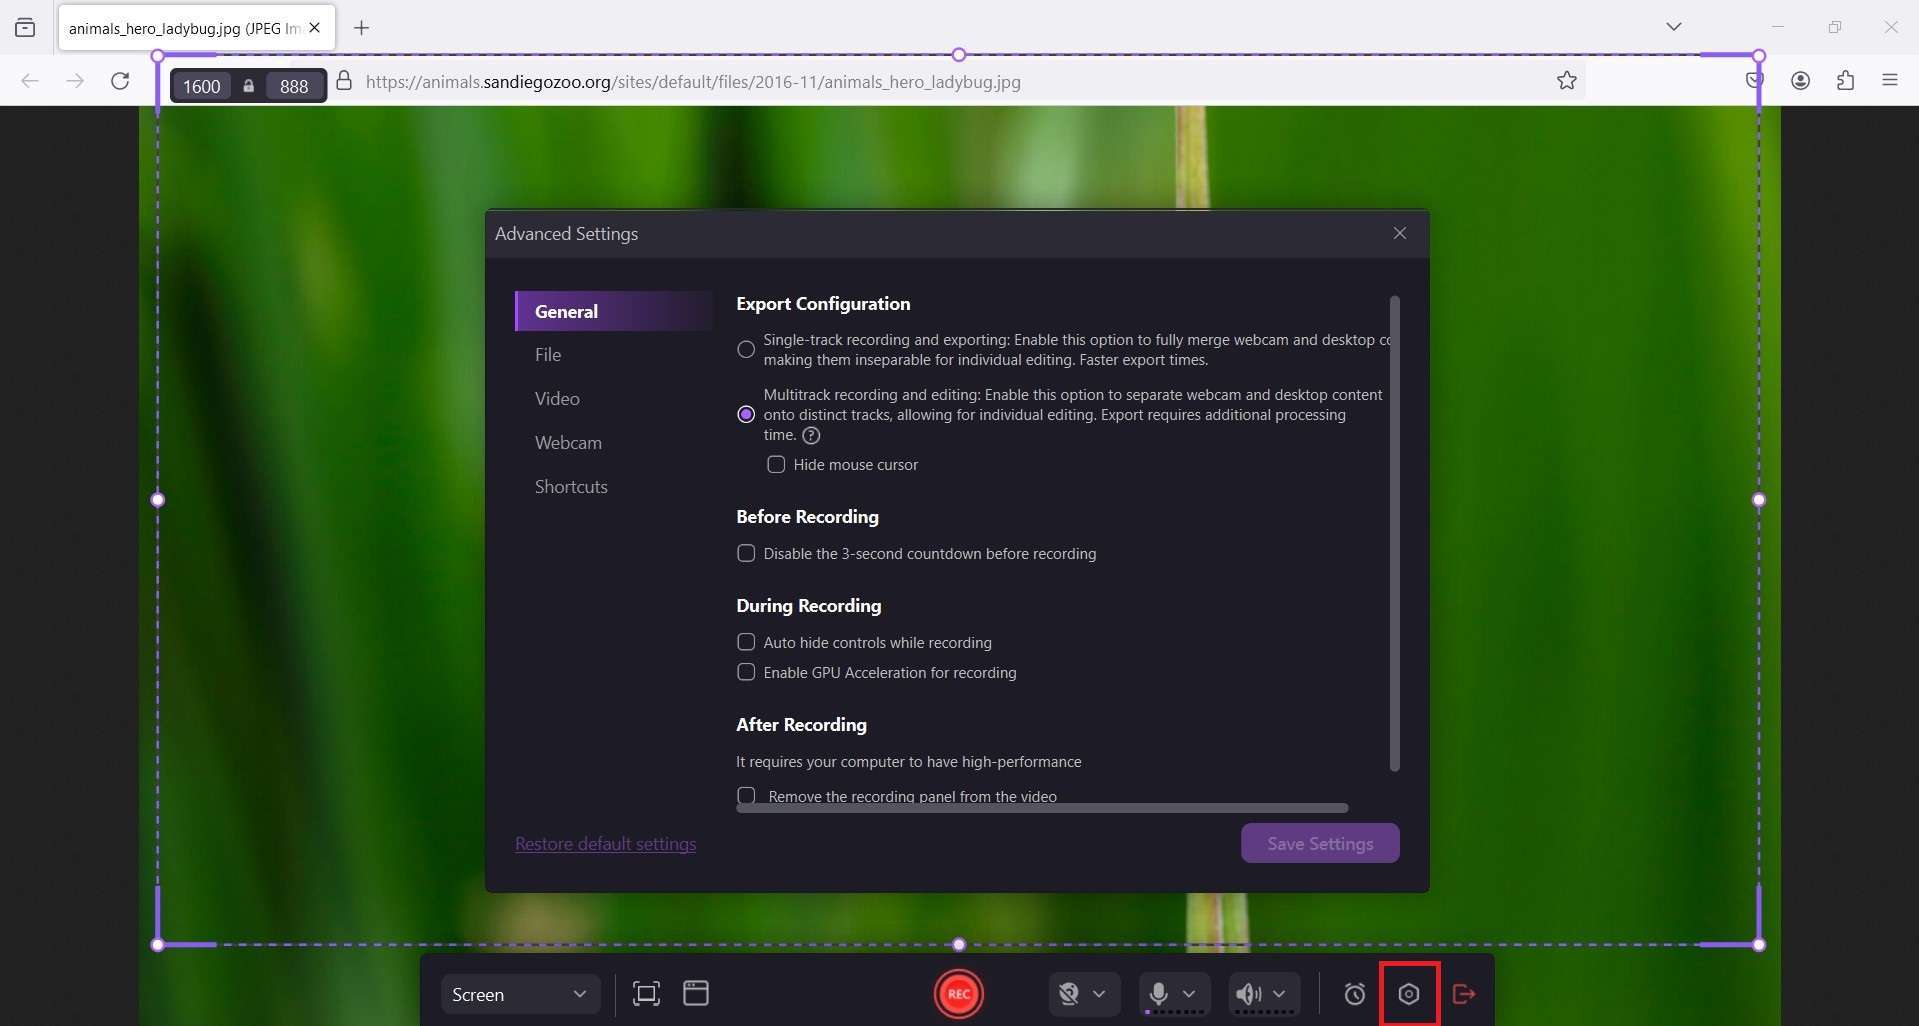
Step 7: Under Advanced Settings, DemoCreator allows you to hide the mouse cursor, set up Frame Rate, configure the Encoder, etc.
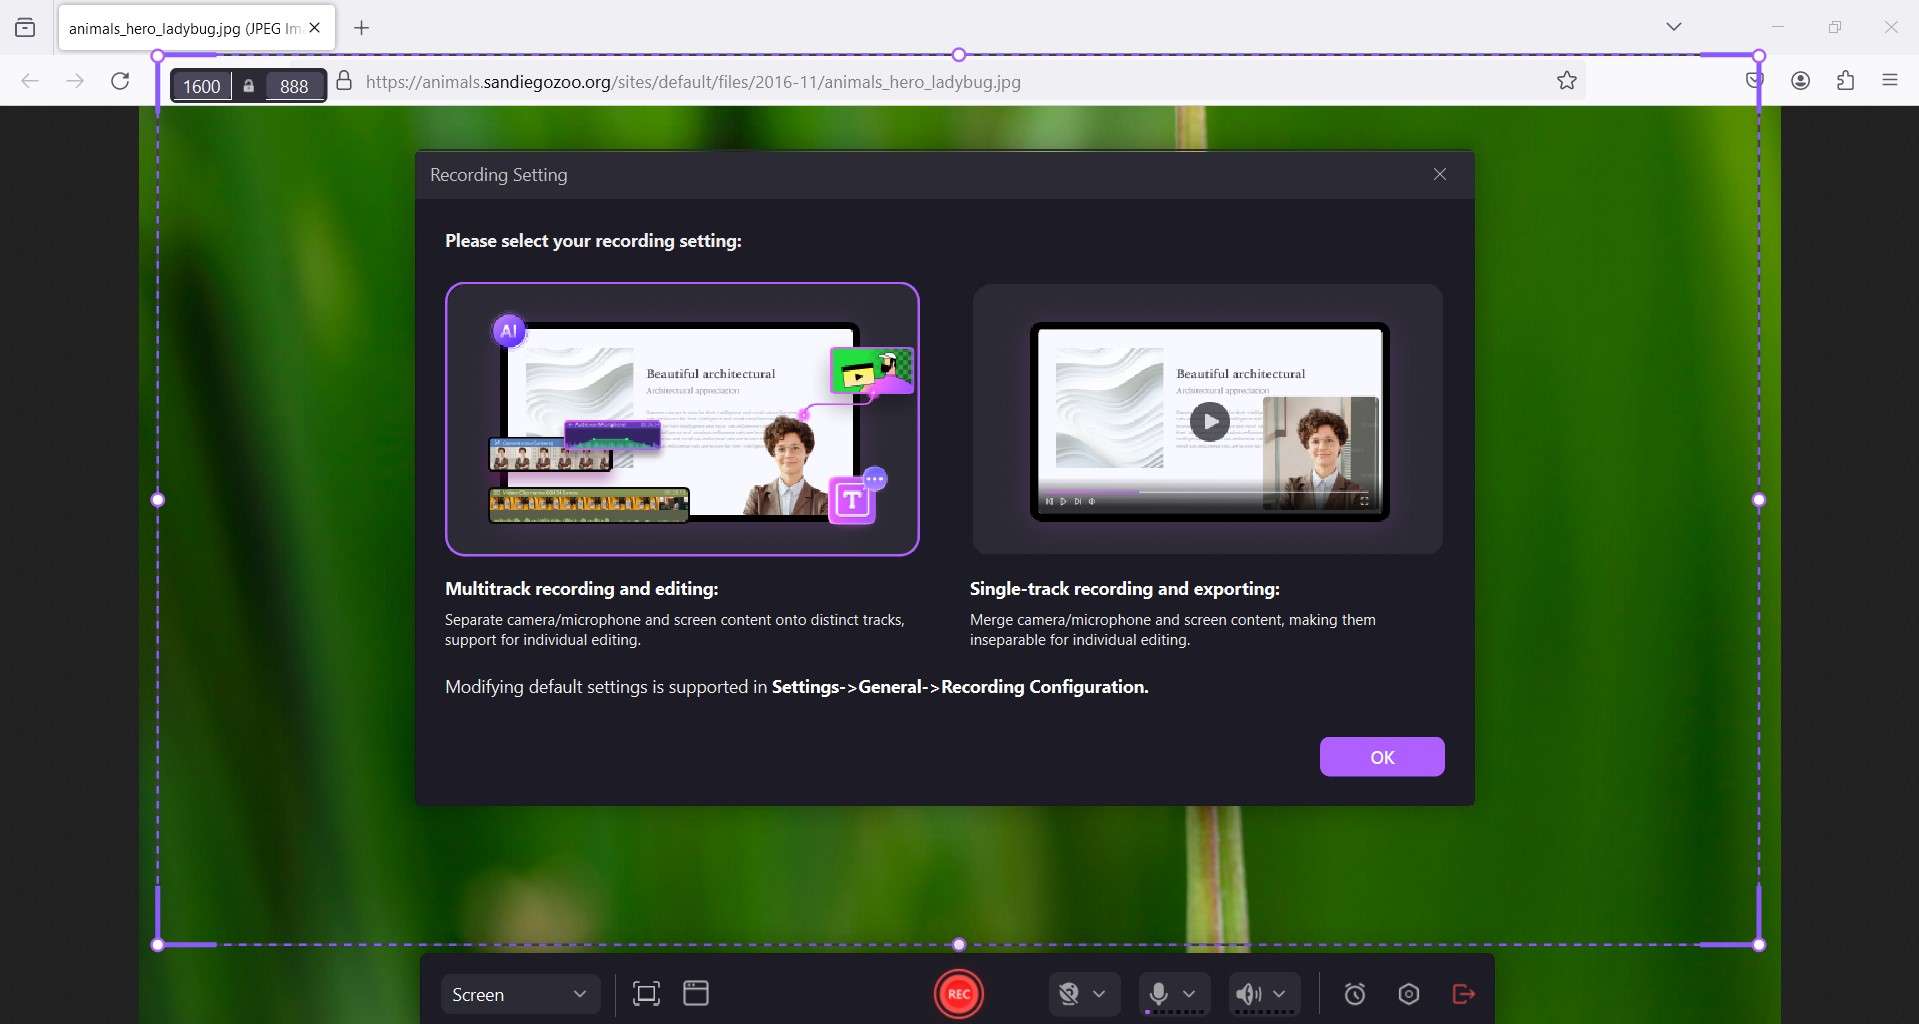
Step 8: To start recording your screen, click the red REC button and select one of two recording settings – Multitrack recording and editing or Single-track recording and exporting. We need a quick screengrab, so we’ll pick the second option.
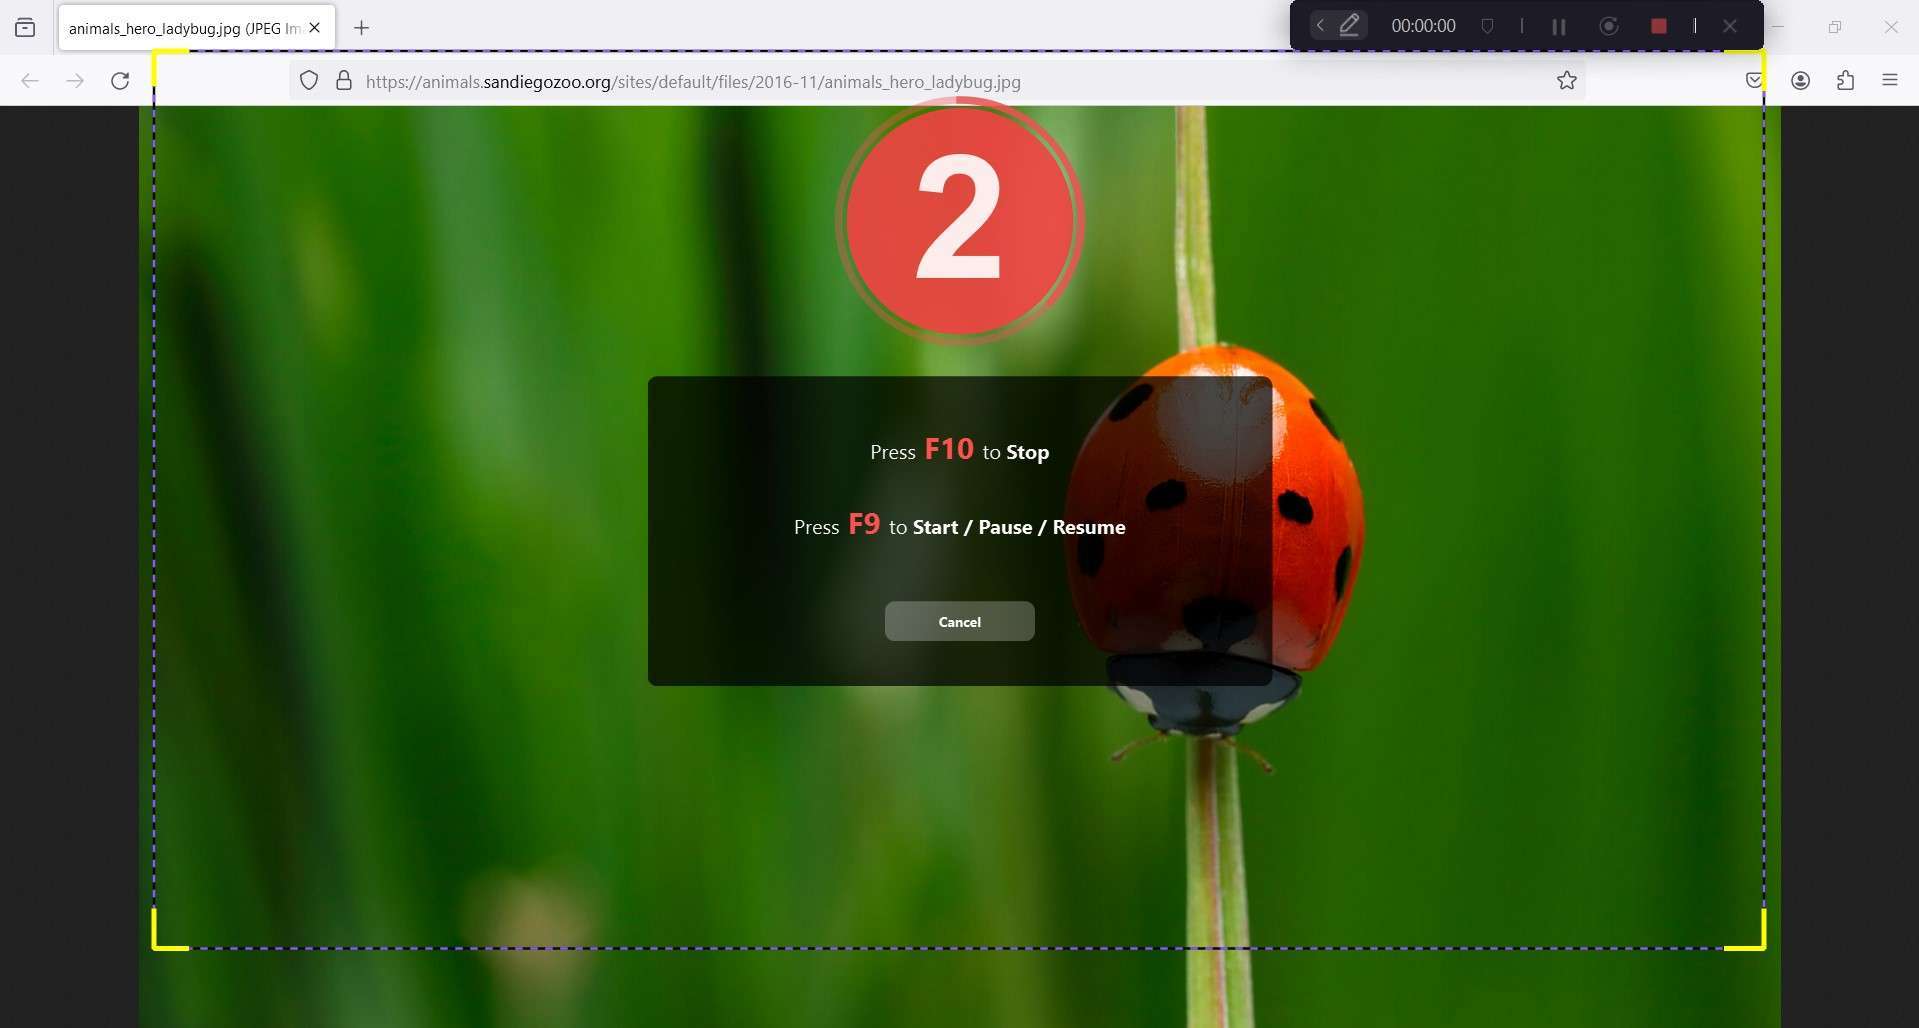
Step 9: Sit tight while DemoCreator records your Firefox screen. If you want to pause the recording, press F9. If you want to stop the recording, press F10.
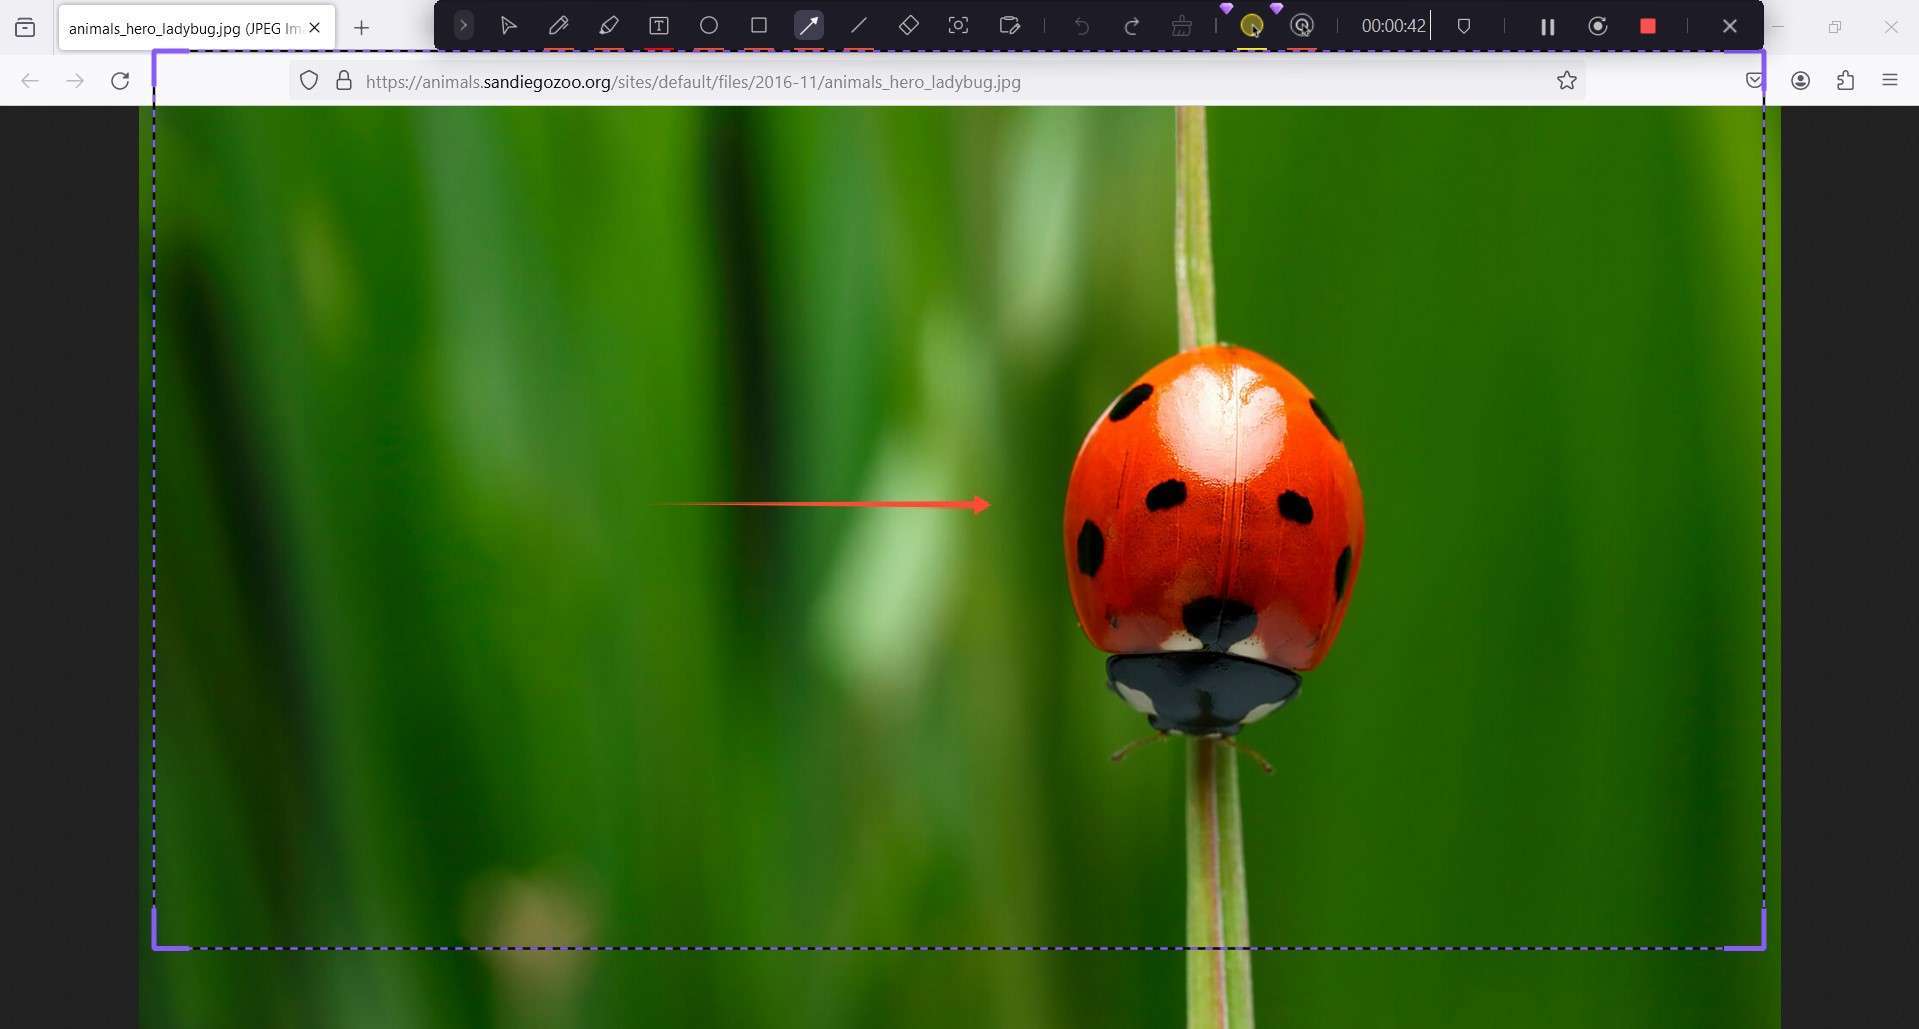
Step 10: To use the Screen Drawing tool, click the Pen icon in the Recording toolbar at the top of the screen. You can use free-hand drawing, add arrows, change color, etc.
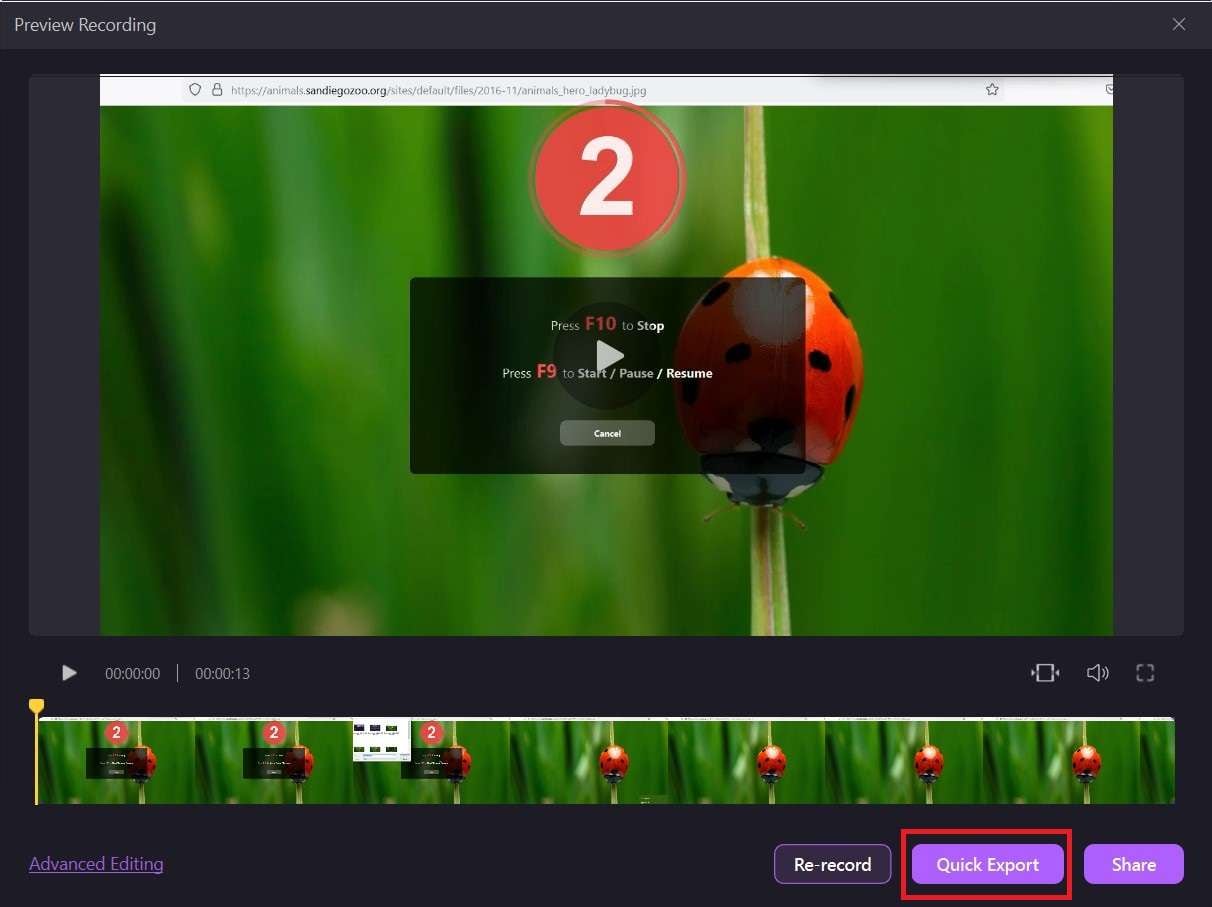
Step 11: When you’re done recording, you can preview the video and make changes if needed. DemoCreator lets you trim the video or choose Advanced Editing for additional features like Background Remover, Voice Changer, Auto Denoise, and more.
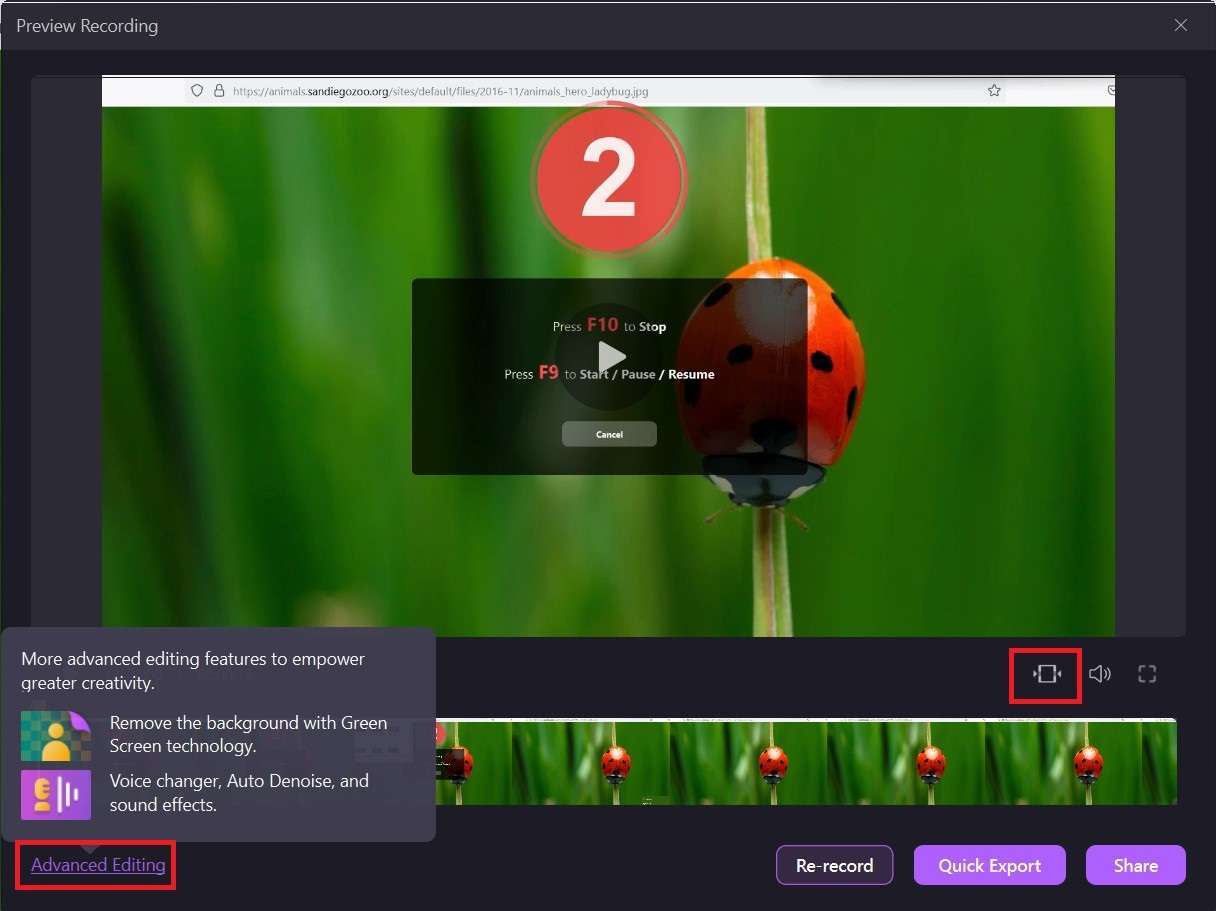
Step 12: Clicking the Quick Export button will export your video to your computer.
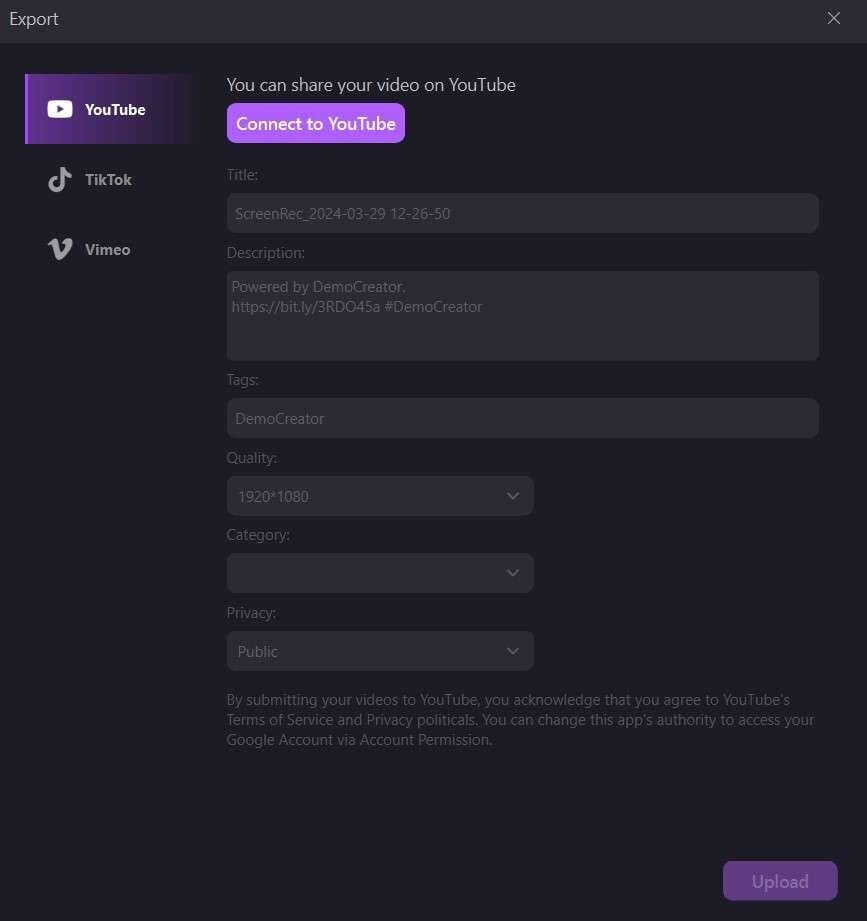
Step 13: Alternatively, you can share it online directly from DemoCreator. Hit Share and choose YouTube, TikTok, or Vimeo. Conveniently, you can also rename the video and write descriptions and tags before posting.
Method 2: Use the Firefox Screen Capture Feature
Unlike Google Chrome, Firefox comes with a built-in screen capture feature that you can use to grab screenshots while using this browser. Be warned: this is a convenient but simplistic tool with only two modes – full-page and visible area screenshots.
How to Use Firefox Screen Capture Tool
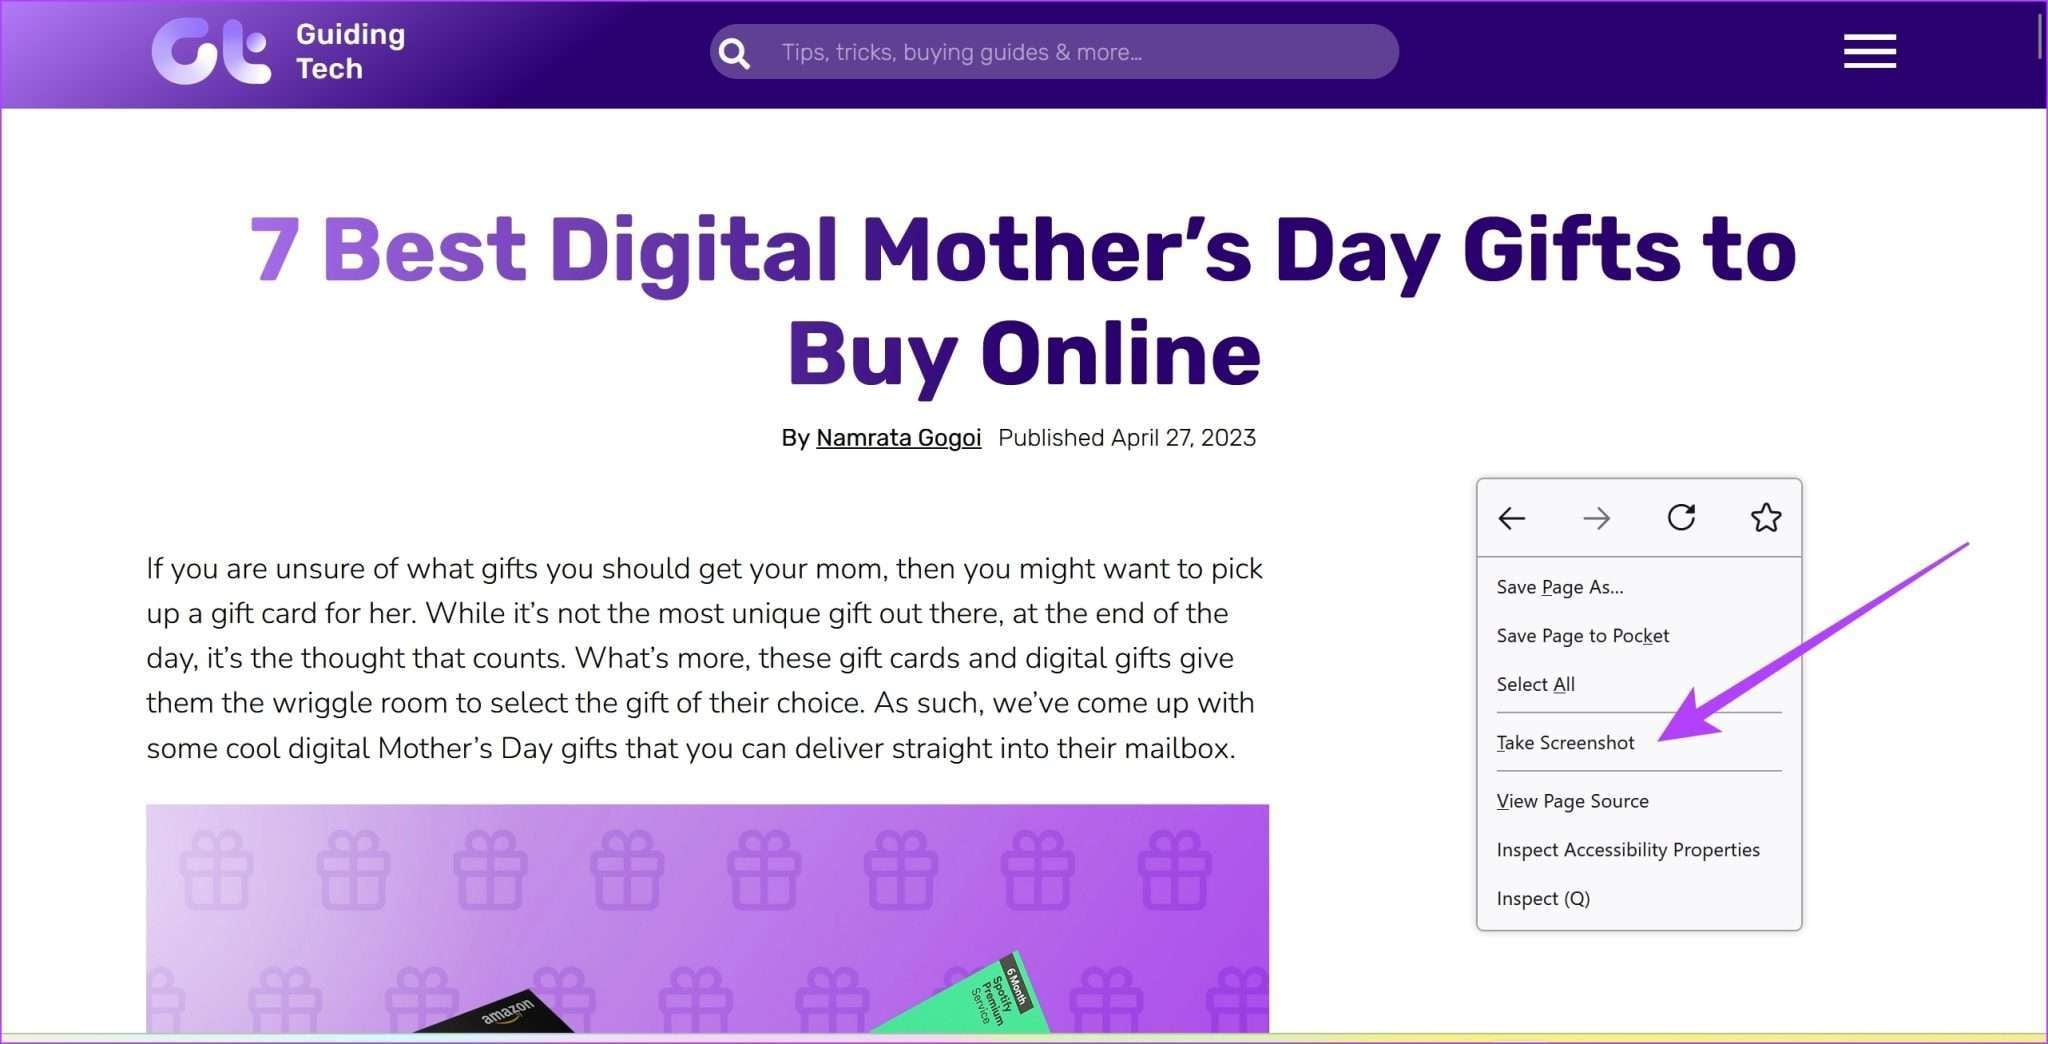
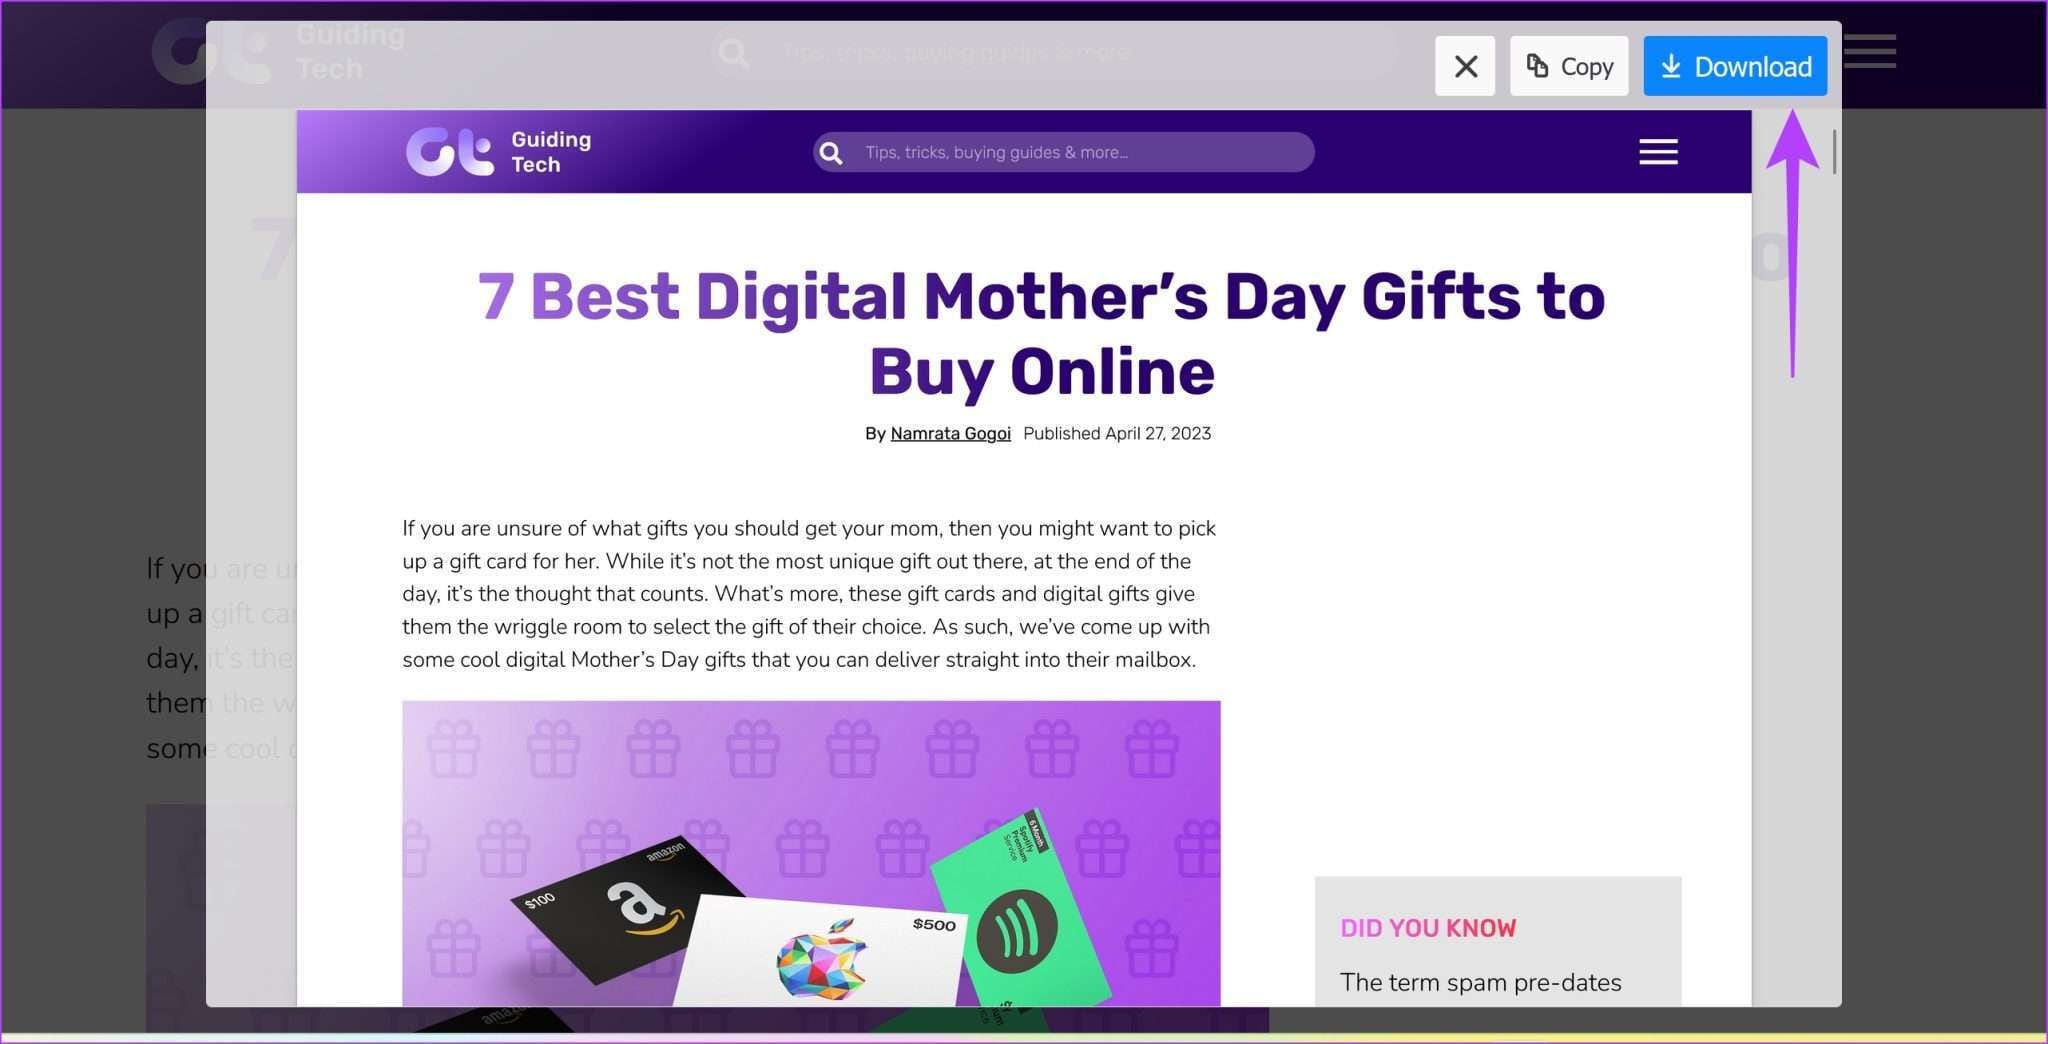
Step 1: Right-click anywhere on the screen and select Take Screenshot.
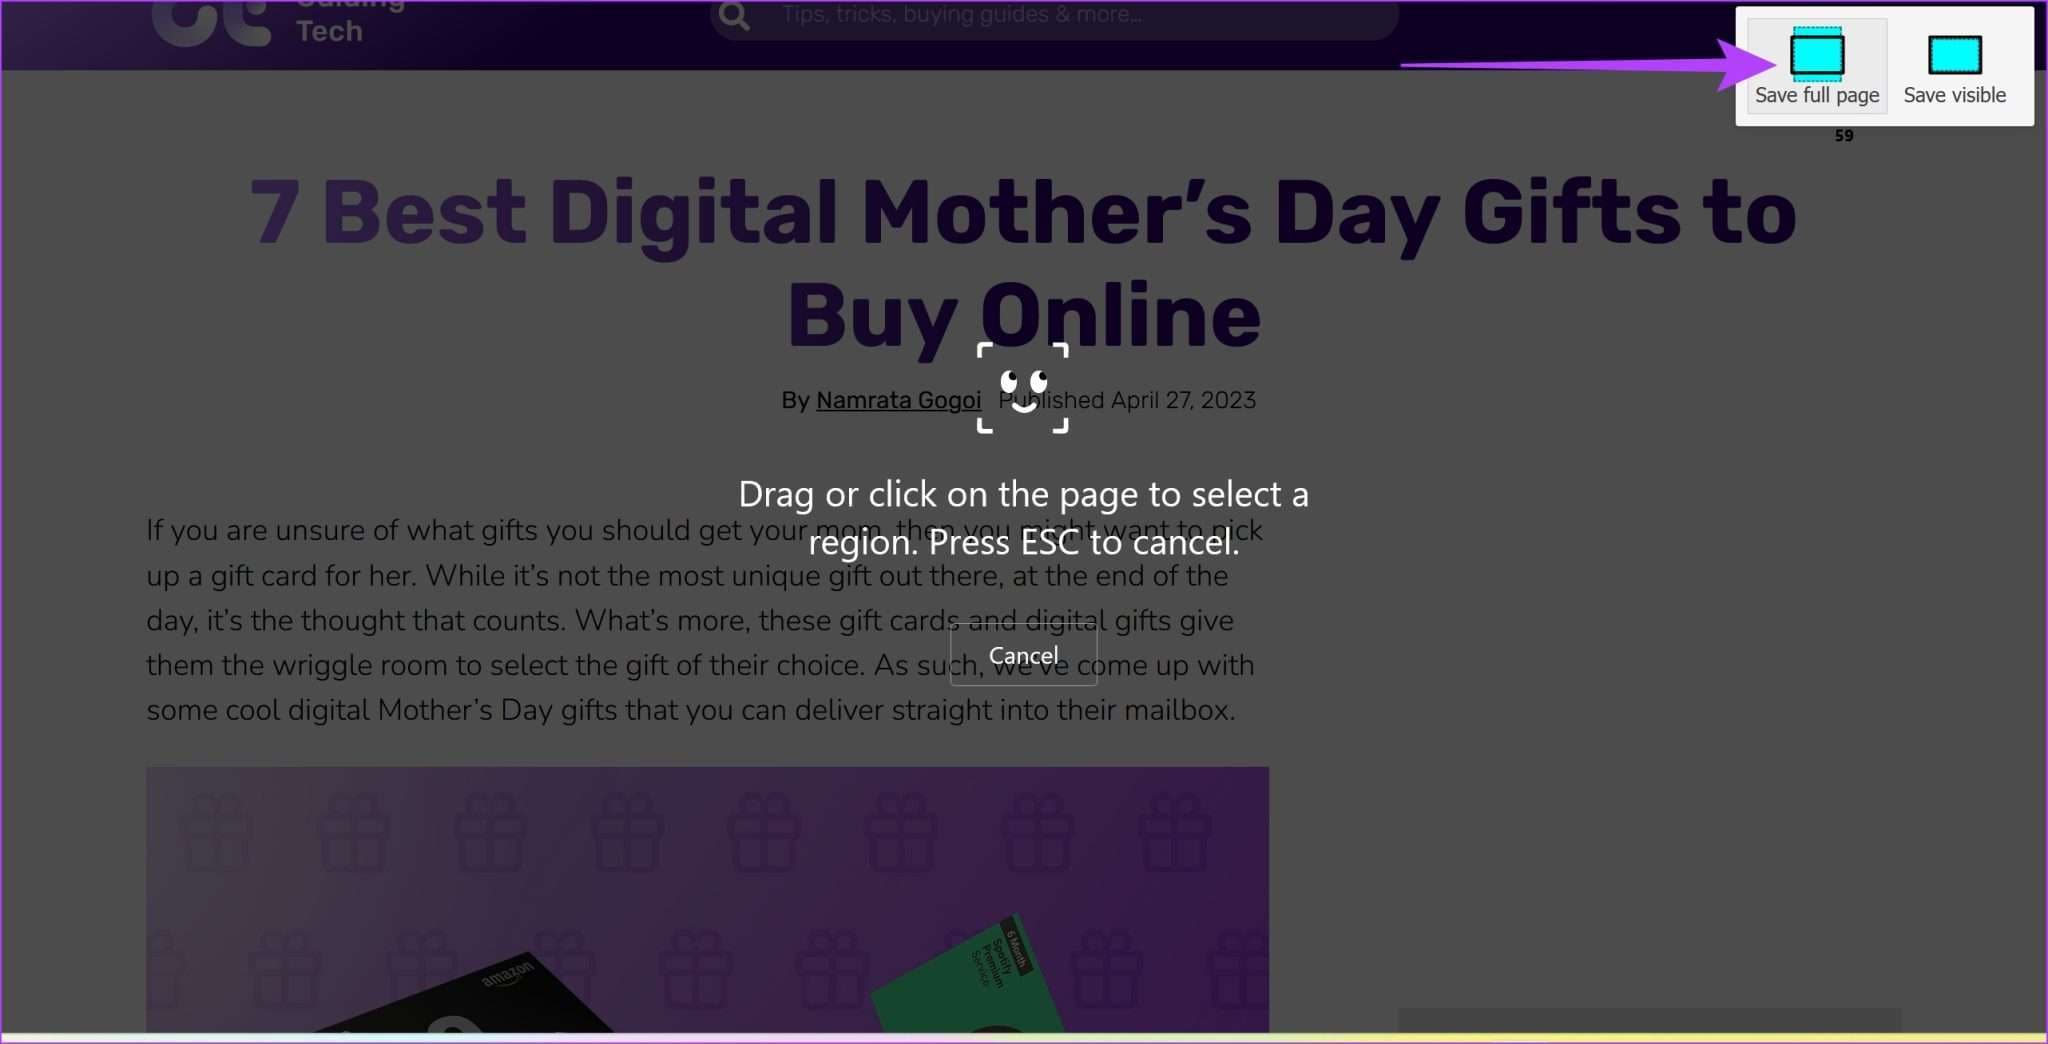
Step 2: Choose between two options – Save full page or Save visible.
Step 3: Click the Download button to save the screenshot to your computer.
Method 3: Use a Plugin to Capture Screenshots (Awesome Screenshot)
Firefox’s screen capture tool is admittedly poorly equipped to grab various screenshots, let alone handle creative editing like DemoCreator. Try the screen capture extension Awesome Screenshot if you need something between these two solutions.
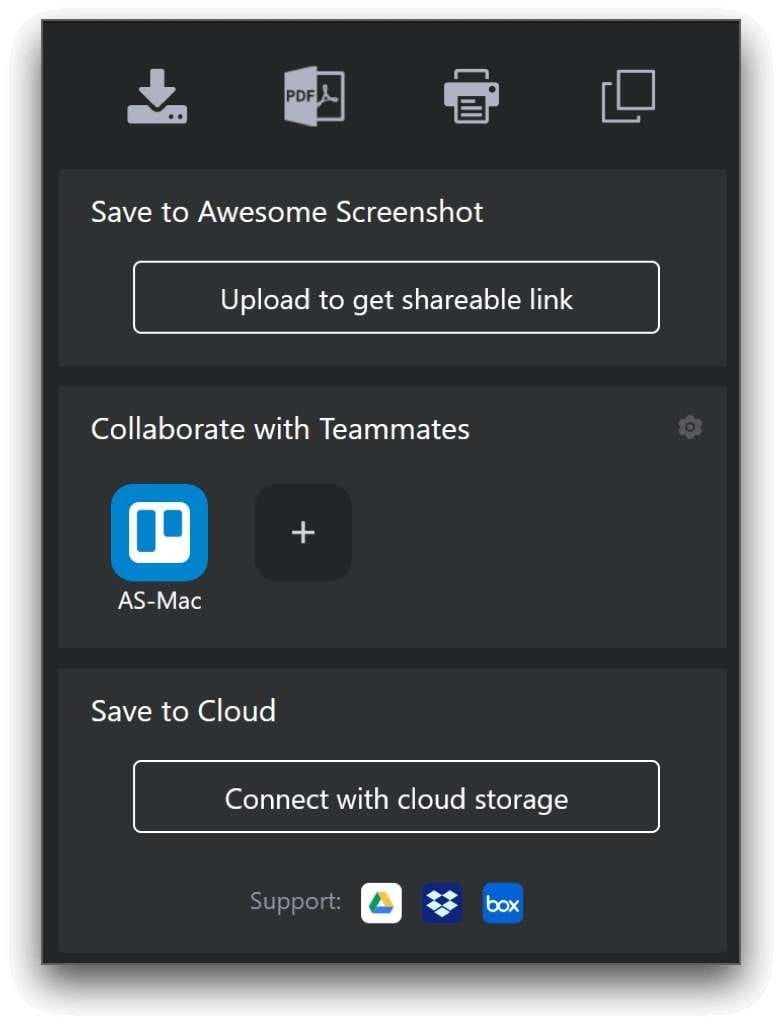
This lightweight tool has many creative options, allowing users to annotate screenshots, perform basic editing, save as PDF, and print the screen.
How to Use Awesome Screenshot Add-On for Firefox
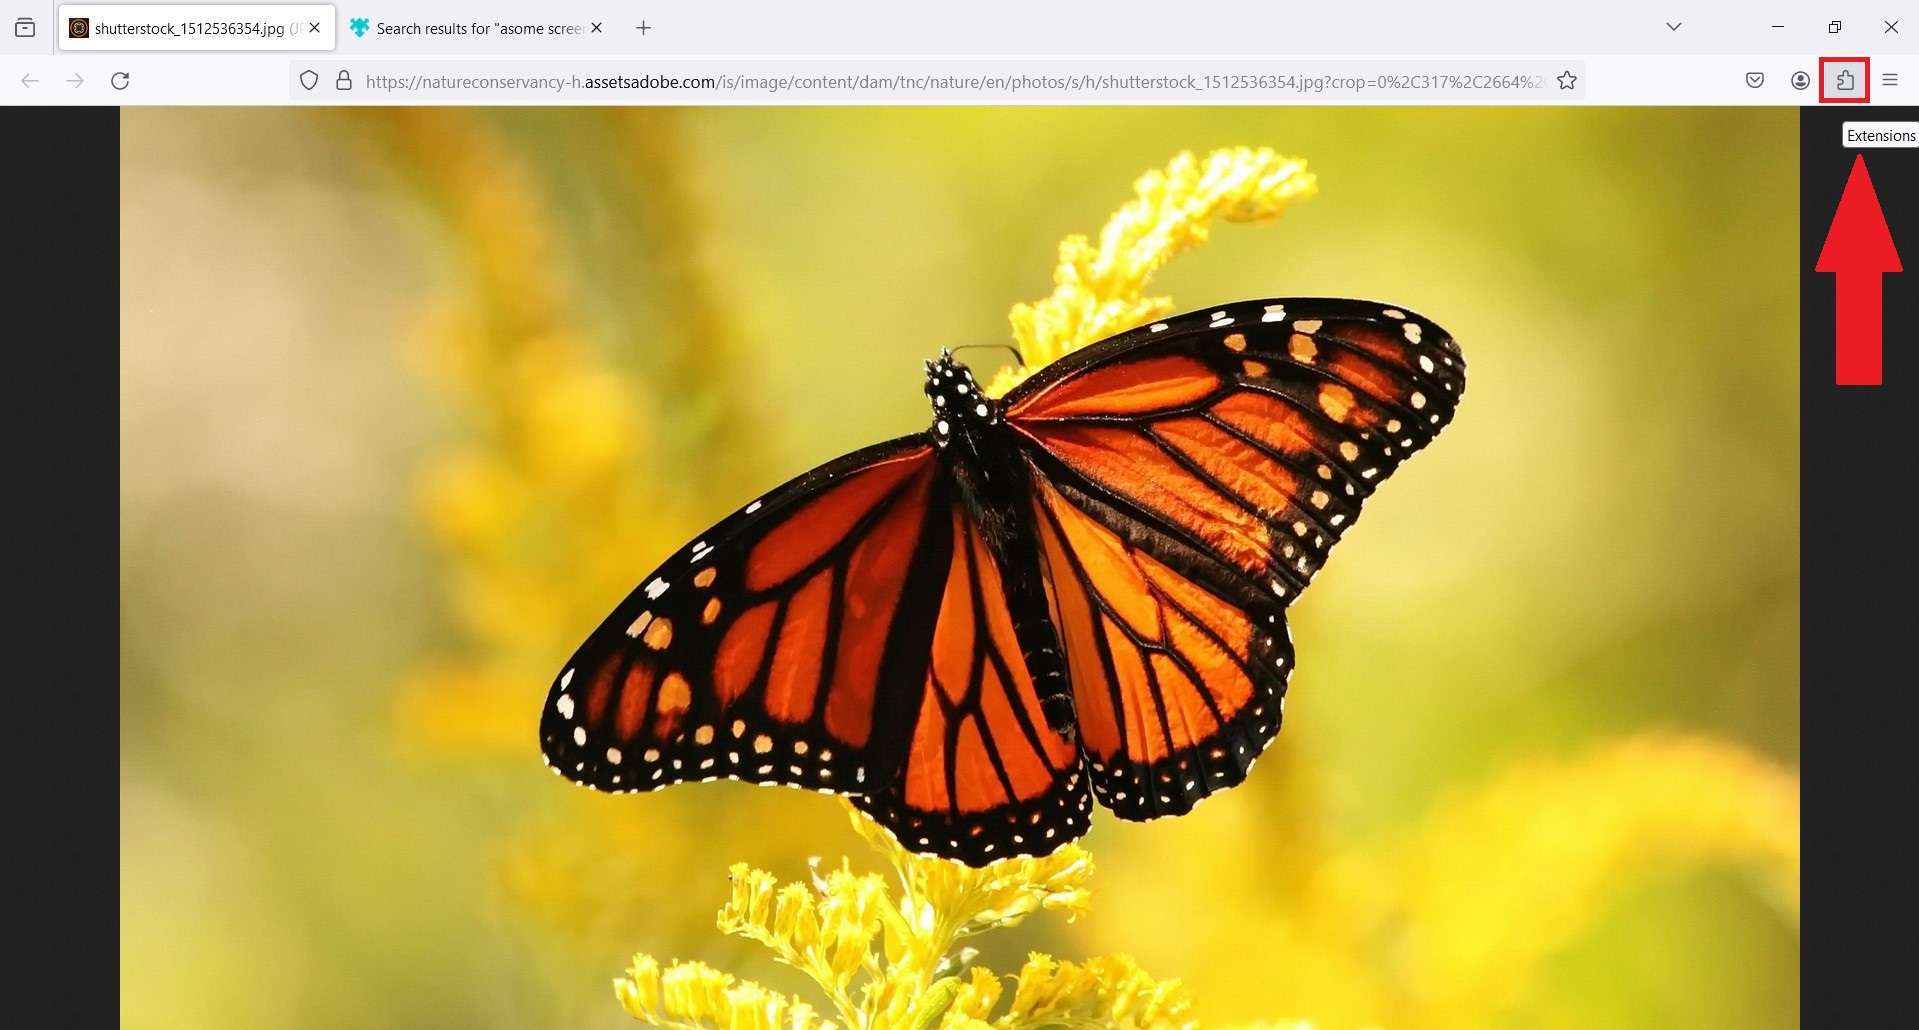
Step 1: Click the Extensions button in your Firefox browser to find and add Awesome Screenshot.
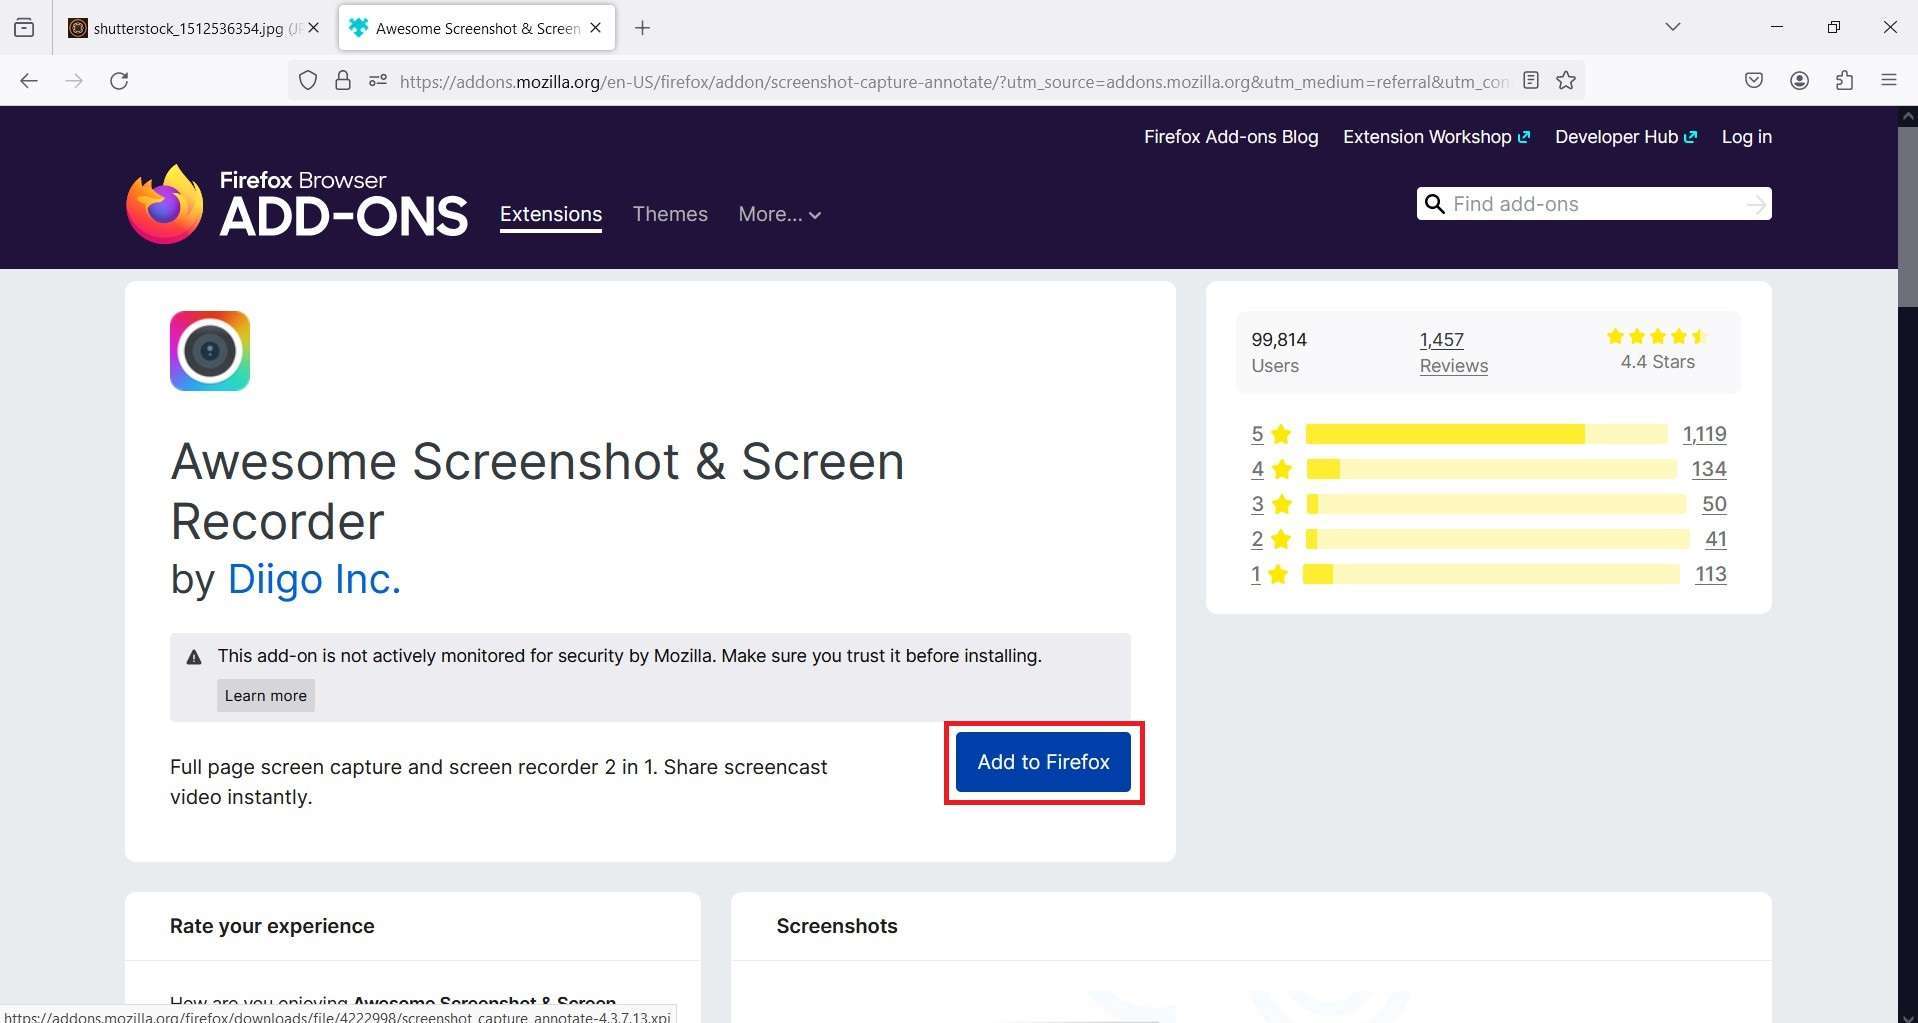
Step 2: Hit Add to Firefox, customize cookie settings, and create your account.
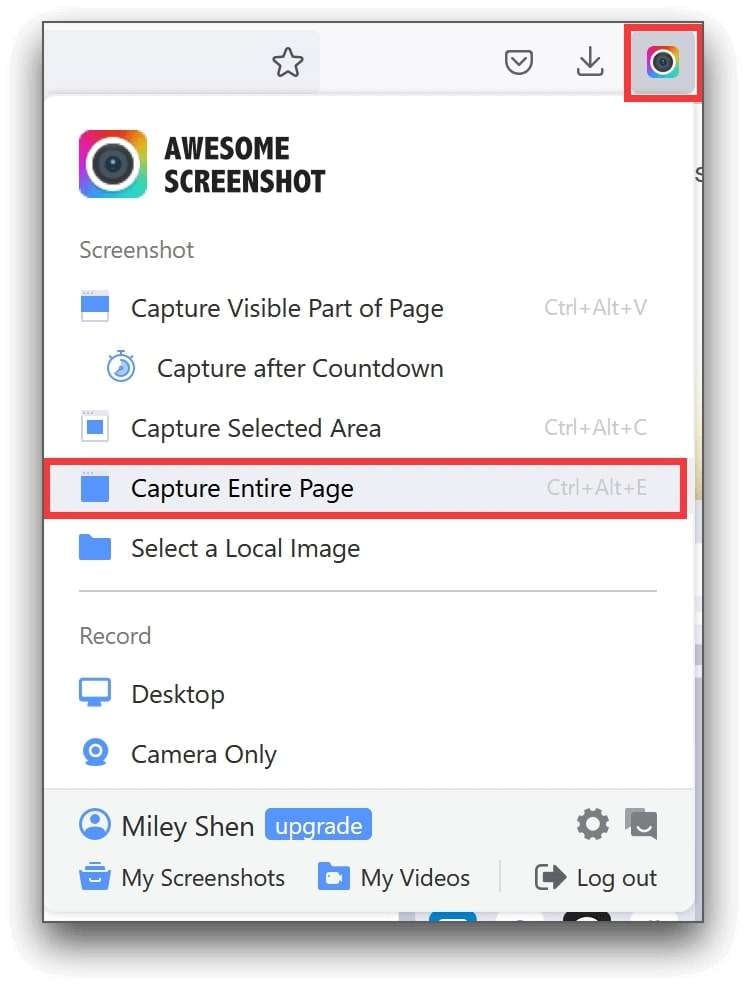
Step 3: When you’re ready to capture the screen, click on the Awesome Screenshot icon in the toolbar and choose your preferred type of screenshot. You can Capture Visible Part of Page (there’s a Capture after Countdown option, as well), Capture Selected Area, Capture Entire Page, or Select a Local Image.
Step 4: When the screenshot is taken, you can annotate and edit it using the tools from the extension bar.

Step 5: Awesome Screenshot lets you download the screenshot, save it as a PDF, print it directly from Firefox, and copy it to the clipboard.
Method 4: Grab a Firefox Screen with LightShot Screen Capture Tool
LightShot Screen Capture Tool is not Firefox-specific. You can download and use it on Windows and Mac computers to grab screenshots and edit them on the spot. It also includes share and print buttons and a Similar image search feature that could be useful.
How to Use LightShot Firefox Screen Capture Tool
Step 1: Download Lightshot from the official website and install it on your computer or add a Firefox screen capture extension version of LightShot.
Step 2: Press the Print Screen key on your keyboard.
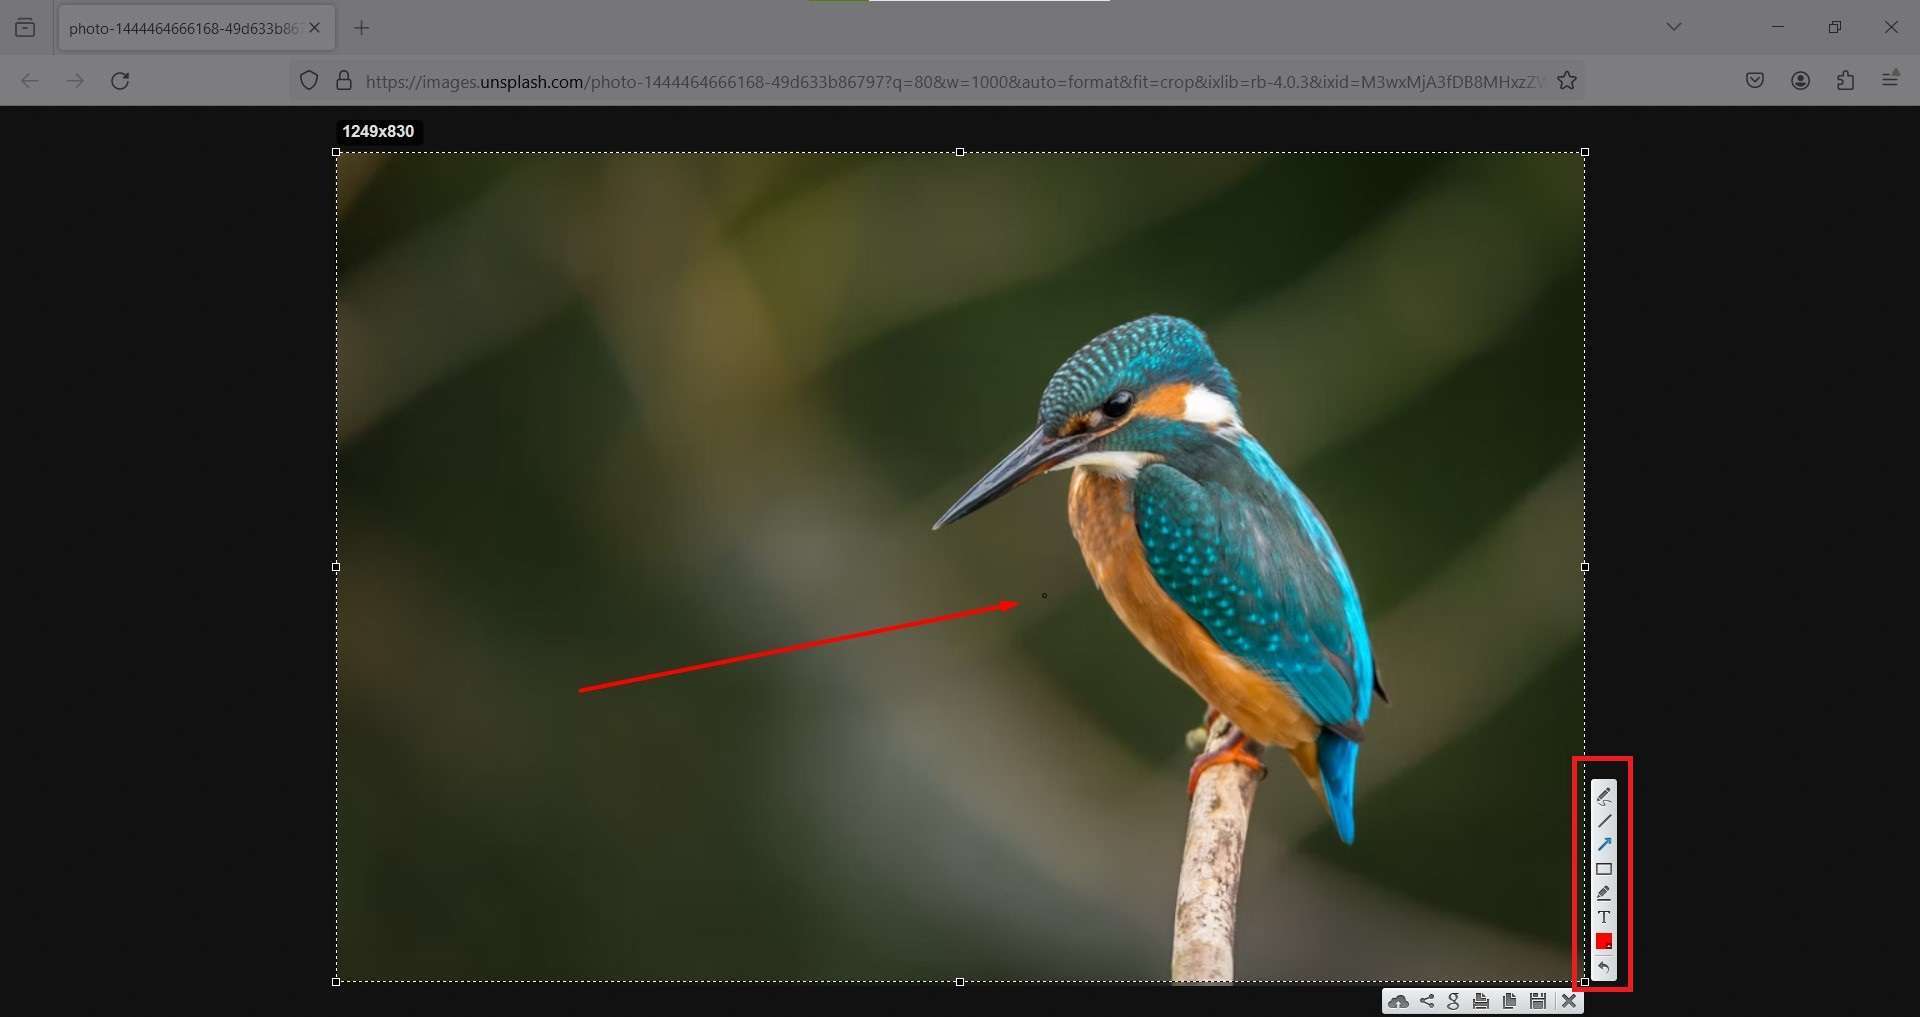
Step 3: If you want to, you can resize the capture area and experiment with different editing tools. Lightshot allows you to write, draw, add arrows, and more.
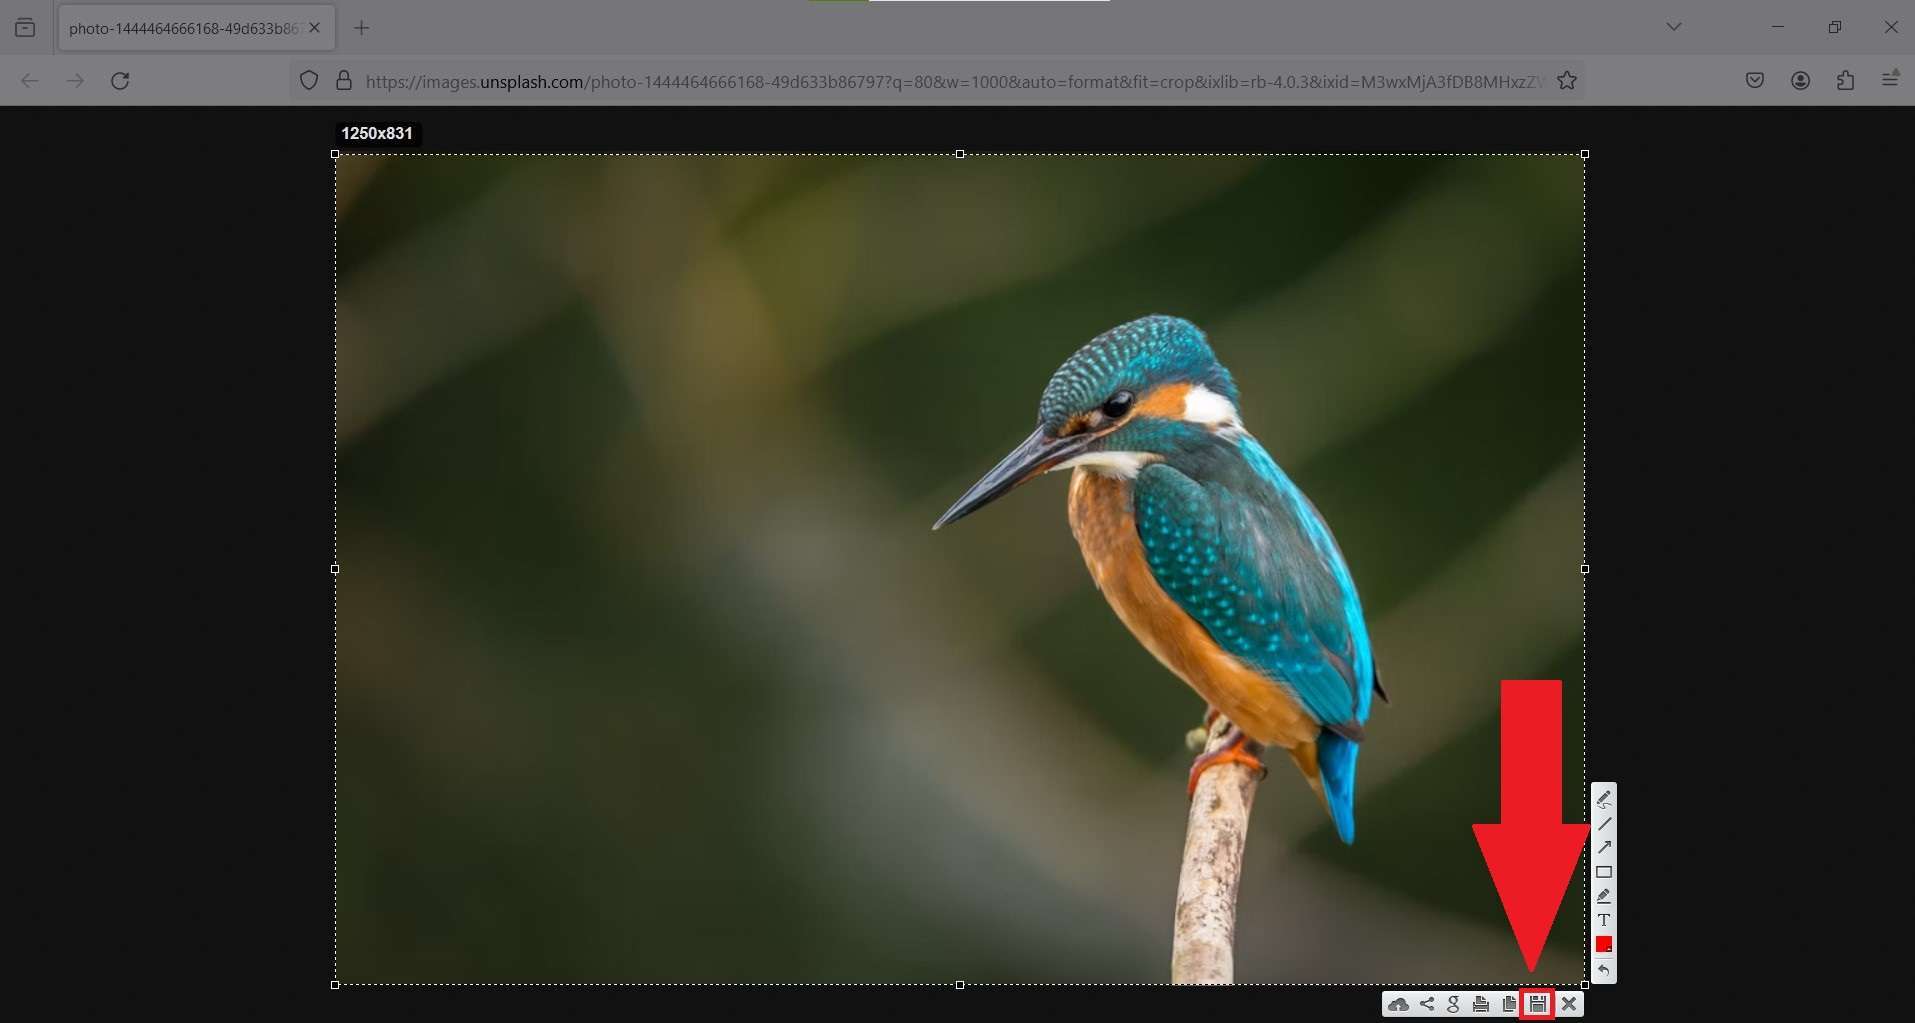
Step 4: To save your screenshot, click on the Disk icon. Alternatively, you can share the image, perform a Similar Image Search, print the captured area, or copy it to the clipboard.
Conclusion
As you can see, there are many different ways to capture and record your screen while using Firefox. The quickest way to do this is with the browser’s own screenshot tool, but you won’t be able to make custom screenshots or edit them, and most users need these functionalities.
The other two options you have are screen recording software and third-party extensions. While both have their pros and cons, the software is superior in terms of editing. If you need both convenience and robust customization features, use Wondershare DemoCreator.
FAQ
-
Is there a built-in screen capture feature on Firefox?
Yes. It has a built-in screen capture feature that you can use to grab your screen. However, this is a basic tool with no editing capabilities. The only customization option offered to users is a full page mode instead of a visible area screenshot. -
Can I use extensions to capture the screen on Firefox?
Yes. You can add many screen capture extensions, some better than others. One of the best screenshot extensions for Firefox is Awesome Screenshot. To find more options, go to the Extensions tab in your browser > Find more add-ons and search for screenshot tools.


