

Where do Zoom recordings get saved on a Mac? Many Mac users ask this question, wondering how to locate and play their recorded meetings.
The answer is pretty straightforward. You only need the Finder, your desktop Zoom client, or Zoom's web portal to reveal the location of your local or cloud recordings.
Here's where to find recorded Zoom meetings on a Mac.
Table of Content
Where Do Zoom Recordings Go on a Mac by Default?
When you record a Zoom meeting on Mac, where does it go? It depends on your subscription. As a non-subscriber, you can only save Zoom recordings on your computer. As a premium user, your meetings automatically go to the cloud, but you can also enable local recordings.
Where does Zoom save recordings on Mac computers? The default location is a dedicated Zoom folder in Documents.
Here's where to find Zoom recordings on a Mac:
- Go to /Users/[Username]/Documents/Zoom.

- Each folder's name includes a meeting date, time, name, and ID, making finding Zoom recordings on a Mac a breeze. Type them in the Finder's search box to quickly locate what you need if you have a long list of recordings.

- Once you open the desired Zoom meeting's folder, access the M4A (audio only), M3U (a transcript), and MP4 (video and audio) files.

Where do Zoom recordings go on a Mac if they aren't in the default location? If you've changed it at some point, your desktop Zoom client or Zoom's web portal can help you find it, so keep reading.
How To Access Zoom Recordings on a Mac With the Desktop Zoom Client
Your desktop Zoom client offers the most straightforward way to locate recorded meetings. Here's how to find Zoom recordings on a Mac:
- Launch Zoom on your desktop, log into your account, and go to Meetings > Recorded.
- Click the desired meeting in the left panel and see the recording path on the right. If it's a cloud recording, you'll have the View instead of the Open option, taking you to the Zoom Cloud, where you can play and manage the file.

How To Access the Zoom Recording Location Using the Web Portal
Zoom's web portal is perfect for finding and managing recorded cloud and local meetings. However, you can only open local recordings on the original recording device.
Here's how to access Zoom recordings on a Mac through the web portal:
- Log into the Zoom web portal and click My Account.

- If you're a regular user, go to Recordings > Local Recordings.

- If you're an admin, go to Account Management > Recording Management > Local Recordings.

- Find the desired Zoom meeting and see the file path under Location and the device under Computer Name.

How To Find Zoom Recordings in the Cloud
Finding Zoom recordings in the cloud is a walk in the park because you have a search box and helpful filters.
Here's how to find recorded Zoom meetings on a Mac using the web portal's cloud:
- Log into the Zoom web portal and go to My Account > Recordings (or Account Management > Recording Management if you're an admin) > Cloud Recordings.

- Specify a date range, search by meeting topic or ID, and filter the results by status.

- Once you find the desired recording, click it to access playback options, hit More > Download to save it to your Mac, or click Share to copy a shareable link to the clipboard.

How To Change the Zoom Recording Save Location
Would you rather have your locally recorded Zoom meetings in another directory? You can quickly change the default Zoom recording location on a Mac. Here's how:
- Launch Zoom on your Mac using the desktop client, click your Profile picture, and go to Settings.

- Click Recording in the left sidebar.

- Click the File Path field under Local Recording to expand it and click Choose a new location. Once you pick one, your future Zoom recordings will be in that directory.

Bonus: How To Record Zoom Meetings With a Third-Party Video Recorder
Why would you need a third-party video recorder for Zoom meetings when Zoom has recording capabilities? For starters, it doesn't let you edit your recordings.
Why even edit Zoom meetings? Because you can remove background noise like hums, hisses, or mouse clicks and cut unnecessary parts to fine-tune recordings for onboarding and other training sessions.
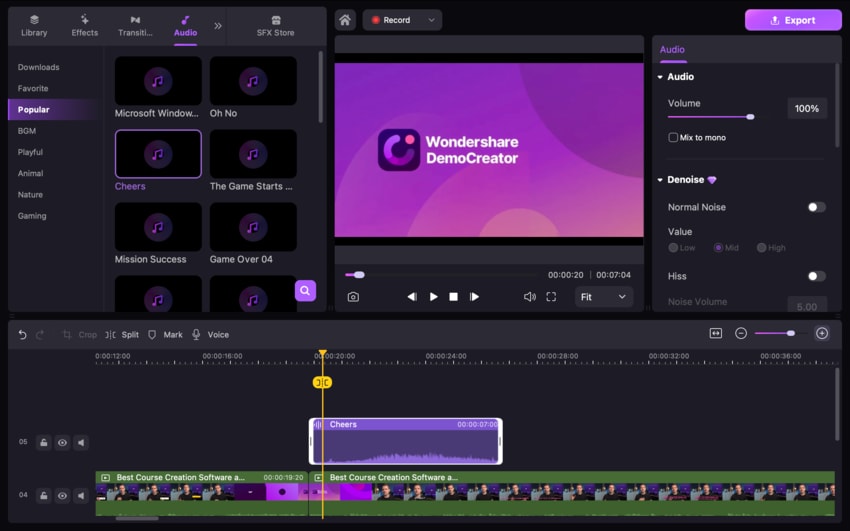
Have you tried Wondershare DemoCreator? It shines in the editing department, providing many AI-powered tools, including a denoiser, voice changer, and auto-caption generator. It can also create automatic subtitles to localize your recordings. Furthermore, it has audio and video effects, transitions, annotations, dynamic stickers, and other over 5K creative assets.
As for recordings, it lets you capture the entire screen or a selected portion (e.g., a Zoom window) or choose an aspect ratio. More importantly, it can simultaneously record your microphone and system audio, saving separate tracks for seamless editing. It also separates your screen and camera clips.
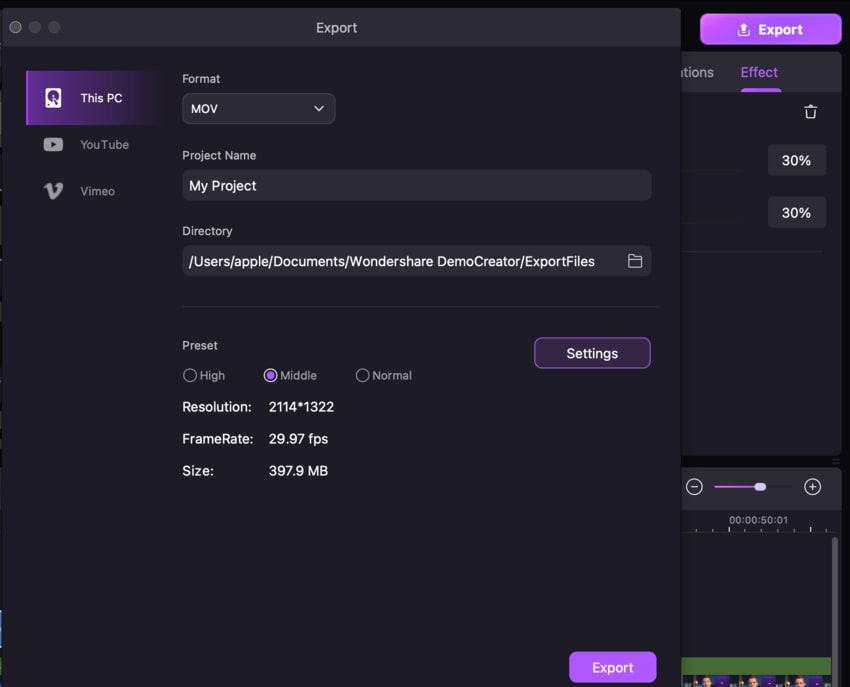
Where do recorded Zoom meetings go on a Mac after using DemoCreator? The default location is /Users/[Username]/Documents/Wondershare DemoCreator/ExportFiles, but you can change it when saving each recording.
- Record desktop screen, audio, and webcam simultaneously
- Various annotation tools to emphasize important points
- Edit videos quickly with a wide range of professional tools
- Export to MP4, MOV, MKV, GIF and multiple formats

Here's how to record a Zoom meeting on a Mac using Wondershare DemoCreator:
- Click the Sound control icon in the menu bar to check which speakers are your default audio output device.

- Launch Zoom and click the Chevron button next to the Microphone icon to expand the Audio Settings. Choose the same speakers as above.

- Download and install Wondershare DemoCreator for macOS.
- Launch the software and create or log into your account.
- Open the All-in-One Recorder.

- Choose Custom under Capture Area and select the entire or part of the Zoom window. Then, choose your recording scheme, system audio, microphone, and webcam, start or join a Zoom meeting, and click the REC button.

- Once the meeting ends, hit the Stop button and fine-tune your recording in the Video Editor (it will launch automatically with the Edit Recordings scheme).
- Click Export to save the file to your Mac. Choose the format, name, directory, and quality, and hit Export.
Conclusion
Zoom automatically saves premium users' recorded meetings in the cloud, streamlining access across devices. Where are Zoom recordings stored on a Mac? Whether you're a subscriber or a free user, you can find them in the Zoom folder in Documents.
However, if you ever change and forget the location, Zoom's desktop client and web portal and your Mac's Finder can help you locate it.
Unfortunately, you can't edit recorded meetings in Zoom, but you can add Wondershare DemoCreator to your trusted toolbox. This professional recorder and editor is your go-to solution for all screen recordings, so try it for free to see how it suits your needs.
FAQ
-
Where is the Zoom recording saved on a Mac?
The default Zoom recording location on a Mac is /Users/[Username]/Documents/Zoom. -
Why can't I find my Zoom recording?
Ensure you've logged into the correct account (if you have more than one) on the original recording device. You can't access local recordings on another computer. However, many Zoom hosts and co-hosts set meetings to auto-delete after a specific period. Therefore, the one you're looking for may be gone if you had permission to access it but weren't an admin. -
How can I download a Zoom meeting recording?
Follow these steps to download a Zoom meeting recording:- Log into Zoom's web portal and click My Account.
- If you're a regular user, go to Recordings > Cloud Recordings. If you're a host, go to Account Management > Recording Management > Cloud Recordings.
- Find the desired meeting and click More > Download to save it to your device.
-
How do I save a Zoom recording to my computer?
Once you start a Zoom meeting, click Record > Record on This Computer or use the Shift + Command + R shortcut. That will automatically save the recording to your Mac. -
Do Zoom recordings automatically save?
Zoom automatically saves recordings on a local computer for free users and in the cloud for premium subscribers. However, the latter can enable local recordings for dual storage. -
Are Zoom recordings stored forever?
You don't have to worry about losing your cloud recordings because they don't expire (you only need to consider storage capacity). The same goes for local files. However, hosts and co-hosts can set a particular retention period for each recorded meeting, automatically removing it from the cloud afterward. -
Is it better to record Zoom to the cloud or a computer?
It depends on your preferences. Locally saving Zoom recordings means enjoying instant access after meetings; cloud processing can take 30–60 minutes. You can also view and manage local recordings without an internet connection. However, cloud recordings provide automatic transcription files, shareable links, and 24/7 access across internet-enabled devices and don't take up space on your computer.


