
Wondershare DemoCreator
An essential demo-making tool that helps learners, educators, freelancers, and gamers to take idea-sharing to the next level.

Do you want to know how to add a virtual presenter to your video? We are here to tell you in detail.
Part1 Why will You Need Virtual Presenters
In business, there’s one skill that every person get mastered is how to be a strong virtual presenter. It helps people in presenting their thoughts or ideas without an in-person connection.
Every person now has to show up on video calls to present their brand, product, or service professionally and compellingly.
The primary purpose of presenting virtual is to maximise the audience and minimise distraction. Virtual presenters are responsible for introducing and interviewing guests and generally holding the guests together. You will need virtual presenters in
● Webinar
● virtual class
● live streams
● Presentations
● Communication
You can present videos to achieve your goals virtually, whether converting prospects into customers or building your brand. It saves you time. You don't need to get up every day and travel outside to attend meetings.
It is helpful in engaging customers and increasing interaction.
Part2 How to Record Virtual Presentation Video
There are many tools to record virtual presentation videos, but DemoCreator is best.
Let us introduce you to DemoCreator and its feature to record virtual presentations.
DemoCreator:

It is software that allows you to record, edit, and export videos. It’s a free and all-in-one editing tool with multiple features. It’s easy to use and web-based program.
Features of DemoCreator:
● Record with Audio:
It enables you to record your video with voice by using the microphone.
● Record with Virtual Webcam:
You can make virtual presentations as well.
● Record with the Camera:
It allows you to record video with Webcam.
● High-Quality Videos
It provides you with high-quality videos/HD resolution to attract and engage the audience.
● Voice Changer
It allows you to sound like someone else by changing your voice
● Change Background
You can change your background using green screen technology, as it’s required to produce a good video.
● Denoise
You can denoise the video; remove the irrelevant sound. It can also make your content worse. So, it's better to remove the unwanted sound.
● Cut/Split
You can split, cut, and trim the video and keep the desired portion of the created content.
● Add Voiceover
You can voiceover and add instructions according to the content so that your viewers can understand what you’re up to.
● Add Closed Captions
Closed captions can be added for a better understanding of the audience. Adding captions is an effective way to message the viewers.
● Add Annotation
It also allows you to add dialogue boxes, arrows, sketch animation, and shapes to your recorded video.
● Add Stickers
DemoCreator has prepared a variety of stickers such as animation effects, gestures, background, social media, etc.
● Add Transitions
It allows you to add transitions such as erase, evaporating, fading, etc., to attract the audience and add a natural effect to the content.
● Control Speed
It allows you to control the video's speed, increase or decrease.
● Multiple Formats
It allows you to export your created content in many formats that suit your device, such as MP4, WEBM, AVI, etc.
● Record Multiple Screens
It allows you to capture multiple screens simultaneously.
● Draw on Screen
It lets you draw on the screen to make your viewers understand specific points.
● Zoom and Pan
You can also use zoom and pan effects in this software.
● Animation Templates
You can use different animation templates to make your videos interactive and engaging.
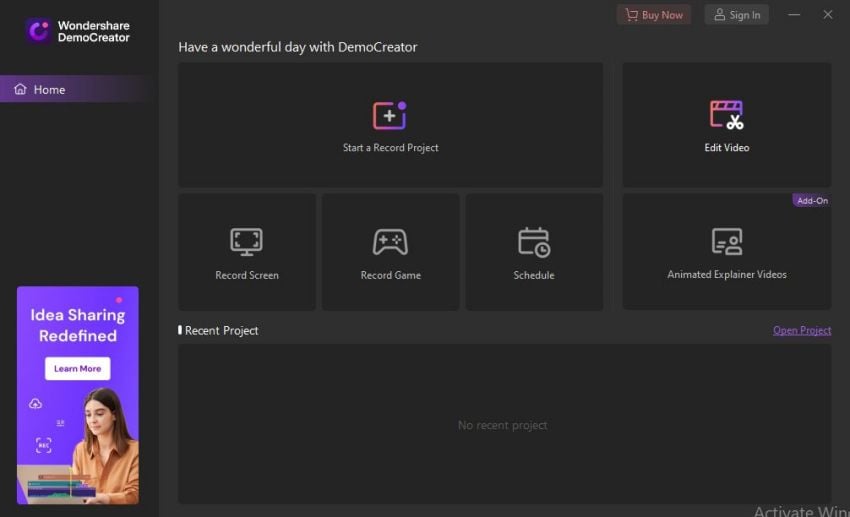
Record Screen:
To record the screen, first, you need to download DemoCreator.
1. Visit the Wondershare DemoCreator website.
2. Click on “Free Download”.
3. After downloading, install it.
4. Open DemoCreator.
5. Click on “Record Screen”.
 Secure DownloadSecure Download
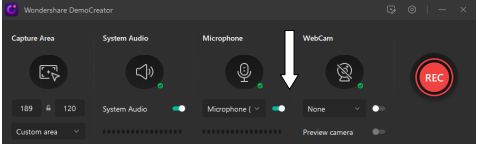
6. Customize the recording area according to your choice by dragging the big plus icon.
7. After choosing the area, click on the big red circle icon to start recording.
8. Press the F9 key to start/pause the recording.
9. To stop the recording, press the F10 key.
Record Audio:
1. Open DemoCreator.
2. Click on “Start a new project.”
3. A pop-up icon will appear.
4. To Record with audio, enable microphone.
5. Ensure that your microphone is connected to your device.
Record with Webcam:
To record video with Webcam,
1. Open DemoCreator.
2. Click on the “Start a new project.”
3. Enable Webcam.
4. Make sure that your Webcam is well connected to your PC.
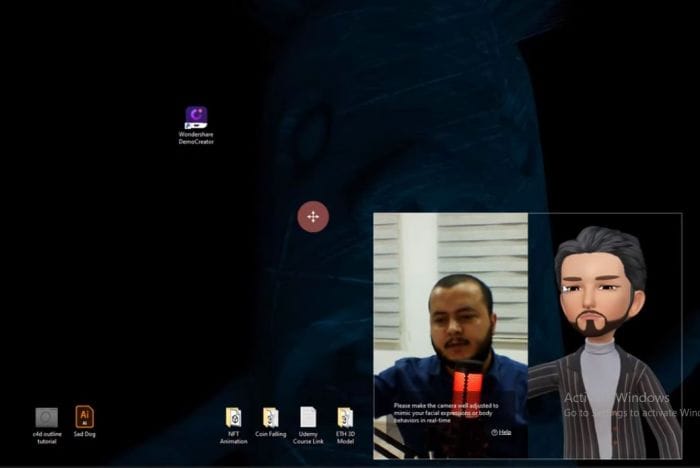
Virtual Webcam:
To record video with virtual Webcam,
1. Open DemoCreator.
2. Click on “Virtual human.”
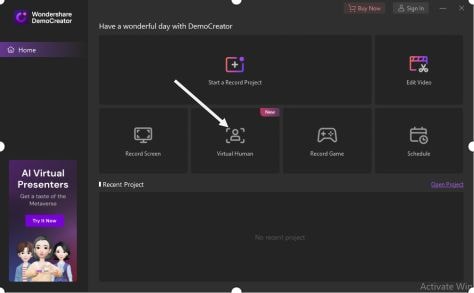
3. A pop-up window will appear.

4. Enable Webcam.
5. Click on virtual character.
6. Choose the character you want in your video.
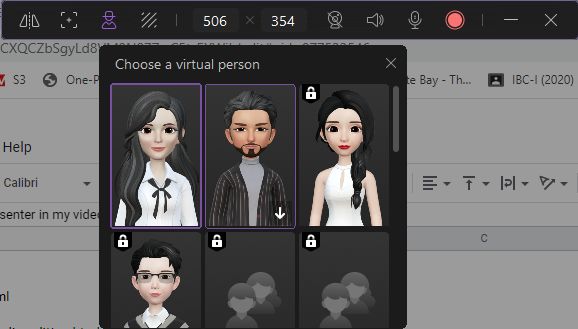
You can select any character relevant to your content and then start recording.
Live Event:
You can record any live event, edit and then upload it on YouTube.
Live Streaming:
DemoCreator allows you to capture live-streaming the way you want.
Simply follow the steps mentioned above, and you'll be able to record videos with virtual presenters.
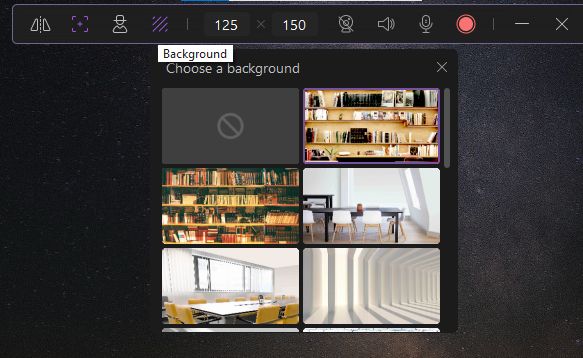
Replace Webcam Background:
DemoCreator allows you to replace your solid background as well.
1. After selecting the character, click on the “Background.”
2. You will see many options.
3. Choose the background of your choice.
Part3 How to Edit Video:
After the recording is over, you can now edit it in the editor phase of DemoCreator.
For this
1. Open DemoCreator.
2. Click on the “Edit Video”
3. Editor interface will open.
There are four operating areas in the editor interface.
● Media Library
You can import videos and images from your computer into the media library. There are many other features that you can use to edit videos, such as annotation, captions, stickers, transitions, etc.
● Timeline
You can drag the video from the media library and drop it to the timeline to cut, split, combine, voiceover the content.
● Preview Window
You can preview your video and changes you’re making in the preview window. In addition to backward, Forward, play, and pause buttons,
● Properties Window
You can change the voice from the properties window.
Import the PPT:
1. In the media library, click on the plus icon.
2. Import the videos you want to edit from your PC.

Drag and Drop:
1. Drag the video from the media library and drop it into the timeline.
2. Cut, split, combine and add Voice-over according to your choice.
Add Auto-caption:
To add captions in the video,
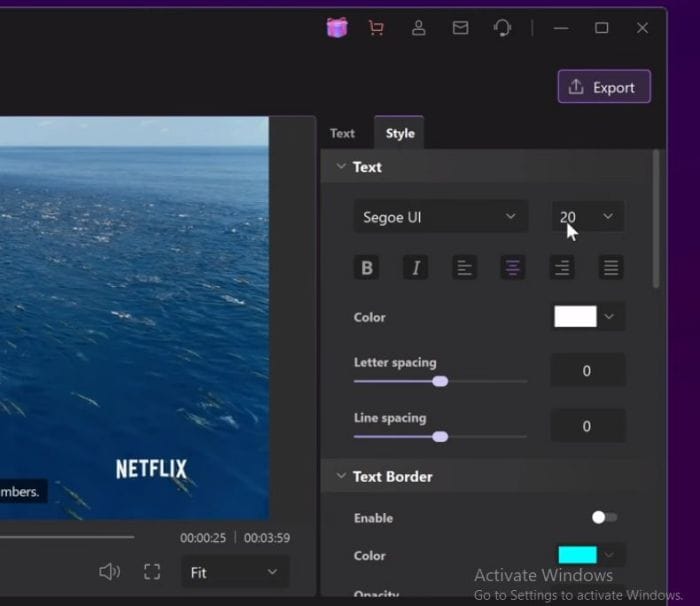
1. Click on the “Captions” from the top bar.
2. Select “Auto-captions”
3. Select language.

4. You’ll see the subtitles overlay on your video.
5. You can also add text if there’s something wrong.
6. It also allows you to change text style from the properties window.
Add Captions
There is also a variety of other captions as well
● Opener
To address your topic, a short intro can be added.
● End credits
To give credit to all the people who've worked on the content at the end of the video.
● Subtitle
It adds at the bottom of the video to translate any story.
● Lower third
It provides additional info at the lower end of the video.
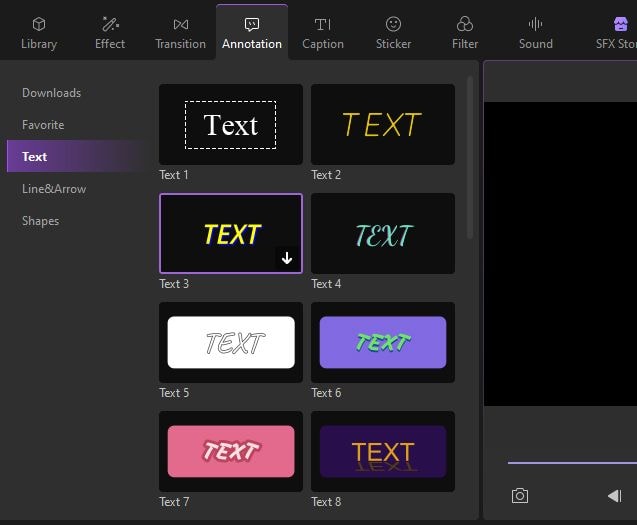
Add Annotation:
1. Click on “Annotation”
2. You'll see the following options
● Lines and Arrows
● Text
● Shapes
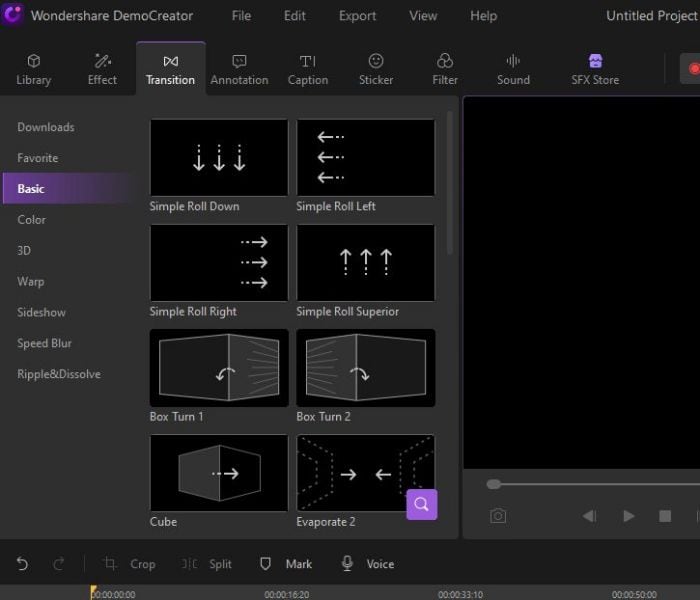
Add Transitions:
1. Click on “Transitions”
2. Select the option from following
● Basic
● Colour
● 3D
● Wrap
● Slideshow
● Speed blur
● Ripple and dissolve.
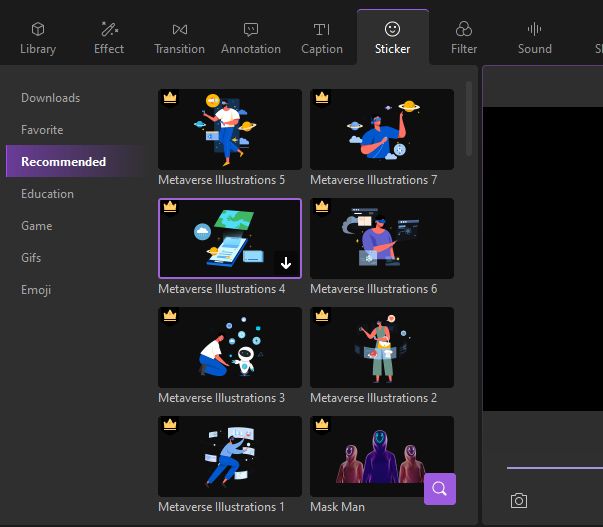
Add Stickers:
You can also add stickers to make your content funny and creative.
1. Click on “Stickers”
2. You’ll see many options such as
● Recommended
● Education
● Game
● Gifs
● Emoji
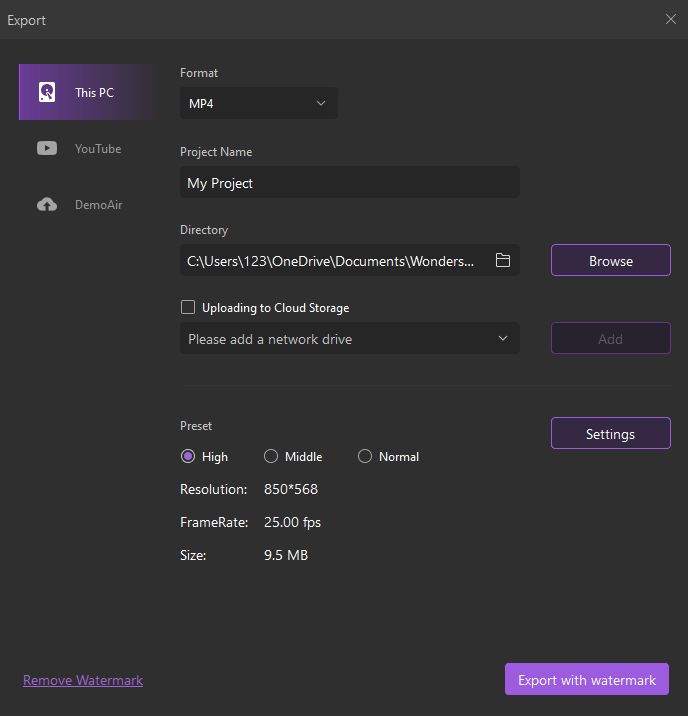
Part4 Export Video:
1. After editing is over, Click on the “Export” option.
2. You’ll see a pop-up window.
3. Fill in the data such as
● Project name
● Directory
4. You can also adjust
● Resolution
● Preset
● BitRate
● FrameRate
5. In the end, click on export.
6. You'll have to buy its subscription to remove the watermark.
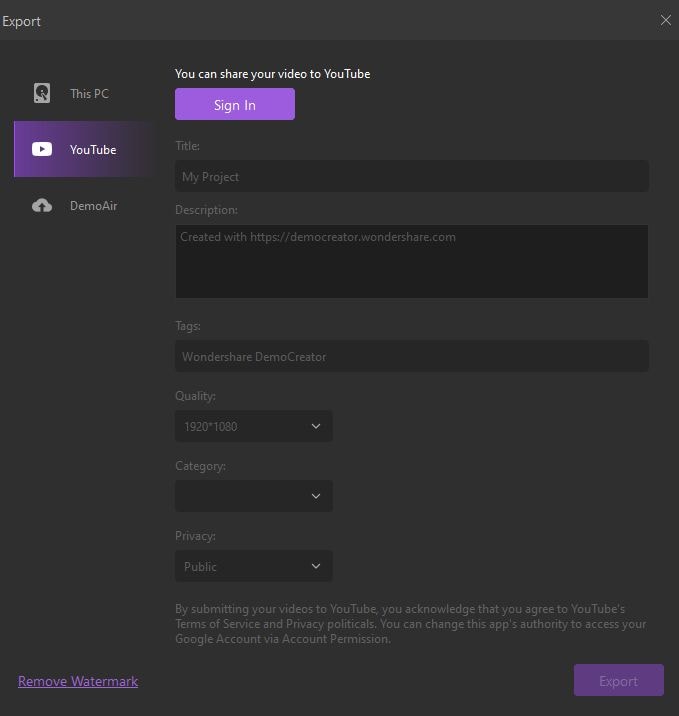
You can also upload the content directly to YouTube.
1. Click on “Export”
2. Select “YouTube”
3. Sign in to continue.
Pros
It is easy-to-use
It is Web-based software.
It provides you with multiple features
Flexibility
Customizable templates
Free updates
Virtual presenters
To operate this software, no technical skill is required.
No need to download separate software
Cons
To use more features, you’ll have to buy its subscription.
Mic stays on after recording is over, which can cause privacy concerns.
Conclusion:
As we know, video is trending these days. Everyone is using content marketing to increase their business strategies. People are creating videos to promote their products, service, and offer. It is an effective way to compel the audience and engage them.
Ordinary man shows up online and attends meetings and presentations by presenting himself virtually. Virtual presentations have made it easy for everyone to attend their projects from home. It saves you from the hassle of going outside and dressing up.
It gives rise to the question, how to make a virtual presentation?. Many video recording and editing tools are available, but it can confuse the audience to choose the reliable one. DemoCreator is best of all. It's an all-in-one software that you can use to make any kind of video such as product demonstration video, explainer, testimonial, and many more.
You can also record webinars, presentations, projects, live streams, and virtual classes with DemoCreator.
With its multiple features and free updates, you can create content the way you want. You don't need to learn any skills to operate this software.
Related FAQs
1. What is closed captioning?
As explained earlier, closed captions in a video can be enabled or disabled as required, and can even be formatted for improved visibility or to match the theme of the video. Closed captions for a video are saved in an independent file, typically with the *.srt extension.
2. How to deal with the auto-caption process failure?
While making auto-captioning, you can try to stop the transaction process if the program fails to recognize it. Then launch and sign in to the software again and check your transaction time.
Secure DownloadSecure Download