How to Record Game with Audio?
Content creation has gained a boost in its popularity and prominence since the last decade. Gaming has been a part of the young generations for quite a while, where generations have aged off of it. However, a new domain was introduced among the modern society, which displayed different gameplays of the games launched or are to be launched to the world. Gameplay recording eventually directed itself towards game recording and live-streaming, leading the gaming world into a new interaction system. This article provides you a detailed guide on recording game audio with gameplay recording for developing new and exciting content for the audience to watch.
Why You Need to Record Audio when Game Recording?
Several reasons make it essential for you to include audio or voiceovers in-game recording. Being a gamer, you may understand that several tips and techniques require an accurate description, which can be presented by none other than the gamer's voice itself. Furthermore, silent gameplays are not quite enjoyed and have been undermined compared to gameplays that have been recorded with proper audios. Thus, it gets significant to record game screens with audio using dedicated video recording platforms offering explicit tools and features for game recording.
Recommended Game Recorder: DemoCreator
The world has been introduced to hundreds of games that have been admired by hundreds of thousands of gamers throughout the world. Content creators target such games for presenting gameplays and game recordings for users to guide them into playing with the best techniques and presenting attractive content that would be a thing to laugh on.
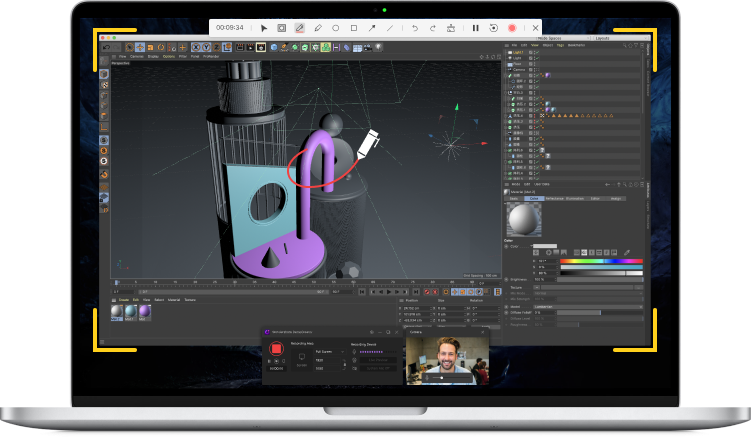
As you move towards game recording, it is important to stick to a platform that would offer you the appropriate environment to record your video. One such platform comes under the name of Wondershare DemoCreator that is both a screen recorder and a video editor. This desktop software provides you a balanced environment in managing the video recording, followed by its editing over a similar platform. Wondershare DemoCreator offers you explicit recording features such as 120fps screen recording that aids it in becoming the best option in the market. It offers a wide variety in screen recording, where you are allowed to record the screen and the webcam over the platform simultaneously. This makes the basic objective of attenuating audio with game recording easier and convenient. You can even consider capturing the audio from the screen and an external microphone attached across the desktop. Its attached video editor helps you develop the perfect content for your viewers to watch with appropriate lacquering.

The All-in-One Screen Recorder & Video Editor
- Record desktop screen,audio and webcam simultaneously
- Edit videos quickly with a wide range of professional tools
- Built-in plentiful video effects
- Export to MP4, MOV, MKV, GIF and multiple formats
How to Record Game with Audio
As you are introduced to the perfect platform for recording your game, this article propagates into discussing the guide on how to record game screens with sound using Wondershare DemoCreator.
Step 1: Download and Install DemoCreator.
Before you efficiently consume the features of DemoCreator, it is significant to download the free trial platform from its official website. After this, install the platform while following the on-screen instructions and launch it to register with an appropriate package. You can consider using the Monthly, Yearly, or Perpetual License for Wondershare DemoCreator as per your choice.
 Secure Download
 Secure Download
Step 2: Enable the Audio recording.
As you launch the platform, you are advised to select out of "Capture" and "Video Editor." Tap "Capture" to proceed. Over the new screen that opens up, you are advised to customize the video recording settings. The platform offers you to set up different settings, including the "Screen," "Audio," "Video," and other "Advanced" Settings. In the "Screen" section present on the left panel, you need to set up the screen's size, followed by its fps settings. As you propagate to enable audio recording for the video, you need to change the settings to "Capture" for both the Computer Audio and Microphone settings in the "Audio" section.
Step 3: Start Recording.
Once you are done setting up the options for your game recording, you must start the recording. Tap "Start Capturing" or "F10" as a short-cut to initiate recording. The platform would wait for a short 3 seconds before starting the recording. You can consider pausing the recording with the "Pause Capturing" button.
Step 4: Finish the game recording and Edit it.
With the recording elapsed, you need to tap "F10" to stop the recording. Move the recording into the "Video Editor" of the platform. With the video in the editing section, you can now perform several edits, including adding transitions, effects, and other video amendments, strengthening the video's development, and making it look more promising and exciting to watch.
Step 5: Export and Share.
Once you conclude editing the video, you need to save the video onto your desktop. For this, lead to the Export Window and initiate the saving process. You need to set up the name, location, and file format for the video. Following this, DemoCreator offers you the ability to change the video and audio settings for influencing a more impressive video with high results. You can set up the resolution, frame rate, bitrate, number of channels, and sample rate for the audio and video you are saving.
 Pro-tip
Click here to get how to record game audio and Mic voice separately?.
Conclusion
This article has introduced you to a guide that would aid you in recording audio with the appropriate toolkits and features. Wondershare DemoCreator is an option that is worth considering for conditions where you wish to add audio within your game recording. This would help you develop attractive content that would be acknowledged across the globe. It would help if you went through this article to understand better the system involved in the game recording.


