How to Record Minecraft on Mac

With more than 112 million copies sold across all platforms in 2017, Minecraft is one of the most popular games to play. Most players find the format highly enjoyable and it is therefore not uncommon to find that they may want to share the gameplay with other Minecraft players around the world. If you are playing the game on Mac and you would like to record the gameplay, you have a number of options available to you.
One of the best is QuickTime. Most people prefer QuickTime because it is a simple solution that comes built-in to the macOS, meaning that you will not need to download any third-party software to record Minecraft. But if you want additional recording and editing functions to make the resultant video as professional as you can get it, we have third-party options that you can use.
This article is dedicated to helping you easily and very quickly record Minecraft gameplay on your computer. Let's begin with how you can do that using QuickTime.
Way 1. Record Minecraft on Mac with QuickTime
QuickTime is one of the best options when you want to record any kind of video on your Mac, including gameplay. This solution is preferred by most Mac users because it is very easy to use, easily accessible and above all free. It can be used to record both the screen and the camera, along with audio, making it the most ideal solution for gameplay recording.
To use QuickTime to record Minecraft gameplay on your Mac, open the game and then follow these simple steps to start the recording process;
Step 1: Open the QuickTime Player from the Applications folder which you can find in the Dock or using Finder Window.
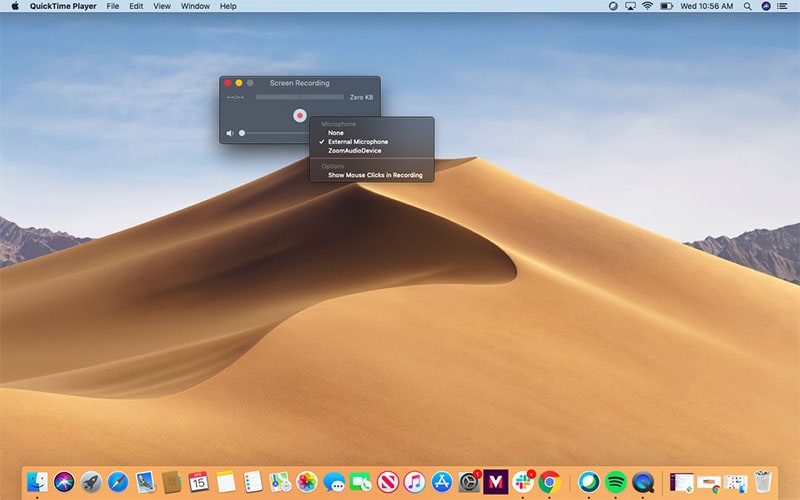
Step 2: Once the application is open, click on "File" in the menu bar and then select "New Screen Recording," to record what is happening on the screen, in this case the game. You can choose to record the entire screen or a section of the screen.
Once you have made your selection the QuickTime control panel will appear.
Step 3: To begin the recording, click on the "Record" button.
Step 4: When you are done with the recording, click on the same "Record" button to end the recording.
Way 2. Use DemoCreator to Record Minecraft on Mac
QuickTime is a good solution, but it is relatively simple, meaning that it doesn't offer the necessary features to make sure that you are recording the gameplay in the best quality possible. For top-quality gameplay recording, we recommend using Wondershare DemoCreator. This third-party solution is designed to make gameplay easy without affecting the computer's resources and it also comes with a built-in editing tool to help you perfect the gameplay recording before sharing it with others.
Before we show you how to use DemoCreator, the following is a breakdown of the features that make it the breakthrough gameplay recorder;
- It can be used to create high quality presentations, tutorials and training courses by recording the screen
- It supports numerous video formats
- It comes with a basic editing suite designed to help you enhance the videos you record
- It can be used to record webcam footage
- It is ideal for gameplay recording since it allows you to set the frame rate and easily select the game that you would like to record.
- It can be used to record and edit audio, making it the perfect solution when you need to add narration to the video
To use DemoCreator to record Minecraft gameplay on your Mac, open the game and then follow these simple steps;
 Secure DownloadSecure Download
Step 1: Download the Program
The first thing you need to do is download the program on to your Mac. Just go to the DemoCreator main website to get the download link and follow the instructions to install the program.
Step 2: Customize the Recording Area
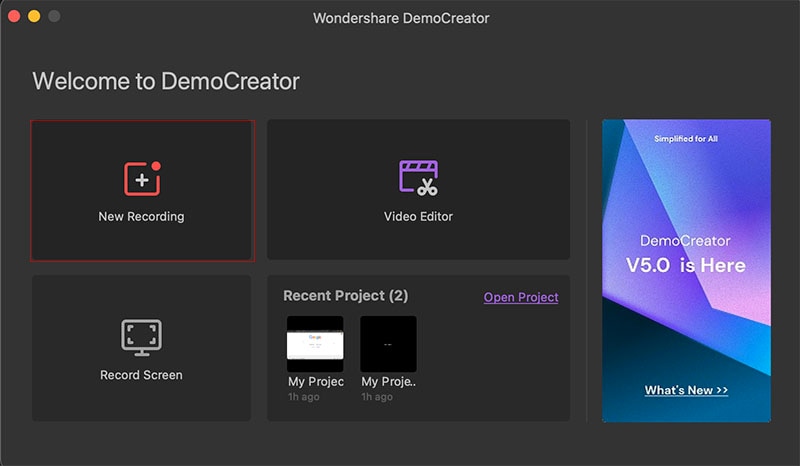
Once the program is installed on the computer, run it and then select "New Recording" to start the new recording.
You can then select the recording area by dragging the border or choosing a target window. By default, the program will record the entire screen. You can change the region by dragging or choosing a customized region by clicking on the drop-down arrow next to "Full Screen" under "Recording Area."

Step 3: Select the Input Device
The next setting you need to consider is choosing the input devices you would like to use, including microphone and camera.
By default, DemoCreator will use the Mac's built-in microphone and the FaceTime HD Camera. If you would like to use an external microphone that is connected to the computer, select it from the drop-down menu next to "Recording Device."
If you would like to add webcam footage to the recording, select "Camera On" in the camera section below "Recording Device."
Step 4: Start/Stop Recording
When all the settings are just as desired and you are ready to begin the recording, click on "Start Capturing" or use "Shift + CMD + 2" shortcut.
You should see a 3-second count down before the recording starts. You can then use the same commands to end the recording.
Once the recording process is complete, you can very open the editor to make as many changes to the recording as you want and then share the finished product with your networks.
Way 3. Record Minecraft on Mac with ScreenFlow
ScreenFlow is another great third-party solution that you can use to record gameplay on your Mac. It is an ideal choice because you can use to record actions on your screen, including gameplay in a few simple steps. It also comes with an editing suite that is just as easy to use and one that allows users to add additional content such as callout, annotations and motion animations to the recorded video.
The following are some of the program's most notable features;
- With ScreenFlow, you can get the highest quality if video even if you choose to record multiple screens at the same time
- It comes with a built-in stock media library with over 500,00 unique images, video and audio clips that you can use to enhance your video in a number of ways.
- You can also use it to record the screen on your iPhone or iPad as long as they are connected to the Mac
- It comes with a built-in editor with numerous useful tools including tools to add transitions, text animations, video animations and even an audio editing tool
- The user interface makes it one of the easiest screen recorders to use
The program is also very easy to use, just open Minecraft on your computer and then follow these simple steps to record the gameplay using ScreenFlow;
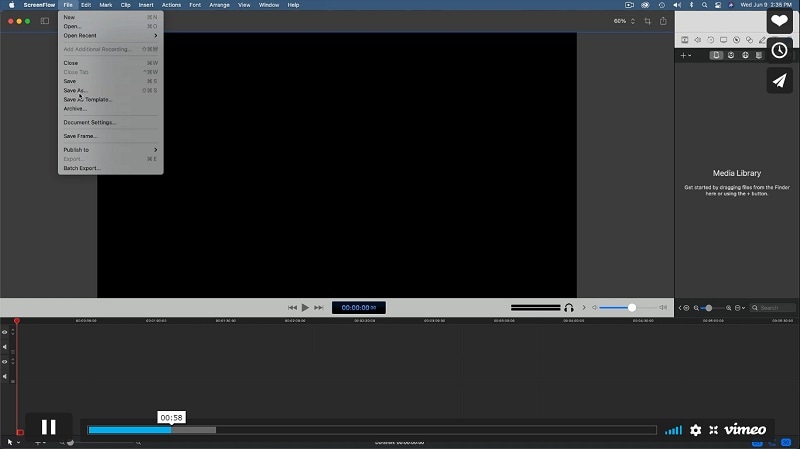
Step 1: Download and install ScreenFlow on to your Mac. Once it is installed, open the program on your Mac. You should see the welcome screen when you first open the program. To start a new recording, click on "New Recording."
Step 2: In the next screen, you have various recording options including "Record Desktop From" and "Record Audio From" among others. These are meant to help you set up the recording settings, depending on whether you want to include screen, webcam or audio.
Here, you can also choose to record just a section of the screen or the entire screen as needed.
Step 3: When you are ready to begin the recording, click on the red "Record" button and the recording should begin soon after a 5-second countdown.
Step 4: To stop the recording, use the keyboard shortcut "Shift + CMD +2" or click on the red "Record" button again. A preview of the recording will appear on the screen and you can then go ahead and edit it as needed.
Recording gameplay on your computer is a process that requires the services of a good video recording tool. QuickTime can work in a pinch, but it lacks the necessary recording and editing features to record a gameplay video that is good enough to share with others. Third-party options like DemoCreator and ScreenFlow are designed to record very high-quality video and both tools even come with editing features designed to ensure your Minecraft video recording will be the best it can be, worthy of sharing across all video sharing platforms.
So, the next time you want to record and edit Minecraft gameplay, consider using DemoCreator or ScreenFlow. Your thoughts on this subject are very important to us and you can post them in the comments section below. If you have any questions about any of the solutions above, post them below as well and we'll do our best to find the best solutions to any issues you may raise.


