
QuickTime is an excellent media player that can open multiple audio and video file formats. However, its capabilities aren't limited to it being just a player. You can also use it for many other things - including capturing your screen.
QuickTime player screen recording offers the utmost convenience, allowing you to capture content from video conferences and webinars, create tutorials, or even make funny memes to share on social media. While it's not always the ideal solution, it's an efficient little tool with plenty to offer.
Explore this guide to learn how to screen record on Mac with QuickTime and start creating flawless video content.
Table of Content
How To Set up QuickTime Player for Screen Recording
Depending on precisely what type of screen capture with QuickTime you want to take, you might need to set things up properly first. If you just need to take a quick screenshot on a Mac or record your screen without audio (or with microphone audio only), all you have to do is launch QuickTime and get started.
Just make sure that you've closed any apps/programs you won't be needing, as they can severely impact your computer performance and screen recording quality.
However, things can get a bit more complicated if you need to record system or program audio.
QuickTime screen recording does not capture system audio, so you must install an add-on like Soundflower. Learn more about recording in QuickTime with system audio here.
How To Record Screen Using QuickTime Player
Using QuickTime for screen recording is a breeze. Regardless of precisely what you want to record - an app, a Zoom meeting, or anything in between - you'll want to open the screen you want to record and then get started.
Follow these simple steps to record your screen on Mac with QuickTime:
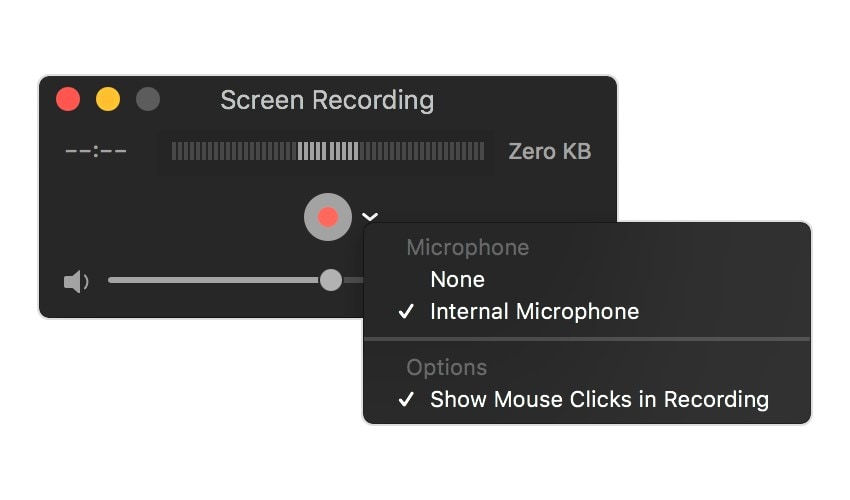
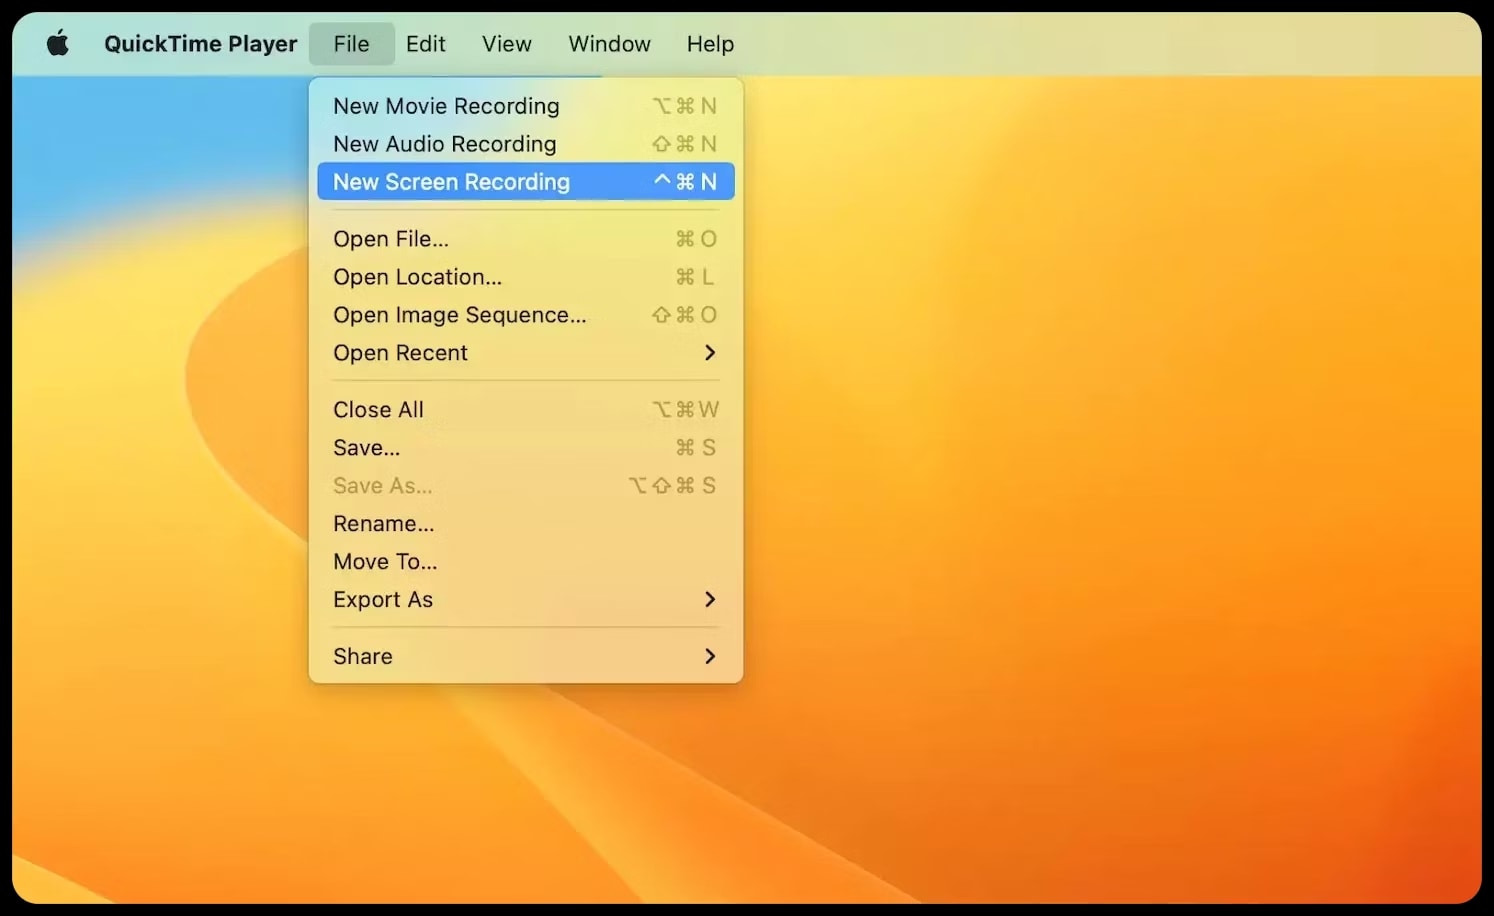
- Open QuickTime and go to File > New Screen Recording;
- If you want to record audio, go to Options;
- Under Microphone, select ;

- Click the Record button to start recording;
- Click the Stop button to stop recording.
QuickTime will save your recording in the .mov file format. If you need a different format for editing, sharing, or posting your video online, you must first convert it.
Moreover, you'll want to remember that your QuickTime screen recording will be stored locally on a Mac and can quickly take up a lot of space. So, make sure that you have enough storage before starting your recording.
Advanced Settings for Recording Your Screen in QuickTime Player
While certainly a useful tool, QuickTime is a basic player with minimal editing and recording capabilities. Therefore, you shouldn't expect any advanced settings to help you improve your videos.
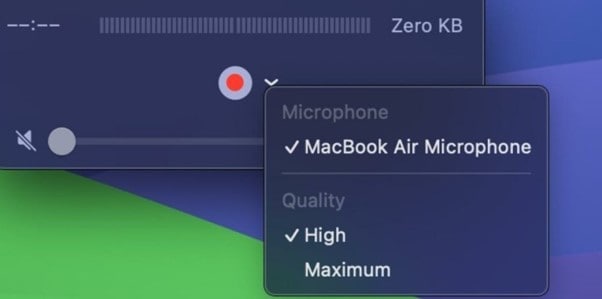
You can only adjust the recording area and video quality. To record the entire screen, you'll simply have to click on it when you start your recording. You can also drag the area you want to record to record a part of it.
As far as the video quality is concerned, before you start to record the screen with QuickTime on Mac, you'll be able to choose between High and Maximum quality. High-quality videos will be recorded in H264 in .mp4, while Maximum will record Apple ProRes 422 in .mov format.
How To Edit and Save Recorded Screen Videos in QuickTime
As mentioned, in addition to being a media player and recorder, QuickTime also has some basic editing functionalities. You can use it to trim your videos, rearrange and rotate them, merge multiple videos into one, or split one video into multiple ones.
Here's how to edit your QuickTime video recording:
- Open the recording you want to edit in QuickTime;
- Navigate to the Edit tab;
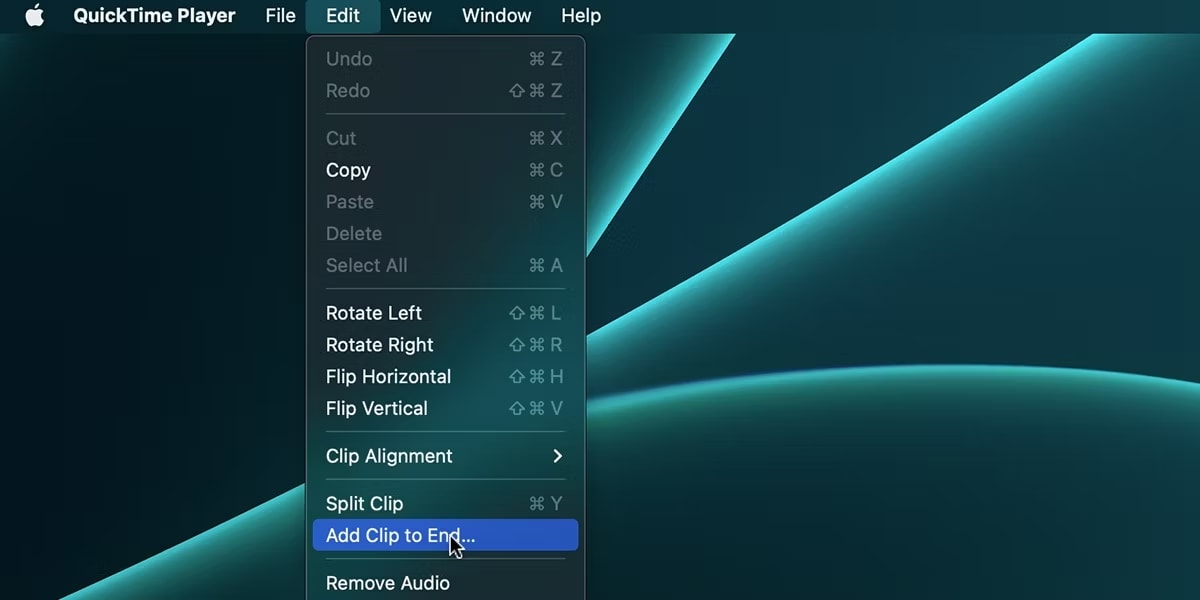
- Select what you want to do with your video recording;
- Make the necessary adjustments and go to File > Export;
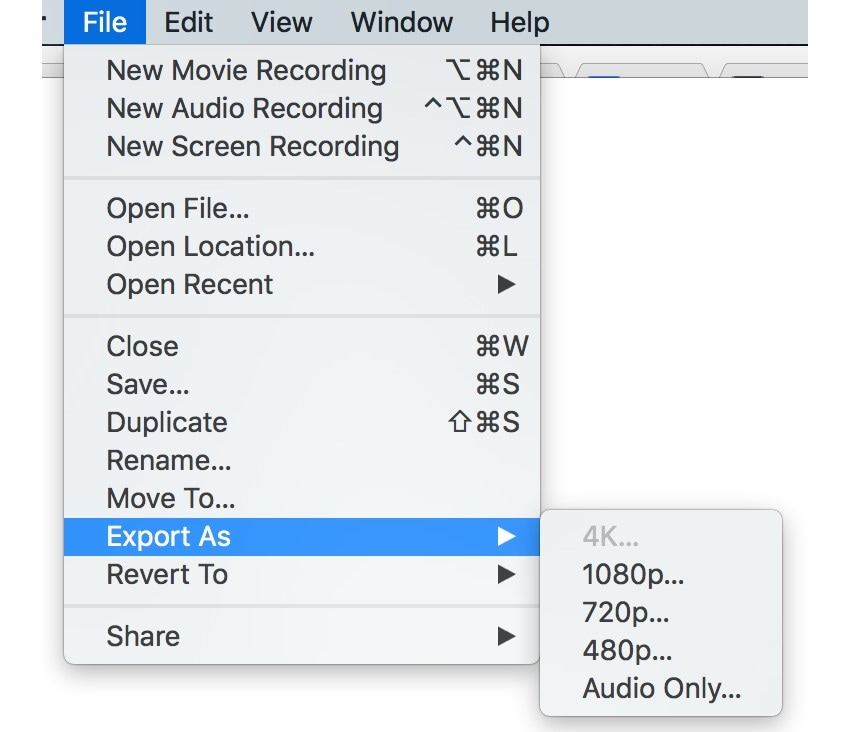
- Select the quality in which you want to save your video.
If you'd like, you can also extract the audio from your clip by selecting Export > Audio Only.
Pros and Cons of Recording Your Screen With QuickTime Player
As you've likely noticed so far, making a QuickTime player screen recording has some unique advantages and disadvantages. Here are the pros and cons summarized.
Consider these pros and cons when determining whether QuickTime will suit your screen recording needs.
An Alternative to Consider: Wondershare DemoCreator
Considering the many disadvantages of using the QuickTime player to record your screen on Mac, you'll likely need an alternative if you want your videos to come out more professional. If that's the case, there's no better option than Wondershare DemoCreator.
With robust recording and editing capabilities, it enables you to create mesmerizing videos with just a few clicks. It offers advanced features that make both recording and editing a breeze:
- All-in-one recorder - Whether you want to record your screen, your webcam, audio only, video presentations, games, or anything in between, the all-in-one recorder will enable you to capture high-quality videos;
- Scheduled recordings - Automatically capture screen recordings by setting the precise start and end times;
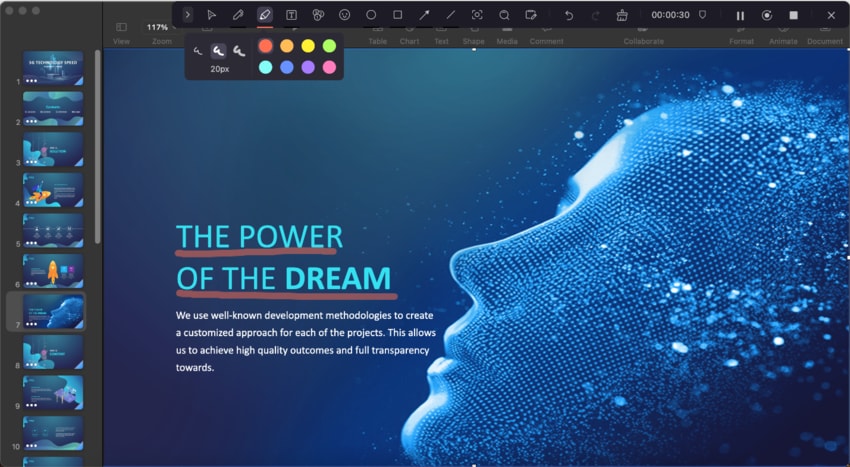
- Annotation tools - Draw figures and sketch explanatory notes while recording;
- High-quality recordings - With DemoCreator, you can record in up to 4K/80K, ensuring the highest possible video quality;
- Built-in video editor - A powerful built-in editor you can use to fully transform your videos and audio;
- AI tools - From automatically removing background noise from audio to creating virtual AI avatars, changing your voice, and automatically generating captions for your videos, DemoCreator offers dozens of AI-powered tools to simplify processes.
Fully compatible with Mac, this tool offers advanced features and capabilities yet remains intuitive and easy to use.
How To Use DemoCreator for Screen Video Recording
Screen recording with Wondershare DemoCreator couldn't be easier. It takes just a few steps to set everything up and start recording:
- Download and install DemoCreator on your Mac;
- Launch DemoCreator and select All-in-One Recorder;
- Customize recording settings (capture area, system audio, microphone, and webcam);

- Select Export Express or Edit Recordings recording scheme;
- Click the red REC button to start recording;
- During the recording, you can use the various annotation tools to make your points easier to follow.
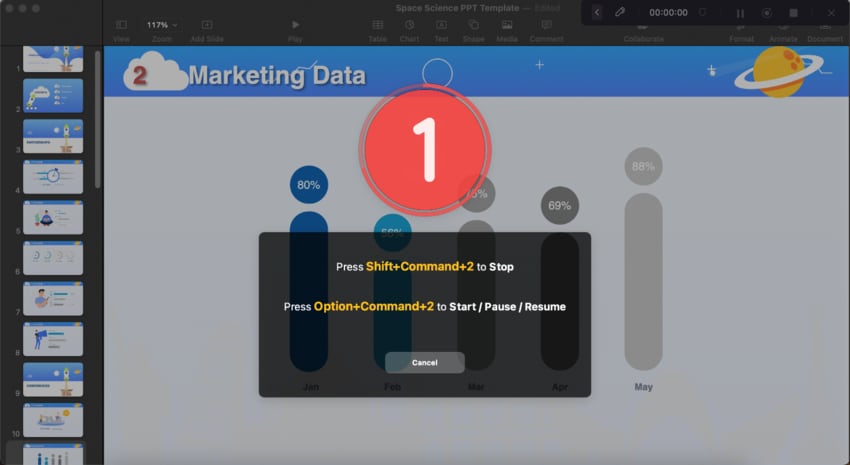
- Click the End button or press the Shift+Command+2 key to stop recording.
If you've chosen the Export Express recording scheme, you can immediately export and share your video however you see fit. If you've chosen the Edit recordings scheme, you'll be taken to DemoCreator's built-in video editor as soon as you've completed your recording. You can add creative effects and edit every minute aspect of your video.
- Record desktop screen, audio, and webcam simultaneously
- Various annotation tools to emphasize important points
- Edit videos quickly with a wide range of professional tools
- Export to MP4, MOV, MKV, GIF and multiple formats

Conclusion
While QuickTime player can be a fine solution for capturing quick screen recordings, it leaves a lot to be desired. Without built-in system audio recording tools, high-resolution recordings, or advanced features, it's not always ideal for professional videos.
If you want to improve your screen captures, Wondershare DemoCreator is the solution for you. It is a comprehensive solution that gives you full recording and editing flexibility and will ensure your screen recordings are nothing short of perfect.