How to Record Audio on PC

A few groups think that it's difficult to get to know, how to record audio on my PC. Yet, truth be told, there's no mystery about how to record discord audio on pc. You simply need to get an application that records PC sound. Also, that is the place where issues can begin. You don't need to hold up a mouthpiece to your PC's speakers to record its sound. Regardless of whether you don't have a Stereo Mix choice on your PC, you can undoubtedly record the sound coming from any Windows PC. You can record the sound coming from your PC from various perspectives, and we will show you the best we've found to how to record audio on pc with microphone.
In the event that you Google how to record audio on my pc, you'll be shown a lot of projects. They can be free or paid, on the web or work area, simple or progressed, with various yield configurations and framework necessities. On the off chance that you attempt to investigate every one of them, you hazard squandering half of your life. Regardless of whether proficient or for beginner purposes, the sound account software programs are vital. These projects permit controlling the sound so it coordinates with the requirement for a particular undertaking, hence follow the guide below to know better how to record audio on my pc.
1. How to Record Sound on Windows 10 PC
Voice Recorder comes installed on Windows 10, but you will have to install it manually if you don't have it.
Installation Steps:
To install the app to record voice, use these steps:
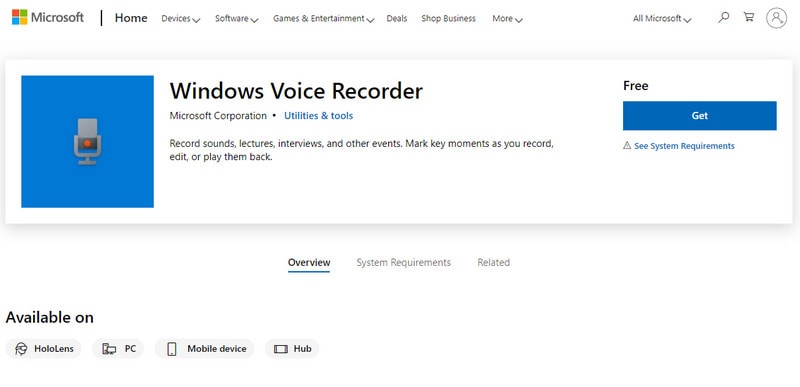
- Launch the Windows Voice Recorder application from the Microsoft Store as shown below:
- Click the Get
- Click the Openbutton (if applicable).
- Click the Get\Install
Recording Steps:
To record audio on Windows 10, make sure the microphone is connected and use these steps:
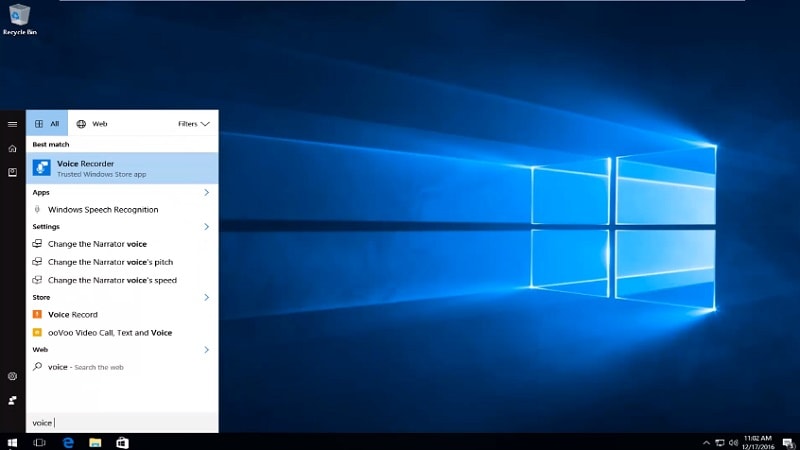
- Open Start of the application.
- Search for Video Recorder, and click the top result to open the app.
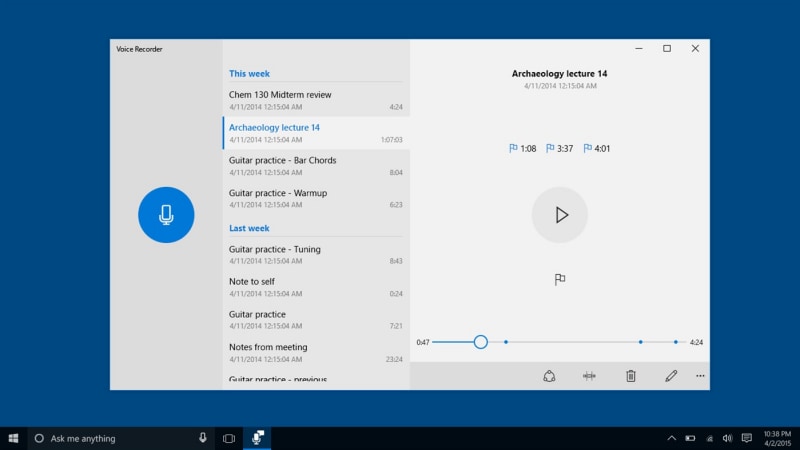
- Click the Record
You can also start recording using the Ctrl + R keyboard shortcut.
- Click the Flagbutton to add a marker to the recording. This option won't interrupt the audio recording, but you can quickly jump to important parts of the recording when editing the track. You can use the marking feature while recording or listening to the audio file.
- Click the Pausebutton (or Alt + P keyboard shortcut) to stop recording without terminating the session. This option will keep the recording in a single file
- Click the Stopbutton to end the voice recording.
2. How to Record Audio on Windows 7/8
Sound Recorder in Windows 8 is a no-frills elective that requires minimal specialized ability to utilize. The best part is that it's free and comes introduced with the working framework. Sound Recorder includes a straight-forward, easy to-utilize interface that empowers you to make, respite, pause and play chronicles. To record your voice in Sound Recorder, your PC should have an inherent or outside mouthpiece joined.
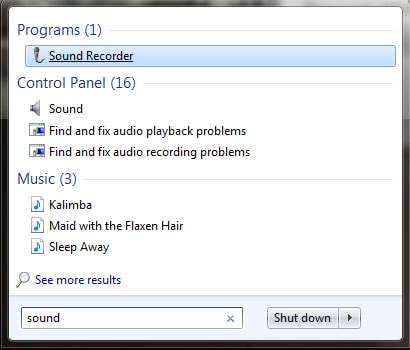
Step 1: Press "Windows-W" to open Settings, enter "sound" into the search field and then select "Sound" from the results.
Step 2: Select the "Recording" tab and confirm that a microphone is connected to the computer. If not, connect a microphone or headset to a USB slot or microphone jack.
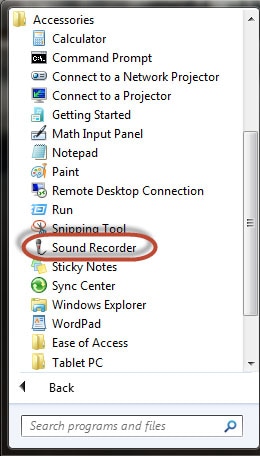
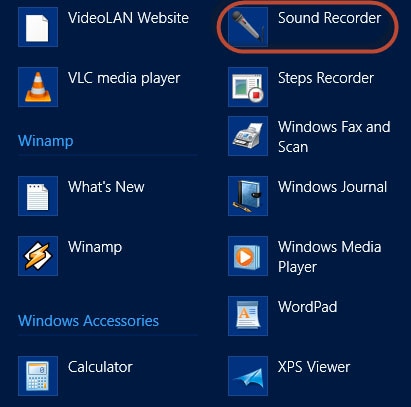
Step 3: Click "OK" to close Sound, press "Windows-Q" to open Apps and then enter "recorder" into the search field.
Step 4: Select "Sound Recorder" from the results. Click "Start Recording" or press "Alt-S" and begin speaking in to the microphone.

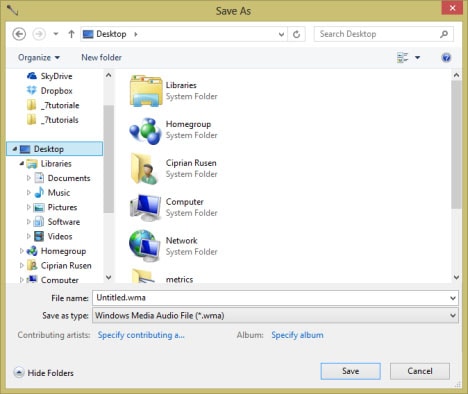
Step 5: Click "Stop Recording" to complete the recording. Enter a name for the file into the Save As dialog that appears and then click "Save."
3. Best Audio Recorder for PC
Windows PC has a plenty of applications that can be utilized on a PC or work area and perhaps the most advantageous and supportive is the Wondershare DemoCreator. This application permits the client to record sound for pretty much any explanation, making it an incredible all-round choice for those searching for an approach to record themselves. It is an extremely straightforward free screen recorder with an underlying sound/video editorial manager. The alluring and instinctive interface permits you to make screencasts without any difficulty of an expert. Despite the fact that this product is free, it doesn't put any watermark and is sans promotion.
DemoCreator is a full-highlighted yet lightweight free screen recorder from a designer known for its free transformation software. It can record Skype discussions without any limits and is subsequently valuable for Skype interviews and online telephone calls. Likewise, various Windows applications can be singled out and caught as discrete components. Included is an essential easy to use picture supervisor that is shockingly useful for achieving a cleaned look. This lightweight, open-source screen recording software makes recordings in AVI design that can later be changed over to various different organizations.
 Secure DownloadSecure Download
Step 1. Download and Install DemoCreator
The foremost Step while opting for this masterpiece software is downloading and installing this software. To ease your research, we've brought you the link as well via which you can easily get access to that software from your Windows PC.
After you've downloaded the software, install this masterpiece within your PC, and launch it right away as soon as it gets completed. Now you shall be seeing the two-section options which have a separate button as well. To record audio, simply opt for the Start new recording button.

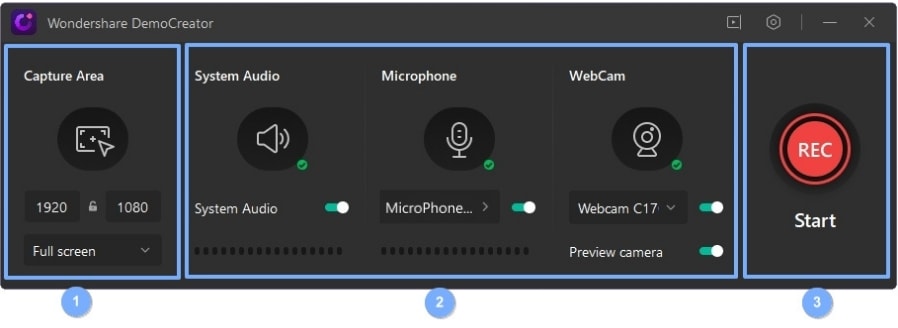
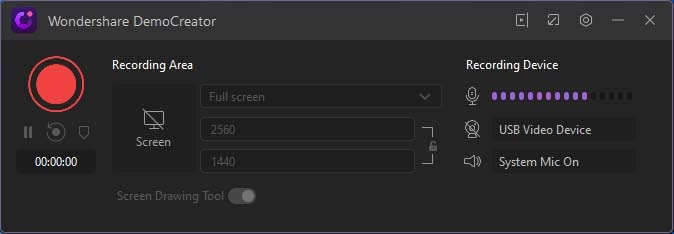
Step 2. Setup the Recording
As soon as you hit the record button, a recording window shall be open with the screen adjustment and customization toolkit for your screen recording. All you need to do is set up teh audio recording and disable screen if you don't need that.
Step 3. Edit the Recording
Wondershare DemoCreator also allows you to set up advanced level customizations for your recorded content, once done, so you can have the desired taste of recorded audio as an output file.
Step 4. Export your Audio & share:
Once you have finished creating the video and editing it, you can now save it to share on social media. The file can be saved into the format as; MP4, WMV, AVI, MOV, GIF, MP3.
The best sound chronicle software has an assortment of devices implanted to clean the sound recorded, in which this article we will audit the best of them for you. We ordered some remarkable and protected, free screen recorders that effectively contend with the best paid screen recording apparatuses. Here as shown above, you can get your favorite method chosen from. All you need to do is follow the guidelines steps and done with your recording and editing tasks.


