How to Change Background Music of Downloaded Video?
Video editing is becoming one of the top-grossing ventures that are being adopted by many people around the world. This activity can neither be practiced in applications present in your desktop by default nor is it a fancy avocation that can be done by any individual who gets into it. If anyone seeks to replace the audio track in their video, it is possible by consuming specially designed software for editing videos. These video editors help you change the sound from video in many different manners, which can be either having it muted, changed, detached, or replaced with addictive sound effects. It all comes down to the availability of an impressive platform to work on.
This article introduces such a platform for video editors so that they can practice their skills in a more intuitive and cohesive environment with better options and mechanisms. Wondershare DemoCreator is a very decorated option for carrying out the tasks that are associated with changing sounds. This article introduces two different methods that are applicable to change the sound in the video.
Wondershare is known for developing state-of-the-art and easy-going applications that can suit both beginners and veterans for carrying out different tasks of video editing. Considering this case, you are to follow to following steps that would surely make the procedure easier for you to change the sound on the video.
 Secure Download
 Secure Download
Step 1: Download and Install the Wondershare DemoCreator
Before you wish to work on the software and have your audio track removed from the video, it is important for you to install the platform itself. You can simply download the trial version for free from the original site of Wondershare DemoCreator, followed by its on-screen guidelines to install it. After successfully installing it on your desktop, you can form a decision over having it registered.
 Secure Download
 Secure Download
Step 2: Import Video to Wondershare DemoCreator Video Editor
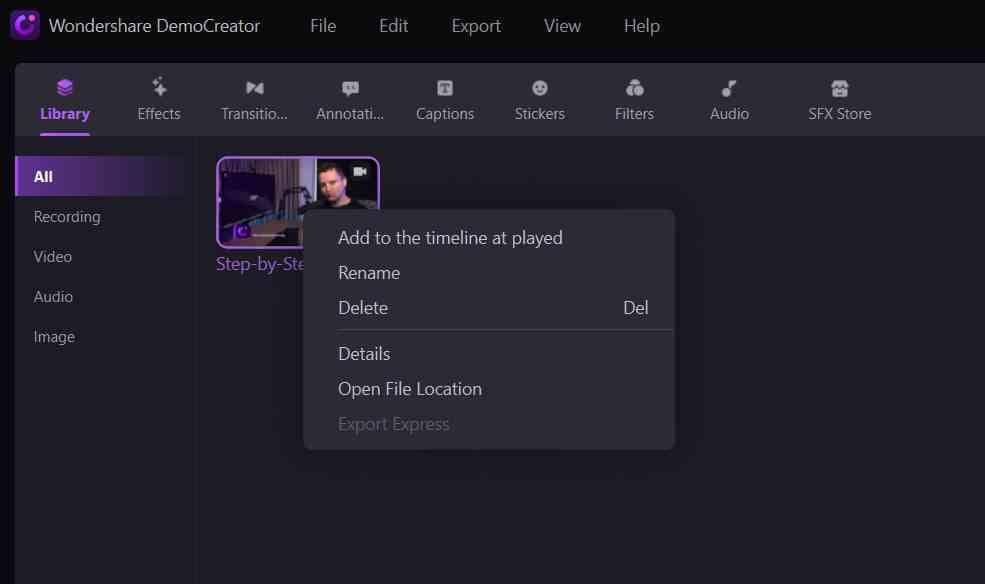
After having the software installed, it is important for you to insert the video before having it amended. For that, you just have to import them from the directory within the desktop simply. This can be performed in three different ways. Primarily, you can approach the "File" submenu from the toolbar above and select the option of "Import Media Files." Secondly, you can import files by tapping the icon present on the Media Library. Lastly, with a timeline opened upfront, the icon depicting "Add Files" can be tapped, followed by the simple procedure of importing videos into the Editor.

Step 3: Drag the video file on the timeline
After having the files imported into the Media Library as described above, you can follow another approach of adding files into the timeline. You can simply drag the files that are to be edited into the timeline from the Media Library.

Step 4: Detach Audio
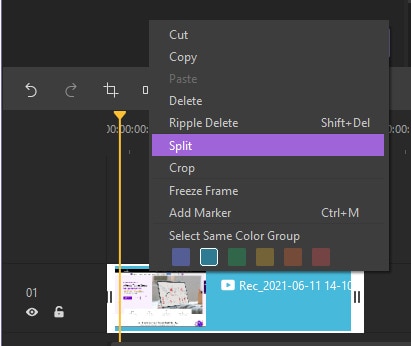
With the video clip dragged onto the timeline, you shall find it in there. Initially, on Wondershare DemoCreator, you have to detach the audio from its original video for replacing it with another sound. T successfully change sound video; you have to detach the original sound first by right-clicking on it and selecting the option of "Audio Detach" from the drop-down menu. An audio file is separated and can be seen on the timeline.

Step 5: Delete the Audio Track
With the audio track present on the screen in the timeline, you now have to simply right-click on it and select the option of "Delete." With this, the audio track is now permanently removed from the video track, leading you to the next stage of replacing the background sound with intuitive options.
Step 6: Drag a New Sound into the Timeline
Sound can be added through various means with Wondershare DemoCreator. You can either have it imported or chosen from the library that exists within the software. After having it imported, simply drag it onto the timeline.
Step 7: Adjust the Audio
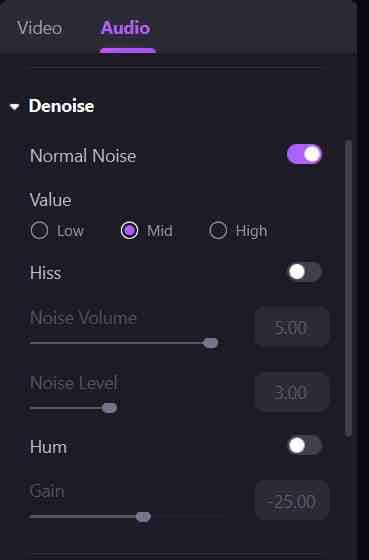
The process to replace the audio track is completed by adjusting the audio within the video. You can access the option of audio from the property tab where you can simply adjust the audio volume from the slider.

Step 8: Export Video
After completely editing your video and previewing it, you can export it in any important video file format. Along with that, you get to set the resolution, frame rate, bitrate, and such options according to your requirements.
 Secure Download
 Secure Download
An alternative option that can be adapted to change the sound in the video is through Windows Movie Maker. This is considered as a viable and easier option as compared to any other video editing software. The following step-by-step guide explains the effortless method of adding sound into a video.
Step 1: Import Video
Have the software downloaded and installed. After running it, you can access the option of "Add videos and photos" from the toolbar on the top of the screen.

Step 2: Turning off original sound
After having the video added, you get to see another option on the toolbar above presented as "Edit." Tapping on it leads you to the next submenu from where you can turn off the original sound by turning off the slider on the option of "Video Volume."

Step 3: Add Audio
Access the Home tab again. Select the option of "Add music" for importing the music that you wish to add to the video. There are two different options of "Add music" and "Add music at the current point" to access from.

Step 4: Save the Video
Open the File tab. This leads you to another screen where you can select the option of "Save movie" for exporting it to the location that you have selected.
Conclusion
This article has presented 2 different forms of video editing, which can be used to change sound videos easily. Considering the two methods that have been discussed, for a better and healthier environment with more video editing options, you can opt for Wondershare DemoCreator since its state-of-the-art design and innovative interface really helps users get off their strenuous tasks effortlessly.


