Best OBS Settings for Streaming

Open Broadcaster Software or broadly known as OBS is a popular name in the world of entertainment. This is used for recording as well as streaming different content to streaming platforms and social media applications such as Twitch, YouTube, Facebook, and many more. This software is free to download and use. Moreover, the open-source availability makes it very comfortable for the programmers to redefine it according to their preferences. When you first try to use this software, most probably you may get confused with all the settings, options, and features. So what are the best OBS settings for streaming?
Well, the software is provided with all the settings to optimize the performance according to your requirement and use. There are many users, who use OBS for streaming purposes and they need good knowledge of this software to set up the software for a smooth experience in streaming. Here, we are discussing a few of the best OBS stream settings, which can be helpful in understating the function of the software for brilliant streaming.
Some of the Best OBS Settings for Laptop Streaming
Although there are plenty of best OBS audio settings for streaming available for different platforms with predefined configurations, you can change them to your needs. Also, this will result in the best version of streaming quality and you will have a better impact on any platform. To do that, the following are some of the settings you need to tend to for making the best streaming experience.
General Settings
After you are done with a stable internet connection, you can tune different changes in the settings. Different sections can be configured inside the settings menu of OBS to get the best broadcast quality. The most important tools are available on the Output tab and in this section; you can configure both audios as well as video.

- For tweaking the settings, open the OBS software, then go to the Settings tab, and from there click on the option that says 'Advanced'.
- This mode will give you the ability to closely monitor the different streaming aspects of your video as well as audio to a finer level.
- Now click the option that says 'streaming' and then set the audio Track to '1' from the audio tab.
Audio
The last step in the previous section will have a great effect on the quality of audio that is being broadcasted on any application. The correct sync between the video as well as audio is very important because clean audio will attract more attention almost instantaneously. So, nailing the audio quality is a must if you want the best engagement in any stream. In the OBS software, there are generally two sample rates for audio are available inside the settings of the streaming audio that are 44.1 kHz and 48 kHz.
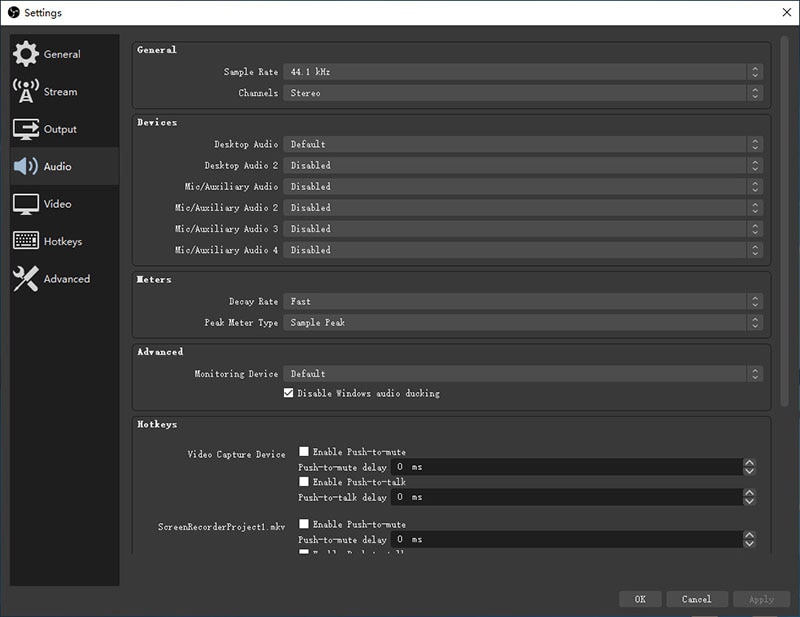
So, whenever you are trying to configure these streaming settings, select the 48kHz, and then you should check the "stereo" option for the channel. When you open the 'Global Audio Devices' tab, you can choose between the different audio sources that you are going to use in the broadcast. According to your system configurations, you can choose a single sound input or even mix different sources.
Video
The video tab is another interesting section of the OBS where you can select the resolution of the video you are going to broadcast or stream. This also has features for selecting the frame rate, and you can also resize the video if you want to. The predefined (Canvas) resolution is a base display resolution that is suitable for any display of the PC or any game streaming. You will need to select the value of the base resolution depending on the activity you are doing.
For example, if you are playing a game with 1920*1080 resolutions, then you will have to change the base resolution to the same. Similarly, for any game with a resolution of 1280*720, you will have to change the base display resolution value. The Scaled resolution which is the output resolution of the live stream can also be selected in this same section. So, when you want to select the output streaming quality to be 720p, then you would have to set it to 1280*720.
Similarly, if you want a broadcast or live stream with 1080p quality, you will have to select the scaled resolution to 1920*1080. There is also another tool that is known as a downscale filter that helps you decide the resolution you want to downscale to when you want to downsize any video from a higher resolution to a lower resolution. "Lanczos" is such a tool that will help you achieve clear and sharp videos. It just uses more CPU power which can be optimized only in high-end PCs.
So, if you are using a low-end PC, then you can go for using "Bicubic" and the video quality for downscaling will be satisfactory. After that, you can select the FPS to whatever you want to stream and then close the settings. We recommend selecting a 60 FPS setting for optimized streaming with great quality. Along with these factors, such as rate control, bandwidth, bitrate, etc., are some of the key aspects of any video stream. Let us look at them one by one, and then we will discuss the best configuration for different encoders.
Encoders
Depending on the type and efficiency of the hardware you are using, the hardware encoding will affect the video streaming. In most of the systems, NVENC or Quick Sync hardware encoding is used, which will help in a reduction of the CPU usage. If you have NVIDIA 10, 20, or 30 in your system, then you should go for using the NVIDIA NVENC version encoder that will help you encode right on your graphic cards.
Also, if you are a gamer and are planning to stream a CPU-intensive game, then this will help you reduce the streaming load. Apart from this, the encoder is also unaffected by the GPU performance, which allows the user to multitask and handle different sections of the stream. If you don't have this card on your PC, then you can use the x264 encoder that will help you stream in great quality.
Rate Control
One of the main factors that decide the consistency of the bitrate, as well as the whole video, is the rate control. CBR or also known as Constant bitrate, is one of the most common methods that is used to change the quality of the broadcast. However, whenever you will select a greater bitrate, it will require more bandwidth of internet. Thus, you must have a system with high internet speed.
If your internet connection isn't fast enough, then you can choose the variable bitrate or VBR if the platform you are streaming on supports the VBR settings.
Bitrate
The first thing that you can consider manipulating is the type of connection you have to your system for streaming. A better internet connection will always give you a better quality of the video, which is why you should go for an Ethernet connection for the computer or streaming device. Now, the quality of video and the FPS also affects the need for different internet speeds.
Also, varying the bitrate if you have a limited interest speed is another solution to boost the quality of the streaming videos. Bitrate is determined by several factors such as video resolution, the frame rate of the video as well as the bandwidth in which the unloading is possible. Some of the key points that you should keep in mind are:
- Always use 1500 to 4000 kbps speed when you are going to stream in 30 fps with 720p quality on any platform.
- For 60 fps in the 720p quality, you will need to up the value of internet speed in the range of 2500-5000 kbps.
- For 1080p videos, when you are streaming at 30 fps, an internet speed of 3000-6000 kbps is a must, while for 60 fps in the same quality; the system should have an active connection of 4500-9000 kbps.
- Users should note that for streaming in Twitch, you can go up to just 6500 kbps which is its present value, and above that, it will affect the video quality.
Keyframe interval
Another factor that controls the quality of any video is the keyframe interval, and if you are streaming on any platform, you should keep its value to 2 in the OBS settings. What this means is that the video that you are uploading or streaming will be rendered with each frame every 2 seconds, thus providing you with better broadcast quality.
CPU Usage Preset
Many users don't know about this feature in OBS that they can set the CPU usage preset according to their requirement. But this can only be used in cases where the user is trying to encode in x264 for encoding. What this does is that it defines the limit for the power of CPU that you want to use for rendering any video in the live stream or broadcasting.
So, the slower the CPU usage is, the better will be the quality of the video. But on the downside, this will cause the CPU to work more. So, it is recommended to use the CPU usage preset as "Very fast" for optimum efficiency.
Profile
For general use in any live stream, you can set the profile as "Main". Or else you can set the different AVC that will help you optimize the broadcast in a dozen of ways. But it is mostly preferred that you don't change it unless you need to change the entire system configuration.
After you make these changes to the default configurations inside the OBS settings, you will see an enhancement in the quality of the stream. A summary of these settings, along with steps for different encoders, is listed below:
If you are using the NVIDIA NVENC encoder in your computer, then you can configure the settings in OBS to the following standards:
- Keep the internet connection up to 6500 kbps if you are using a twitch or else change it according to the streaming quality in any other application.
- Set the CBR rate as the rate control along with the Keyframe interval of 2 and set the profile as high.
- Now check the option that says 'Look-ahead' along with the 'Psycho visual tuning'.
- Then set the 'Preset' to Max quality if you have a 20 series GPU or else sent it to higher quality if your system has 10 series GPU. Now, after you are done with this, set the "Max B-Frames" to the value '2'.
- Now you will also see an option "GPU". You will need to set its value to 0 if you are using just 1 GPU. Else you can adjust its value according to the number of GPUs you are using.
If you are using the x264 encoder, then only a few changes are made other than the above settings. Those are:
- Set the bitrate configurations and rate control with the keyframe interval like the previous encoder.
- After that set, the CPU usage is preset to "Fast to Very Fast" if you are streaming high movement games. Otherwise, chose the "medium" option for games that don't involve heavy CPU usage.
- Then select the profile for high and correct the tune to "None".
Conclusion
The article discussed some of the most important and most used streaming settings for the OBS software. You can follow these to achieve great quality while streaming on any platform. The broadcasted video after these settings changes will put an extra star on the streams. However, these settings may have a different effect on different system configurations, and thus, you should always be ready for experimenting with a few settings to get the best quality stream.


