

High CPU usage OBS could be very frustrating, especially when you are a content creator trying to record high-definition videos. It is important to understand the causes behind high CPU usage, which will then allow you to address the cause and find a fix. In this article, we will explore the common causes of high CPU usage and also give a related fix.
In this article
-
- Fix 1: Lower the Screen Resolution
- Fix 2: Lower FPS
- Fix 3: Close excess programs and change process priority.
- Fix 4: Run all audio devices at the same frequency
- Fix 5: Change the preset
- Fix 6: Replace GPU
- Fix 7: Perform disk Cleanup
- Fix 8: Disable Game mode
- Fix 9: Update OBS Software
- Fix 10: Downgrade to an older version of OBS.
What causes the OBS high CPU usage issue?
Numerous reasons could lead to a high CPU usage issue, causing your system to hang or OBS software to shut down automatically. Let's explore various causes of OBS high CPU usage and possible fixes for the same.
| Probable Causes | Common Fixes |
| High-Resolution settings | Lower the screen resolution. |
| High FPS | Lower FPS |
| Too many applications running in the background | Close excess programs and change process priority |
| Audio Frequency is different for different sources | Run audio sources at the same frequency |
| X264 preset | Change the preset |
| Outdated hardware | Replace GPU |
| Low storage space | Perform disk Cleanup |
| GAME Mode on | Disable Game mode |
| OBS Software outdated | Update OBS Software |
| System incapable of handling higher version of OBS | Downgrade to an older version |
Fix 1: Lower the Screen Resolution
OBS has been designed to record the screen in real-time. Based on the pixels recorded in each frame will affect the clarity of the video and also the CPU usage. The higher the pixels, the better the quality of the video, and the higher the CPU usage. If, however, your CPU is unable to handle such resolution, causing the recording to hang or OBS to shut down, giving an error message such as “Encoding Overload,” you must try downscaling your screen resolution.
To that, you need to follow the following steps:
- Go to settings at the lower left corner of the screen.
- Click on the video under the settings window.
- Lower the Output (scaled) Resolution.
- Click ok. Refer to the picture below for more clarity.

Fix 2: Lower FPS
This is the most straightforward fix for OBS using too much CPU. The number of frames per second is directly correlated to CPU usage. The higher the FPS rate, the better the quality and the higher the CPU usage. So, if your PC is lagging, you can reduce the FPS rate. To do this, follow the following steps.
- Go to settings at the lower left corner of the screen.
- Click on the video under the settings window.
- Go to Common FPS value, select a lower frame rate, and click on Apply.
- Close OBS and restart your PC to see if the problem is resolved.

Fix 3: Close excess programs and change process priority.
If there are some extra applications running in the background, they may increase the CPU usage, increasing the load on the CPU and thereby slowing down the OBS. Closing all the background apps may help reduce the load on the CPU.
Also, the processing priority dedicated to OBS should be reduced. You can do that by following the steps.
- Go to settings.
- Click on the Advanced tab.
- Click the drop-down menu next to Process Priority.
- Default is above normal. Reduce it as per your requirement.
- Click Apply.

Fix 4: Run all audio devices at the same frequency
Is your OBS using too much CPU? Try checking the audio frequency. When the audio frequency and the video frequency are different, more CPU is used. Run them at the same frequency to lower the CPU usage. The steps are as under:
- Go to Control Panel > System > Sound > Device Properties > Speaker > Additional Device Properties > Advanced
- From here, you can check the speaker's Hz.
- Now go to OBS and the audio tab under settings.
- Now, match the sample rate with the rate of your speaker and click ok.
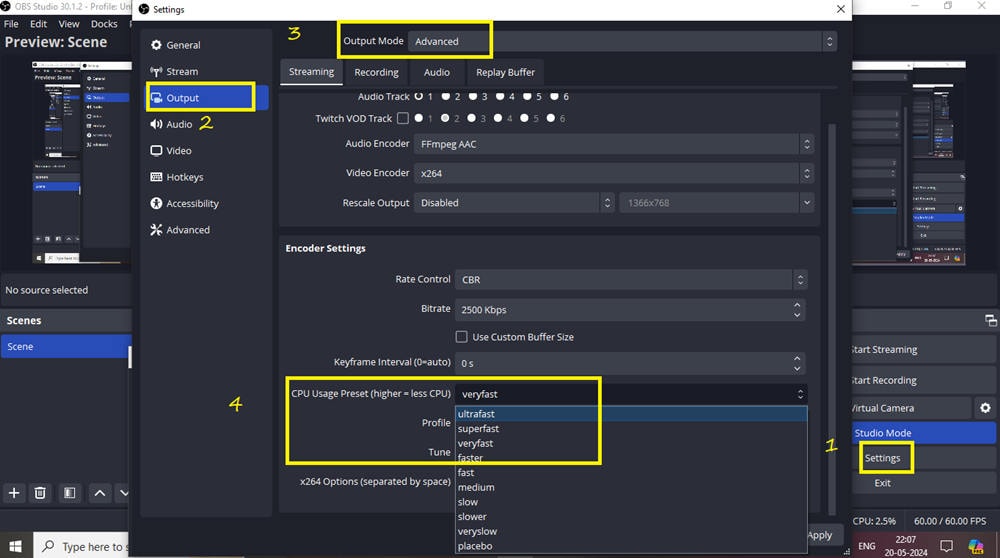
Fix 5: Change the preset
OBS has many presets to balance the video. The default setting is very fast, but that even needs a lot of CPU storage. Preset and CPU storage have an inverse relationship. This means increasing the speed at a faster rate will reduce the burden on the CPU and vice versa. To increase the preset rate, follow the following steps.
- Go to settings.
- Click on Output.
- Change the Output Mode to Advanced.
- Under Encoder Settings, change the CPU Usage Preset to Ultrafast from default Very fast

Fix 6: Replace GPU
Unfortunately, if you are working on an older system, simply downgrading the settings will not help much in reducing the high CPU usage issue. Besides, the quality of the video will also reduce to the extent that it would make no sense to take that recording anyway. In such a case, it's time to upgrade the system.
Upgrading a CPU would mean buying a new computer. Instead, you could try upgrading the GPU (Graphics Processing Unit). OBS uses the GPU to improve performance. So upgrading a GPU would automatically relieve the burden from the CPU and also improve the quality of the capture.
Fix 7: Perform disk Cleanup
OBS uses much space on the hard drive and needs a lot of RAM to run the software. If you do not have sufficient space on your HDD, it's time to delete some unwanted files and free up some space.
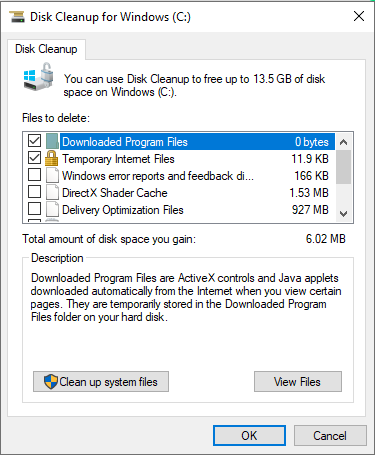
Disk Cleanup is a Windows application that can help you remove fragmentation and free up space. It also improves your machine's overall performance.
To Run Disk Cleanup, type Disk Cleanup in the Search Bar and open it.
The Disk Cleanup will ask you which Drive you wish to clean and show you the list of unnecessary files on that Drive. Once you click on Clean up, it will ask you to confirm that you want to delete those files permanently. Once you click Delete Files, viola, you are done.
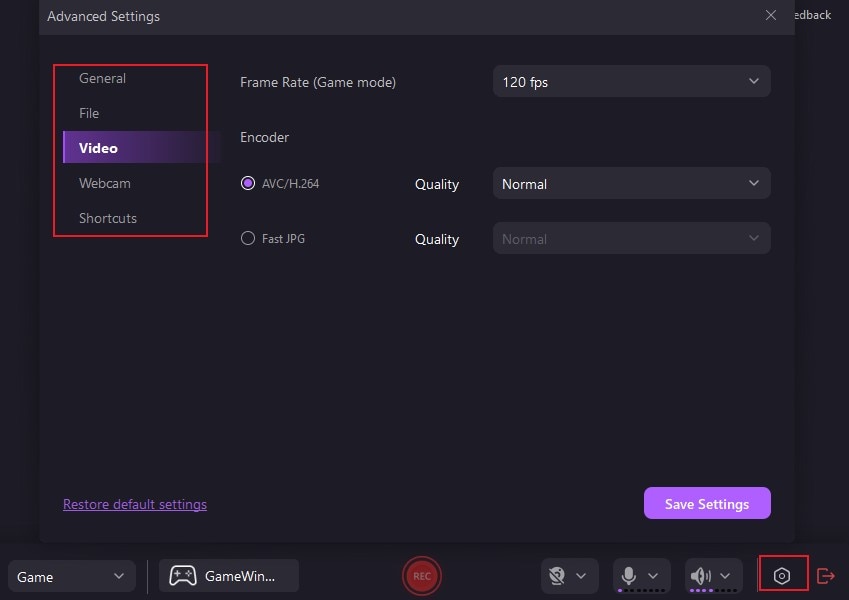
Fix 8: Disable Game mode
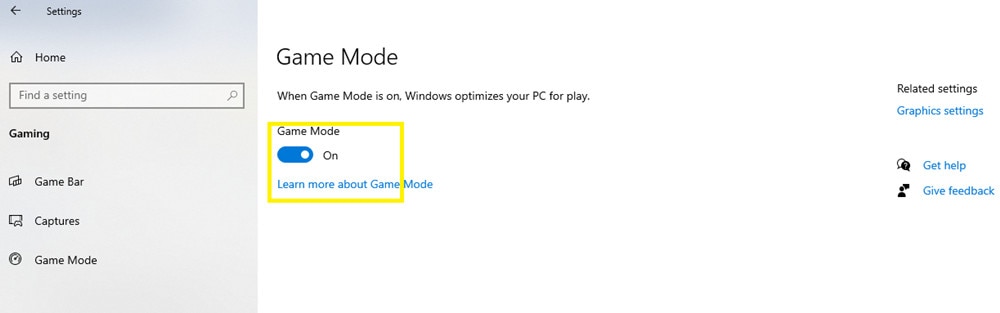
Game Mode is beneficial, but sometimes it may get in your way of recording through OBS. Turning off the Game Mode will release some pressure from the CPU. To turn off the Game Mode, do the following.
- Go to the search bar and type Game mode. It will show up the option saying Game Mode Settings.
- Open the Game Mode Settings.
- By default, the Game Mode toggle will turn on. Click on it to turn it off.
A screenshot of a computer
Description automatically generated
Fix 9: Update OBS Software
The software developers keep upgrading it to fix bugs and improve its usability. Make sure that your OBS software is up to date. If not, update it and see if it helps.
Fix 10: Downgrade to an older version of OBS.
This is the last thing you can do before you understand that it's time to upgrade your system.
Uninstall and reinstall the OBS software. If your system can't handle the updates, revert to the older version.
Part 3: Still facing issue? Try Wondershare DemoCreator: The best OBS alternative.
There are many screen recording software programs available on the market, and Wondershare DemoCreator is one of the best. If OBS uses less CPU, making the video quality poor, you may try using DemoCreator.
Steps to record video on DemoCreator.
Step 1: Download and Install DemoCreator
Go to the Wondershare DemoCreator website and click on Free Download. You can also choose to buy the paid version to access all the advanced features.
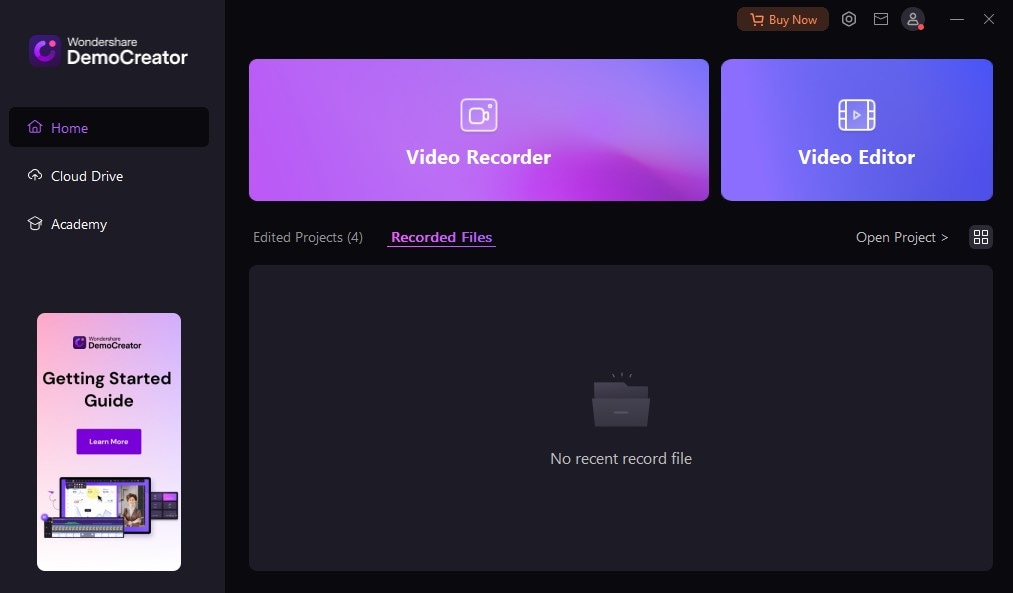
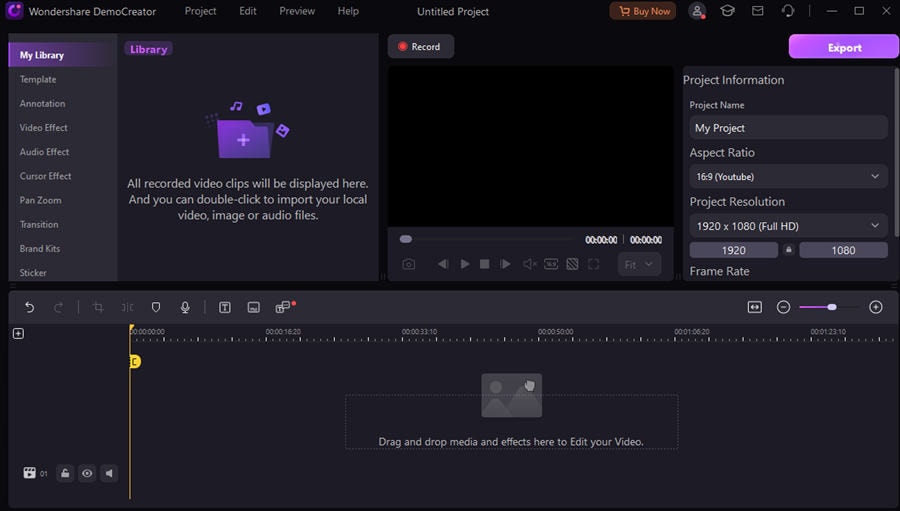
Step 2: Open DemoCreator software
Open the Democreator software. Select Video Recorder to record a video or Video Editor to edit a pre-recorded video. You may also click on Academy to learn how to use the software to record and edit videos like a pro.
Step 3: Begin recording
DemoCreator gives you 6 alternatives to choose from, whether you want to record Screen, Screen & Camera, Camera, Game, Virtual Avatar, or Video Presentation. Select the correct alternative to meet your requirements. Check your Camera, microphone, and speaker, and then click on the red Record button.
Step 4: Edit video
Once your recording has been completed, you will be taken to the next screen, where you can preview your video and make all the necessary editing to improve it. You can edit the background, change the transition to how you want the screens to transit, add effects to the video, and also optimize the audio.
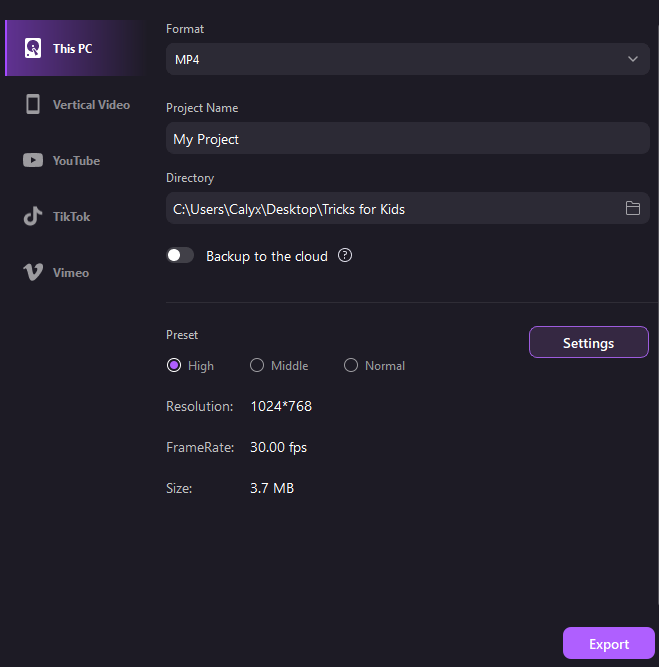
Step 5: Export
Once your video is ready, click on Export. Here, you can decide the format in which you want to save the video and change the directory to determine the path. From this screen, you can directly upload the video to YouTube, TikTok, or Vimeo. Once you are done, click on Export.
- Record customized screens with audio and edit them in different tracks.
- Capture gaming videos, tutorials, and presentations and then edit them in one tool.
- Built-in unlimited editing templates, special effects, and other sources.
- Supported export to MP4, MOV, MKV, GIF, and other formats.

Conclusion:
OBS is one of the best video capture programs. However, it requires a lot of processing power and hence becomes difficult to use on computers with lower processing power. If you are facing OBS's high CPU usage problem, try the above fixes to improve the CPU usage. If you are still not satisfied, try using alternative software such as DemoCreator.
FAQ
-
Q1: How to lower CPU usage on OBS?
A1: There are multiple ways to lower the CPU usage on OBS. We have mentioned 10 different ways above. -
Q2: How much RAM does OBS use?
A2: OBS needs at least 4GB of RAM. It must also have a minimum AMD FX series or Intel i5 2000
-
Q3: Why is OBS using too much memory?
A3: OBS doesn’t need too much memory. However, if you are using too many browser sources and plugins, it may seem like your OBS is using too much memory.


