

OBS Screen Recording

OBS is a well-known open source screen recording software to capture videos on Windows, Mac and Linux. For people who want to share their ideas, such as a gameplay explanation, lecture or even product demos, using OBS to record your screen and share the video will be a good choice. However, not everyone is familiar with this software or know how to use it. In this article, I’ll show you the basic functions and tools within OBS and the steps on how to record a computer screen with OBS.
Part 1: How to Use OBS to Record Screen
1. Installation and Downloading Process
Without further ado, let us know the process of downloading this open-source application from its official website.
- Go to the internet browser and type OBS Download and press enter to open the original download page.
- After downloading the installer, you can double-click on it to install it on your computer.
After successfully downloading the installation file, you can install the software anywhere on your computer. Note: You need a considerable amount of space to store the recorded files recorded with this application.
After the complete installation process, this application will ask you to set you recording preferences and some other related setting; however, you can choose the automatic settings for the initial stage.
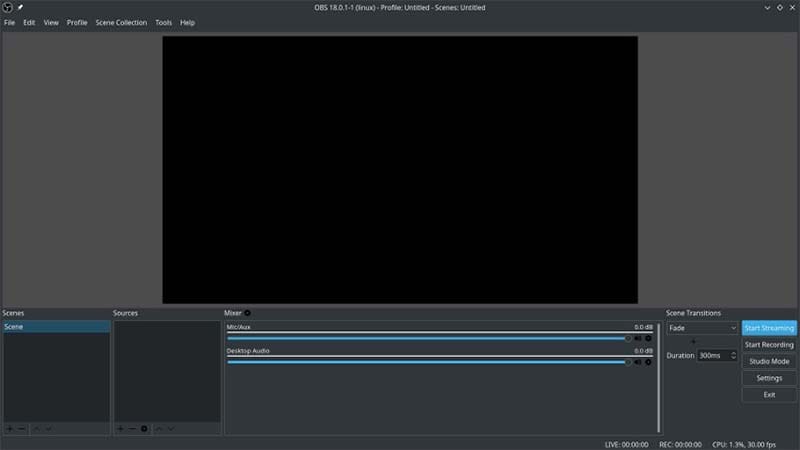
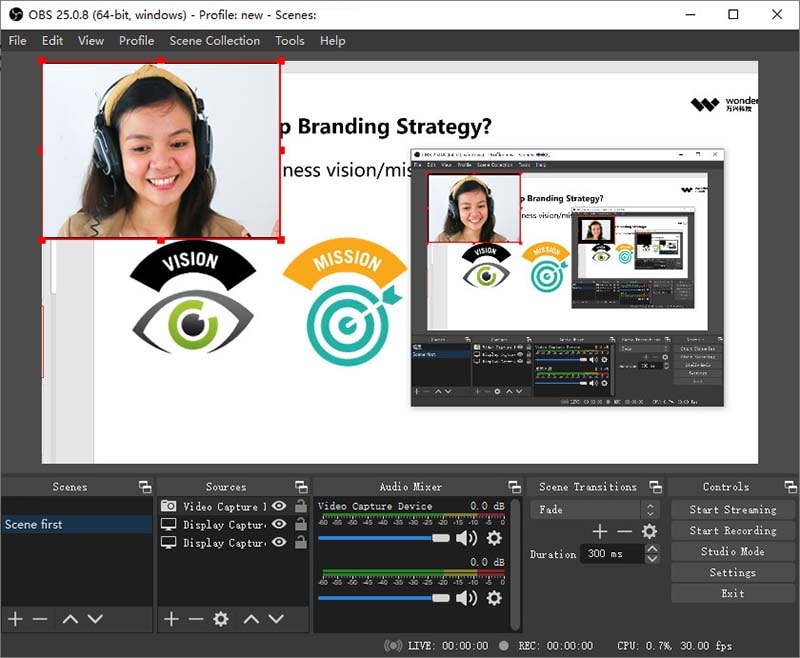
After the settings procedure when the final window will appear on the screen, it will look something like this
2. Screen Recording and Quick Setup
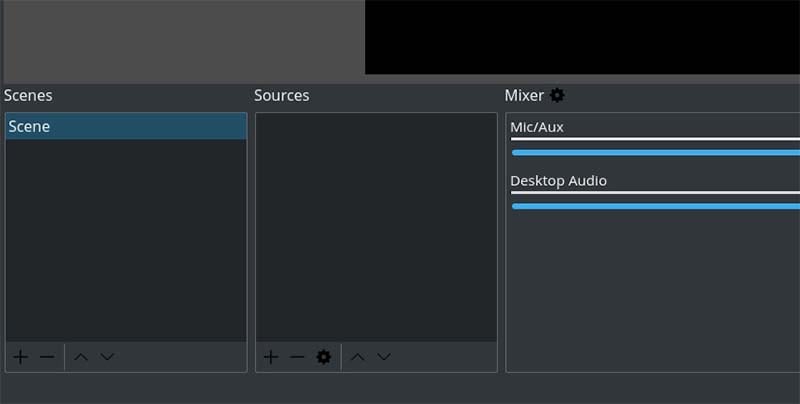
After opening the OBS screen, you will notice two boxes called ‘Scenes’ and ‘Sources’ in the bottom left corner; these two sections of this application maintains all the resources while creating video contents.
The default application comes with a default scene; however, you can add multiple scenes by pressing the plus button of the ‘Scenes’ box of this application.
On the other hand, in the starting, the ‘Sources’ panel appears blank with a message of pressing the + button to add the desired source for recording.
Choose any of the sources like browser, Display capture, image slid show, and game capture; however, for this tutorial, you have to select the ‘Screen Capture’ or the ‘Desktop Capture’ option of this application.
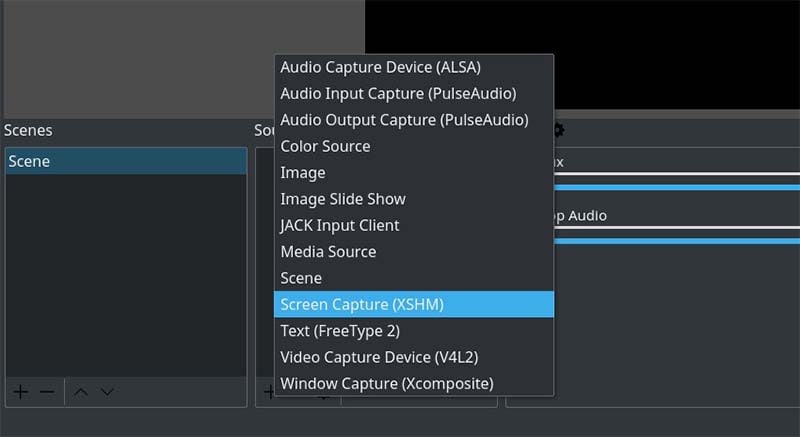
Now under the ‘Create New’ tab, provide a name and press the OK button.

Then from the properties tab, press the OK button again.
Now move on to the next section of this tutorial and press the bottom right option ‘Settings’ under the ‘Controls’ panel.
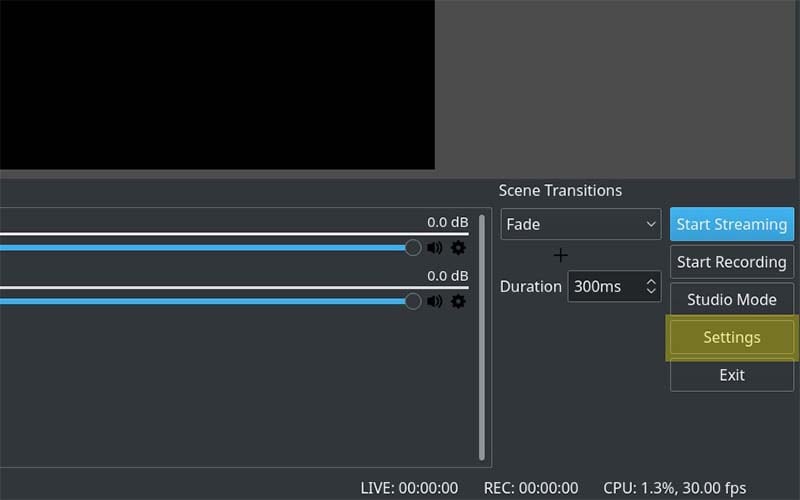
From the settings panel, chooses the output tab and change the recording path at your convenience. Remember, no to select any drive destination that has a limitation of storage.
3. Start Recording
After configuring the OBS Screen Recorder, press the ‘Start Recording’ located under the ‘Start Streaming’ option under the ‘Controls’ tab.

After finishing the screen recording process, press the ‘Stop Recording’ option, and the file will be automatically saved to the destination export folder that you set previously.
4. Customize Your OBS
In the steps mentioned above, we demonstrated the basic procedure of creating a screen recording video with the OBS Screen Recorder.
However, this application has further powerful functionalities to provide you additional facilities for the recording desktop screen like setting the video capture parameters, setting the video recording parameters, changing the output file extensions along with size and quality of capturing, and some advanced features of scenes and sources of this app.
Part 2: Pros and Cons of OBS Screen Recorder
Though the application OBS Screen Recorder has several powerful and useful features, it still has its own kind of few demerits. While planning to screen recording with OBS Screen Recorder, you should be aware of its significant merits and demerits too to utilize this application at its optimum potential. Below we have enlisted some essential pros and cons of this application.
Pros:
- One of the significant advantages of using this application is its seamless and powerful performance.
- The ease of performing screen recording with this application is another significant advantage of this application.
- It is open-source and completely free recorder with no watermark; thereby, you do not have to worry about buying subscriptions.
- Easy to incorporate the audio and video sources files on this application interface.
- The conversion of recorded files in different prevalent formats; thus, you would not have to face significant issues while uploading an exported video file with OBS Screen Recorder.
- The capacity of continuous recording helps to eliminate the chances of introducing any additional recorder.
- A vast library of additional plugins is available on the internet that makes your live-streaming very easy.
- The exported video quality is significantly high, comparing all its competitor products of the market.
Cons:
- Often the application malfunctions at the time of exiting the application interface. However, you can use the task manager to force close the application while facing this issue.
- The process of installing and integrating additional plugins is a little complex.
- The developer organization frequently sends updates of this application that could be annoying at times.
Part 3: OBS Alternative to Record Computer Screen
Wondershare DemoCreator is one of the best alternatives available in the market of screen recorder. However, this application has a paid subscription where the OBS is free for any usages.
In real terms, this application is OBS Screen Recorder’s perfect competitor because both the application has a clean and smooth interface for users.
Introduction
This application is loaded with a huge library of presets for any screen capturing need, along with great options for post-processing its contents with exciting transitions and animations. Overall, this video recording program is a one-stop solution for online teachers, gamers, and demonstrators.
The video editing feature is way more supreme than the OBS screen recording application. Videos that are created with this application can be shared directly in different file formats like MP4, MOV, MP3, and even the popular GIF format. Last but not least, this application has one of the clear graphics user interface among all its contemporary software, which makes it the best OBS alternative software for video recording.
Below, we are about to mention the entire process of recording your desktop or laptop screen with this wonderful application in just three steps.
How to Record Desktop Screen with Wondershare DemoCreator
At first, install the application if your computer does not own this software. After finishing the downloading, install it on the device.
Now, we are ready to start the screen recording action. After launching the application, choose the ‘Capture’ option between ‘Capture’ and ‘Video Editor’ options. After that, you can, you must set the recording resolution and area along with webcam and audio settings. You can further set the frame rates and hotkeys through this window.

Press the Settings icon located in the top right corner of the popup screen for these settings mentioned above to modify.
- Screen Setup: Go to the screen option; from there, you can choose between Screen Capture and game. This time you need to select the Screen Capture option, thence, set the screen size, and the frame rate of the screen recording from here.
- Audio Setup: Next, move on to the next option, ‘Audio.’ From here, you can choose which device will perform the audio recording task for your video. You can even turn off both the audio input devices, Computer Audio and Microphone.
- Camera Setup: Now move to the next section of this window, Camera. Using this option, you can choose to record video through your web camera, or even you can turn off that. If you configure your web camera, then you can further select the resolution of the recording along with the frame rate from here.Try It Now - It's Free!
 Secure DownloadTry It Now - It's Free!Secure Download
Conclusion
If you have gone through this entire article properly, then you may know now that how to record screen with OBS. The whole article has unveiled all the needful information related to the OBS Screen Recorder. Now, considering all the major pros and cons of this application, you can choose whether you want to stick to the application or move to something more productive for your need.
We have further mentioned one great alternative to this computer screen recorder so that you can choose between both of them before taking any major decision. However, all the applications have their respective strengths and weaknesses, and we need to consider some minor demerits of all products to take proper advantage of their actual strengths.


