
How to Watch and Share YouTube Videos Safely

You may be a teacher who wants to watch and share YouTube videos with students in the classroom. You may also be a parent worrying about your children when they watch YouTube videos. Sometimes YouTube shows irrelevant content alongside the actual video. Which is definitely a problem for students or children.
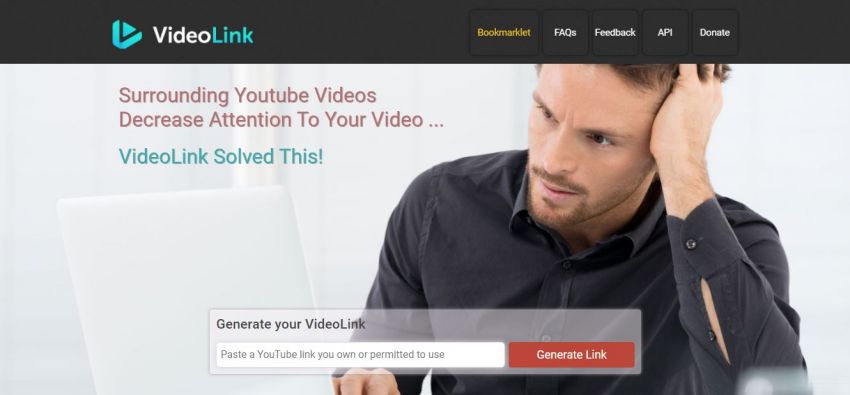
In that case, VideoLink is for you. Videolink will give you a much better experience than YouTube safety mode. Whoever you are and whatever your work or your interest may be, you will enjoy using its free service. It is a safe and friendly way without any offensive comments.
Videolink:

With Videolink, you can watch, crop, and share YouTube videos safely without any
- Comments
- Ads
- Distraction
- Suggested videos
If you don’t want your children to see adult content or to keep Youtube videos safe, you can use Videolink. It’ll help you to eliminate your safety concerns. It has many features that you can use.
Features of videolink:
- Completely free
You don’t need to buy any subscription to use this software.
- No registration is required
You don’t have to register before using this.
- No annoying ads
You’ll not have to face ads while using Videolink.
- Closed captions (Subtitles)
You can also add closed captions so deaf people can understand the videos.
- Loop YouTube videos
It also enables continuous watching.
- Views counter
Through Videolink, you can count views.
- Bookmarklet for fast Videolink video creation
You can quickly create your videos.
- Safe code
URL, HTML, and BB code can use that are safe.
- Share through social networks
You can share on social media and also by QR code.
- Alter video title
The title of the video can also be changed.
- Background skins
You can choose the background of your own choice.
- Autostart
You don’t need a process to start it.
- Sharing buttons
Enable/Disable buttons are available
- Responsive design
That can work on any design.
- Web-based
There is no need to install it. You can use it on your browser.
- Compatibility
It is compatible with any operating system, MP3, and MP4 conversions.
How to use VideoLink?
- After recording the video, upload it to YouTube.
- After uploading, Copy that video’s link.
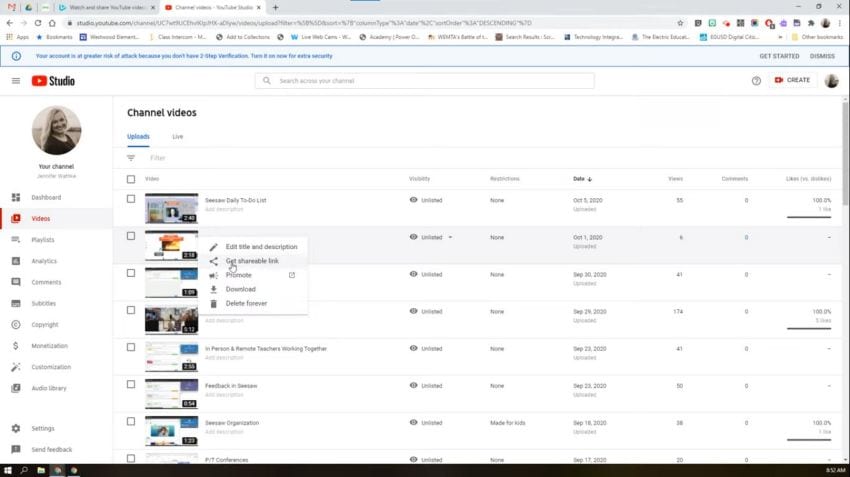
- After that, visit https://video.link/
- Paste your link there.
- Click to generate link
- From there, it will create a brand new link for you. A pop-up window will appear. Copy that link

- Share it with your family or friends.
(You can copy the link of any video whether you created it or found it).
Safe YouTube is now Videolink:
Can you say that safe YouTube is now Videolink? Yes, How? Because it helps you in making a friendly environment around the ones you share your link with. Some users not only want to create links but just to have access to partial video with a custom page. They also want to use it to avoid themselves with any distraction; no content on-page.
VideoLink helps in many aspects. Such as in business, in your project videos, you can share with your clients with no fear. In the education industry, as a teacher or instructor, you can share videos after generating safe links through this software.
Last year, due to lockdown, education was dependent on online classes. Teachers had to teach students online by giving lectures or sharing videos. At that time, Videolink helped most of the people regarding this situation. Even at home, you can't keep an eye on your children when they use phones. It has become the most existential threat for parents. But, this website has made it easy for parents as well to protect their children.
Alternative ways to make YouTube safe:
- Monitor
Watch; what type of content they are seeing?
- Help children self-monitoring
Teach them some basic sense of media consumption, habits, causes, goals, and effects.
- Disable Search
You’ll be able to keep your children away from searching irrelevant content by disabling search.
- Adjust the content level
There are settings where you can adjust the content for younger users as well as restricted ones.
- Pause Watch History
YouTube suggests the videos based on the ones you already watched. Once you pause the watch history, it’ll not show more content.
- Add a custom passcode
Add a tricky passcode; that can't be solved by your children.
- Block inappropriate content
It will help in not showing irrelevant content.
- Use Restricted Mode
You can use this mode to make YouTube videos safe.
- Remove distractions
Remove recommended videos and auto-play to avoid inappropriate content.
- Create custom playlists
You can also create a playlist of the videos, by selecting the content you want to watch.
- Use content filtering
You can also use some monitoring devices to see what they watch, when, and how long.
These are the ways that you can use to make Youtube videos safe.
Pros:
- Share safe content
- Protect children
- Free
- Easy-to-use
- Friendly YouTube maker
- Everyone can use
Cons:
- It takes too much time to generate
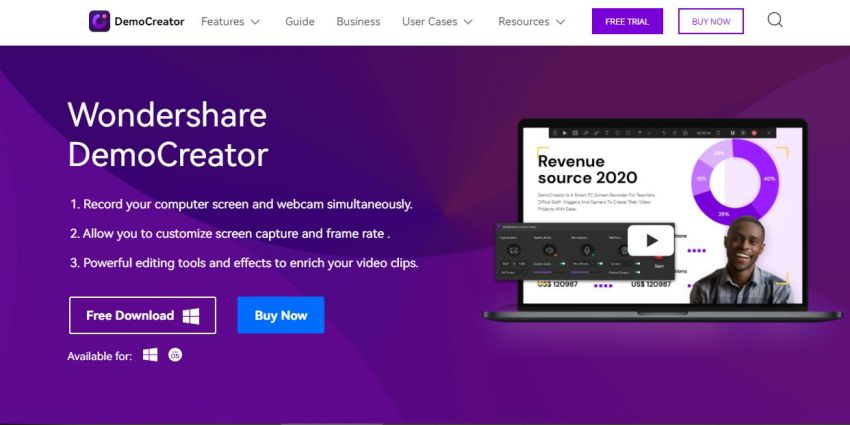
Wondershare DemoCreator features as a teacher & family-friendly YouTube video maker:
Democreator is software that serves many functions and features as a teacher and friendly YouTube video maker.
It is a desktop capture tool that allows you to record, edit, and export videos safely. Whether you are a teacher or parent, you can use DemoCreator. It is multi-featured software that you can use easily.
DemoCreator features as a teacher and family-friendly YouTube video maker because it is:
● Free to download
You can download this software freely. No registration is required to install this. It offers free updates as well.
- Just visit https://democreator.wondershare.com/
 Secure DownloadSecure Download
- Click on” Free download”.
● The closed caption can be added
You can also add closed captions (subtitles) for a better understanding of the viewers. Just as in Videolink, this feature is encapsulated by DemoCreator.
- Choose the audio effect option and select "Captions.
- Then click the subtitles.
- Select your desired format.
- Add subtitles you want to add of your desire, in your video.
- Comes with a web-based video recorder
Videolink is a web-based video recorder that does not want any hardware.
- Share through social media
You can capture your screen, edit it and then upload it to any social media such as Facebook, YouTube, etc. DemoCreator allows you to share your videos effortlessly.
Click on the "Export" option.
- Select “YouTube”
- Do some Adjustments.
● Novideo editing skills needed:
To use DemoCreator, you don't need any technical skills. It's so simple that everyone can use this software.
● Save your video in different formats and store it local:
You can export your video in any format such as MP4, AVI, WEBM, etc.
You can convert your video into any format suitable to your device.
- After editing the video, Click on “EXPORT”
- Choose the format in which you want to save your video.
- Choose the location to save.
Uses of DemoCreator:
- Making presentations
- Making tutorial
- Record Gaming videos
- Share interesting things
- Record any bug
Features of DemoCreator:
- Record multiple screens
You can record the main screen and other screens at the same time.
- Screen-Drawing
You can draw on the screen while presenting, for explaining a specific point.
- Green screen technology
You can change your background by using this green screen technology.
- Video Quality:
It allows you to export the video of resolution up to 4096*2160
- Stickers
You can also add the sticker of your choice, relevant to the video.
- Video speed controller
You can change the speed of the video; increase or decrease it.
- Removal of noise
You can remove the unwanted sound from the video.
- Record with camera
You can also record the screen with a webcam; make sure it's well connected to the computer.
- Record with Microphone
You can record your voice in the video.
- Transform
It also allows you to transform your captured content.
- Crop
You can cut and split the video; keep the desired portion.
- Trim
It allows you to trim the video.
- Captions
To let everyone understand, you can add captions, subtitles, so they can learn easily through your videos.
- Transitions
You can also add transitions of your choice to create amazing content for viewers.
- Voiceover
DemoCreator also enables you to voiceover your video. Through this, you can do commentary as well.
- Multiple formats
To view the video on all devices, DemoCreator allows converting it into a suitable format.
- Modification of cursor
Cursor movements can also be modified by this software.
How to use Wondershare DemoCreator to record your screen
1. Record screen and audio
How to record?
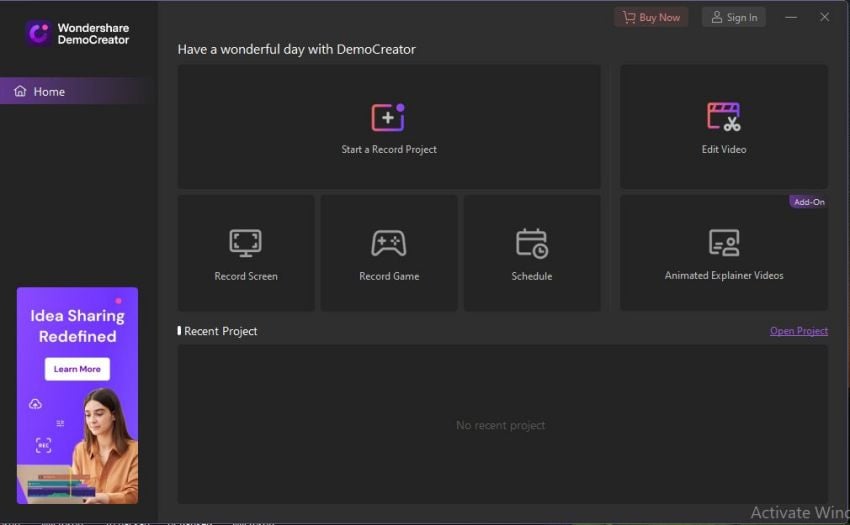
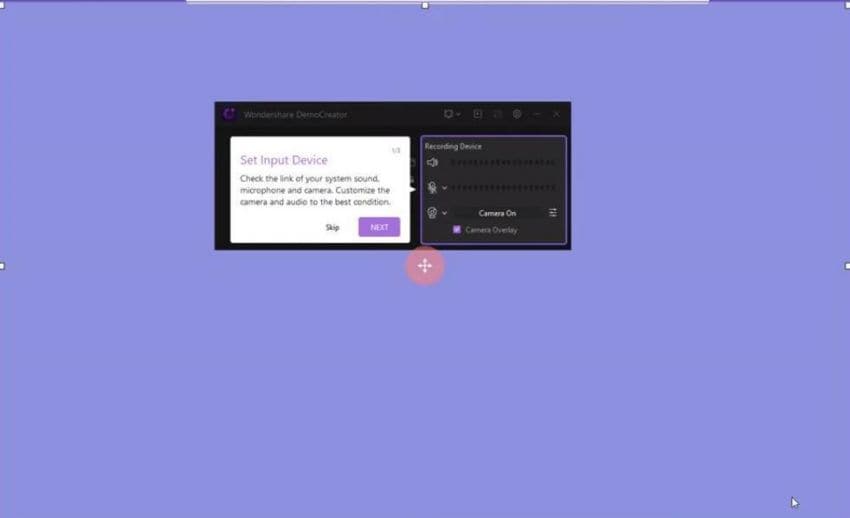
First of all download the software, DemoCreator by Wondershare on your PC.
- After installing it, open DemoCreator.
- A pop-up window will appear. Click on” Record screen”.
Secure DownloadSecure Download
- To customize your recording area, you just need to drag the border to adjust the size of the portion you want to record. In this way, you'll be able to make precise adjustments according to your region size using the magnifier
- After determining your screen recording range, you can find the webcam and audio icon in the bar.
- Enable the webcam and microphone, to record the screen with sound. Make sure your webcam and microphone are well connected to the computer.
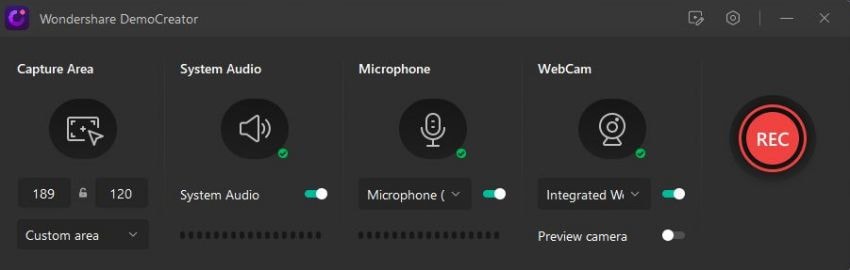
- After everything is ready, you can now click on the red round icon to start the recording.
- Adjust your recording area according to your choice.
- You can press start or stop the recording by pressing the F10 key.
- To pause the recording, press the pause icon or F9 and can resume it by pressing it again.
- Finally, the video will be saved to a specific location and open it in the editor phase.
2. Schedule screen recording:
You can also set a time to capture the screen. You can record your screen for 10 minutes in the free trial period. For more, you need to sign in or subscribe to the account. To schedule:
- Open DemoCreator.
- Click “Schedule time”
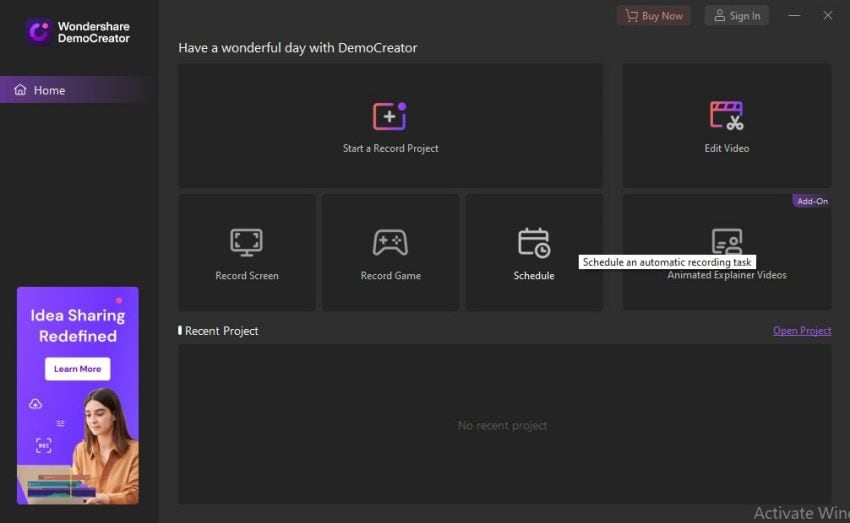
- A pop-up window will appear. Select record time, it’ll show you the adjustments.
- In the end, save settings to continue.

3. How to edit video safety
To edit the captured video, now we need to edit it. In the editor interface, there are 4 main operating areas
- Media library
In the media library, you can import files, add captions, annotations, stickers, transitions, montage, cursor effects, and preview clips. Recorded videos will be automatically uploaded to the media library.

- Timeline
You can drag your video into a timeline. Once a video clip is in the timeline, you can detach the audio for separate editing. You can cut, copy, delete or split the file you want. Mute audio and add markers are supported as well.
- Preview window
In addition to the backward, forward, play, and pause buttons you can also voiceover and take a snapshot. Drag the border to adjust. You can also adjust it through the properties window.
- Properties window
It allows you the following features
- Transform
- Compositing
- Speed
- Cut:
To cut the video
- Drag the video from the media library to the timeline.
- Crop or trim in the way you want.

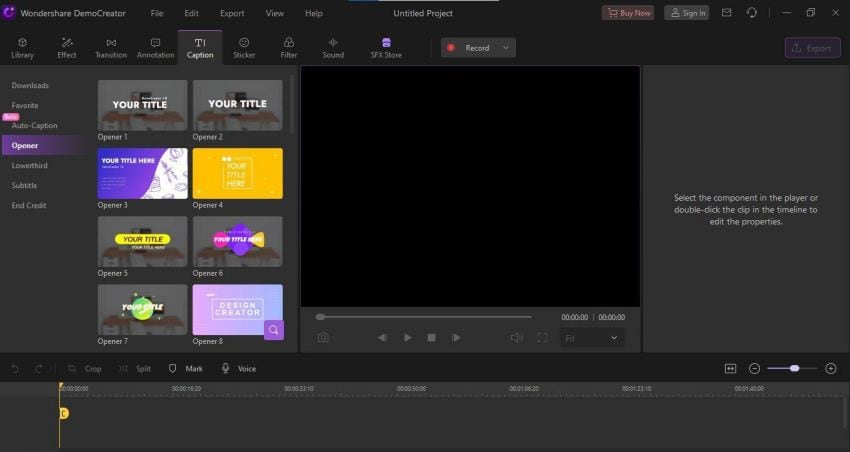
Add caption or subtitle
You can also add captions and subtitles for a better understanding of the people.
- Open editor interface
- In the media library, click captions.
- Choose the caption you want to add.
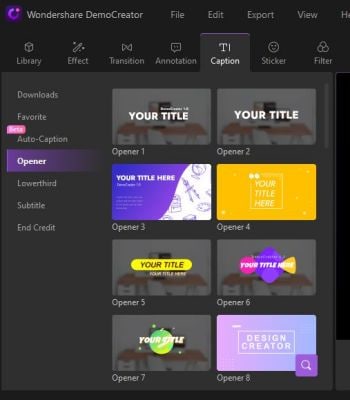
There will be other options as well
- Lower third
- Subtitle
- End Credit
Add transition
DemoCreator also allows you to add transitions.
- From the top bar, select transitions.
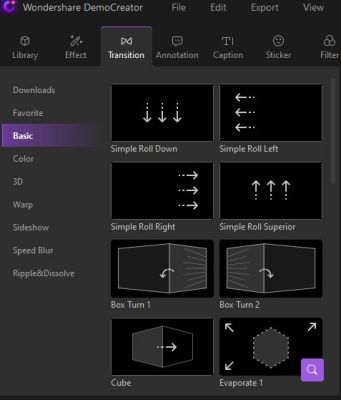
It will show many options such as
- Color
- 3D
- Wrap
- Slideshow
- Speed Blur
- Ripple and dissolve.
Add stickers:
You can also enhance your content by adding some stickers.
Choose stickers from the media library.
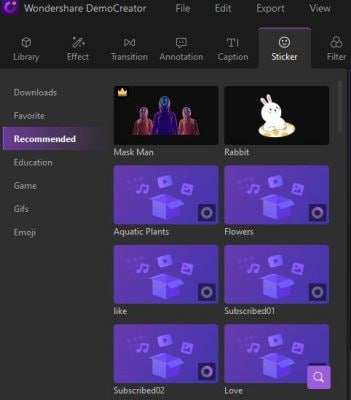
You’ll see different options
- Education
- Game
- Gifs
- Emoji
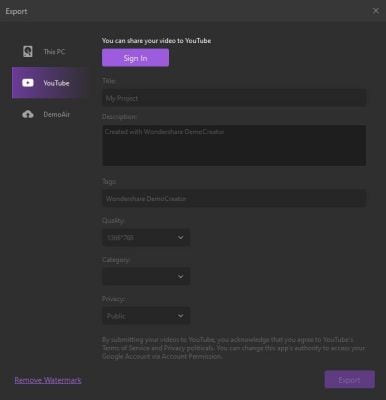
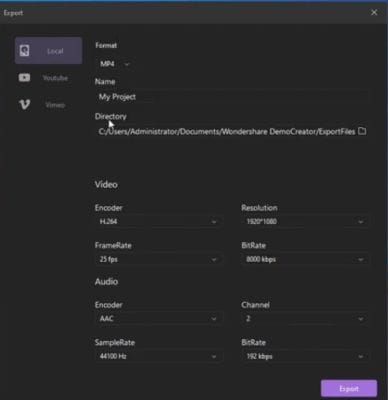
Save to local or YouTube:
DemoCreator enables you to save the video to your PC. After editing the video
- Click on "Export", in the upper right corner of the editor interface.
- You’ll see a pop-up window.
- From there, do adjustments such as choose format, location, etc.
- At last, click on export.
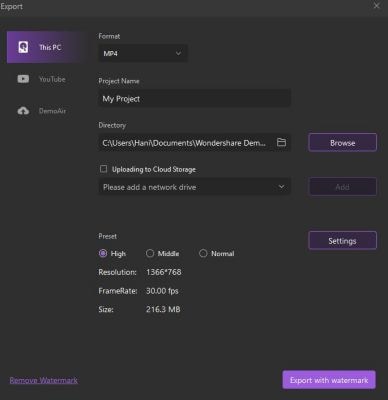
You can adjust settings such as
- FrameRate
- Resolution
- Preset
- Size
If you want to remove the watermark, you have to buy its subscription.
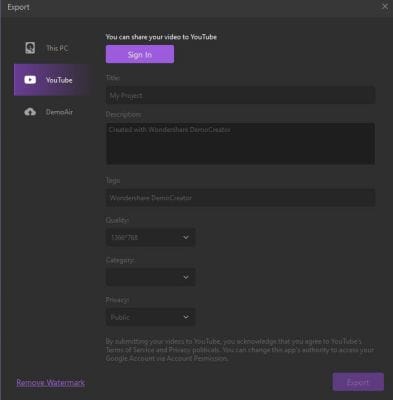
You can directly export the video to YouTube in the same way
- Just click on “Export”
- Go to YouTube
- Sign in to continue.
- After fulfilling all the requirements, export your video.
Pros:
- It records videos with good quality
- Distinct screen
- Wide range of features Free updates
- All recording editing features
- You can magnify the portion of the video you want to highlight.
- Availability of microphone and webcam
- Flexibility
- Add subtitles
- Safe YouTube videos
Cons:
- One of the main disadvantages of using DemoCreater, some filters are available only in a paid subscription.
- Privacy concerns; mic stays on after the recording is over
Conclusion:
Videolink enables you to generate safe video links so you can share them with your children, students, etc. It allows you to protect your children from watching adult content. It's more reliable than YouTube safety mode. Irrelevant content could be a problem for parents as well as teachers. You can solve your problem by using a video link.
It is all-in-one software. Along with your privacy concerns, you can also add creativity to your videos. But it takes too much time to generate safe links.
DemoCreator offers safe YouTube Videos and many other features as well.
Wondershare DemoCreator allows you to record your screen, edit your captured videos and then export it safely to a local drive as well as on YouTube.
You can crop, trim, add transitions, add effects, voiceover, add subtitles, etc.
One of the main advantages is, it’s free of cost. You’re just one click away from solving your problem. It’s a web-based tool that you can use on a browser.
It’s more reliable and has multiple features. Download it and must give it a try. Experience its amazing features on your own.


