OpenShot vs. Shotcut
The trend of video marketing is the future of marketing and will soon overtake all other marketing tactics and strategies. To keep up with the ongoing trend, you should think of entering this league by using one or several video editing software.
For your convenience, we have shortlisted two such programs, Shotcut and Openshot, which can be your ideal choice. Before you pick any one tool using Shotcut vs. OpenShot table, you should get into a detailed analysis of both tools along with the comparison table, which will help you in picking the most suitable video editing tools for your videos.
Part1. OpenShot Video Editing Software
Award-winning open-source video editing software OpenShot has you covered if you're searching for something that'll be simple to use and learn for short video projects. OpenShot is a video editor that may be downloaded for free as an open-source application. On their official website, you can get it for many OS systems. It's a strong tool that may serve as a good starting point for learning how to edit films on your own. OpenShot does have a few unique capabilities that are generally missing from free software, such as a chroma key and rudimentary 3D animation tools for snow, lens flares, and flying text.
OpenShot is a free video editing tool for Windows, Mac, and Linux, which is a huge plus for any aspiring but cash-strapped editor. Is this one worth your time in the burgeoning field of free editing software? With drag and drop, you can resize, scale, cut, and mix audio while seeing real-time previews. Learning how to utilize the complete interface takes some effort, but it's well worth it with all of the options offered. However, there are several videos and YouTube tutorials available to help you through the procedure. It's a capable small video editor that's ideal for modest tasks, and OpenShot allows you to work with an infinite number of tracks and layers. It is a versatile option since it is compatible with a variety of formats and operating systems.
If you are looking for an easy and quick way to master the art of editing, your search will end with OpenShot. OpenShot is an open-source video editing tool that creates high-quality outputs with the fantastic features it offers. It supports a wide range of video, audio, and image formats. You can even burn your film to DVD, upload your work directly to YouTube or Vimeo, or export it in any other video format. Its basic editing features include resizing, scaling, trimming, and audio mixing with real-time previews.

It has curve-based keyframe animations and supports 2D animation created through image sequences. The in-built video effects include brightness, grayscale, gamma, hue, etc.
Though it lacks the Multicam editing feature, it is equipped with some other features that make it unique from all other free editors available in the market. These outstanding features include the chroma key function, basic 3D animation tools for adding snow, text, or lens flares to the frames, etc. It even provides unlimited tracks and layers. Its desktop is integrated with drag-and-drop support.
This free tool, packed with powerful features, would be a great choice for simple projects. It is best to edit basic YouTube videos. However, it lacks professional editing features that may give a cinematic look to your videos. Thus, this simple video editor is useful for editing simple videos and cannot be used by filmmakers.
Pros
- It has a user-friendly, intuitive interface that allows users to explore all the editing features
- This allows previewing the projects from a common window, which is of great help.
- It offers a diverse range of seamless transitions.
- The editor supports excellent audio editing features to improve the audio
- This helps in additional boosting the effectiveness of the video.
Cons
- The engine of the editor has lagging and crashing issues.
- It is still not GPU-accelerated for encoding or decoding videos.
- Being a simple tool, it cannot be used as movie-making editing software.
Part2.How to Use OpenShot to Edit Video
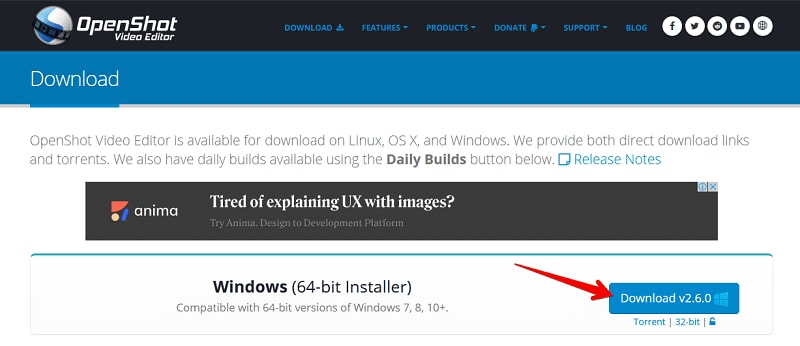
OpenShot video editor is a free and open-source video editing software that enables you to quickly make changes to your films. Jonathan Thomas, a software developer, began the project, which is currently maintained by OpenShot Studios and individual software. It's quite simple to set up the application. The installation procedure is not difficult to complete. Once you've downloaded the software to your computer, all you have to do is double-click the setup file and follow the easy steps to install it.
Step 1: Download OpenShot and Import Videos
Many video and audio formats are supported by the OpenShot video editor. In reality, the application reads and writes most multimedia formats using the FFmpeg library. MP4, AVI, WMV, OGG, MKV, Blu-ray, FLV, MP3 AAC, WMA, and more video formats are supported by the software. JPEG, GIF, PNG, and other image formats are widely supported by the software.
Step 2: Go to the Editor
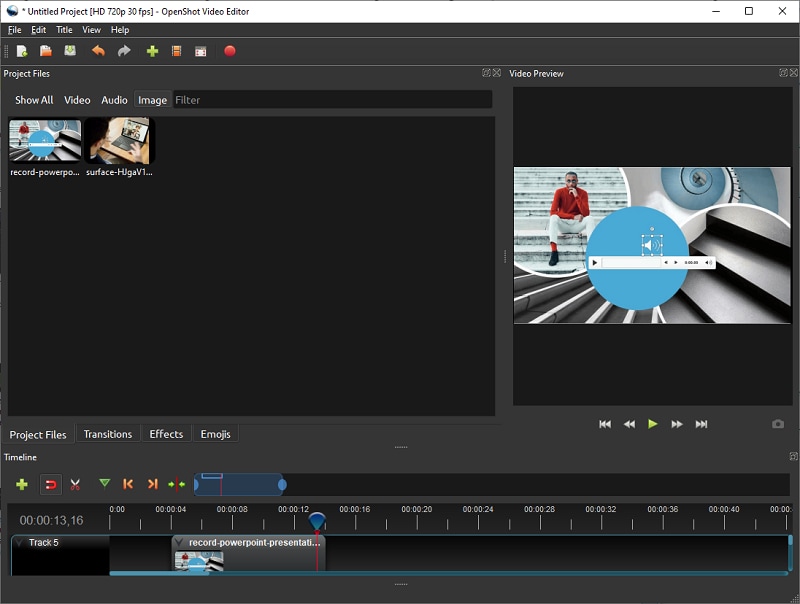
It also has a preview player that enables you to see your project while you work on it. This feature allows you to see the final product you're going to create and make modifications if your intended objective isn't met. You may also speed up your work by using the available keyboard shortcuts. All of the shorts may be found in the preferences box. The track or layers functionality in the OpenShot video editor enables you to utilize many files at once. You may layer videos or photos on top of one other and organize them in any way you choose.
Step 3: Edit your Project Files
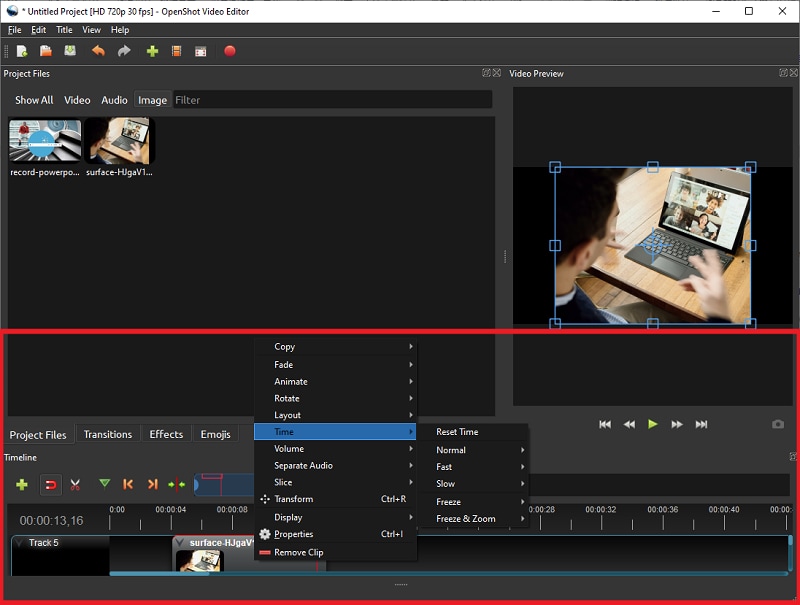
You may use this OpenShot for a variety of tasks, the most important of which is video editing. You may use a variety of editing tools in this software. The split tool enables you to cut out parts of movies that you don't believe are required. To utilize this tool, just enter the start and finish timings for your project and create a new movie. Cutting, scaling, rotating, and transforming tools are some of the other tools that we found intriguing.
Step 4: Record and Export the Videos
Cross-platform compatibility enables you to work on your project on a variety of operating systems without difficulty. You may opt to work with Windows today and then switch to Mac OS or Linux later without generating any issues with your project. When you're through with your creation, you may easily save it in the format you prefer. You may store your creations in predefined profiles for the web (YouTube, Flickr, Vimeo, Meta Cafe, and so on), Blu-ray, DVD (NTSC or PAL), and Xbox and Apple devices. The predefined profile settings aren't the only ones available. You may save your work in whatever format you desire, including MP4, MOV, AVI, FLV, OGG, WEBM, and MPEG. You may also choose the video quality and profile you want, such as HD, 2K, 4K, and others.

Part3. Shotcut
Moving on to one more free video editing software that impresses professional video editors is ShotCut. Like OpenShot, it is an open-source program that supports a wide range of formats. But it is a bit more advanced than OpenShot as it is widely used for creating 4K quality videos.
Shotcut is a respectable open-source video editing tool that is fully free and full-featured. They can handle a wide range of formats and even mix and match resolutions and frame rates within a project. When compared to other free tool alternatives, the number of audio and video effects available is astounding. Shotcut is one of the greatest free video editing software tools available since it works on even low-end systems. Shotcut may be a good fit for you if you're an amateur-slash-prosumer videographer with a mid-level Mac, Windows, or Linux machine who doesn't need a lot of bells and whistles or handholding to achieve your objectives.
Importing video, keyframing on a timeline, editing, splicing, and adding transitions, titles, and effects are all handled with just a few clicks and lots of drag and drop. It's touted as a consumer/prosumer-friendly, straightforward software that gets the job done with little interface complexity, and it succeeds for the most part. This video editor works with a variety of operating systems. It might be a good place to start if you want to start making videos with excellent video and audio quality. Shotcut also has the advantage of not requiring any imports due to its inherent timeline editing functionality. The clean UI is easy to use, with basic controls for everything from simple splicing and locking tracks to multitrack and waveforms.
With a collection of remarkable features, it helps beginners to create professional-quality videos. It allows mixing and matching resolutions and frame rates within a project.

It offers a bunch of amazing audio and video effects, filters, and transitions. Due to its native timeline editing feature, no import is required in Shotcut. From basic scaling, snapping, and rotation to cutting and trimming of clips, it is an all-purpose video editor that fulfills basic video editing needs. It includes a history view option with unlimited undo and redo while editing. Additionally, its features include splicing, locking tracks, multi-tracks with thumbnails, and waveform.
This cross-platform tool opens up a sleek and intuitive interface and keeps things simple for editors. But as soon as you start adding more modules using advanced features, it will show its depth. Shotcut is easy to use, but its stackable features may make it a bit complex to use. Also, if you are a first-time user, you are advised to go through the Shotcut YouTube channel. Their channel offers a set of video tutorials to help you out with editing.
Moreover, you can even buy an online course dedicated to Shotcut. This course has been officially approved by Shotcut's lead developer. However, being stacked with too many features may appear a bit confusing. You may need to go through tutorials if you are using it for the very first time.
Pros
- It offers an outstanding collection of audio
- You get a vast variety of video filters.
- It comes with a set of unique features that help you the most in a quick sports video.
- This offers features like video stabilization and chroma-keying,
- It helps you in making overlays, fixes lens distortion, and many more things.
Cons
- One of the major drawbacks is that the tool is not supported by Android or iOS devices.
- You can only add texts using Text HTML filters as the software does not support subtitles files in SRT or SUB format.
- Non-availability of stock music
- The non-availability of the VFX or color grading tool makes it less appealing.
- The export process may become a tedious task for some users as it has no export presets for devices. It gives you access to control export settings in terms of frame rate, resolution, etc. Controlling these settings is quite difficult for users who are not familiar with these parameters.
Part 4. How to Use Shotcut to Edit Video
Shotcut is another widely used open-source video editor that runs on a variety of platforms. It has a pleasant user interface to operate with. When it comes to features, it has virtually everything you could want (from color correction to adding transitions). It also comes with a portable version for Windows, which is rather excellent.
Step 1. Launch and Import Videos
First and foremost, you'll need to download and install Shotcut, which may be found at shotcut.org. You won't have to pay anything since it's free and open source. When you initially start Shotcut, all you'll see is a basic software window waiting for your orders. There are no popup boxes or a welcome screen. It's all there, just waiting for you to put it to good use. Before you begin, take some time to go through the menus to discover what options are available. The Shotcut source code is available on GitHub, along with installers for Windows, macOS, and numerous Linux operating systems.
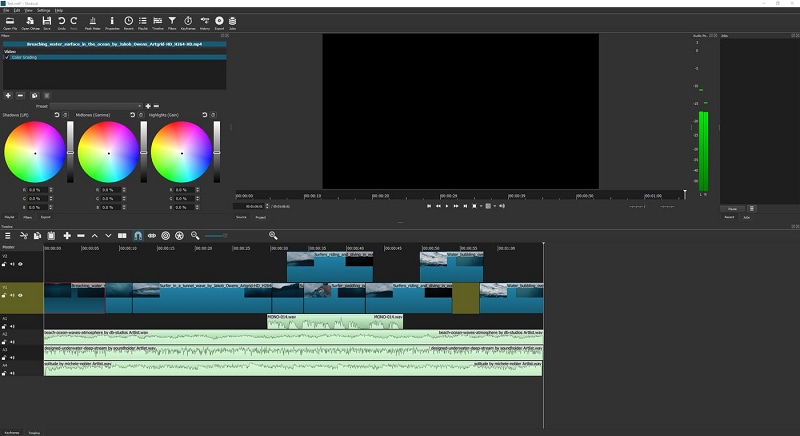
Step 2. Go to the Editor and Customize
When you're ready to begin your movie production, choose Open File to import the files you'll need. Wait for the files to be imported; keep in mind that the first video will start playing automatically, so be prepared to halt it if required. The imported files will be shown in the left-hand pane (the Playlist), and the currently-selected file will be displayed in the main window. Look for the players, which you may use to play, stop, nudge back and forth across the movie, and even drag.
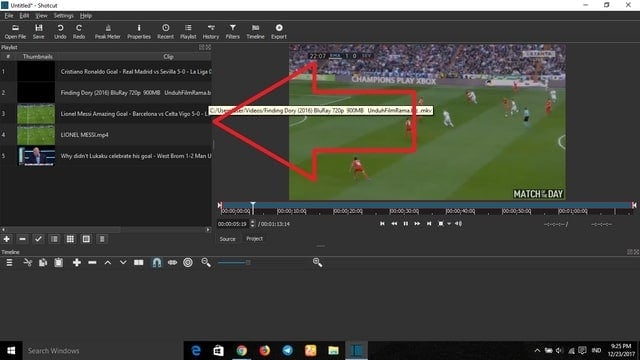
Before you do anything more, use Ctrl + S (or open File > Save) to save the project after the files have been imported. Don't forget to give it a meaningful name!
Step 3. Edit the Video with Effects
You'll need a timeline before you start putting your video together. This isn't shown by default; to see it, go to the View menu and choose Timeline. All that's left is to start organizing your video clips along the timeline, maybe with some still photos and a soundtrack. You'll see a single, linear timeline by default, but you may add extra tracks if necessary. Do you want to adjust the pace of your video clip? After you've selected it, go to Properties. Across the Video, Audio, and Metadata displays, you'll discover a wealth of comprehensive information. Most significantly, you'll find Speed, which is set at 1.000x by default. To adjust, use the up and down arrows.
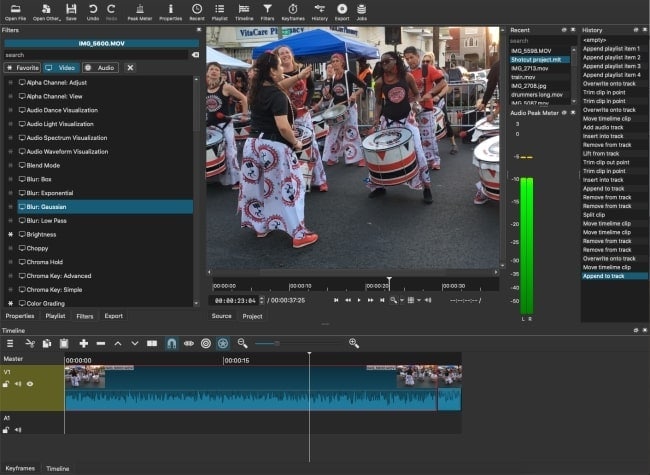
This is handy when creating a film with a variety of shots for the same scene, for example. To do so, just drag the placeholders at the beginning and conclusion of the clip until it reaches the required length. Simply import the footage, again and again, cutting each shot as required, if you want numerous chunks from the same clip.
Step 4. Export and Share
It might take a long time to create an export file. You'll need to find something else to do even if it's just a one-minute video. It's worth noting that you may alter the resolution and aspect ratio before exporting, as well as the codec and audio bitrate.
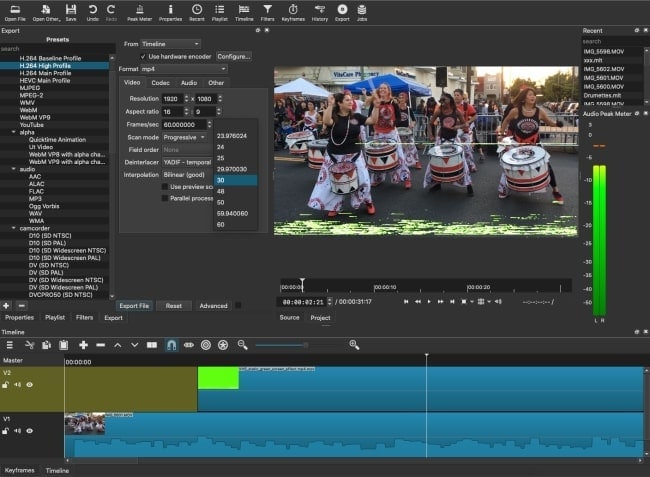
You'll eventually be able to export the final video. To get started, click Export and keep with the default export parameters. While you'll have a wide range of output formats to choose from, it's better to go with the most basic, default choice. If this isn't the best format for your upload, try something else. The export file will eventually be available for you to see. Go ahead and save it if you're satisfied. Otherwise, return to the previous step and export in a different format. Your video will be available to share after it has been properly exported to your specifications.
 Pro-tip
If you want to get more OpenShot comparisons, click here to learn more details about it.
Part 5. Comparison Table
Well, this OpenShot video editor vs. Shotcut comparison table will help you understand which is better Openshot vs. Shotcut. Dig in:
|
Particulars |
OpenShot |
Shotcut |
|---|---|---|
|
Support OS |
Windows, Linux, Mac |
Windows, Linux, Mac |
|
Hardware Acceleration |
Experimental Support |
OpenGL through Movit and WebGL through WebVfx (testing period) |
|
Price |
Free |
Free |
|
Training |
Documentation |
Documentation |
|
Speed Adjustment |
Support |
Not support |
|
Audio Tools |
Support |
Not support |
|
HD Resolution support |
No |
Yes |
|
3D Video Editing Tools |
Yes |
No |
|
Text Overlay |
Support |
Support |
|
Split/Merge |
Support |
Not support |
The selection of the tool would be completely based on your needs. Also, you would be able to create appealing video content only when you know how to shape and put your idea using an appropriate tool.
Part 6. OpenShot vs Shotcut
On the internet, you may find a variety of video editors that you can download and use on your computer. But how can you know which one is capable of completing the work at hand? Some of the software is free, while others need payment before use. OpenShot Video Editor vs Shotcut is one promising product that educated me and inspired me to create this evaluation.
Effective Audio Editing
This editing software also allows you to easily edit audio. You can also change the color, preserve white balance, apply sharpness filters, and increase color saturation. It's a free multimedia editing software for the Windows operating system.
For the majority of what you'd need to perform when editing a movie, OpenShot offers a set of programmable keyboard shortcuts. Unfortunately, on the system we tried it on, those used to move about your work didn't operate; even moving one frame at a time through the timeline using the relevant arrow keys didn't work.
Best for YouTube Video Production
YouTube viewers and other social media video creators would appreciate Shotcut Video Editor 32-bit. A video file's display resolution and frame rate may be mixed and matched. This software has a drag-and-drop feature. You may drop a file into the timeline by dragging it into the UI.
Titles are added in OpenShot Using A Floating Window
You choose one from a list, input your text in the relevant boxes, modify the font and color to your satisfaction, and OpenShot converts the template into a still picture and places it in your Media pane. It's still changeable while it's in there if you want to make changes, but after you put it into the Timeline, that option is gone. You'd have to remove it, alter the one in the Media pane, and then add it to your project again to change it.
Multiple Videos Can Be Loaded
You may even combine numerous films to create a music collaboration and adjust the size and location of the windows as needed. Shotcut will create a video track and add your video file to it automatically.
You may then add the edited clip to your timeline and extend your clip beyond those Start and End markers from there. However, it appears to be overly complicated, particularly the creation of a new clip. Thankfully, you can avoid all of this by dragging the whole clip to your timeline and then cutting it with the Razor Tool (shown as a pair of scissors) to save just the sections you need. The speed and performance of OpenShot have improved significantly.
Can Add Transitions and Various Effects
You can download an update for Transitions for Shotcut if you're using the current version and it's available. It is, however, constantly updated. You may upgrade to the newest version with a single click once a new update is available online.
When applying transitions and effects, it no longer seems slow, and OpenShot looks to be considerably more stable than previously. That alone is worth its weight in gold since nothing is more annoying and useless than constantly crashing software.
Undo and Redo options are available
It also keeps track of prior actions so you can see what you've done. You can, on the other hand, undo and redo your activities. As a result, there is no room for error.
One of the most important aspects of video editing is being able to choose the appropriate portion of your footage to use in your cut. You can preview a clip with OpenShot by right-clicking it and selecting 'Preview,' but you can't define In and Out points. To do so, go to the contextual menu and choose the 'Split' option, from which you can also preview your film and set the Start and End markers.
Remover of Green Screens
You may quickly remove the green backdrop with the Shotcut chroma key and replace it with whatever you wish. You can create interesting green screen effects by overlaying films over other videos or photos. Simply look for chroma in your filters and search for it.
The Properties pane, where most of the data on display are keyframes, is where keyframe animation is done. It's annoying, however, because the scale option is still separated between the X and Y axes, requiring you to modify two numbers to proportionately resize a clip over time.
Part7. Alternative to OpenShot and Shotcut- Wondershare DemoCreator - Bonus
Overall, OpenShot has promise, but it hasn't gotten nearly as many updates as we would have expected after two years. Although it is more reliable, which is a positive thing, we believe there are better - even free - options available.
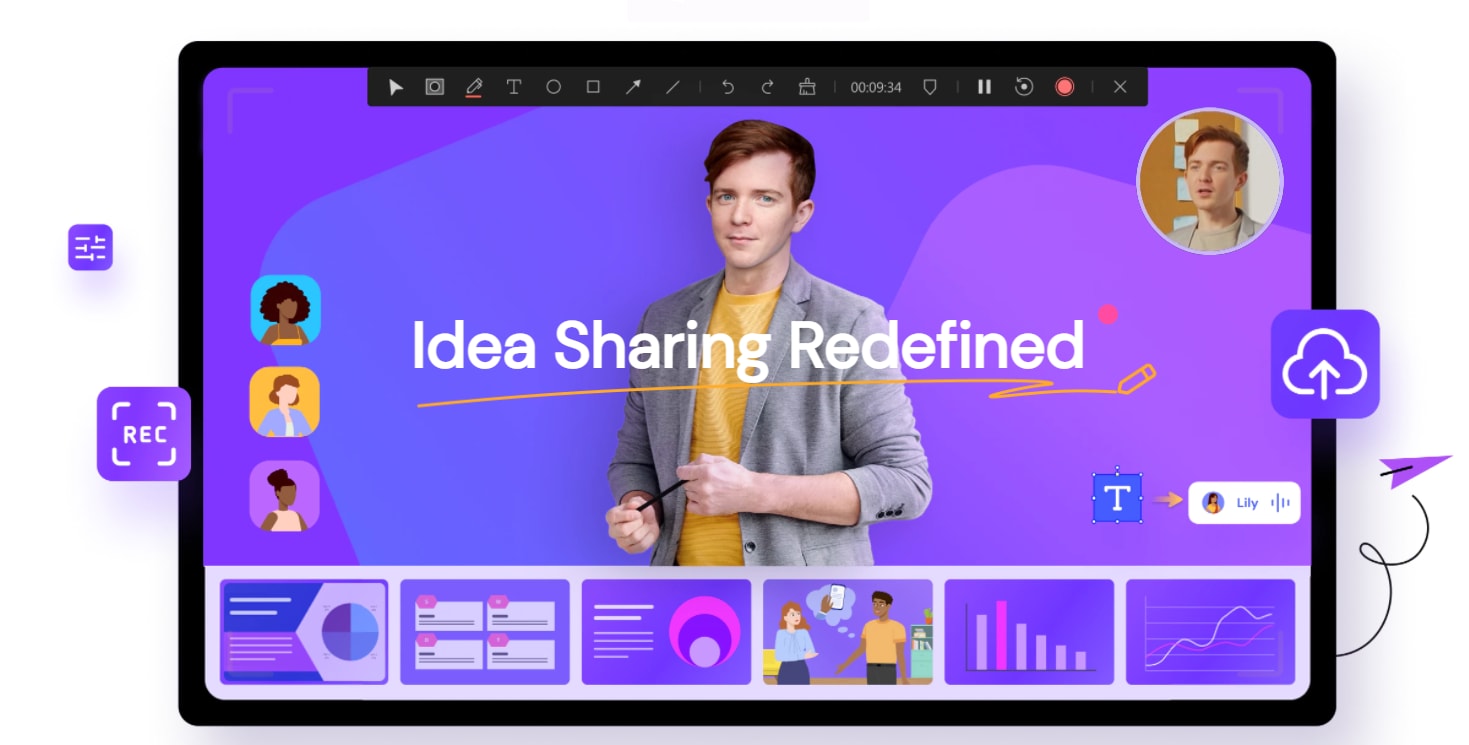
It all boils down to what you need the most from your free tool. More than the technology you choose to put it all together, the performance of your video marketing will be determined by your concept and what you want to achieve. DemoCreator video editor is an all-in-one software that combines power and the most requested features by video makers.
You've undoubtedly heard of DemoCreator if you're not new to digital filmmaking. DemoCreator is a video editor created with the novice filmmaker in mind, while also providing professional filmmakers with advanced video editing features.
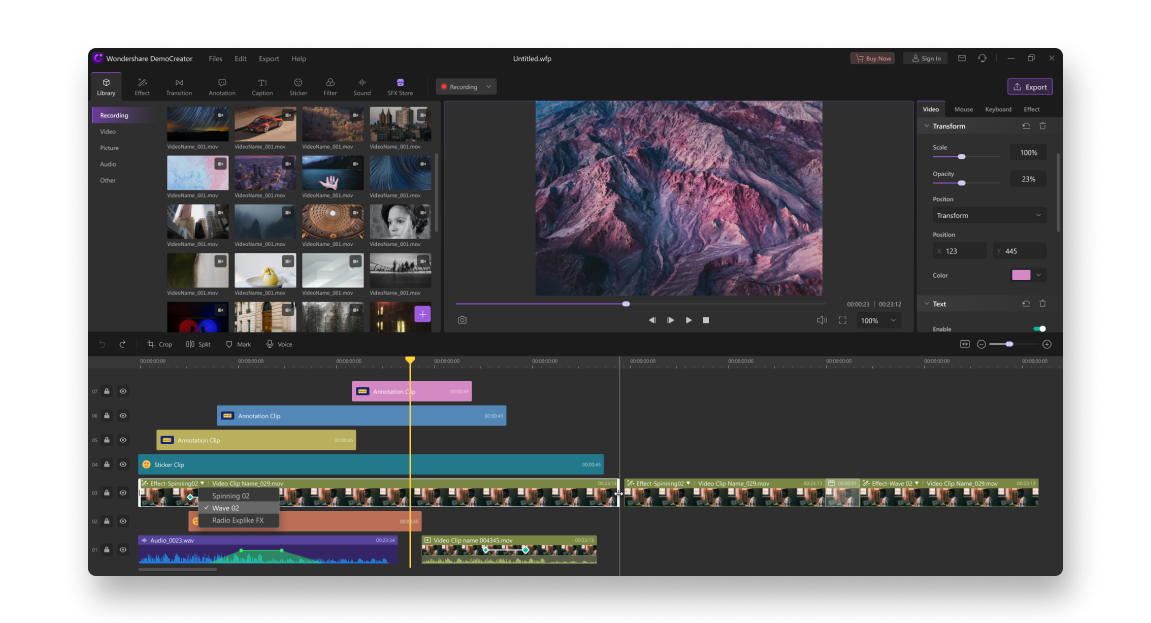
DemoCreator video editor has an advantage over many other video editing applications because of its excellent mix of straightforward design and strong video editing capabilities. It completes the experience by displaying complex functions in a user-friendly manner. Two intriguing video editors were demonstrated. However, if these open-source options do not meet your needs, we offer DemoCreator, which is our editor's recommendation.
 Secure Download
 Secure Download
DemoCreator Video Editor's Highlights
This video editor is a paid option with free trials that demonstrate all of the capabilities of a powerful video editor. It is compatible with a variety of computer operating systems as well as mobile platforms. Here are a few of the more notable characteristics:
- Color matching and video color correction are simple.
- Make ads, instructive, gaming, vlog, cosmetics, and music videos in no time.
- Cropping, rotating, merging, trimming, and splitting movies are all possible.
- Subtitles and text/title templates in a variety of styles.
- Filmstock (DemoCreator's Effects Store) has an endless amount of audio and visual effects.
- On both Windows and Mac, the software is readily accessible for download and installation.
- Directly from the software, export completed work to social network handles.

The Best Text Animation Maker & Video Editor
 Secure Download
 Secure Download
Final Words
All-in-all, both of these video editing tools are free to download and quite easy to use. Furthermore, they both work on all operating systems without leaving a watermark on your creation.We’d also like to note that if you want to make professional films, a paid tool will provide you with more features. Now, it is your time to make a decision and attract the audience with your captivating content.
