
2 Ways to Edit Videos on Windows

The world has changed drastically, and the internet has got a more vital role to play. The majority of the content on the internet is about photos and videos. Teachers, Doctors, Entertainers, Engineers, Businessmen, Cooks, and about everyone is utilizing videos to reach more people. Moreover, videos are also being used by common people to share their precious moments, hobbies, and creations on social media.
However, you just can't shoot anything and post it on our wall as it is, especially if you are a professional in the field. Most of these videos need some trimming or cropping and some add-on effects to attract the eyes. So, how to edit videos on Windows? Well, in this article, we are going to discuss 2 ways to edit videos on windows or video editors for your windows PC. Also, these will help in elevating your game of Videography:
Unlike the name suggests, the Windows Photos app is not only meant for photos. Windows Photos app comes pre-installed with the Windows operating system, and if not, you can download it without paying a penny from the Windows app store. So, can you edit videos on Windows 10? Well, the app is a creation of the Windows itself for light editing of the videos and showing some creativity with your pictures.
So, how to edit videos on Windows 10 or how to edit videos in Windows 8.1? Well, there are many features in the app, which you can use for a mindblowing result. Here we are giving a small glimpse of how you can use this app for your video editing.
The whole video editing process can be divided into 4 sections:
- Automatic video creation
- Creating a new video project and editing existing video project
- Adding 3d effects
- Backing up your project
Automatic Video Creation
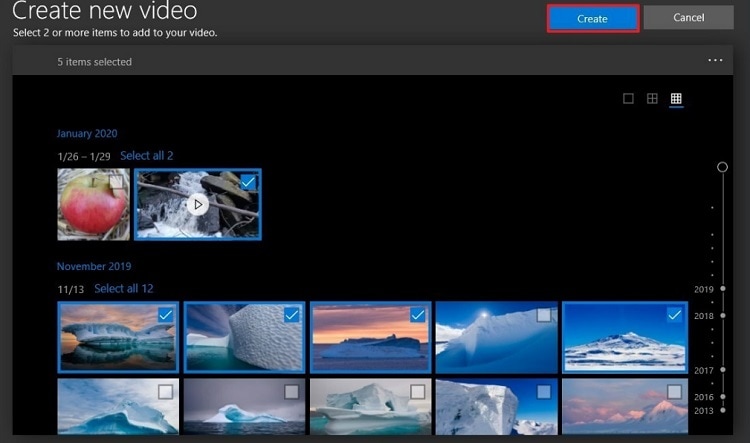
To get a good output in the form of video creation, you can leave all your tension on the Photos app. Just put all your photos, videos that you want to make a video of, and photos will make a video out of it. The steps are as follows:
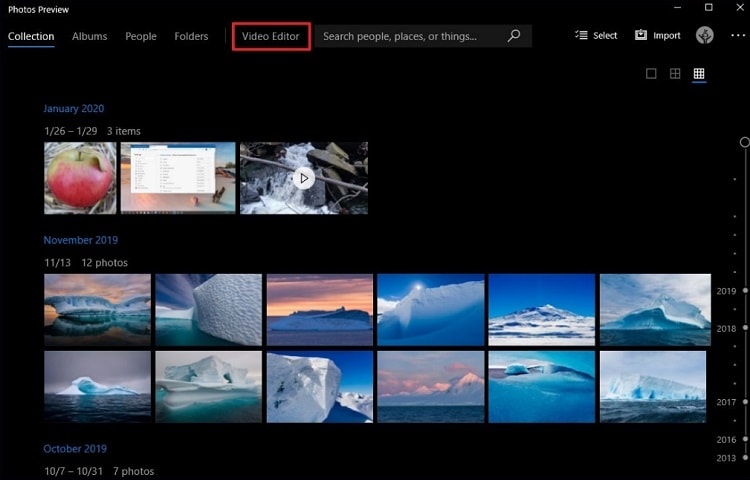
Go to the Photos app and click on the video editor app.
Now, go to the New video project and tap on the Make a video for me option.
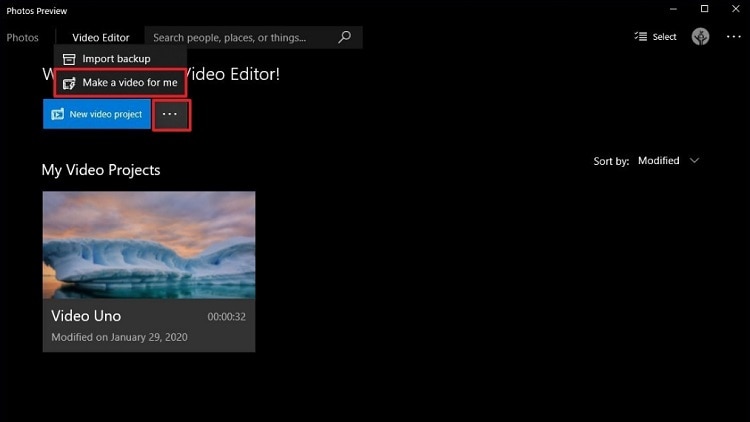
Put all the images and videos you want and ask the app to "Create". You can also put a new theme to the video with the "Remix it for me" option.
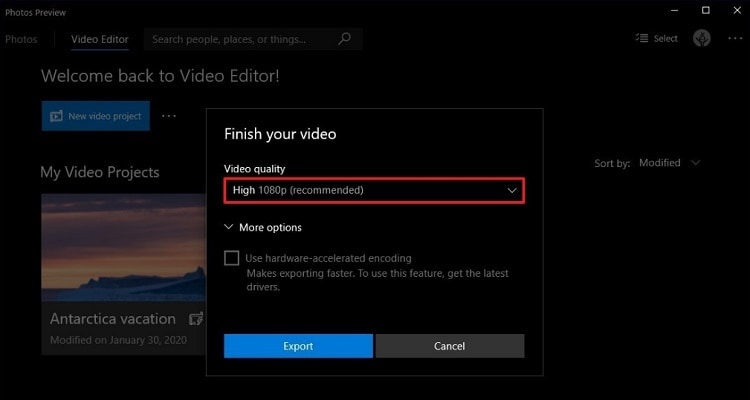
After that, you can click the button "Export" to get done with it and store it in .mp4 file format.
Manual option to creating a new video project and editing
Photos give you the freedom for manual editing also. The steps are as follows:
- Go to Photos and click on the Video editor tab.
- Click on the "New Video project".
- Give it a name. Now, select, OK.
- Export all the videos and pictures you want to add and start editing.
- Now, you can use tools like Trim, add slow-mo, Draw, add effects, filters, background, crop your video, etc.
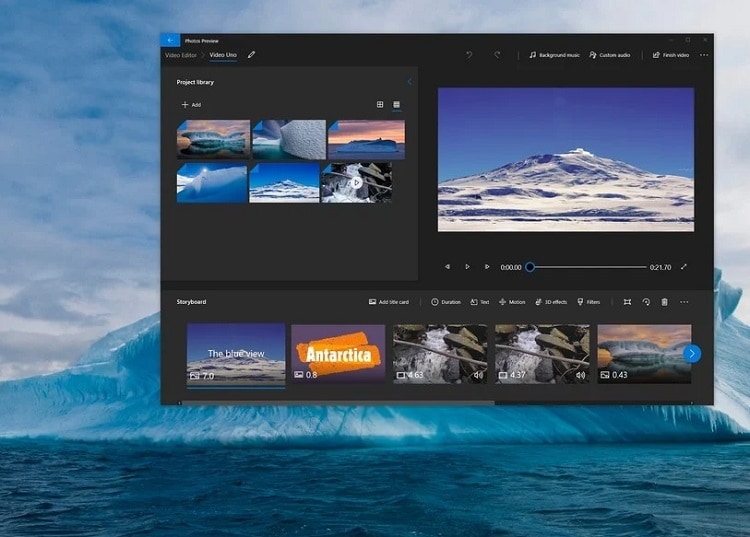
Here we are giving steps for some of the editing tools:
Duration: On the storyboard click on the Duration, select a time duration or input your desired duration manually
Text: Go to Storyboard and click the Text button from the toolbar. On the Text box, you can modify the appearance of the text as you wish.
Motion: Click the "Motion" option on the toolbar of your Storyboard. Now, choose any motion effect you want to and see how it looks on the preview.
Filters: Go to the Filters option on the toolbar to choose any one Filter from the 14 given Filters
Trim, Split, Speed: On the toolbar of your Storyboard, you get all these 3 options. Now, you can choose the tool you want and use it as per your choice.
Title Cards: From the Storyboard, click on the Add title card. You can click and drag the card to the location. Now, do right-click on the card to check for the available option. Now, from the toolbar select Text, modify it as per your wish, use layout for location.
Background Music: Click the Background music button; choose sounds you want. Now, click the play button for a preview.
Theme: Click the menu from the top-right corner. Now, select the Themes option and choose anyone from the list
3d Effects: On the Storyboard section, click on the 3D effects and go to the Effects tab. Select the 3D effect in the preview on the left. Also, you can adjust the effect on the left side. Click the 3D library tab, category elements for the video. Now, click on the Quick animation to choose animation and then done.
Backing up your Project: Click on the three-dotted menu and choose Back up the project. Now, click the Choose backup location button and go to the folder location to save your file.
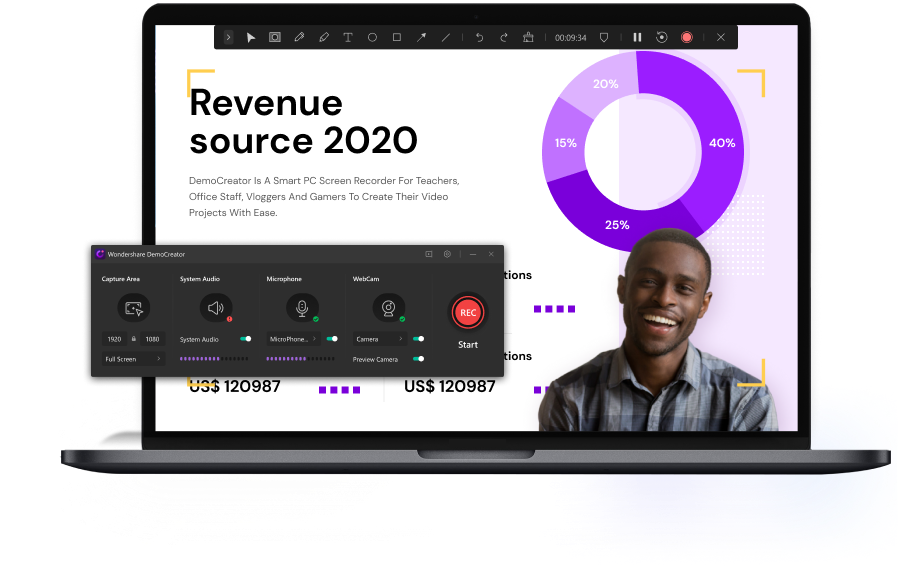
The All-in-One Screen Recorder & Video Editor
- Record desktop screen,audio and webcam simultaneously
- Edit videos quickly with a wide range of professional tools
- Built-in plentiful video effects
- Export to MP4, MOV, MKV, GIF and multiple formats
 Secure Download
DemoCreator Editor is one of the best screen recording tools that enable its users to record screen and record video through the web.
You can edit it before uploading it on the internet. The tools come with this software are of professional-grade, so it is not a bad idea to use it as a video editor full time. Moreover, the app is not free and comes with a license agreement for some time.
Here we are going to discuss some of its tools and how you can use it for your editing work:
Adding Videos: Drag your photos or videos to the timeline of the Filmora Scrn app. Go to the media file and right-click on it to select add to timeline at playhead. Moreover, you can reposition it using your mouse

Preview the Clips: If you move around your cursor over a video, you will get a preview of the clip.
Audio Editing: You can remove the sound of a video by right-clicking and selecting Mute. Also, you can detach the sound in the same procedure.
Audio De-noise: To remove the unwanted sound, click on the audio icon and then check Enable under the denoise tab to remove all the noise in the background. Moreover, there are 3 levels of denoise, i.e., Low, Mid, and High.
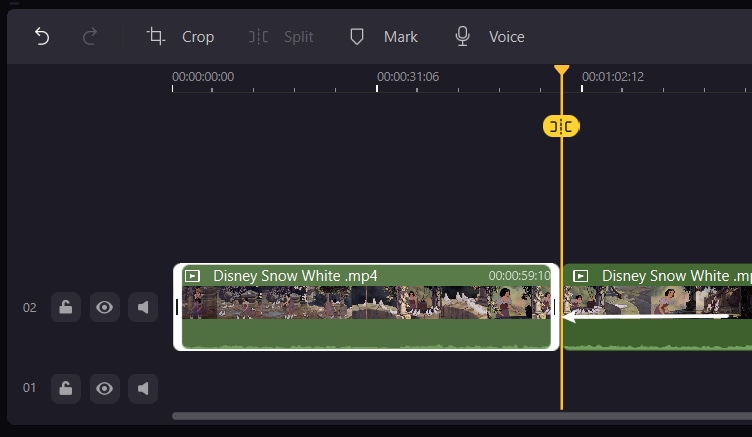
Trim Video Clips: Trimming is the most useful tool in video editing. Also, to perform this task, choose the file, and move your mouse to the ends. An icon will appear, drag it to cut off the desired part. Moreover, to trim multiple clips, Ctrl and select all the clips you want to trim and then follow the same.
Resize Videos: To resize the clip in the Preview Window, go to Visual Property and modify it as you want it to be
Rotate your Video Clips: For rotating your video, you can do it from the Visual Property. Moreover, you can perform it with the use of the center handle that you can see in the preview.
Crop your Video Clips: All you need to do is click the drop button that you see in the displayed window to crop it.
Add a Border: Now, add a border, using the button in the window displayed, to your video clip. The Max size of the border is 50.
Split Video: If you want to dissect your video into pieces, you can use a split tool. Position the playhead and right-click for the menu and then go for a split. You can use Ctrl+B as a shortcut.
Playback Resolution: Resolution is full by default; below the preview window, choose the playback resolution to modify it.
Voice Over: If you want to add your voice to your video, click on the Voice over icon in the toolbar. You can also play the video while you give your voice to it.
Scale Videos: Below, in the right side corner of the Preview Window, you can click on the scale icon. Drag the dot that is in white and scale it as you wish.
Add Marker: Now, in the toolbar, opt for the marker icon, and to the timeline, go ahead to add a marker.
PIP Mode: With this tool, you can put a layer of video or other media on your main track.
Fade in & Fade out: The most famous tool for video editing. To fade in, at the start, drag the left marker to the right. To fade-out, in the end, drag the right marker of a video on to the other side, i.e., left.
Freeze Frame: Freeze frame is used to magnify a moment. Now, right-click on a video track and then select freeze-frame for a 2-second frozen image.
Conclusion
DemoCreator and Photos are two different kinds of video editing tool. When Photos is a free pre-installed app, DemoCreator is a paid one. DemoCreator can record your computer screen, and Photos can be used as a photo viewer.
Moreover, the capabilities and features are very different from each other. And hence, you should explore research more about both before choosing and choose according to the need. Furthermore, both of them are awesome apps and have immense power in them.