

How To Crop QuickTime Video

QuickTime is Apple's exclusive media player. The application is local to the Mac OS X software suite. Despite the fact that it is an Apple item, how to crop a QuickTime movie is usually conveyed in a Windows adaptation. As a media player, QuickTime is designed to control the playback of media videos; assuming you need to utilize QuickTime to trim sound and video cuts, you should move up to QuickTime Pro to crop movies in QuickTime. The authorized variant of the media player is furnished with altering abilities that make it conceivable to manage any advanced media records the program can play. There will be times when you want to trim a portion of the pointless encompassing casing from your video, eliminate unimportant picture regions that you might want to cover or make a video viable to see in a casing gadget.
Video editing is frequently handled with a decent perspective proportion. For a Mac client, cropping video should be possible with iMovie, the free video manager preinstalled in macOS. Can't help thinking about how to crop QuickTime video yet track down no chance? Cheerfully, you simply need to pause for a minute in this post to get familiar with the full stride underneath. On the off chance that you are confounded by the intricacy of the method, we have additionally uncommonly pre-arranged an option for you to know that how to crop video on QuickTime on Mac. QuickTime Player is in excess of a media player on Mac; it permits recording a piece of the screen as well, which makes it conceivable to trim a video with needed angle proportion by recording. In any case, cropping video with QuickTime Player will not keep the sound; in case you are cropping video for additional altering and will add a new soundtrack to it, this technique is conceivable.
1. How to Edit QuickTime video
At the point when you play recordings on Mac, the main player you use ought to be QuickTime, the pre-introduced player on Mac. so essentially, you can find this application on practically all Mac PCs. As a famous sight and sound player, you can utilize it to open a wide scope of media videos, including pictures, video, and sound. Furthermore, it offers a straightforward and clean interface for clients. QuickTime Player is the default player on Mac, which makes it a preeminent choice for most Mac clients. With this playback instrument, you can watch online recordings, HD films, and other computerized media videos effortlessly. Aside from being a media player, QuickTime is likewise a decent decision for essential video altering, screen recording, and so forth. It even empowers you to catch your screen exercises on your iPhone, iPad, or iPod Touch.
Step 1 Launch QuickTime Pro
All you have learned above is simply managing the video length. In the event that you want to dispose of the edges of a video, redesign your QuickTime Player to QuickTime Pro, and introduce Photoshop on your Mac. By partnering with a Photoshop veil, it accomplishes editing a video with the accompanying advances. Dispatch QuickTime. Go to "Help" on the application menu and select "Purchase QuickTime Pro" Follow the directions to purchase the permit and initiate the update.

Step 2 Load the Files for Cropping
Go to "Record" and choose "Open File" Browse for the clasp in the video choice window. Select the thing and snap the "Open" button to stack the media into the media player. Drag the in and out markers on the clasp timetable around any piece of the media that should be edited out. Go to "Alter" and choose "Erase."
Step 3: Copy Your Video Clips
You will require a cover video to educate QuickTime on how it should edit your video. To make this cover record, you'll initially require a depiction of a specific casing of the video. To duplicate the picture, the initial step is to make a veil utilizing a picture-altering instrument, like Photoshop. You need to at first duplicate the picture from QuickTime Pro by clicking "Alter" > "Duplicate" and afterward glue the substance to Photoshop to make another report.

Step 4: Create a Mask Utilizing Photoshop
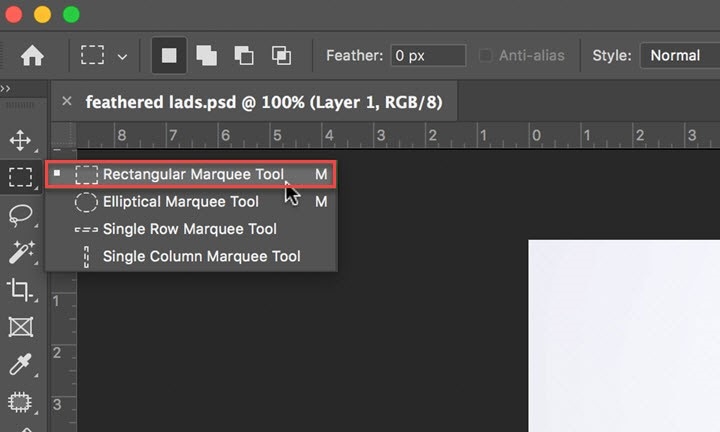
Apply the "Rectangular Marquee apparatus" in Photoshop to choose a specific region that you need to keep and fill it with dark. Open Photoshop and make another venture by going to File > New. Then, at that point, glue the picture you'd recently duplicated. Presently utilize the Rectangular Marquee Tool to choose the region you need to utilize and fill the chosen region with a dark tone. Presently occupy the space outside the black box with a white tone. At long last, save the video in GIF or TIFF design. A short time later, right snap to pick "Converse" choice and make the determination of the opposite region; correspondingly fill it with white, which will be utilized as a cover. Then, at that point, it's the ideal opportunity for you to save the record as .gif or. Altercation.
Step 5 Apply the Mask
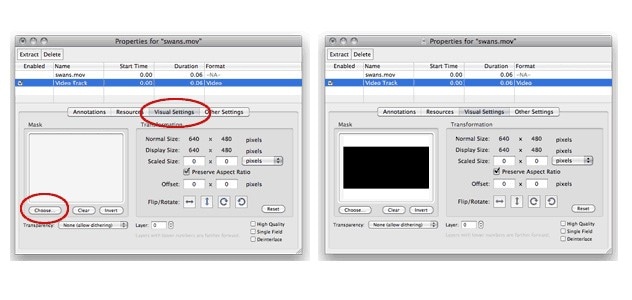
Presently open the necessary video in QuickTime Pro and go for the "Window" menu to choose "Show Movie Properties." Keep on picking your video track; go-ahead to "Visual Settings" - "Pick" to peruse and import the made veil video. By doing it, the dark space of your video will be stowed away soon, and the editing impact will be added too.
Step 6: Output Cropped Video to Mac
When the cover is applied to your video, just the chosen region appears. Whenever everything has been done, you can go to "File" - "Save" to save the cropped video with another name and save it to a particular area.
2. Alternative Way to Edit QuickTime Video
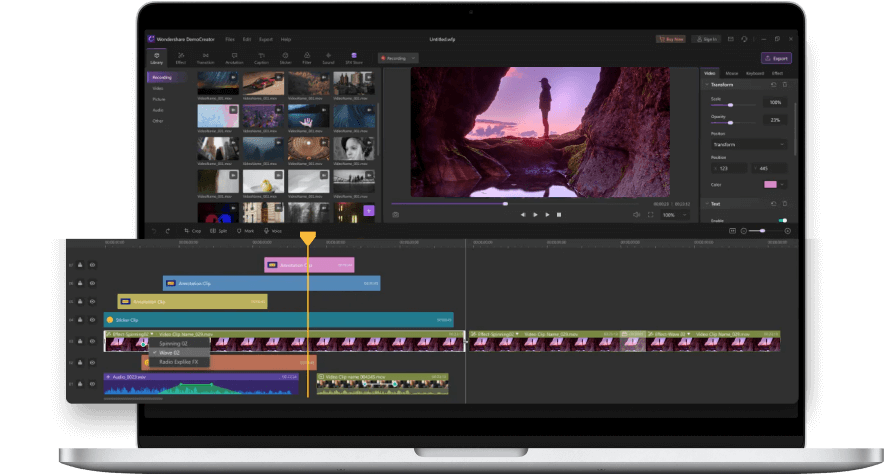
Bet you have been disturbed when the groups got into your landscape film, downloaded a film with dark bars that didn't fit the screen, or committed errors while recording and needed to erase specific fragments in the end result. Any of these issues can be addressed effectively by cropping the video with the assistance of the best free video editing software on Mac. We need to concede that there is no ideal local video cropper for Mac. Concerning QuickTime Player, it doesn't highlight any cropping apparatus in its altering toolbox. Yet, don't be vexed. Here comes DemoCreator to your guide. With a natural cropping UI, you can, without much of a stretch, drag and resize the harvest window to eliminate irritating edges or excess parts in your video at any viewpoint proportion and see it progressively.
As the name proposed, it is a performing multiple tasks tool compartment that can likewise record, alter and share sound/video videos. Numerous Mac clients are contemplating whether or not they can trim films in QuickTime Player. Indeed, its altering highlights are restricted to managing and turning. It is totally the best QuickTime Player elective for the two Windows and Mac clients. It can play most video designs without a hitch. Besides, it likewise upholds multi-track sound and captions. It permits you to play recordings and music of top-caliber. You can likewise play Blu-beam and DVD format files without such constraints. DemoCreator additionally gives countless helpful elements to control the playback cycle and get diverse film impacts. Furthermore, like QuickTime Player, it is very easy to utilize. It upholds playing an assortment of video designs like MOV. In addition, there will be Dolby, sound system, DTS multi-channel encompasses sound choices.
Steps to Crop Mov Files with DemoCreator
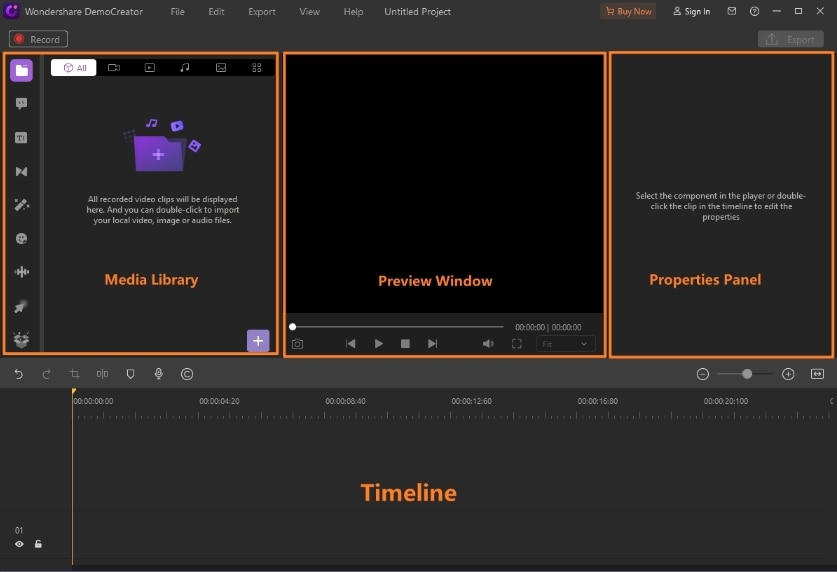
1. Launch and Import Videos to DemoCreator
In the Import part, DemoCreator has some splendid qualities you can get to know. As soon as you've downloaded and installed the application, you can launch it right away and then get inside the Video Editor. This product permits you the import media is not at all like arrangements. It upholds a scope of arrangements for a comparable video FLV, MKV, MP4, M4V, PSP, 3GP, MOV, MPG, MPEG, VOB, DAT, and so on for picture or symbol, JPG, JPEG, BMP, PNG, JPE, GIF, and so on. For sound, it upholds M4V, M4A, MPA, MP2, MP3, RA, WMA, and so on.

 Secure DownloadSecure Download
2. Crop Your Videos Well-Accordingly
With DemoCreator video editor, you can crop your video right after adding them to the timeline below. From there, you can select the video and drag and zoom it inside the canvas to adjust the aspect ratio to being cropped right away.
Other than cropping MOV format videos, it also permits you all to edit the recordings along with adjusting their speed. Simply add the clips to the timeline and join them with dragging to edit them according to your choice.
Secure DownloadSecure Download3. Take Your Videos to PC or YouTube
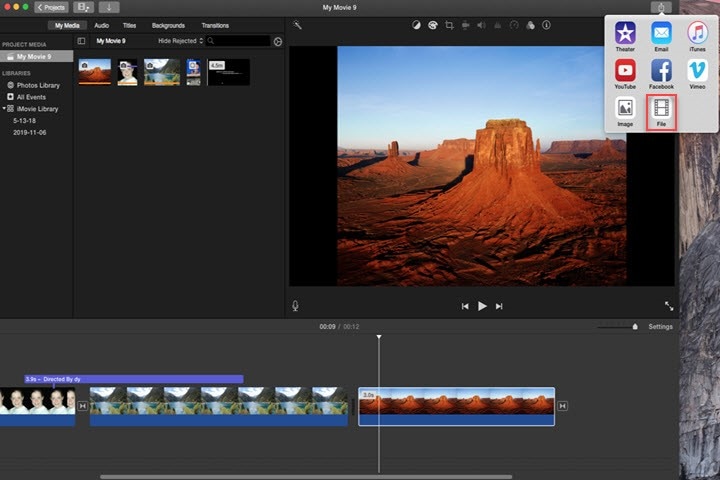
In the final step, the software permits you to share or either save the MOV videos to your desired format right away. It also eases your recordings configurations, like MP4, MOV, just as GIF.
In addition to that, you can also add your favorite texts, music, and even effects to make your video interesting than ever. This component makes your video more than intuitive. You go numerous choices to get up your imagination and transform your thoughts into the real world. This product permits you all to mix dissimilar recordings and sounds to make your show-stopper. Simply refer to the Export button to find out more inside the Export window, as shown here.
Conclusion
Although, being a Mac user, QuickTime is a well-known media player. Created by Apple, it can deal with a wide scope of pictures, videos, sound, and all-encompassing picture designs. QuickTime Player has turned into a main decision among Mac clients with a basic, clean, and intuitive interface. While the instrument has quit getting support for the Windows form, it's not as yet a decent choice for individuals acquainted with the route and elements. Refer to the software platform to try it out for free! For that need, DemoCreator needs to be utilized if you want to achieve flawless results after cropping your video files hassle-free.
Secure DownloadSecure Download