Merging Videos with Wondershare DemoCreator in 3 Easy Steps

Have you ever thought of combining a video? What happens when you merge video? What output can you expect when you join two or more footage into one? There might be several similar questions that you may have in mind, especially if you are new to the multimedia field, and are planning to dive deep into the post-production industry.
Well! The following sections give detailed answers to all your queries, along with suggesting one of the best programs get the job done, which allows you to join video files with ease.
Part 1: How to Merge Videos with DemoCreator
DemoCreator is an intuitive and efficient application developed by one of the leading IT solution organizations, Wondershare. Wondershare DemoCreator is a complete package that enables you to record a computer screen. Such videos could be used to prepare game walkthroughs, interactive tutorials, informative clips to elaborate certain methods, etc.
The software also has a built-in video editor that enables you to split, crop, or merge video clips. Adding transition effects, stickers, and other decorative elements are some other significant features that the app offers.
To learn how to merge videos with Wondershare DemoCreator, you can follow the instructions given below:
Step 1: Import and Add the Source Clips to DemoCreator’s Timeline
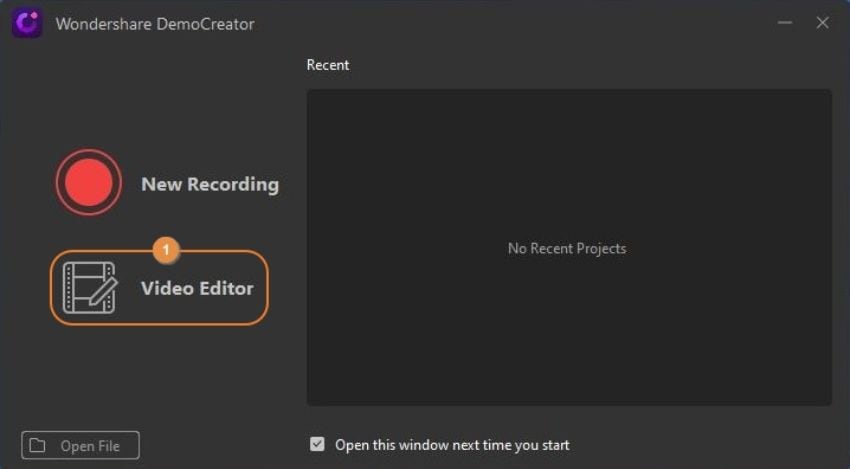
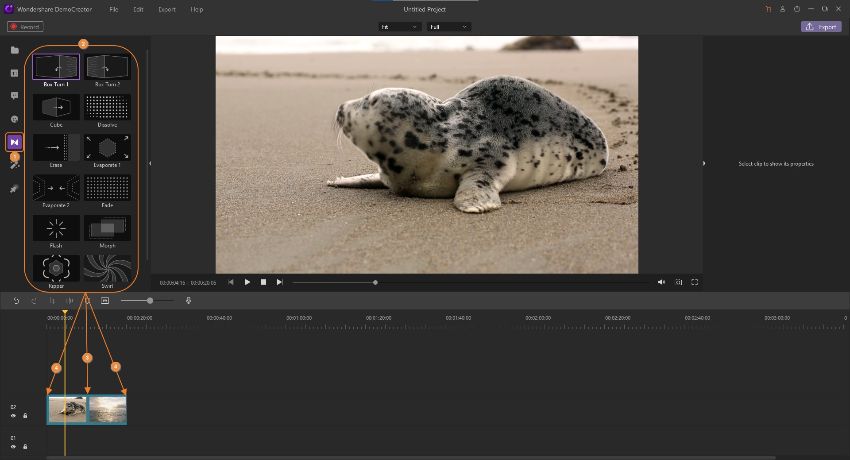
Start Wondershare DemoCreator on your Mac or Windows computer, click Video Editor, click Import from the Media box on the main interface, and select and import the source footage. Next, drag all the clips from the Media box to the Timeline, and place them next to each other on the same track.
Step 2: Add Transitions (Optional)
Click Transitions from the left bar, and drag your preferred transition effects at the beginning of the first clip, in between the two videos, and at the end of the last footage to make the produced video look professional.
Step 3: Merge the Videos
Click Export from the top-right corner. Make sure that the Local category from the left section is selected, and use the options in the right window to choose an output format, the name of the video, its location, audio preferences, etc. Finally, click Export from the bottom-right corner to merge video files into one.

Tips for Putting Your Video Clips Together
After learning how to merge videos with DemoCreator, it is imperative to know about a couple of tips and tricks that can help you come up with industry-standard outputs. Some import points worth remembering include:
- Add Transition Effects– Transition effects enable smooth switching between multiple clips. This enables the viewers to understand that they are watching the next/different scene
- Audio Leveling– Audio leveling becomes important if the clips that need to be merged have sounds recorded with microphones, at different locations, and at different times. Such footage may have different noise volumes, and leveling them gives balanced acoustics throughout the clip after exporting
- Identical Resolution– Ensure that all the videos participating in the merging process have a common resolution. This makes the video display consistent
- Color Correction– Because different video footage may have varied ambiance and color, correcting them makes the merged clip look like it was shot in a single go
- Export Preferences– If the source clips have been shot in high resolution, you should export the merged video to the highest possible resolution. After the videos are merged, the output can deteriorate to a lower resolution during the conversion process.
Part 2: Merge Video and Audio
Audio being an integral part of visual media files need equal attention. Therefore, it is important to learn how to detach and add sounds to the footage when you merge video clips. Both the processes are explained below:
Detach an Audio
Step 1: Add Video to Timeline
Use the method explained above to add the source video to the Timeline.
Step 2: Detach the Audio
Right-click the media clip in the Timeline, and click Audio detach. To remove the audio, select the sound track in the Timeline, and hit Delete.

Attach an Audio
Step 1: Import Audio File
Assuming that the video clip (without audio) is already in the Timeline, use the Media box to import a soundtrack to DemoCreator.
Step 2: Attach Audio to Video
Drag the imported audio file to a new track, and place it right above the layer that holds the video in the Timeline. Drag the side handles of the audio track to adjust its duration, in case it exceeds the length of the video. Finally, use the method explained earlier to export the video with the new audio.

Part 3: Merge or Combine Multiple Videos into One
This section focuses on explaining how to merge video clips while getting split-screen effects in DemoCreator. Although there is no particular tool named ‘Split Screen’ in the app at the time of this writing, with a clever tweak, you can produce a better output as compared to using any preset that many such programs have. To do so:
Step 1: Import Source Clips to DemoCreator
Use the method explained earlier to import multiple source clips to the Media box.
Step 2: Place Each Clip in Its Own Layer
Drag the first clip to the Timeline. Next, drag the second clip, and place it above the track holding the first clip. Repeat this process to add all the visual media files to the Timeline, and make sure to place them on top of the other. Use the method explained earlier to remove the audio track that any of the clips has.
Step 3: Arrange the Video Window
Select the topmost media layer in the Timeline, and use the scaling handles in the Preview window to resize the video. Now position the video at your preferred location on the screen. Repeat this process for all the clips, and place them accordingly. Optionally add a soundtrack to the Timeline that will be played throughout the video. After this, use the method explained earlier to export the video.

Part 4: A Faster Way to Merge Videos Without Downloading
If you want to expedite the joining process, it would be wise to record the videos rather than downloading them to your PC. After recording, you can use the built-in video editor to make other adjustments to the footage as needed. The recording process is explained below:
Step 1: Choose the Recording Area
Launch Wondershare DemoCreator, and click New Recording on the first screen. On the recorder panel, use the options under the Recording Area section to define the area you want to capture. Prepare the videos you want to merge, then adjust the recording area.

Step 2: Record Videos
First, open one video you want to merge, then click start recording or press “F10” to start recording. After one video is recorded, press “F9” to pause, then choose another videos needs to merge to record.

Step 3: Finish Recording
Once you are done recording, press F10 to stop. You can find the recorded video in the C:\Users\<User Name>\Documents\Wondershare DemoCreator\RecordFiles directory on your computer.
Conclusion
To merge video files into one, it is imperative to use an efficient and robust application like Wondershare DemoCreator to get precision in your outputs. Sometimes you may also want to have a split-screen effect. In such cases, you can add all the clips on top of each other in the Timeline, select every clip individually, and scale its size in the Preview window. In addition, to expedite the entire merging process, you can record the video in DemoCreator, and then use its built-in editor to make the required adjustments to the captured footage that is by default saved in the C:\Users\<User Name>\Documents\Wondershare DemoCreator\RecordFiles folder of your computer.


