How to Extract Audio from MKV
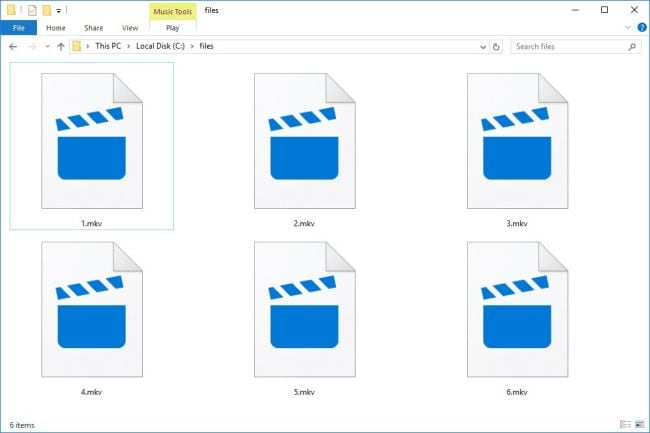
Many people confuse the MKV format for a video file format. Well, MKV is an open-source platform that harbors multiple videos, audio, and subtitle tracks in a single file. Also known as “Matroska Video files, MKV originated in Russia in 2002 and served as multimedia container formats. We’ve seen that MKV encompasses numerous file formats in a single file. You may wish to extract audio from MKV and perhaps wonder how to execute the plan. Well, this article shows you three ways to extract audio from MKV and operate separate files.
Part1. 4 Steps to Extract Audio from MKV (Windows & Mac)
When you decide to extract audio from MKV Mac or Windows OS devices, Wondershare DemoCreator will stand in the gap. This tool encompasses the latest technology ability to record and edit your videos and other file types like MKV with a unique touch of creativity. It supports various output formats like MP3, AAC, MOV, FLAC, etc. And when it comes to editing resources, DemoCreator encompasses over 500 precepts like text animation, sound effects, annotations, and many more. Check out the steps to easily extract audio from MKV files.

The Best Audio Extractor & Screen Recorder
 Secure Download
 Secure Download
Step1. launch DemoCreator and select "Video Editor"
Head to the official website of DemoCreator and download the app for either your Windows or Mac OS device. Then install it, launch, and hit the “Video Editor” option.

Step 2. Import MKV file and drag to timeline
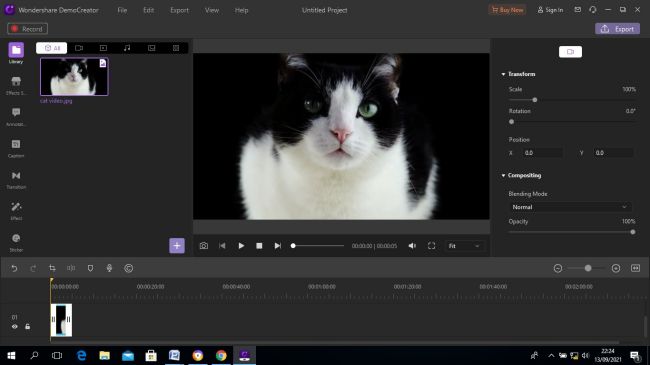
Next, click the “Import Media” option to import the MKV file that you need to extract audio from. Then drag it to DemoCreator’s timeline.
Step3. Audio detach
Next, right-click on the MKV file you just added to the timeline and then select the “Audio Detach” option from the context menu. Audio will immediately be detached from the MKV file. Check the “Audio track” for the separated audio from your video file.

Step 4. Export audio and video separately
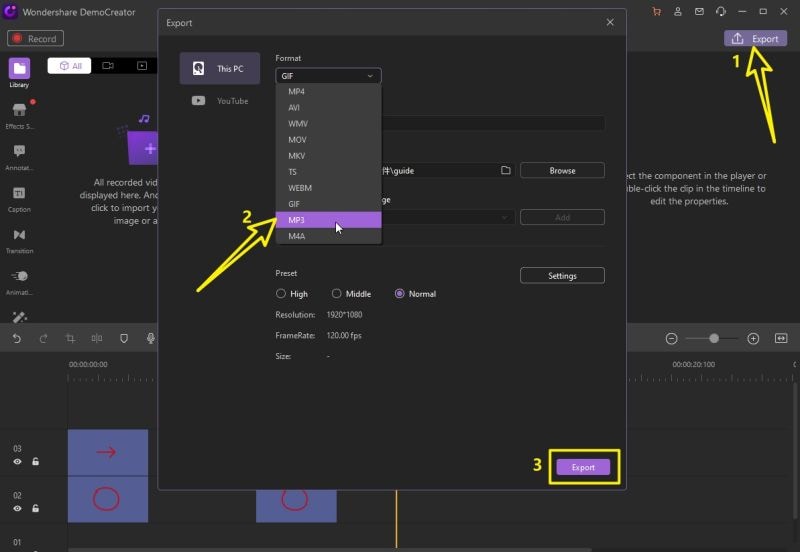
Finally, you can handle the audio and video file separately. Save the audio file on your computer then choose to Export it to any media platform. Just hit the “Export” tab and hurray! Your audio file will be exported separately.
Bonus Tip:
① How to add more sound effects to audio?
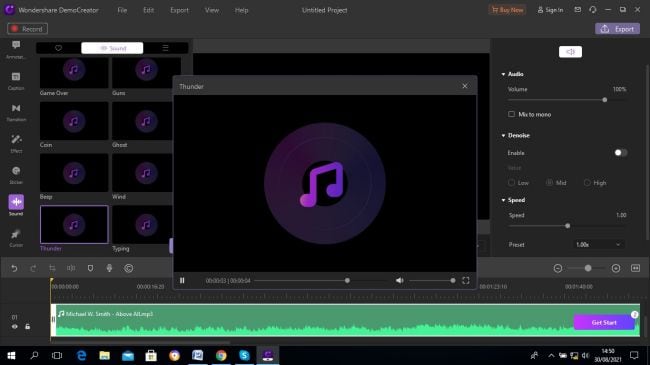
DemoCreator offers you advanced editing features, including sound effects. You can add any sound to your separated audio, including the sound of ghost, wind, typing, game-over, and many more. Follow these steps to add more sound effects to the audio and make it extremely professional.
Step 1. Import and choose sound effects to your audio
First, import the audio file to add more sound effects. Then drag and drop it to DemoCreator timeline. Then in the Menu bar and click the “Audio” option. Several sound options like a wrong answer, correct answer, page turn, buzzer, explosion, among many others will be availed. Choose the “Sound” effect you wish to add to your audio.
Step 2. Apply the effects
To apply the sound effect that you just chose, drag and drop it onto the clip of the timeline. Likewise, you can adjust the audio speed, volume, etc, from the “Audio Settings” window located on the right “Properties” pane.
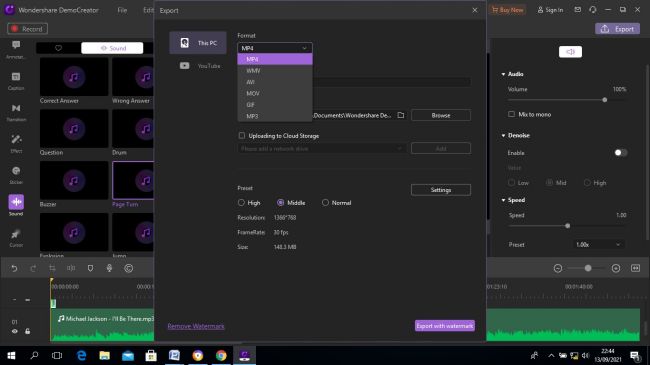
Step 3. Save and Export
Finally, save and export your audio in any format such as MP3, MP4, AVI, and many more. You can also share it on any media platform like Instagram, YouTube, and Vimeo, etc.
Part 2. Extract Audio from MKV Using VLC
The VLC media player is the most compatible tool for Windows and Mac operating system devices. It also supports various video files, DVDs, CDs, Flash disks, making it easy to use. Follow these steps to extract audio from MKV VLC.
Step 1. Install and launch VLC
Head to the “VLC” website, download, and install it on your computer. Next, launch the tool and click on the “Media” tab. Then scroll to the “Convert/Save” tab to open the “Media Window”.

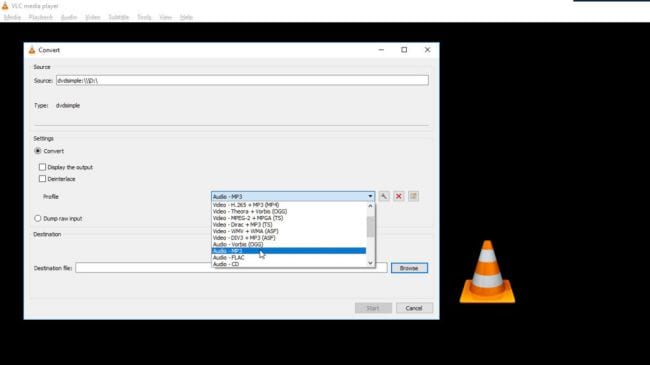
Step 2. Set Conversion options
Set the conversion options you want for the detached audio. It can be audio MP3, FLAC, CD, among other options. Next, go to the “powse” and navigate to the folder to get your files and save them to a selected folder.
Step 3. Click Start to Extract MP3 audio
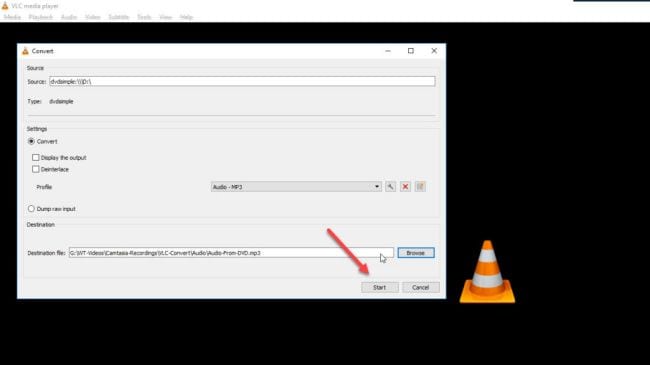
Hit the “Start” button and let the extraction of your audio from the MKV file begin.
Step 4. Save your file
Finally, save your extracted audio file on your computer within a located folder for easy retrieval.
Part 3. Extract Sound from MKV with MKVtoolnix
MKVtoolnix is an editing tool that lets you merge MP4 videos to MKV format and even edit video tracks and audio. This tool is Command based and you will need some knowledge of computer programs. However, you can follow this guide to extract sound.
Step 1. First, click on the “Search” button located at the lower bar of your Window’s screen. Then type “CMD” to launch the “Command Prompt”
Step 2. Go to the “MKVToolNix installation directories” by typing
cd C:
cd “Program files\MKVToolNix”
Step 3. Next, identify which “Track ID number” is the MP3 audio located. When you open the “mkvtoolnix gui”, you’ll see the Track ID of the audio.
Step 4. Finally, extract the MP3 from MKV files using these codes:
mkvextract tracks “C:\Downloads\YOUR_AUDIO_FILE.mkv” 1:”YOUR_OUTPUT_DIRECTORIES.mp3”.
Conclusion:
If you wish to extract audio from MKV, then you can use any of these three methods. The first option, DemoCreator, presents you with numerous editing resources amounting to over 500, including adding any sound effects for a polished product. It also works effortlessly and will retain the lossless quality of the extracted audio file. VLC is another great tool you can use to extract audio. It supports various files but lacks advanced editing resources. And MKVtoolnix requires some knowledge of programming languages. It is Command Prompt based and may not look friendly to beginners. However, you can keenly follow the steps to successfully retrieve audio.


