How to Use WavePad Sound Editor [2021 Updated]

A majority of creators will only focus on the video aspect and this is the blunder one should not make. If the audio in your content isn’t rich, it will feel incomplete and you will not be able to make that perfect connection with your audience.
There is nothing to worry about as we are going to introduce you to the WavePad Sound Editor. The interface that you will get here is highly intuitive and the editor will offer you all the features and settings under a single dashboard. There are a few issues that you will find on the Mac version of the app. The PC version has no such glitch and you will be able to use all the features.
How to use WavePad Sound Editor?
There are various options that you will find helpful and all thanks to the intuitive editor; the features are kind of self-explanatory. In this section, we are going to jot down the steps that you will need to follow to trim, add effects, or combine multiple files. The editor will be a completely free tool to use and it will work on any video either it’s stored locally or is on any CD/DVD.
Here are a few simple steps that will guide you to use the application without any effort.
- On the browser, you will need to enter the WavePad Editor and the search results will take you to the download portal.
- Find the download link and save it on your storage. Double-click on the setup file and it will give you the instructions to complete the setup.
- Once installed, you will need to click on the File tab and browse the file that you want to edit.
- Moving on, to tweak any aspect of the audio file, you will need to go to the Levels tab. Here, you will get to amplify, equalize, and even normalize the levels.
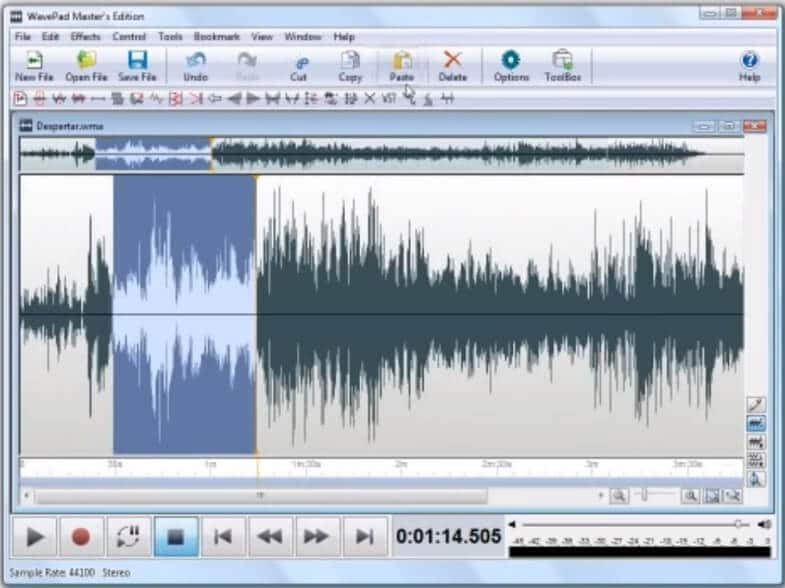
- If you want to trim the existing clip, all you need to do is click and drag it from each side. If you want to select and paste a section to somewhere else on the waveform, it’s quite easy. All you need to do is select that particular section, hit Copy, and then pastes it where you need to paste it.
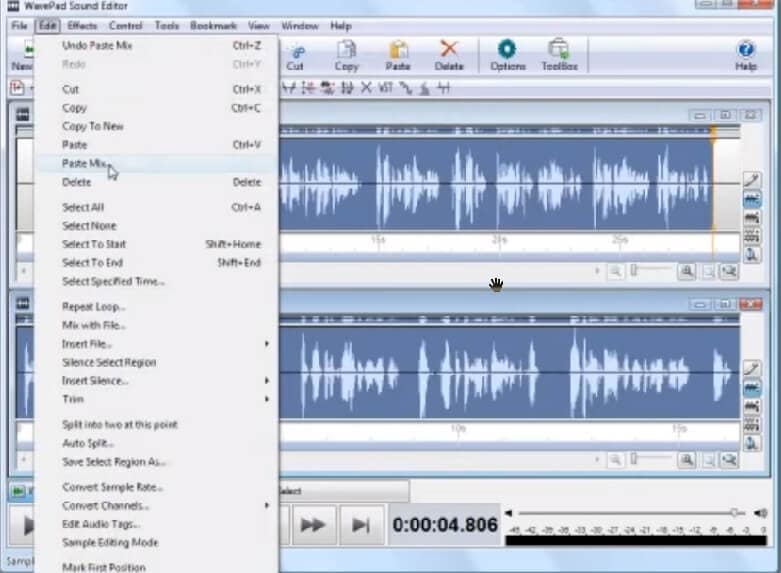
- Next up, you will need to click on the Edit option and then go to the Audio Tags section. You can change the tags, accordingly.
- Once everything is done, it’s time to export the file to your system. Click on the File tab and hit Save As. Users will get to select the output format before exporting.
Pro and Cons of Wavepad Sound Editor
Before we move on in this WavePad Sound Editor review, it’s time to discuss the pros and cons of the editor. The application is free to use and you will not have to pay any amount to access the features. If you are a professional user, you will need to use the Pro version of the app.
Pros
- The editor will give you an extensive range of options where you will get to trim, silence, merge, along copy-paste the audio file.
- The integrated audio effects on the WavePad Sound Editor will allow users to amplify, add echo, and/or reverse the sound clip. It will also give you an advanced equalizer.
- The application comes packaged with a range of tools and plug-in effects that users will get to use. To apply these effects, the app will need DirectX and VST DLL that comes with full support.
- There is also an audio restoration setting/feature that you will need to use in case you want to implement noise reduction.
- If you are working on a long file, it’s obvious that you will not be able to finish the edit in one go, WSE will give you the option to bookmark the progress.
- The application extends its support to a wide range of formats like WAV, MP3, VOX, AU, AIF, real audio, OGG, MID, AAC, M4A, AMR, etc.
- There is also a batch processing setting that you will get to use if you are working on a large number of files. It will implement the tweaks on all of the files, simultaneously.
- The interface that you will get here is highly intuitive and you will not find any hassle to understand all the features.
- There is also a sound library that comes with the package and users will get to use the file without worrying about any copyright claim.
Cons
- If you want to record in the multi-track mode, you will need to install an extension.
- There is also no technical assistance provided in the personal use’ version.
Alternative to WavePad Sound Editor: Wondershare DemoCreator

The All-in-One Screen Recorder & Video Editor
 Secure DownloadSecure Download
There might be a section of people who is finding the WavePad a complex one. And hence, to take away all their worries, I am going to give you an alternative option to take a glance at. Wondershare DemoCreator is a highly advanced application where users will find all the necessary tools to work with.
DemoCreator will also pack an integrated editor where you will be able to customize the content in various ways. This is the tool that you will find quite easier to use when it comes to tweaking the audio.
The interface that you will get here is highly intuitive and you will not need to seek any sort of professional help. The recorder will also allow you to easily record the audio from the computer which will eventually help create guides. The application will give you the ease of using any microphone and camera to shoot. It will significantly enhance the video and audio quality of your content.
How to record using DemoCreator Tool?
In this section, we are going to lay down all the steps that you need to follow to record the screen or the audio. Thanks to the easy interface, you will not find these steps to be any confusing or face any hassle.
- Once you have downloaded the setup file and launched it to install the application, you will get all the onscreen instructions to complete the setup.
- Launch the app and it will greet you with an intuitive dialog box where you will get a Record button. Once clicked, it will give you another dialog box where you will find multiple parameters.
- These settings will prompt you to set the area of the screen to record (in case you want to), and next to it, you will get the option to configure the mic & camera.
- The hotkeys, F9, F10, will be used to pause/resume and start/stop the recording, respectively.
- Once the recording is stopped, you will be automatically taken to the integrated editor. Here, you will get to trim, crop, or add a range of effects to the audio. Moreover, you will also be able to merge and split the existing audio.
- After you are done with all the tweaks, the file can easily be exported to any format of your choice. The app will save the tweaks, automatically.
Related FAQs of Wavepad Sound Editor
Is WavePad Sound Editor free?
Yes, all the features and options that you will get here are completely free. However, the tool is for personal use. If you are going to use it professionally, you will need to purchase the Master’s version. Also, there are two options in the paid version. One, where you will not get any VST support and it's a more affordable option. The variant with all the necessary support will cost you around $99.
Is WavePad Sound Editor better than Audacity?
Well, there is no straight answer to this. It is significantly depending on the use case. If you are asking which one to try, all I can say is that Audacity feels like a toned-down version of WSE. Audacity also offers a range of tools and effects along with features like scrubbing, bookmarking, and some even advanced ones like spectral analysis, etc. The interface that you will get here is also highly intuitive and you will not seek any sort of professional help on any of the apps.
There is also a perk with Audacity and that’s it is an open-source application. However, there are a lot of cases where users might find it a bit buggy, and to change the case, it’s better to try WSE and see whether it’s able to fit in your workflow.
Can I also use the VST plug-ins on the macOS?
The VST plug-ins are not for the Mac version, these are only available on the PC version.
Can I eliminate the vocals?
No, WSE will only reduce the voice. Here are the simple steps you need to follow.
- Find the Effects tab, and then scroll to the Voice button.
- Here, you will get the Reduce Vocals tab.
Can the file be converted to stereo?
No, if you want to convert the file to stereo sound, it will not work. The original file should be in stereo format.
Conclusion
It’s time to wrap up and I hope that you can find just the right amount of information to make your decision. The advantage that WavePad Sound Editor free version has to offer is that it is available for both Mac, as well as Windows. However, I have also mentioned it above; you should consider the factor that the Mac version doesn’t support the VST plug-in. The interface that you will get here is also highly intuitive and you will be able to find all the features without any effort. If you are finding it a bit buggy or it’s not a perfect fit for your workflow, you can give Wondershare a try. I hope that this review can turn into a bit of help and you can find the right tool.


