The Full Guide About Microsoft Voice Recorder Windows 10

Microsoft Windows is one of the most popular computer OS since its user base is almost four times bigger than other operating systems. Microsoft has improved Windows to offer a much more convenient user experience and support for various software. When it comes to a voice recording app, Microsoft does have one of its own, so you don’t have to rely on any third-party software for audio recording.
Yes, the Microsoft Voice Recorder software is freely available to use and has a bunch of handy features that you can utilize for good. It’s not actually readily available on Windows 10 computers as it’s an additional utility that you need to download separately. To download the Microsoft Voice Recorder app on your Windows PC, you can visit the Microsoft Store and download Microsoft Windows Voice Recorder from there. Or you open the Microsoft Store app on your PC directly and complete the Microsoft Voice Recorder download process swiftly.
Features of Microsoft Windows Voice Recorder
- One-Click operation: The Microsoft Voice Recorder does not make you select any settings or do any extra stuff before you record something. You can simply start a recording or resume a paused recording by clicking a single button.
- Autosave feature: Unlike other voice recorder apps, Microsoft Voice Recorder automatically saves your valuable recordings in the Documents folder for easy access. This way, you no longer have to worry about any missing recordings. You might forget to save the recordings, Microsoft Voice Recorder doesn’t.
- Easy Sharing: Whenever you wish to share your voice recordings with your friends or colleagues, the Microsoft Voice Recorder helps you send recordings to other apps as well.
- Editing Tools: Microsoft Voice Recorder not only lets you record your audio but also provides you with a bunch of editing tools as well. In the Microsoft Voice Recorder application, you have complete freedom to Playback, trim, rename, and delete your recordings, whatever you want.
- Marking Tool: One of the greatest benefits of using Microsoft Voice Recorder is recording interviews with it. And, if you believe there’s a special moment, you can immediately mark it as important, so that you don’t have to struggle to find it next time.
- Compatibility: No matter what device you are using, whether it's a PC, tablet, or smartphone. As long as it is running on the Windows Operating system, you can download the Microsoft Windows Voice Recorder application and use it on your device.
How to Use Microsoft Windows Voice Recorder
We believe you have already downloaded the Microsoft Voice Recorder application on your PC, but don’t know how to use it yet. Well, there is no need to worry as Microsoft Voice Recorder is one of the simplest applications that anyone can learn to use. There’s nothing complicated about the app, and even beginner users will find it pretty easy. If you are using the Voice recorder for the first time, you can follow up on these steps to record your first audio clip using the Microsoft Voice Recorder:
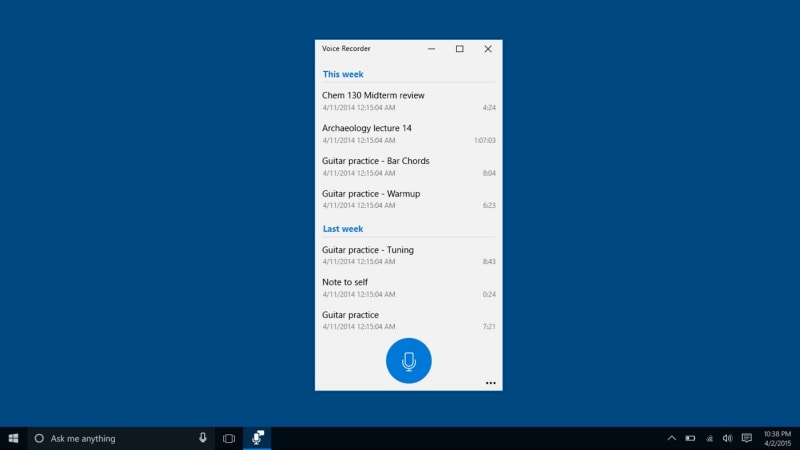
- As you open the Voice Recorder software on your PC, or any other Windows Device, you will notice all the previously recorded audio clips in a listed format. For new users, this might be completely empty. At the bottom, you will notice a Microphone button, which is the one you need to click to start recording an audio clip.
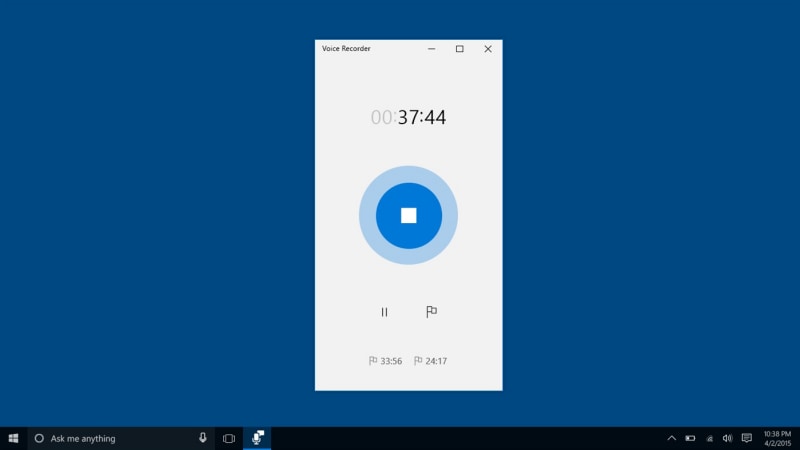
- After you hit the Microphone button, you will see the app will start to record your voice. Now, you can speak and record for as long as you want. When you wish to stop the recording, simply click on the button present in the middle of the screen. On the other hand, if you want to pause the recording, you also get a separate Pause button which is located below the Stop button.
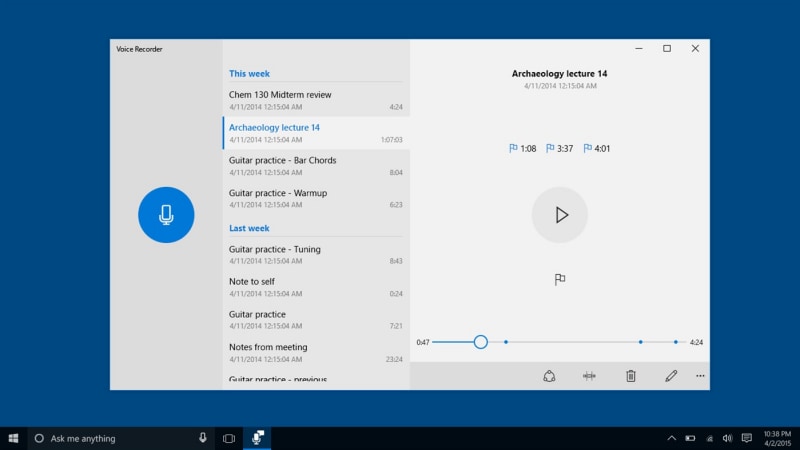
- To listen to any previously recorded audio clips, just double-click on any recording, and it will start playing like shown in the picture. If you look closely, there’s also a Pencil icon at the bottom right; it’s the Edit button. You can access the editing tools and adjust the voice recording as per your requirements by clicking on it.
How Do I Record My Voice on Microsoft Word
First of all, some people might want to ask, is that even possible? Fortunately yes! But, to access the feature, you should be having a licensed version of Microsoft Office installed on your PC. If you have it already, then proceed to download the Microsoft Voice Recorder app.
Now, create a new Microsoft Word document and open it. Here, you will see a bunch of options and settings in the toolbar mentioned above. In the toolbar, you will see an option that says, Dictate. If you directly want to type in the document using your voice, you can click on the Dictate button and start speaking. Microsoft Word will listen to you and automatically convert it into text form.
If you look closely, there’s another option, along with Dictate, that’s Transcribe. This feature comes in handy when you are in conversation with someone and want to record it all and convert it into text form. So, in a way, this works as a voice recorder as well.
Once you are ready to record, hit the Transcribe button on your Microsoft Word document, and it should automatically start recording your voice. Later on, when you are done, simply hit the Pause button, and click on Save and Transcribe. It will automatically type down all the conversation for you, which you can edit as well. You are even allowed to upload any previously recorded audio clips for transcription.
Microsoft Voice Recorder Alternative
Although the Microsoft Voice Recorder is quite simple to use and has a good interface also. People often report issues like Microsoft Voice Recorder not working because of some buggy Windows update or some other sort of bugs in the application itself. No wonder that’s one of the biggest issues that all Windows users face at some point. In that case, you should have another software as a backup to use. If we think of a Microsoft Voice Recorder alternative, the Wondershare DemoCreator software is the first name that comes to our mind.
Since it’s yet another simple tool that everyone can use without any expertise, it’s worth trying. Moreover, the Microsoft Voice Recorder is not at all available for macOS, so Mac users can definitely stick to using Wondershare DemoCreator as the primary audio recording software; you’ll surely like it. In contrast to Microsoft Voice Recorder, the Wondershare DemoCreator software can also be used for screen capture as well as audio recording. So, it will also come in handy if you wish to create any video demos.
How to Record Audio with Wondershare DemoCreator?
We have been personally using the Wondershare DemorCreator for a long time now, and actually didn’t face any errors or bugs until now. Unlike the Microsoft Voice Recorder users who face issues almost once or twice every month. In fact, the good fact about using Wondershare DemoCreator is that you get access to multiple editing tools as well.
You can check them out all by yourself. But, before that, we must tell you how to record audio with Wondershare DemoCreator. Since Wondershare DemoCreator comes for Mac devices as well, unlike the Microsoft Voice Recorder, we will show you how it works on a Mac:
Step 1. Download and Install Wondershare DemoCreator
You can simply download and install it on your Windows or Mac device by visiting the official website and download it for free. Or click the free download button below. Once done, launch the software, and choose the New Recording in the start up window.

 Secure DownloadSecure Download
Step 2. Start Audio Recording
If you only want to record audio, you can select the Don’t record screen. Then it will only record the audio. If all the settings are favourable, hit the Red-coloured Record button to start recording your audio. After clicking the Record button, you will notice that Wondershare DemoCreator has started to record your voice, so you can start speaking.
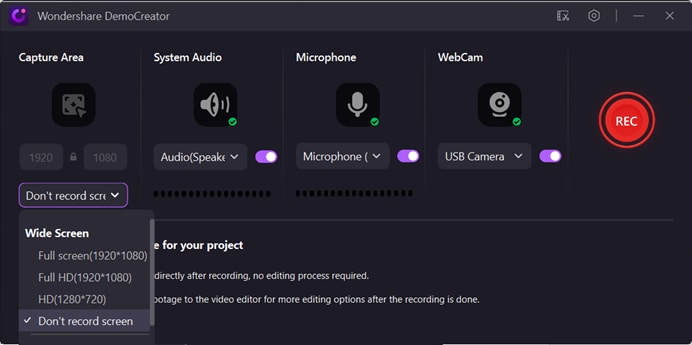
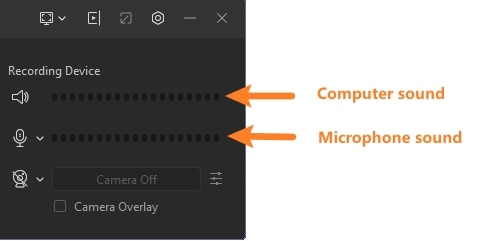
And there are 2 kinds of audio, the system sound and the microphone sound, you need to notify. If you record those 2 voice simultaneously, then the voice will be displayed on 2 different tracks, you can edit then separately.
Step 3. Finish and Export the Audio
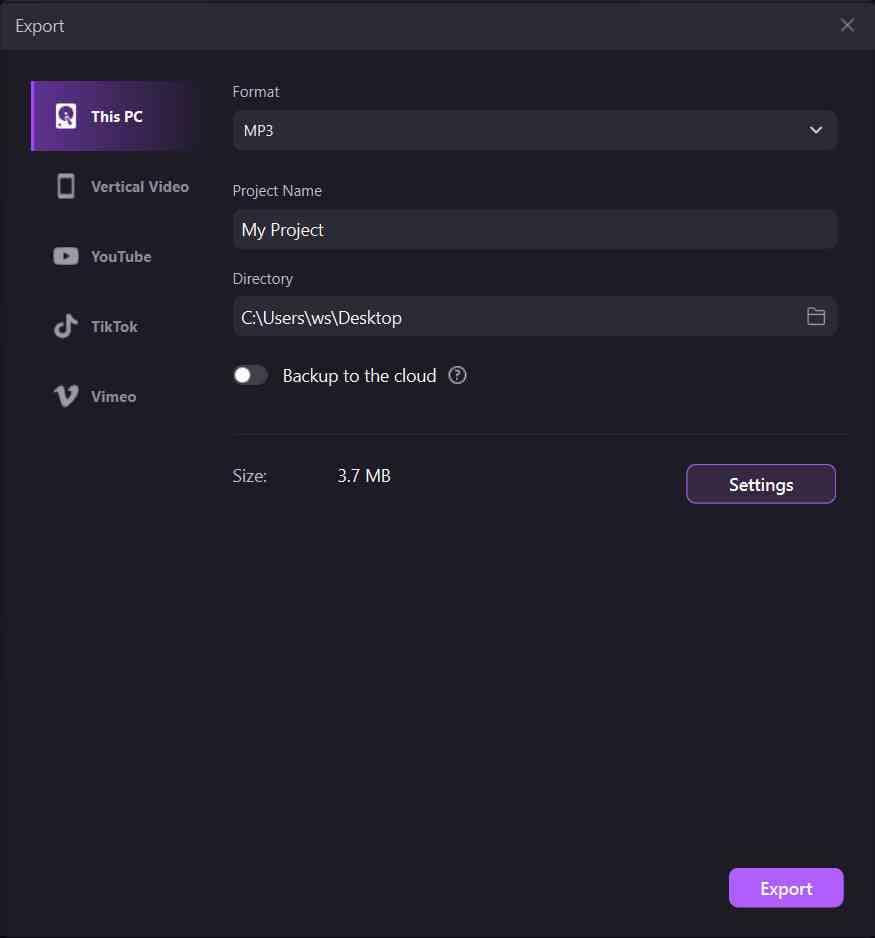
Next up, when you are done recording your audio clip, you can click on the Stop button to end the recording. Now, if you wish to make any changes to the audio, such as delete any part, or trim it, you can head to the Edit section. Otherwise, you can simply choose to export your audio clip in any of the supported formats like MP3, MP4, AAC, MOV, and others.
Conclusion
No wonder Microsoft Windows Voice Recorder is a great tool to use for Audio Recording. But, since many people have recently reported bugs in the software, it’s just not a viable software to use on a daily basis. Apart from that, it’s only available on devices running on Windows OS, so that’s a dealbreaker for people who have a Mac device. That said, we believe that Wondershare DemoCreator is an exceptional alternative tool that anyone can use. It’s free to use and supports both Windows and macOS. Moreover, it is capable of screen capture along with audio recording. So, in every way, we believe it’s a better choice than Microsoft Voice Recorder.


