
Adobe Premiere Screen Capture

Do you Want to convert a conference meeting, online class, or game into a video? Just simply screen-record it!
Screen recorders are applications with tons of impressive tools that not only help in recording the screen but allow you to annotate, crop, edit, and do much more with it. With so many options on the web, it might be arduous for you to narrow down the best one. Hence, we have done the task for you.
Adobe Premiere Screen Recorder is by far the best application we have tried and tested. It is an all-in-one application that easily records your moments and allows you to share them with people all across the globe. The interface is quick and straightforward to get the hang of and is also compatible with all devices.
The article covers all the details about Adobe Premiere Screen Capture and also suggests some other amazing alternatives. So without further ado, let’s start!
What is Adobe Premiere Screen Capture?
How to record screen with Adobe Premiere
Adobe Premiere Pro can record audio directly however, you cannot record your screen or capture a video with the application. Adobe Premiere Pro does not have an in-built screen recorder.
If you want to screen record, or capture a video real-time, then use dedicated screen recorders like OBS studio, Wondershare DemoCreator and Flashback Express. These applications have an in-built recorder for hassle free screen recording and sharing- anywhere anytime!
After recording the videos, you can open them up with Premiere Pro for some editing, since most screen recorders do not support the in-app editing.
Alternatives for Adobe Premiere
Since Adobe Premiere does not have the screen recording feature, one is most likely to look for alternatives. There are multiple screen recording software available in the market that also allow you to edit your videos seamlessly in no time.
You have the choice to record your screen using one of the software given below and then use Adobe Premiere to edit the video if you find it easier to edit on Adobe Premiere. However, these screen recording apps also have their editors too so that you can record and directly edit videos all in a single app.
Let's start looking at some alternatives for Adobe Premiere:
1. Wondershare DemoCreator
 Secure DownloadSecure Download
If you are unable to find all that you are looking for in Adobe Premiere, then a great alternative is Wondershare DemoCreator. Wondershare DemoCreator also allows you to create videos using the screen recording feature and edit them.
Apart from that, it has a highly intuitive interface that is perfect for beginners and professionals. With an array of powerful video editing tools at your disposal and an easy-to-use interface, anyone can make high-quality videos with DemoCreator.
DemoCreator is especially recommended for anyone who is not really familiar with video editing or is still learning the basics of it.
If this is the first time you have heard of Wondershare DemoCreator, then let us give you a small tutorial on how to navigate it.
How to Use Wondershare DemoCreator
Before you start working on DemoCreator, the first step is downloading the software on your PC. Go to the official Wondershare DemoCreator website and click on Free Download. There is a version for both Windows and Mac. You can choose according to the Operating System of your PC.
Once downloaded, install the software on your computer by simply following the steps given on the screen.
Step 1: Launch DemoCreator
- Now that you have installed Wondershare DemoCreator, you can start working on it.
- Launch the app on your computer and you will see different options on the screen varying from video recording, screen recording and video editing.
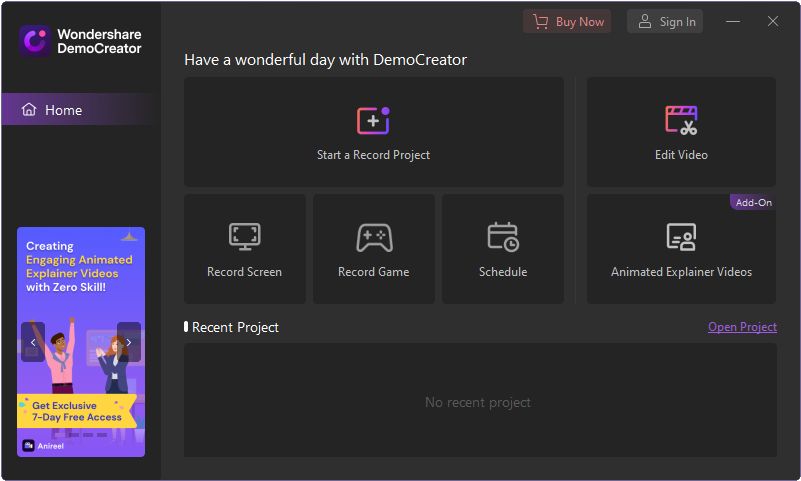
- You can click on any option that you want to work on. In case you want to create a new project, click on New Recording.
Step 2: Start a New Recording
- Once you click on New Recording a New Window will open that will allow you to record your screen.
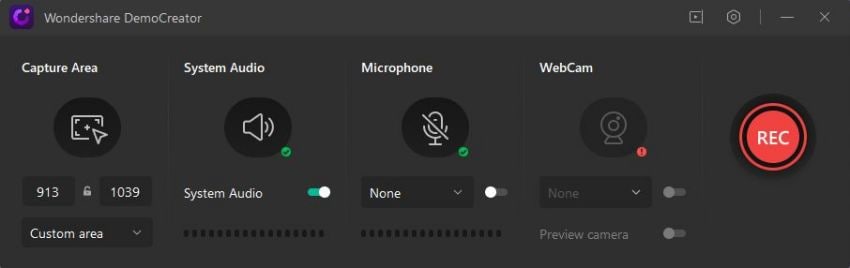
- You have the freedom to select the recording area. This means you can simply select the part of the screen you want to record to make sure your recording looks clean and not cluttered.
- Furthermore, you can change the frame rate, select your audio and video devices and even add a screen overlay.
- With a screen overlay, you can record yourself talking along with the screen capture.
- Lastly, click on the red circle to start your recording. You can also press F10 to start or stop the recording or press F9 to pause or resume the recording.
Step 3: Video Editing
- Once you have recorded your video, you will automatically be redirected to the video editing window.
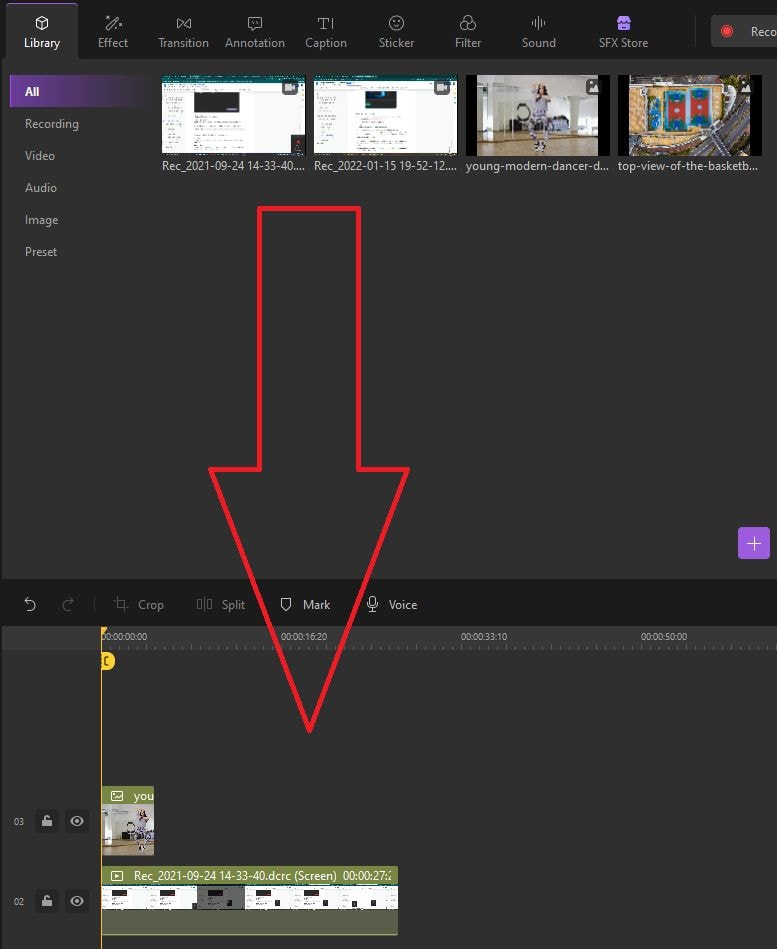
- Your recording will already be shown in the files section. You can drag and drop your recording on the timeline to start editing it.
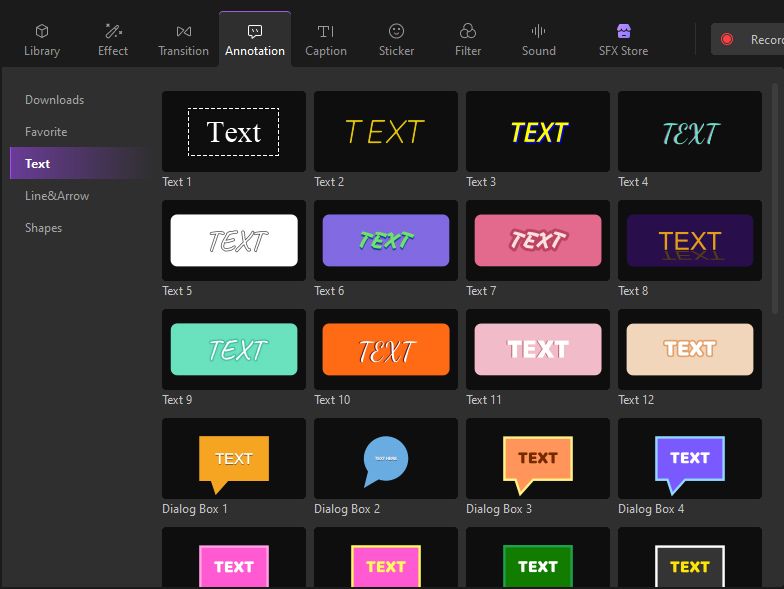
- With the various tools available you can add captions, annotations, emojis, filters, voiceovers, and so many other effects to your videos to give them a professional quality.
- From the left pane, you will be able to add effects and from the right pane, you can adjust the dimensions and the position of the video on the screen.
- You can also edit the audio, trim or split your video or add visual effects like pan and zoom effects along with so many other transitions.

Step 4: Exporting and Sharing Your Video
- Once you are done editing your video, you can export it anywhere. Just go to the Export Tab and click on Create Video.
- You can then select the resolution for the video you want to save. You can also post the video directly on your YouTube channel from Wondershare DemoCreator.
And you are done! You have successfully created a video on Wondershare DemoCreator!
2. OBS Studio

The all-time best screen recording software that is compatible with the Adobe Premiere Pro is OBS Studio. It is highly recommended by YouTubers, gamers, educators, and video trainers who create step-by-step tutorials and video demos for their audience. You can change the video settings in the OBS studio to make your content compatible with Premiere Pro.
The interface is very intuitive and user-friendly, making the application suitable for both- newbies and professionals. Besides, the application offers a vast variety of editing tools like transitions, color correction, frame adjustment to make the editing process a piece of cake.
With the in-built camera option, you can also record your own video. OBS also allows its user to save the recording in the format of their choice or stream it directly on another application.
OBS Studio supports both recording and high resolution streaming, with no restriction on the time limit of your creation. Because the application is capable of recording directly from a graphic card, it can record games on full screen with high definition. By our test and trials, OBS studio is by far the most powerful and versatile screen recorder for video creators.
How To Record Screen With OBS Studio?
Step 1: Download and launch the Software
- Launch the browser and open https://obsproject.com/.
- Click on your PC type to start downloading the .exe setup file.
- Once downloaded, run the file to install the application on your PC.
- Launch the software.
Step 2: Record Screen with OBS
- When you launch the OBS studio software, go to the bottom right corner and click on settings.
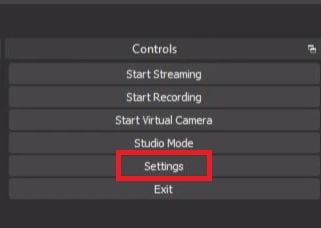
- A pop-up will open where you can select settings of audio and video.
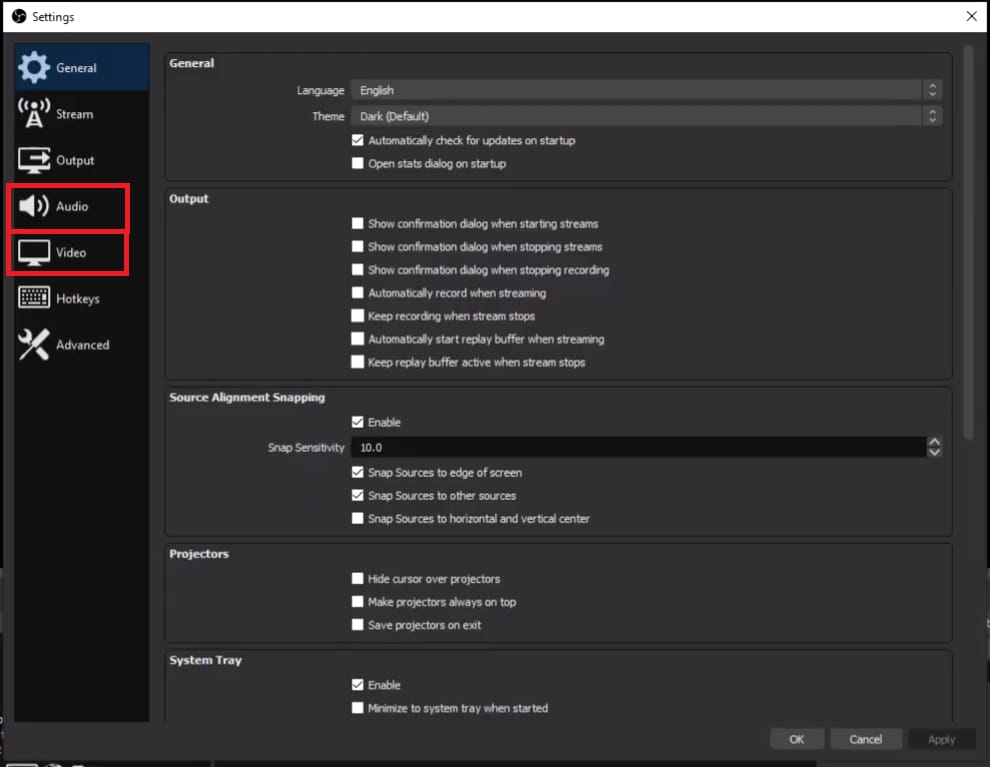
- If you go to the output tab of this pop up you can change recording settings.
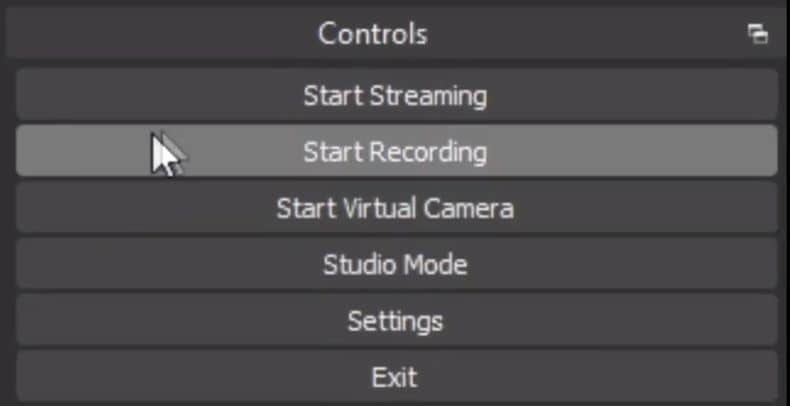
- After that, go to the right bottom and select recording to start the recording.
- OBS uses ‘Scenes’and ‘Sources’ to keep your audio and videos synced. When you launch the software, a scene is added in by default on the bottom left corner of the application.
- Add a source on the screen. Click on the +sign on the bottom of the panel labeled ‘Sources’.
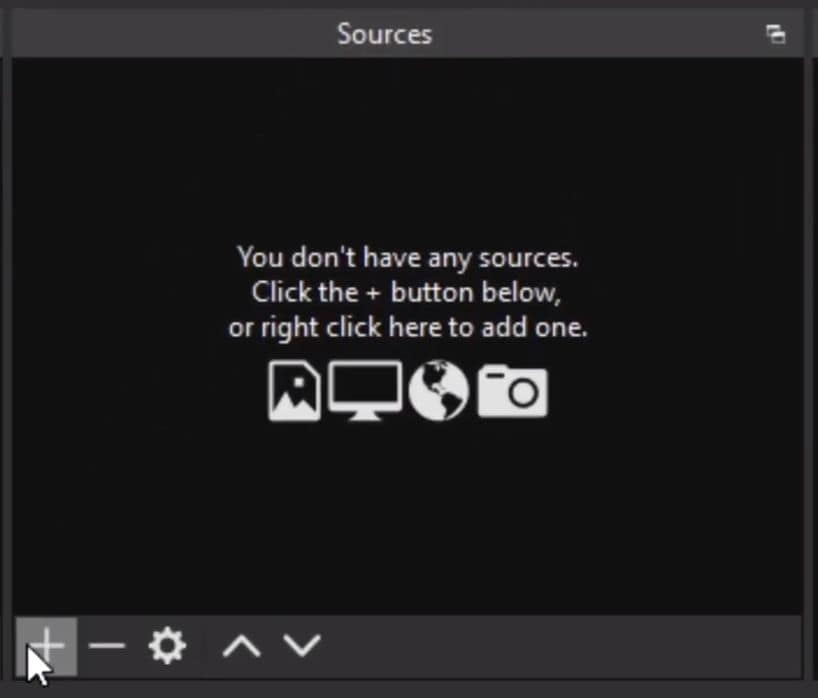
- Then select Screen Captureon Linux and Desktop Capture for your Windows or Mac.
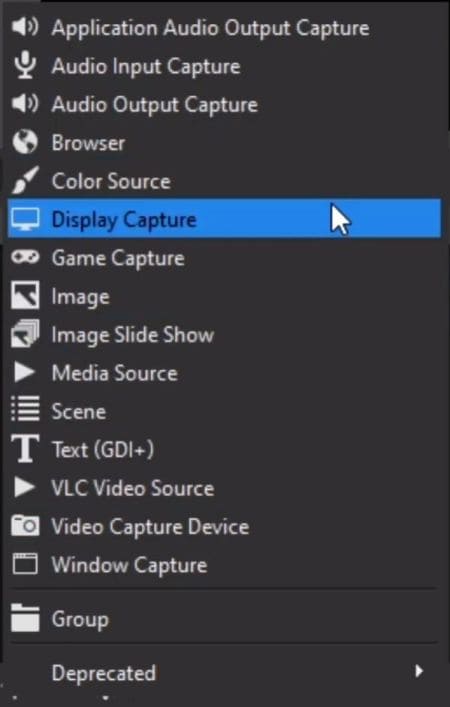
- A pop-up will appear on the screen. Click
- Next, open the settings by clicking on the bottom right of the application. Choose the Outputtab and check the Recording Path of the video. This indicates the destination where the video will be saved on your computer.
- When you are ready, click Start Recording on the bottom right of your screen.
- Once done, click Stop Recording.The video will be saved in your previously selected folder.
Step 3: Editing Video with OBS Studio
Once you are done recording your video, you can edit it with the built-in tools. The application features numerous transitions that can be used to effectively switch between different scenes.
Besides, you can also collaborate with other editing software to make your video stand out from the rest. OBS Studio allows users to alter the resolution to make it compatible with software like Adobe Premiere Pro so you can seamlessly edit your videos via third-party applications.
3. Movavi Screen Recorder

Movavi Screen Recorder is an excellent tool to capture any desktop activity on both windows and Mac. It has an extremely reliable screen capture feature that allows you to record presentations, meetings, videos and so much more.
Not just that, after recording you can edit your videos too! After editing, you can even export your videos in various file formats or save any screen images. This is a very useful tool especially if you like to create gaming videos with video overlays.
For a seamless screen recording experience, we highly recommend you to use Movavi. Here is how you can record screen and edit videos in Movavi:
How to Record Screen in Movavi
Step 1: Download and Launch the app
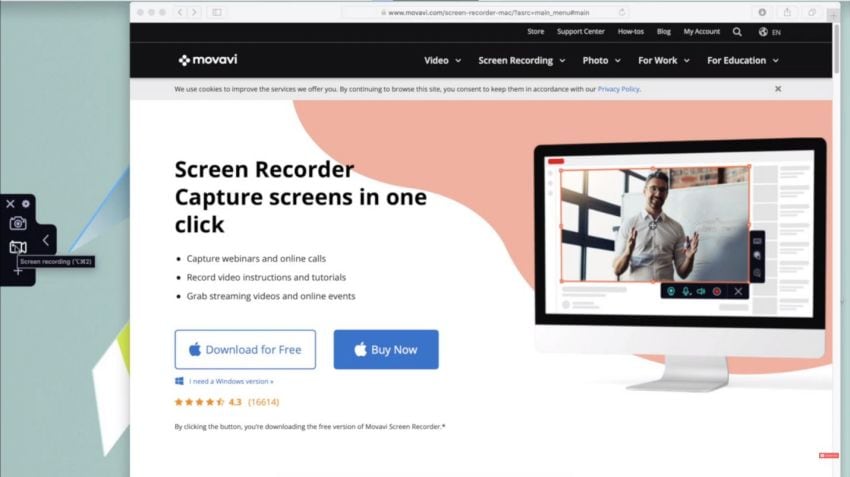
- Before beginning make sure you have installed Movavi on your PC. If not, you can download it for free from the Movavi Screen Recorder website.
- Click on Download For Freeto download it. You can either opt for the windows or the Mac version.
- Follow the steps on the screen to install Movavi and then Launch the app.
Step 2: Adjust the Settings for the Recording
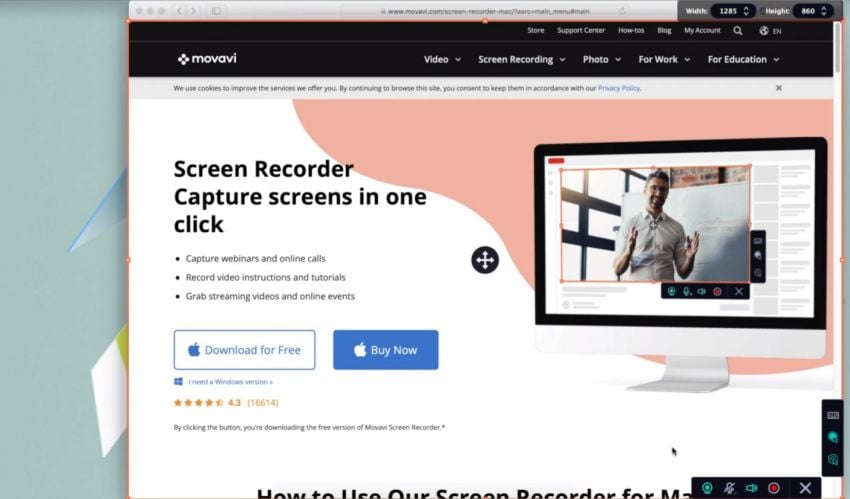
- Before beginning the recording, make sure the parameters are what you want.
- Using the recording window, you can adjust the presets for the capturing window.
- The capturing window will be shown in the form of a yellow box. You can even simply drag and adjust the capturing window too.
- In case you want to record the computer sounds, make sure there is a green checkmark on the speaker icon.
- To enable your own audio to also be added to the screen recording, click on the microphone icon so there is a green checkmarkon it.
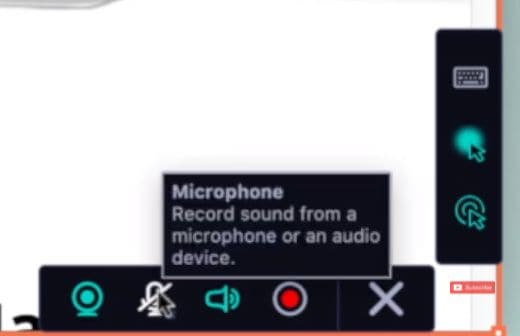
- Click on the cursor options if you want to enable your cursor movements in the video.
- Another great feature Movavi Screen Recorder has is the keyboard keys option. Any key you press on the keyboard will be shown on the screen to show which key is pressed. Just click on the keyboard option below the cursor option to enable that.
Step 3: Start Recording
- You can start recording by pressing the Rec button. You can even press F10 to start the recording.
- During the video recording, you can press F9 to pause or resume the video and F10 to stop the video capture.
Step 4: Editing and Saving the Video
- Once you stop the video, you can preview the video and save it.
- The save menu will open.
- From the save window, you can click on edit to edit your video or you can directly save it as it is.
- To directly save you can select the file extension type and choose an appropriate name and location to save the video. Now your video recording will be saved.
- To edit click on the small magic wand icon.
- This will redirect you to the editor where you can split, trim and merge videos. You can also add background music, transition effects, and animations! When you are done you can save your edited video.
4. Flashback Express

Flashback Express is a free screen recording and video editing software that allows you to create high-quality videos in no time. Especially if you do not have much experience in video creation and video editing then using flashback express is highly recommended.
With Flashback Express, you can not only record your screen, but you can also add a video overlay with no limits to the size of the recording. Without bearing any watermarks, you can easily share your video directly from Flashback Express after editing.
Let's see how you can create and edit videos with Flashback Express:
Recording Screen with Flashback Express
Before beginning make sure you have Flashback Express installed on your computer. If not you can access the free version from their website.
Once installed, launch the app on your PC to begin working.
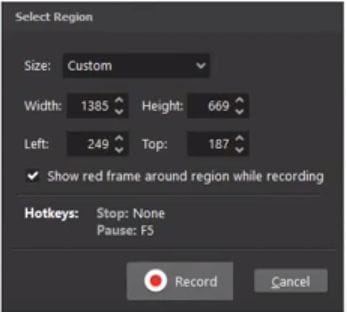
Step 1: Adjust Settings for the Recording
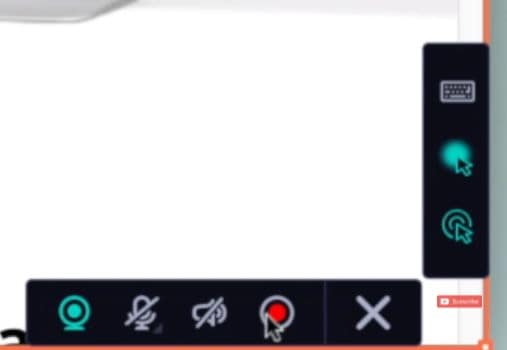
- Once you launch the app, the recording window will open. This will show you a number of settings that you can adjust according to the type of recording you want.
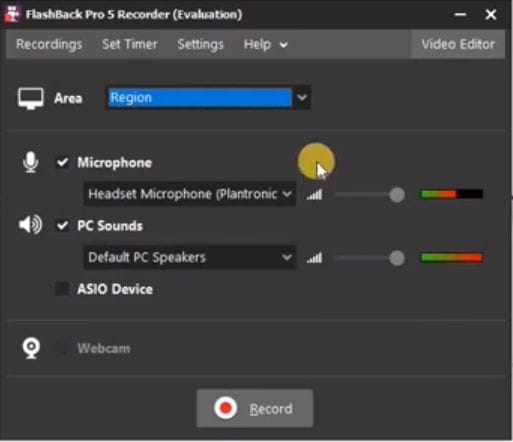
- You can select the area you want to record, adjust the microphone and see if you want to allow the recorder to pick the sounds from the PC.
- You can even add a video overlay by clicking on the webcam option. Make sure your PC has a webcam to avail of this option.
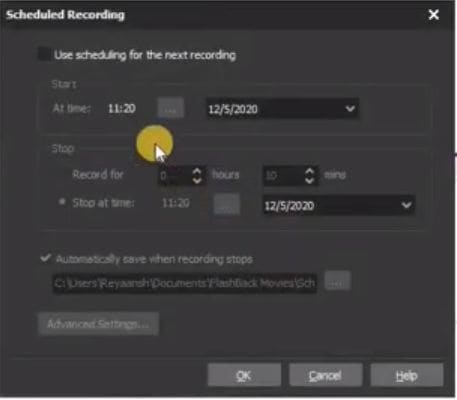
- Apart from that, you can set the timer and select the location where you want to save the video. Just click on the Set Timertab from the top of the window. Click Ok once done.
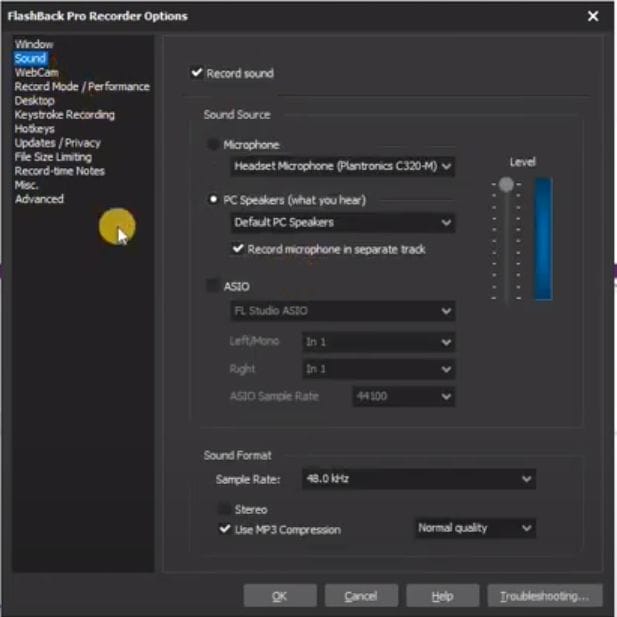
- Lastly by clicking on the Settingstab, you can change video and audio quality for the recording. Once the Settings window opens, you can change multiple settings from the options in the left pane including webcam settings and keystrokes. Click Ok once done.
Step 2: Start Recording
- Once you are done with the settings, make sure to open the tab you want to start recording.
- Now open the Flashback Express window again and pressRecord.
- Now start recording your video.
- You can stop the recording anytime by pressing Ctrl F10.
Step 3: Editing and Exporting the Video
- Once you are done recording your video, the video will open in Flashback Express Video Editor.
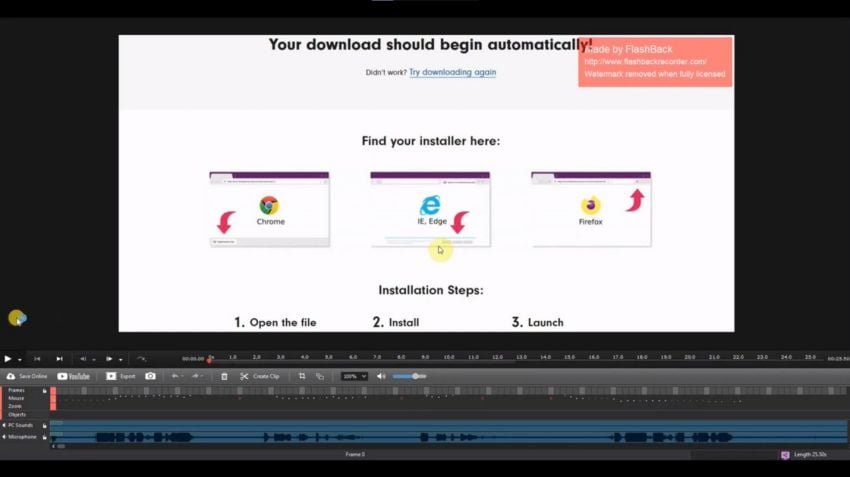
- You can preview the video once and see if you want to trim it or edit it.
- You can add transitions and many other effects from the menu on the top of the screen.
- When you are done, at the button on the screen, you can click on Export to export the video.
- For exporting you can decide the file type, scale, quality, and if you want only specific frames from the recording.
- Click on Exportto export the video now to your desired location.
- If you want to share the video directly to youTube you can also do that apart from exporting. Just click on the YouTube icon adjacent to the export icon. Make sure you are logged into your channel.
And now you are done with creating your own screen recording and editing it.
5. Wondershare Filmora

Wondershare Filmora is a very popular video recording and video editing app that allows you to share informative videos with anyone. With a very intuitive interface, Filmora offers professional-grade video editing for everyone out there.
It contains powerful features like noise removal, color grading presets, tilt-shift, scene detection, and even layering of multiple clips.
Filmora is especially known for its screen recording feature that also allows a video overlay. This is ideal for making youTube videos, especially gaming videos, reaction videos or even educational videos.
If you have never worked on Wondershare Filmora before, here is how you can create videos:
How to Record Screen and Edit Videos on Wondershare Filmora
Before you begin using Filmora, make sure you have Filmora downloaded and installed on your computer.
If you do not, then go to the official website of Filmora on your browser to download it. Click on Free Download to download it . There is a version for Windows and a version for Mac, you can use whatever suits your needs.
Step 1: Launch Your Screen Recorder
- Once downloaded, follow the steps on the screen to install it. Now, let's start working on Filmora.
- Launch Filmora on your PC and open the Full Feature mode. Once it opens, click on the RecordMedia from the file menu and then select Record PC Screen.
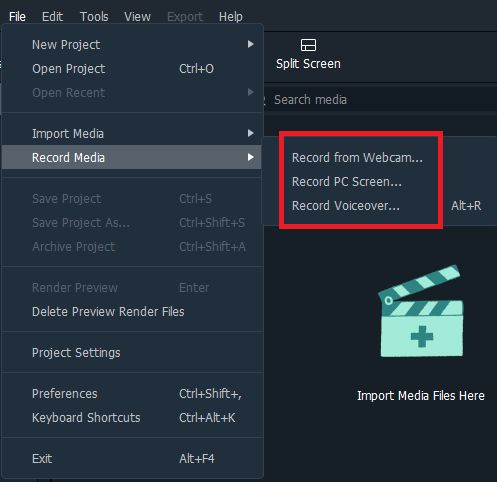
- This will open the Wondershare Screen Recorder window.
Step 2: Record your Screen
- From the Screen Recording window you can select part of the screen you want to record. Just click on the small rectangle of the left side of the window.
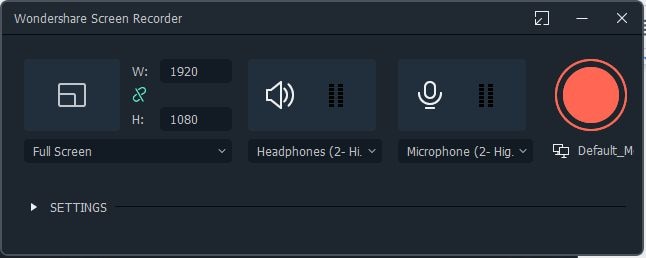
- You can also adjust your audio device by clicking on the small microphone and you can click on the speakers option to turn on or off your computer’s speakers during the session.
- You can change additional settings by clicking near the setting drop down iconon the bottom left corner. This will help adjust the video quality and where the video will be saved.
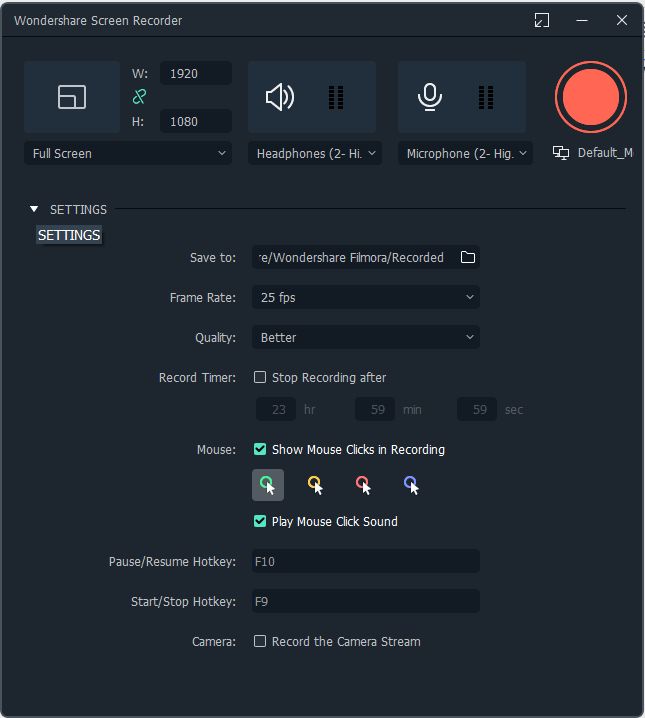
- You can also toggle the option that allows your mouse click to be visible on the screen and you can even select the length of the session so your recording turns off automatically.
- Now press the red recording button to start recording to start.
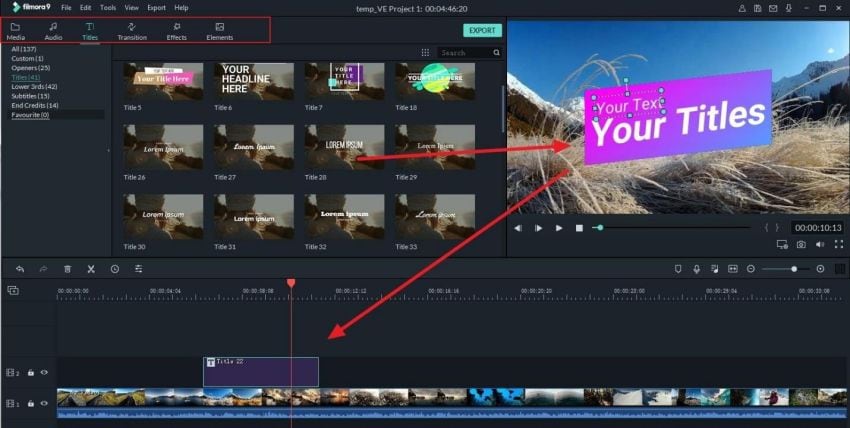
Step 3: Edit the Video
- Once you have recorded the video, you can edit it using the numerous tools in Filmora. You can add the video to the timeline and start working on it. You can add audios, text, transitions, effects and filters to create a professional style video in no time.
Conclusion
Screen recording and editing videos can be a fun process. While Adobe Premiere does not allow you to record the screen, there are plenty of other softwares in the market that can help you create tutorials or other informational videos.
Later, you may even edit them using the same software or even Adobe Premier. The editing options are endless with each software. You have complete freedom to make certain settings for recording your screen and then edit anything you don’t like later.
With such softwares, you can even share your videos directly on any social platform.


