Live Streaming OBS

Among various tasks that are now shifted online after the WFH has started, getting a live streaming setup is also a very important one. It is not as easy as you might have imagined. You might have seen some creators doing an advanced stream on platforms such as Twitch. Well, there is one option that will allow you to have a much easier streaming process. It is Open Broadcaster Software (OBS) which is open-source software, and it is comparatively easier to start with. In this article, we are going to discuss live streaming using OBS and all its aspects that you will need to know.
There are various creators, who make educational content such as guides, tutorials, etc., and no matter whether they are up for live stream or offering a recorded session, OBS will be a perfect go-to that they can opt for. This software application will also allow you to record various scenes by letting you choose more than one source.
Best Live Stream Settings for OBS
Just like any software that you might be using to create content, there are a few settings that are needed to be configured here, as well. In this section, we are going to discuss the 3 best settings that you must know if you have decided to shift to OBS.
Auto-configuration
Though you will have the option of changing the settings anytime you want, OBS will allow you to set a default config on which the application will start. Let's find out how to access the auto-config wizard.
Once you have downloaded the setup wizard and installed it on your preferred location, launch the app. You will find a range of options on the top; you will need to hit the Tools.
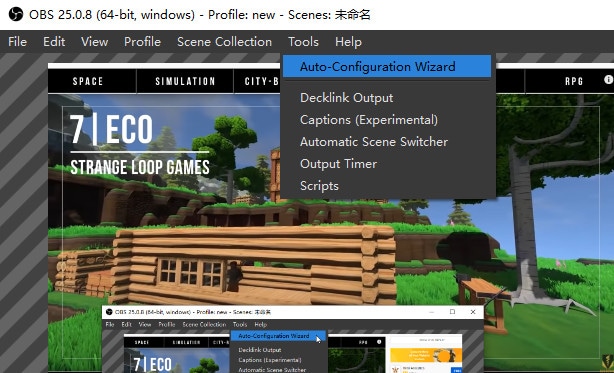
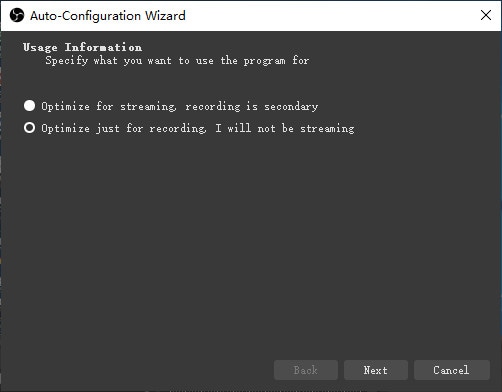
Click on the Auto-Configuration Wizard. It will open up a new dialog box where you will be prompted to make a selection. Here, if you are using the application for live streaming OBS YouTube setup, you should select the first option. If you are just recording the screen for later use, you should go with the second one.
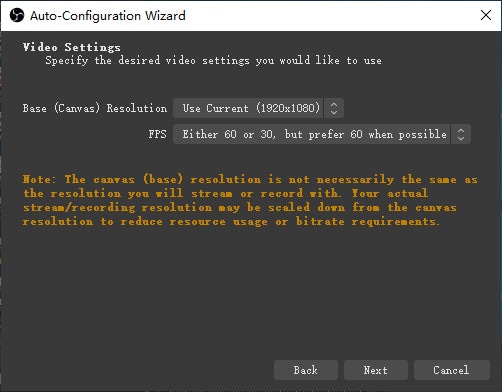
Next up, you will be greeted by the options that will let you choose the video resolution you want to stream in. Along with the resolution, the dialog box will also give you the option to select the FPS.
The auto-config settings will prompt you to set up the default streaming service. From the drop-down menu, it will auto-select Streaming Service. Right below it, you will need to select the platform you want to stream to. You can find the stream key in the account details of that platform.
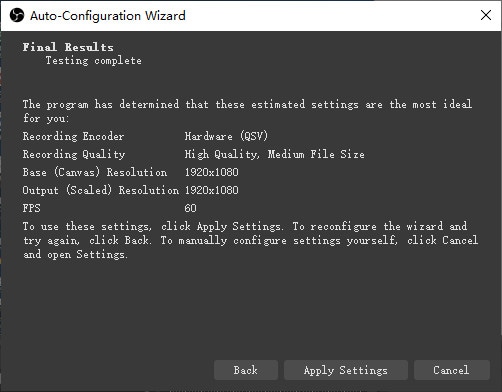
As you will hit Next, the wizard will run some tests of its own, and you will need to give it a few moments to optimize everything according to the settings.
Adding Scenes
To perfect your working with this advanced and highly professional tool, you will need to know the steps that you are going to follow. Now, when you have completely understood the auto-config wizard, it's time to move on to understanding the steps you need to follow to add scenes in your stream.
Once you have launched the app, you will need to give it a few moments to start working. Below the blank screen, you will find all the options that are there to help you create high-quality content.
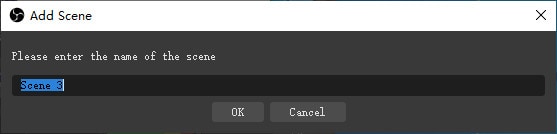
Now, as you are seeing above, it will not be the case when you will start afresh. All these sections will be blanked out, and the very first thing that you will be required to do is add some scenes and sources. Talking about scenes, you will need to hit the ‘+’ button in the Scenes section or right-click and Add.
You will get to add as many scenes as you want. You can set scenes such as introduction, intermission, and live. It will allow you to rename the scenes, as well.
Once the scenes are set, you will need to move on to the Sources. It will be highly useful in case you have multiple displays and/or when you are also adding the webcam footage to the stream.
You will also be able to set the OBS Add Scene/Source to record any screen that consumes the full screen.
Setting up Audio
When you are creating video content, the most important aspect apart from the video quality is to get the audio right. As you launch the software, you will find the audio settings right up front. It will also represent the mic levels right upfront. Right below the mic, you will also get the levels of the desktop audio.
On the dashboard, you will find all the options. Once you are done with scenes/sources and the basic settings, it's time to move onto the audio settings.
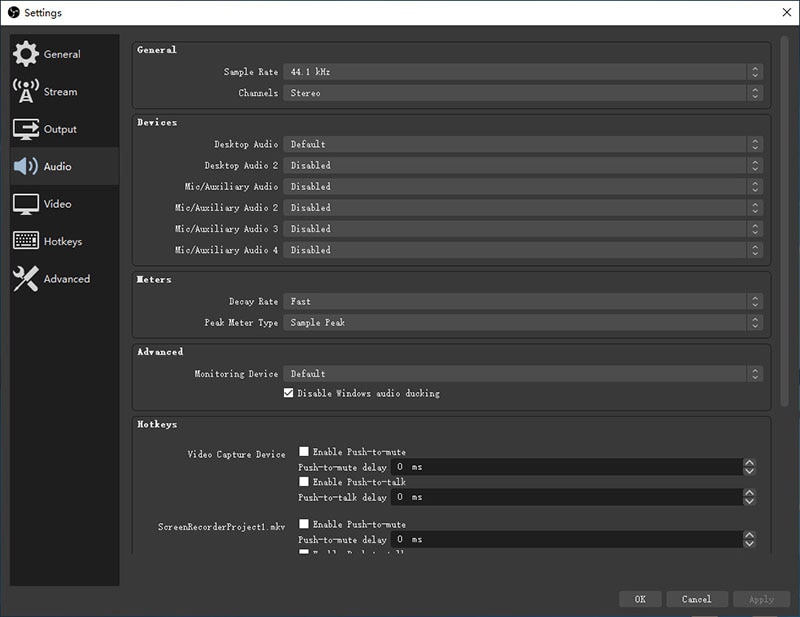
It will give you a new dialog box where you will need to go to the Audio panel. You will find a long range of options here where you will be able to produce quality content.
Based on the microphone that you are using, you will need to select from the various options from the drop-down menu such as stereo, mono, and other frequencies.
Next up, you will find a long range of settings, including setting up the desktop audio. You will also get to choose the auxiliary or the mic input.
Under these drop-down menus, you will find various checkboxes that will give you the ability to tweak a few things. You will get the following options as push-to-talk along with a push to insert music, webcam, etc.
Once you have configured all the settings, it will offer you a control center right on the dashboard. You will get to adjust the volume from there along with a shortcut to the settings page.
How to Live Stream with OBS
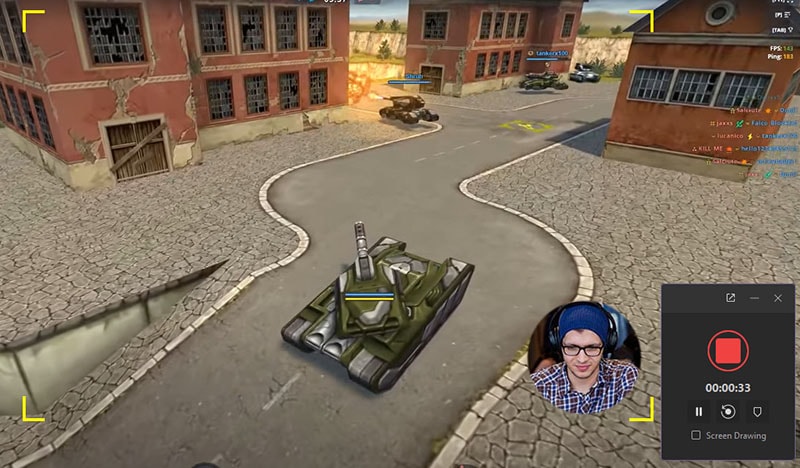
Live streaming has become one of the passions among the youth. There are various creators who are now confined to their homes and now, they have opted for the live streams. The content that's best suited for this genre is either guides and tutorials or gameplays. The gameplays have now become the most loved content and creators are getting millions of views on their content. In this section, we are going to jot down a detailed guide on the steps that you will need to follow to start streaming.
Launch the app, and the very first thing that you will need to do is add some scenes. You will have the option to run a full Livestream under a single scene. However, adding multiple scenes will enhance the overall quality.
Once the scene is set, you should move on to the Sources section. If you are also adding the webcam footage, you will get to add the webcam as a source along with the display capture.
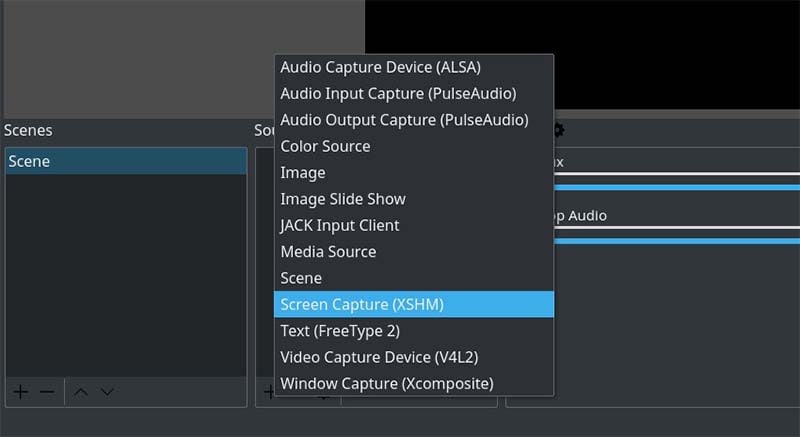
Once you have selected the Window Capture for the game that you are about to play, it will give you a new window to make some selections such as including the cursor/pointer in the video.
Open the app that you are going to record. Bring it to the blank screen section on the Studio dashboard. You can right-click on it and find a plethora of options to configure according to you. If you want to fit it on the screen, you can simply hit Ctrl+F. Once you add the webcam in the sources, it will give you another dialog box. This is to tweak a few necessary settings.
As you are done with the Sources, it's time to deal with Audio settings. As we have mentioned above under the head "Setting Up Audio".
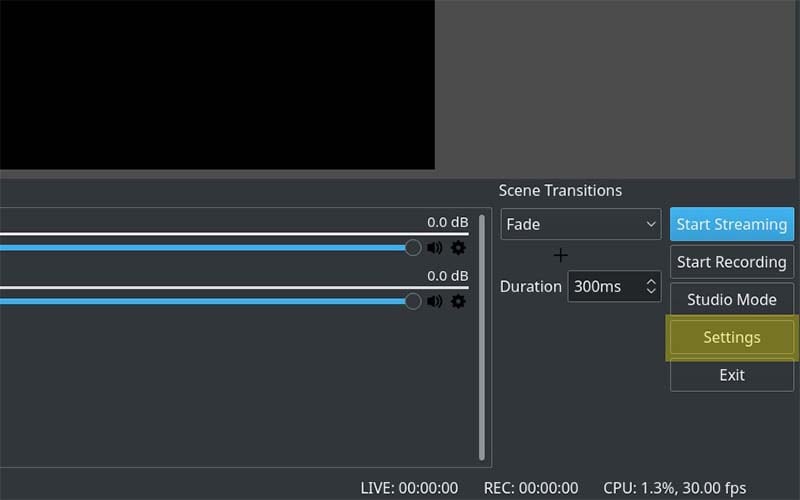
Next, you will need to go to the Settings tab where the Stream tab will provide you all the configuration options.
Here, you will need to provide the live stream key that you will get from the Youtube account.
Right below the Stream window, you will get the Output tab. Here, you will get to configure options such as video bitrate, it will also be the dialog box where you will set the recording to be saved.
Recommended Tool to Record Live Videos - DemoCreator
Wondershare DemoCreator is an all-in-one screen recorder and video editor. This tool helps record live TV shows, soccer and basketball shows, and other activities on your PC and Mac with audio. Besides, it also comes with powerful webcam recording feature, which allows you to capture your face with AI recognition, which will make your video more natural and engaging. Some great feaures of this tool include:
- Customize recording area, frame rate, and webcam frame style.
- Embedded with AI face recognition to improve webcam recording experience.
- Improved game recording mode that supports 20+ popular gameplay.
- Record and edit video and audio in different tracks.
- 6 animation effects for the text while editing videos.
- Thousands of video tempaltes to improve your video editing .
 Secure DownloadSecure Download
While you are using the OBS Studio, there is one thing that you need to make sure is that the device that you are using should be able to handle any and all graphic-intended tasks. We hope that you are now able to completely understand the issue of record YouTube live stream OBS and if you are stuck at any point, OBS will give you detailed on-screen instructions to help resolve it.