
How to Record a Lecture in PowerPoint

There could be a variety of reasons why you should record yourself and your lecture presentation while attending a live class. Following that, you must upload the session recording of the lecture to assist students with revision purposes.
Due to the sudden and pressing need to deliver non-face-to-face instruction due to the coronavirus crisis, this is an excellent opportunity to learn how to create online teaching resources.
Creating a PowerPoint lecture with audio is relatively simple. What you need is a web camera or something connected to your computer to record lecture videos, plus the PowerPoint software where you can create your slides to turn them into a lecture video.
A video lecture is a video that contains educational content on a specific topic. It could be a talking-head video with an instructor speaking to the camera, a "lecture capture" of a live classroom lecture, slides with topic-specific voiceovers, demonstration videos, or screencasting.
It can also take the form of an "interactive lecture," which combines video, audio, PowerPoint slides, and other elements.
Using PowerPoint, users can convert a slide presentation into a narrated lecture video recording. You record your presentation in PowerPoint and then share it with your audience, who can view it as a PowerPoint Show or a video. As part of a 'flipped classroom,' some educators use recorded lessons.
The most common method for producing a video lecture is to film a presenter with a camera and then polish it with a video editing tool to make it look more professional. However, in this article, we'll show you another way to create a video lesson using PowerPoint.
AI Presentation Maker
Why You Will Need to Record a Lecture Video
You may already be using PowerPoint in your classroom. But, how do you?
- Make yourself available when students need to hear your lessons multiple times?
- Is it possible to accommodate students who learn at different rates?
- Examine the comprehension of all students in the class, not just the most vocal.
- Create video-based lessons without knowing much about video production or technology?
Creating a lesson in PowerPoint is as simple as adding a few interactive elements to your PowerPoint presentation and saving it as a PowerPoint Show or a Video. Then share it in Office 365 as you would any other file, such as a file in SharePoint or a video in Stream.
You can design interactive lessons that do the following:
- It can be viewed once or as many times as a student requires.
- It can be sped up or slowed down, starting from the beginning or any slide.
- Include quizzes to assess student comprehension.
- Use your webcam and built-in microphone, as well as any other audio-visual peripherals connected to your PC, to contain audio and video.
- Demonstrate your speaking directly to students.
- To draw your students' attention, show ink on crucial parts of your slide.
- Include screen recordings of other Windows applications that are running.
How to Record Lecture Video with PowerPoint?
Video lectures are a fun way to share your expertise. The best part is that you can make them yourself using only a few pieces of equipment and software tools. Check out this step-by-step guide to learn how to quickly and easily create a good video lecture outside of the classroom setting.
Step by Step guide
Follow the steps mentioned below to record a lecture video:
- Open the Powerpoint slides that you want to convert into a video.
- Navigate to the 'Slide Show' tab.
- Click 'Record Slide Show,' then 'Begin Recording from the Beginning.'
- Click the 'Start Recording' button
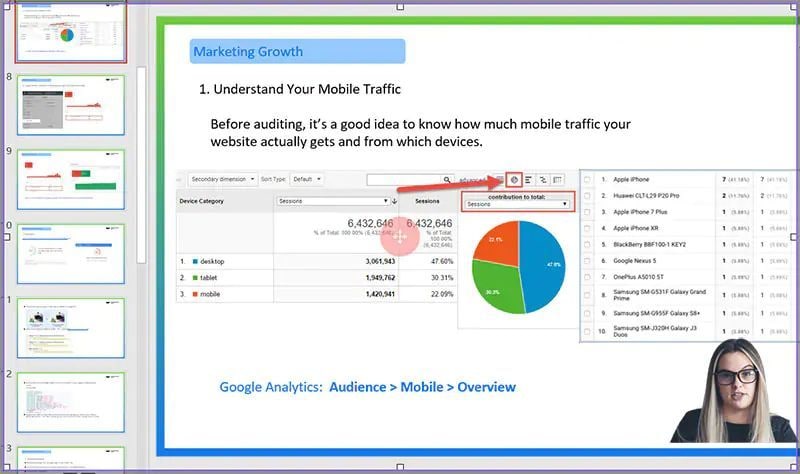
- Talk through your presentation as if you were delivering it to a class of students, going through the slides as you go. You can pause the recording by clicking on a small box that appears if you want.
- Press the 'Esc' key on your keyboard when you've finished speaking. You'll now notice a small speaker icon in the bottom corner of each of your slides. So the software has recorded your presentation slide by slide. You can hear the audio for that slide if you click on it (and re-record it if you want).
- Go to the 'File' menu, select 'Export,' and then 'Create a Video.' The default settings appear adequate, so click on 'Create Video.'
- It will prompt you to choose a location to save the video. Save it somewhere you'll remember it, such as the folder containing your presentation. Saving it in the default MPEG-4 format appears to be sufficient.
After saving your presentation, you can upload the lecture video in the Google Classroom or the students portal of your Institution.
How to record Lecture Video in PowerPoint with DemoCreator?
Wondershare DemoCreator is an option for an application with more features to record a narrated Lecture video. It is the best choice for recording PowerPoint presentations.
This is due to the fact that it quickly captures your presentations with narrations. This software gives Presenters the most straightforward methods for creating product demo videos, lesson tutorials, gameplay videos, and more.
With Wondershare DemoCreator, you can record video demos, tutorials, presentations, and games and quickly edit them like a pro. The user-friendly interface makes it simple for anyone to record a clip.
You are free to record the system sound, microphone, or webcam as needed. Furthermore, you can set the resolutions before recording to ensure that the videos are high quality.
To enhance your videos, DemoCreator includes various Annotation options such as Captions, Banners, Overlays, Arrows, and more. To make your video more engaging, insert colorful stickers into the recordings to help your points stand out.
DemoCreator screen recorder also includes simple editing tools to help you make your video more creative. You can cut, copy, accelerate/slow down video speed, adjust the border, composite, change the volume, and do various other things.
Best Features
For over ten years, this screen recorder and video editorial manager has been honing the art of demo creation. It now provides the best tools for recording, editing, and sharing demo recordings to Windows and Mac clients.
Here are some of DemoCreator's key advantages:
- Because this software is so simple to use, you can record your voiceover without knowing anything about it. Its features are all valuable and straightforward to use.
- Because of this toolkit, DemoCreator does not require a powerful computer to run. A computer with 2 GB of RAM is all that is required. This software is available for both Windows and Mac.
- Whether you want to adjust the volume of your recording or denoise it to remove background noise, the DemoCreator voice recorder and editor support the best audio editing features immediately after recording.
- In addition to recording, the recording interface lets you control the Encoder, Resolution, Frame rate, and Bitrate intuitively.
- You can change the audio settings and source with a single click on the audio recording devices.
- DemoCreator voice recording export options are also extensive. It allows you to import video, GIF, or audio-only files and export them to your preferred format.
Step by Step guide to recording Lecture on PowerPoint with DemoCreator
Follow the simple steps mentioned below to record your lecture video on PowerPoint with Democreator;
- Begin by downloading and installing the software on your computer. It's worth noting that there is a free trial edition of this program available. However, if you want to use all of the program's features, then buy the complete version of it.
- Launch the program after installing it on your computer and complete the registration process.
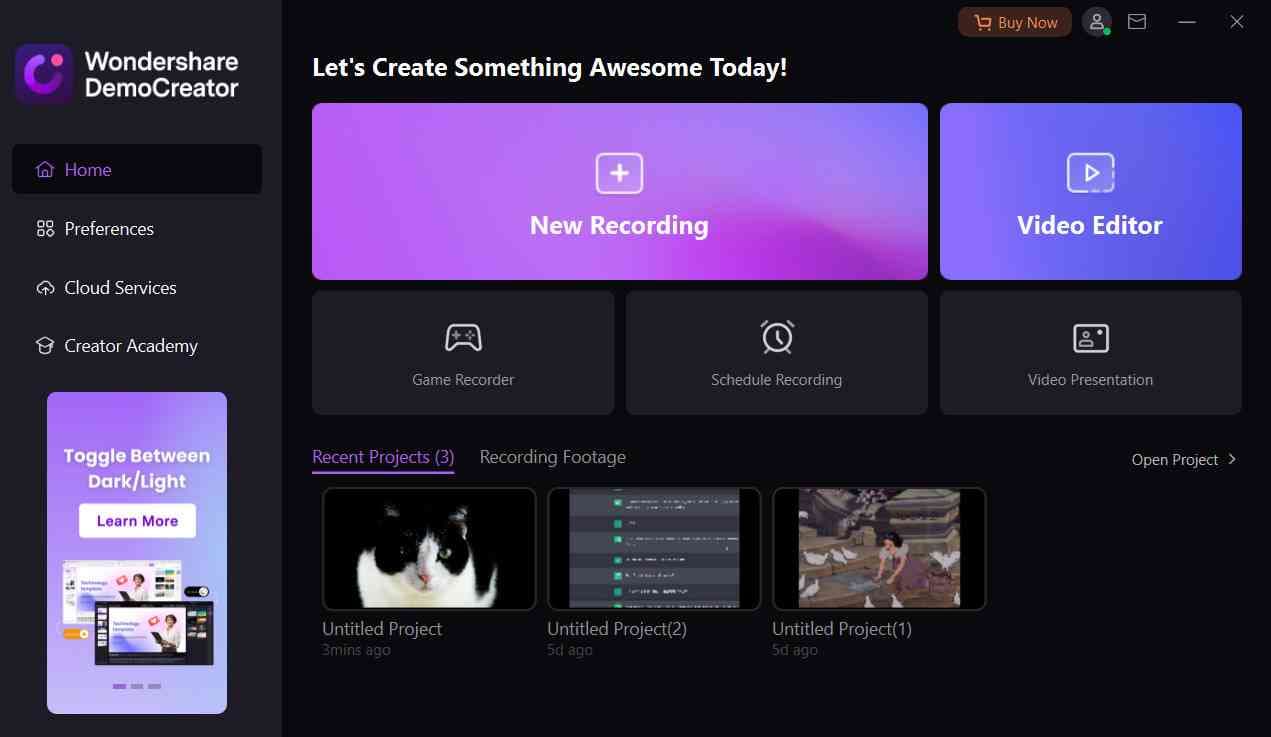
- In the program's main window, click "New Recording" and then customize your preferences in the window that appears. To access these options, click the "Settings" icon.
- DemoCreator allows you to record both the screen and webcam footage simultaneously. To choose whether to use both or either, click the "Camera" option and select the camera you want to use from the drop-down menu next to "Choose a Camera."
- Because you want to record your PowerPoint presentation with audio, we recommend that you go to the "Audio" section of the setup window and set both "Computer Audio" and "Microphone" to "Capture."
- When all settings are correct, click "Capture" to close this setup window.
- Return to your presentation and begin the slideshow. Click the "Record" button to start recording the presentation when you're ready.
- During the recording process, you can add markers to the presentation. To do so, click the "M" icon and then select the markers you want to include in the widget that appears.
- To end the recording, press the "Record" button once more.
- Save the lecture video.
Adding annotation, captions for your lecture
In addition to your voice, which allows you to communicate more efficiently, you can use a variety of annotation tools, such as captions, speech bubbles, overlays, arrows, and other colored elements.
These features will help you transmit the messages that are most important to you. This is especially useful if you've been using DemoCreator to create presentations, video tutorials, or training courses for your students.
Annotations enhance the educational value of videos by incorporating various elements such as text, graphics, or drawings. It keeps the audience interested in the content.
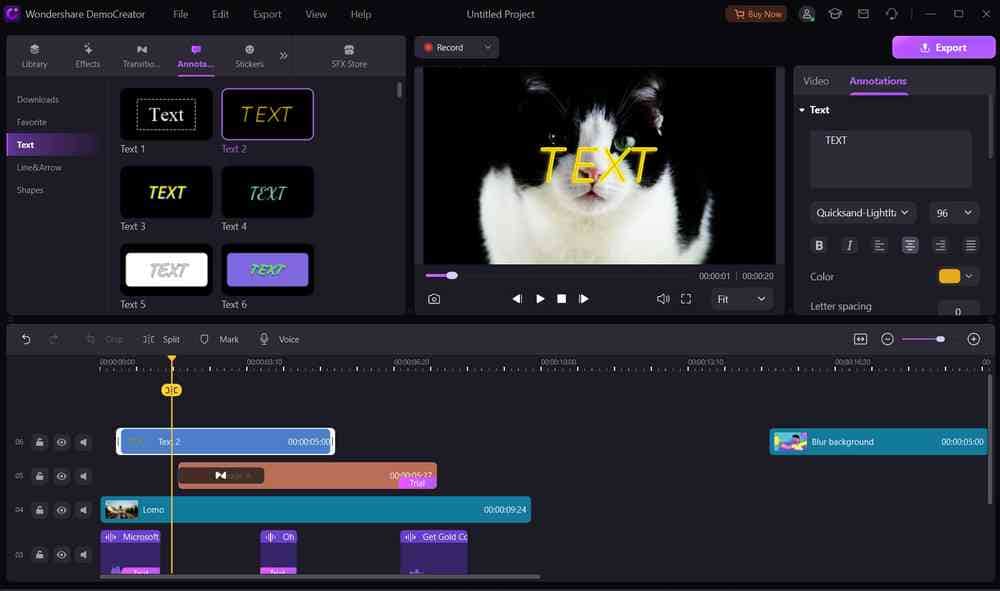
Annotation text boxes can be added to the top of an image or a screen to provide a brief narration, findings, or information about the presentation screen. You can do so by selecting the annotation icon on the left side.
You can enhance the video, make it look convincing and more presentable using Captions. It helps to convey ideas, thoughts, and feelings attractively. You can add a caption with various styles, formats, colors, designs, and other effects.
Conclusion
One of the best ways to make a screen flow video is to start with a PowerPoint presentation and then use a screen recording tool to turn it into a video. The tool you use to create the video will ultimately determine the quality.
QuickTime and Windows' built-in screen recorder are fantastic solutions. Still, suppose you want a professionally created video. In that case, we recommend using a tool like DemoCreator, which gives you various options to create the video exactly how you want it with no limitations.


