

Can You Edit Videos in Lightroom

Apart from Photoshop, Lightroom is one of the most useful image-editing suites in the business, a fact that is not surprising considering that both are made by Adobe. Most professional photographers prefer the features in Lightroom over Photoshop for their image editing purposes. But since it is actually possible to edit videos in Photoshop, it begs the question; can you edit videos in Lightroom as well?
The simple answer to this question is a resounding yes. Lightroom can in fact be very useful when you need to edit videos and, in this article, we are going to show you how to edit videos in Lightroom. But before we share with you the tutorial to edit videos in Lightroom CC, let's take a look at some of Lightroom's most useful features;
Main Functions of Lightroom
One of the main benefits of Lightroom is that it comes with powerful features designed to make photo-editing both professional and easy. These features include the following;
- Presets to Save Time and Develop a Style
Presets in Lightroom are there to make your task easier. This is because they allow you easily save the configurations of your adjustment sliders such that they can easily be applied to other projects. They can also help you develop a uniform style that can give your images and photos a consistent look.
- Quick Develop Panel makes Batch Processing easy
The Quick Develop panel in Lightroom allows you to easily apply presets to multiple images at the same time. For example, you can correct overexposure in more than one image by selecting all the images and then using the Quick Develop panel.
- Easy to Use Interface
The Lightroom interface is also very easy to navigate and highly intuitive. You can easily move from one photo to another in the Develop module or view sheets more easily in the Library grid view.
- Transfer Adjustment Settings from One Image to Another
Adjusting the settings on an image can take a very long time. This why one of the most useful features in Lightroom is the ability to easily transfer the same settings to another image. To do that, just click on the "Previous" button in the Develop module.
- Lightroom Protects your Originals
When you make adjustments to your image or video in Lightroom, the adjustments are stored in a catalog file that will only be embedded into the original image when exporting it. This means that Lightroom protects the original file that you can go back to anytime you need to.
- Edit RAW Files
Lightroom is the most effective RAW file editor, allowing you to very easily edit high-quality RAW images even perform adjustments like converting them to black and white.
- Crop images Easily
Lightroom comes with a great crop tool that is very easy to use and can be used to crop photos to any aspect ratio. The straightening tool is also worth a mention here as it is also quite easy to use and highly effective.
- Great Adjustment Tools
The key to easy and effective image editing is great adjustment tools and Lightroom has some of the most effective adjustment tools. These include a graduated filter, and adjustment brush, and a post-crop vignette.
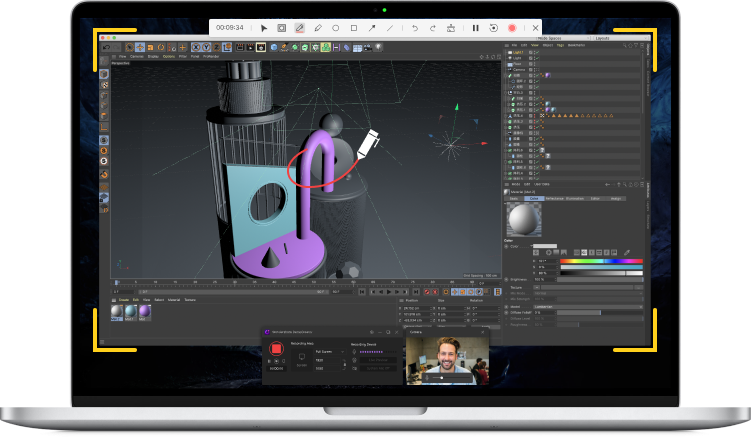
The All-in-One Screen Recorder & Video Editor
- Record desktop screen,audio and webcam simultaneously
- Edit videos quickly with a wide range of professional tools
- Built-in plentiful video effects
- Export to MP4, MOV, MKV, GIF and multiple formats
How to Use a Lightroom to Edit Videos
Please note that Lightroom only allows you to edit all frames as a whole. You will therefore not be able to splice the video clips together and any adjustments you make will be applied to the whole video.
With that said, follow these steps to edit your video in Lightroom;
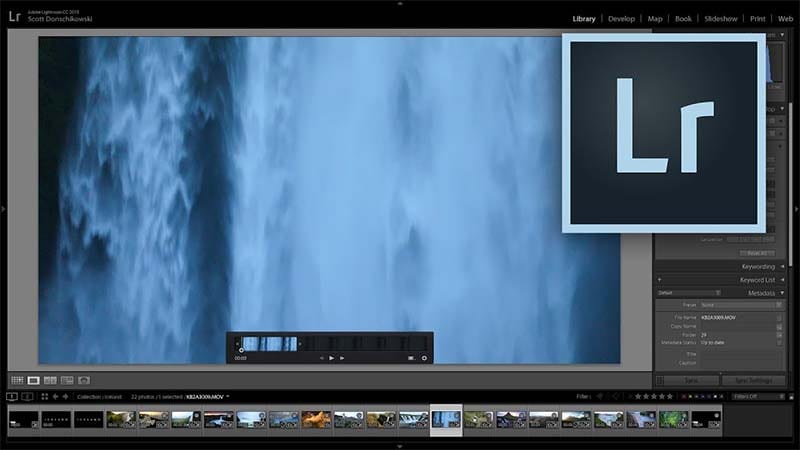
Step 1: Import the Video into Lightroom
You can import a video into Lightroom much the same way as you would an image. Either click "File > Import to browse for the file on your computer or drag and drop the video into the program.
Make sure that you are in "Library Module" as Lightroom will not allow you to edit a video in "Develop mode"
Step 2: Apply Presets to the Video
You can edit the overall exposure and white balance on a video in Library Mode, just as you would with an image. You can also click on the "Preset Tab" to apply presets to the video.
Lightroom comes with several presets that can be applied to videos including auto settings, white balance, tone curve, split toning, process version and calibration.
Step 3: Edit the Video in Lightroom
You may not be able to slice clips together in lightroom, but you can trim the video to adjust the beginning and ending time.
To do that, simply click on the gear icon to open more options and drag the slider to the left to trim the beginning and to the right to trim the end of the video.
Step 4: Export the Video
When you're done editing the video, click "File > Export" to open the "Export" dialogue. Here, it is important to select the highest quality possible for the video for the best results. Click "Export" to complete the process.
Alternative Way to Edit Videos
While Lightroom can allow you to easily edit videos, it is clearly not designed for editing videos and lacks advanced features for a more professional edit. If you would like more options, we suggest using Wondershare DemoCreator. This easy to use video editor is designed to help you capture and edit videos very easily.
Follow these simple steps to use DemoCreator to edit your videos;
Step 1: Open the Video you Want to Edit

- Begin by installing DemoCreator on to your computer. Run the program and in the main window, click on "File > Import Media Files"
- In the Media Library panel, click on "Import" and then select "Import a Media File" to find the video you would like to add to the program.
- Once the video has been added to the program, you need to add it to the timeline to begin editing. To do that, right-click on the video and then select "Add to Timeline at Playhead"
Step 2: Edit the Video in Different Ways
- DemoCreator gives you numerous options when it comes to video editing. The following are some of the most popular ways to edit the video;
- If you would like to trim the video, click on the "Scissors" icon to select it and then move the cursor to the edge of the clip until it disappears. Now, drag the cursor backward or forward to trim the video to the desired length.
- To resize the video, open it in the preview window and then go to "Visual Property" to adjust the percentage value next to "Scale"
- You can also easily rotate the video in the same window by changing the value next to "Rotation".
- To crop the video, click on the "Crop" button and then drag the white handles that appear in the preview window to select the portion you want to crop out.
Step 3: Export the Video
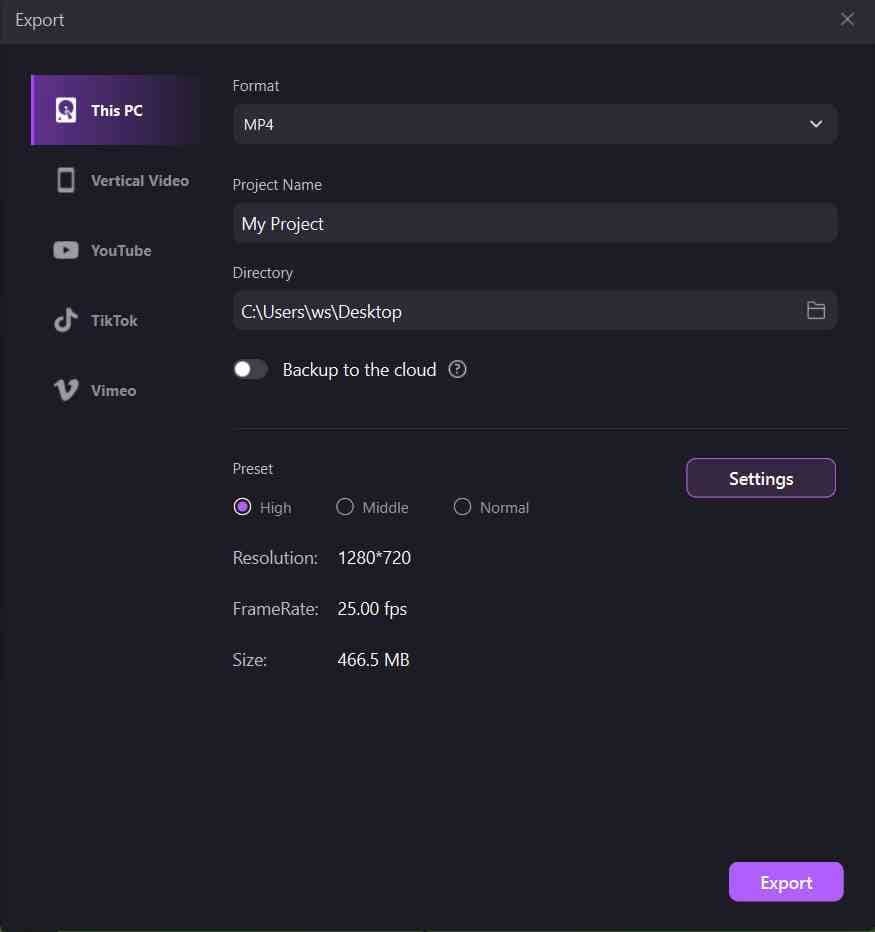
When you're happy with the changes you've made to the video, you can click on the "Export" icon to export the video in various formats including MP4, MP3, or MOV. In the "Export dialogue box that appears, you can also add a filename to the and adjust several other settings including the frame rate, bitrate, and the resolution of the video.
 Secure DownloadSecure Download
Note: Click here to know more How to Choose the Best Free Photo Video Editor for Mac or Windows PC.
If you want to edit a small video clip that doesn't require to much work, then you might be able to get what you need from Lightroom. But Lightroom was built to be an image editor and it, therefore, lacks some of the more advanced editing options you will find with DemoCreator, a program that is specifically designed to help you edit videos quickly and easily.


