How to Create Text Animation in Premiere Pro

“Are there text effects in Premiere Pro?”
“How do you animate text in Premiere Pro?”
If you are still looking for the ways to create text animation in Premiere Pro, then you can find answers in this article. The Essential Graphics has been added to Premiere Pro in 2017, which is a great addition to all the editors. At the same time, it allows users to experience a new animation feature in the Essential Graphics. About how to apply those animate text, read the articles below to get your thoughts. Premiere Pro comes with advanced features to help you animate text for a stunning professional video.
Part 1. Add and Edit Text to Video in Premiere Pro
It’s easy to add a title to your project. Please follow the steps below:
- First, select the “T” tool
- Then create a text box in the viewer. Remember to type your titles at this step.
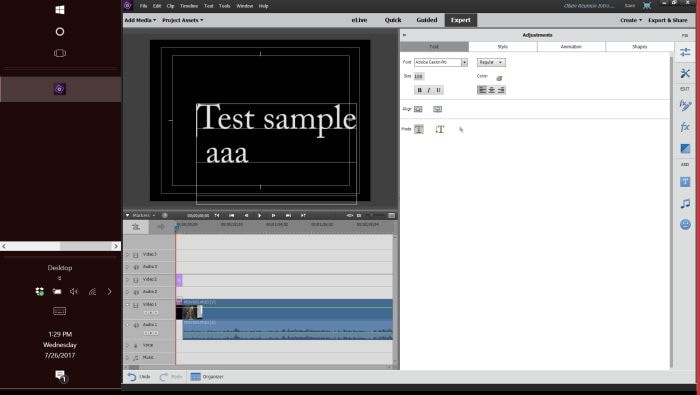
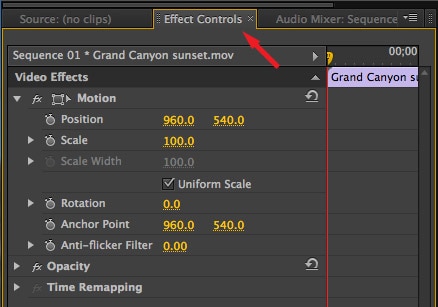
- Go to the “Effects Control” panel and change the size, font, and color of your text to your taste.
Part 2. How to Animate Text in Premiere Pro
Check out how to animate text in Premiere in two ways. These are through the Essential Graphics panel and by using Motion Graphics Templates.
Method one: Through the Essential Graphics panel
This method gives you a variety of pre-animated text templates to use for Premiere text animation.
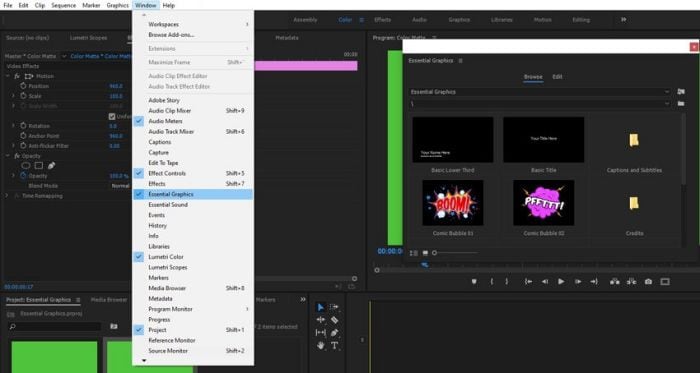
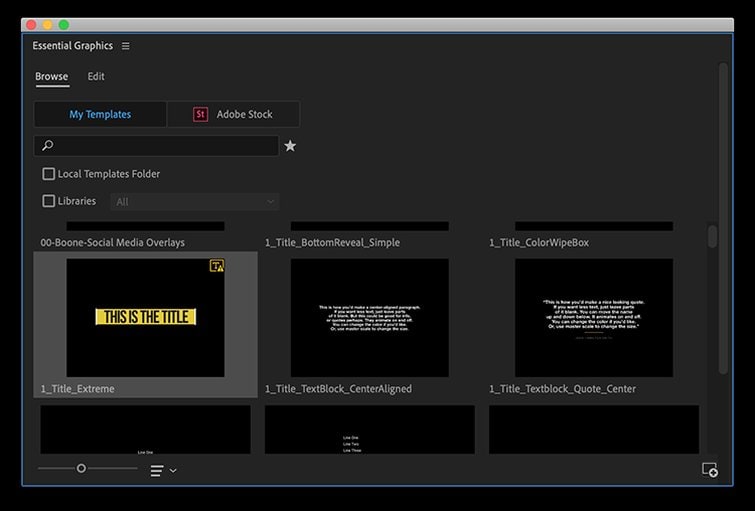
Step 1. Go to the “Graphics” tab and open the “Essential Graphics” Panel.
Step 2. Peruse the templates to find the one that you like.
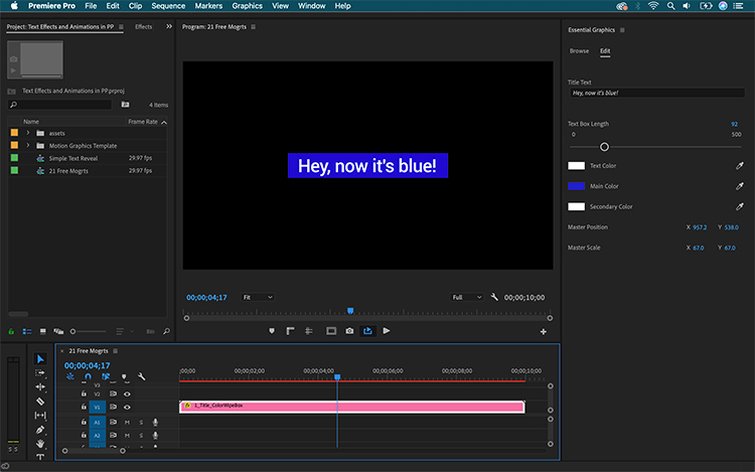
Step 3. Once you find a preferred template, drag and drop it to the Premiere timeline. Ensure you place the template above the clip that you want it to appear on.
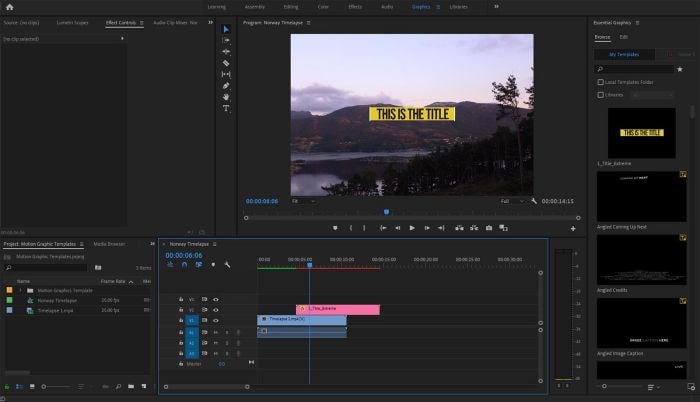
- With your template in the timeline, now is the time to edit it. Start by double-clicking the text on-screen.
- Then select the title from your timeline. You will see numerous customization options appear in the Essential Graphics Panel.
- Finally, edit the font, size, and color of the text. You can also edit other effects for a customizing look such as fade, scale, or a bounce to your text.
Method two: Using Motion Graphics Templates
The other method for Adobe Premiere text animation is to use Motion Graphics Templates (MOGRT) files. Adobe After Effects create these through Premiere Pro. You don’t need to open up After Effects as Premiere Pro works seamlessly with it.
Step 1. Install fonts to use
Get and install fonts from the pack before you use Motion in Graphics.
Step 2. Install MOGRT files
Head to your “Browse” tab of the “Essential Graphics” panel then click on the bottom right-hand corner.
Step 3. Customize
Simply drag and drop your graphics for customization. You can also make use of the pre-built animated titles. Then customize the fonts by adding a background color or tweaking the amount of texture to apply to the text.
Part 3. An Easier Way to Create Text Animation
Premiere pro text animation is a high-tech tool with tons of pros. It gives you high-quality videos and audio and comes with built-in non-linear video editing for advanced options. However, you are bound to come across some shortfalls with Adobe Premiere Pro.
The system will only work for free for 30 days after which you will need to upgrade. The tool is also quite detailed, making it a challenge for beginners to use it. You require vast knowledge of the application to animate your text successfully.
That’s why most new users check out for alternatives to Adobe Premiere Pro. Tools like Wondershare DemoCreator work in simple steps and run at a low cost. Also, it will make great text animation effects in a few clicks. It is a great eye-opener for most new users, enabling you to develop professional animated text. DemoCreator brings you more than 1,000 templates and resources for that rich content creation.
Check out how to animate text with DemoCreator
Step1. Download and install DemoCreator
Click the free download button below, then proceed with the steps for installation. Remember, DemoCreator supports both Windows and Mac OS systems. Hit the correct option, then install the app and launch it on your device.

The Best Text Animation Maker & Video Editor
 Secure DownloadSecure Download
Step2. Choose Video Editor
Once you have launched DemoCreator, you can now choose the “Video Editor” option. Then go to the video editor panel and double-click the left side to start importing your media files.

Step3. Drag text to the timeline
Here, add text to the timeline by dragging and dropping it there. To do so, go to the “Toolbar” and find the “Annotation” icon. Then choose the text to add to the timeline. You can also preview the annotation before adding it to the timeline.
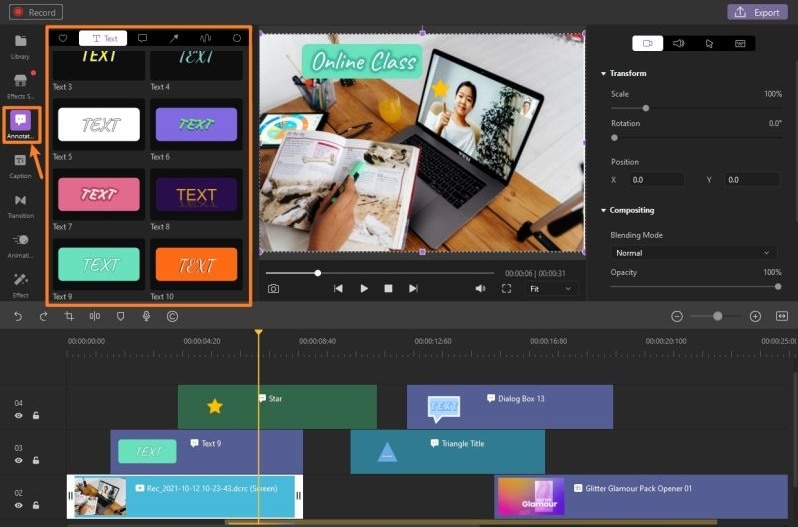
Step4. Add Animation to text
Finally, you can apply animation effects to your text. Once you drag the text to the timeline in the previous step, now go to the “Properties Panel” and click the “Transform” icon. Next, select the option you like and view the effect in the preview window.
Pro-tips: How do I find more text animation templates?
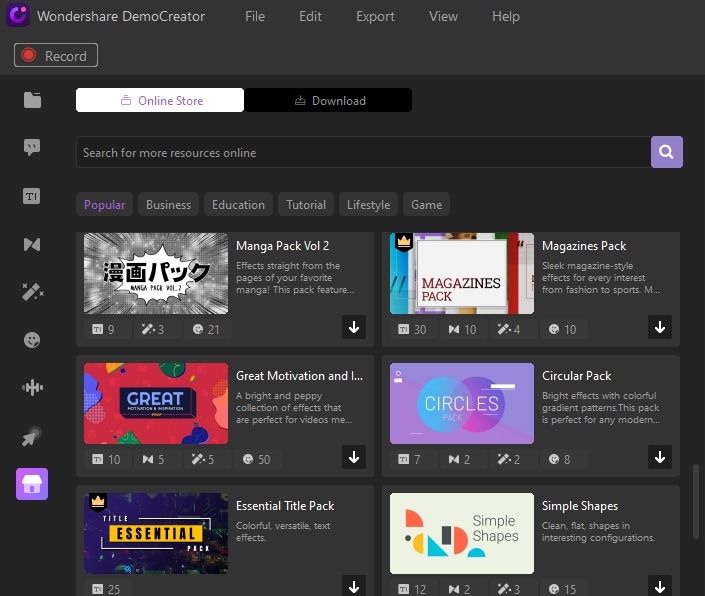
You’ll find more resources in DemoCreator’s library. It contains thousands of templates, business, education, tutorial, etc. Once you browse the “Effects Store”, you can start to overlay text with captions, add sound packs, and use other annotations for animation.
To use more text animation templates, click the “Tools Panel” and choose the “Effects Store” tab. These include Life packs, Education packs, Business packs, and Game Video Effects packs.
To download and apply the effects, first choose a template and click the “Play” button. Then hit the “Download” button to start using the template.
To apply the effects:
- First, choose a template then drag and drop it to the timeline.
- Next, go to the “Annotations” tools to download and apply the effects to your video. Remember that you can change the color, font, and size of the text.
- Confirm that the effects are good for you, and then click the “Export” option to export the animated text.
4. Advanced Text Effects to Level Up your Video
Competition is paramount and every user wants their video to stand out. You’ve got to be smart and the best way is to engage in advanced text effects that will level up your video. You can still escalate your skills with the available modes on how to animate text in Premiere Pro with advanced text effects.
-Animating with scale and shapes
Scaling is useful for call-outs and product videos. This effect will enhance your text, making the message stand out just at a glance. It also helps to draw the reader’s attention to what is being emphasized.
Follow these steps to animate with scale and shape.
- Head to the “Essential Graphics” Panel and create the text you want to use for scaling.
- Next, add an ellipse-shaped layer to appear beneath your text.
- Move both the text and ellipse shapes to the timeline. They’ll now be combined and used as a single entity.
- Then, find the scale parameter for your text in the “Effects Control” Panel.
- Next, create a scale keyframe. Start with “Zero” at the beginning of your clip. Then move to 120 20 frames and lastly, use 100 5 frames. Remember to create the same keyframes for the shape layer for uniformity.
- You should now get the text and shape layers aligned uniformly.
-Revealing text with Linear Wipe
You want a seamless transition but you don’t know how to achieve it? Revealing text with Linear Wipe works best to enable the transition wipe across your screen while uncovering other hidden texts.
- First, create your text and position it to your desired location.
- Then, go to the “Effects” Panel and put the cursor over the “Linear Wipe” effect. Drag and drop it onto your text layer.
- Next, go to the “Effects Control Panel” and change the wipe angle. Either use angle -90 degrees or 270 degrees. These options will make the transition to reveal your text from left to right.
- You can also enable the effect to move the wipe across the screen as it reveals your text. To do this, make a keyframe for 100% transition at the beginning of the clip and an additional one at 0% transition complete for 30 frames.
Conclusion
You have learned the Adobe Premiere Pro effect, including how to animate text in Premiere. The only challenge comes in its ambiguity. If you are a new user, you can employ DemoCreator to animate and customize your text with simple steps. Furthermore, you can enjoy its free version free version with limited features and only upgrade when you need more advanced options.


