How to Record Skype Audio Calls on Mac

A majority of us have shifted to working from home in this pandemic and now as we are witnessing the vaccination process in its first phase, there's a hope that things can get back to normal now. From meetings to classrooms, everything has become virtual. Yes, students are taking their classes from online meeting platforms like Zoom and Meet.
However, a significant amount of professionals are yet taking resort to old-school Skype. There are quite many reasons behind this option. The primary one is the wide range of features that this platform has to offer.
When everything is virtual, the business houses and companies have raised their demand to get some sort of tool that can keep a record of all these meetings, interviews, etc. Skype listened to these demands and has provided relevant updates with an integrated Skype audio recorder for Mac.
Before we move any further, you need to know that there will be no issue regarding the OS. Skype will run smoothly on Windows, as well as macOS. Users will also be able to record and share these sessions directly from Skype.
When you take a look at it on a macro level, there are multiple benefits that you will get in terms of operating a smaller business. There will be a lot of cases when you will find these videos quite helpful, especially in the case of any misunderstanding or dealing with a lawsuit. However, if you are using the integrated recorder, Skype will give a popup to everyone that the call is being recorded. For a lot of people, it's a drawback.
There are some alternative methods that you can go for where the other party will not have any idea of you recording the meeting.
How to Record Skype Audio Calls on Mac?
Once you are all set for the meeting, there are a few things that you need to keep in mind. No matter if you are going to be a host or an attendee, having the meeting recorded will be quite helpful and you can always keep it saved in your archives.
Here, we are going to discuss some methods that you can use to record these virtual sessions. Once you will end the session/meeting, the recorded video will be shared in the chat as media shared by you. The video shot by a native recorder will be saved in the chat for up to 30 days.
Method 1: Use Quicktime to Record Skype Calls
All of us know that Mac is a full package when it comes to necessary tools. If you are a Windows user, there will be a range of applications that you will need to install to make everything work.
On the other hand, when you boot a macOS device the very first time and go through the installation process, all of the tools will be available. As we are yet to go back to our normal lives, we are highly dependent on the virtual meeting platforms. If you are searching for the answer to your question ‘how to record Skype audio on Mac?’, you have landed exactly at the correct spot.
There is a section of people who believe that recording online meetings is a bit creepy but it also becomes necessary for a lot of purposes. We have seen many bad factors present in these meetings who don't miss any opportunity to harass other attendees. Having these meetings recorded will give management solid proof to take necessary action. In this method, we are going to discuss the tool that comes integrated with Mac, QuickTime Player.
Now, it's time that we go through the steps you will need to follow to successfully record the Skype session. This QuickTime method will allow you to record the session without giving any clue to the person on the other side.
- Once the system boots up, launch QuickTime Player from the Application tab.
- From the top menu, click on the File menu and scroll to the New Screen Recording tab.
- On the dashboard, users will get a Reveal button that you will need to click on. This is to get the option to select the input method. Right next to it, you will get the Record button.
- Once the input source is selected, you will need to click the Record button.
- Next up, you will get a dragging icon to select the part of your screen you want to record. QuickTime Player will also allow you to record full screen.
- Before you start your Skype conversation/meeting, you need to make sure that all the parameters are set and ready to record.
- Once done, you will need to click the Stop button. Be aware that the recordings here will be huge in size based on the length of your Skype session.
- Click on the File button and go to the Save As button to save your recorded session where you want.;
Method 2: Use Skype's In-built Recorder
Not only for professional and academic purposes, but the call recorder will also serve many other purposes, as well. For example, you are away from your home and you want to share some big news with your mother.
You have called her on Skype and it will be great if you are able to record her big reaction when you reveal something. Skype's integrated browser is the tool that you will get as a free Skype audio recorder Mac and it's also quite easy to use.
There are a few things that you need to know when it comes to the default Skype recorder, the first is that it's available only for Skype to Skype calls. You will not be able to record the call that is placed from Skype to a phone number.
Once you hit the Record button, all the other members will get alerts about the call being recorded. For those who are also recording the audio along with the video, the application's inbuilt editor will make sure that everyone's video is also recorded in crisp quality. Skype will also record the screen in case someone is sharing their desktop.
Steps to record the call:
- Once the call is established and everyone is connected, you will get to click on the Menu icon. It will be represented by the ellipsis icon.
- Click on it and you will get the option of Start Recording.
- The app interface will show you the banner where it will alert everyone that the call is being recorded.
- Once done, the recorded session will be shared with all the attendees in the chat.
- The recorded session will stay there in the chat for up to 30 days. In the meantime, you can download the recording to save it in your archives.
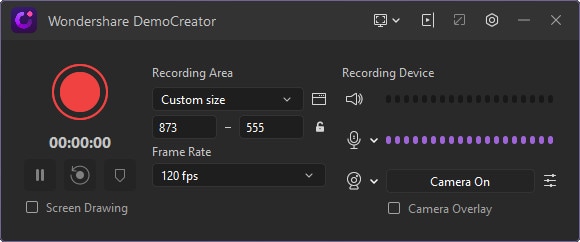
Method 3: Record Skype Calls with DemoCreator
There are a lot of people who need to have a tool that can offer them a wide range of features that can be used to tweak the video as they want. Also, there are quite many tools that are available in the market.
You will find it significantly helpful when it comes to producing a professional video. There are a few factors that you need to consider before settling on one. The very first thing that you need to do is narrow down your search and put your requirements on priority. The screen recording tool will also be helpful to all the students who are attending online lectures.
Students will love to have their lectures saved so they can always get back to them whenever they need any referencing. Wondershare DemoCreator is one of the tools that you will find quite intuitive and all the features and options will be provided under a single dashboard.
It’s the application that will let you record audio from Skype Mac along with a range of other features. One of the primary reasons why this application is loved on such a wide level is the integrated editor that it comes with. The editor will give you a range of options where you will be able to add multiple transition effects.
Wondershare DemoCreator will also provide you with multiple options that are there to help you film the video that you want in all the parameters as you want. Users will also be able to set the frame rate. The two methods that we have discussed above will come as very limited features ones and opting for this 3rd party app will give you the option to customize and edit the video in the way you want it to.
Steps to record using DemoCreator
Launch the app, and based on the system specs that you have, DemoCreator will take a few moments to load.
You will be greeted by a compact dashboard with two options, New Recording, and Editor.
Click on New Recording to get to a new dialog box where the application will prompt you to set all the parameters.
Now, when all the parameters are set, it's time to hit the Record button.
As you are going to record a Skype session, there will be no need to turn on the webcam recording.
Once the recording is stopped, the interface will take you automatically to the editor. The interface that you will get on DemoCreator editor is highly user-friendly and kind of self-explanatory.
More Info about Skype Call Recording
Is recording a Skype call legal?
The simple answer is no. When you are in a meeting or a conference, there will be a lot of discussions and you will not be able to note everything down in such a short span. Among a very limited list of solutions, the best one is to record the screen. Earlier, people had to use some third-party applications or QuickTime Player to record the screen activity. Well, Skype has understood the demand. It has now included a native recording tool that you can use to keep all the sessions saved. To get the answer to your question ‘how to record audio from Skype on mac?’, you can go through the aforementioned methods.
There are many situations when you will need to record these sessions and there is no wrong with that. All you need to do is never record any meeting without the prior knowledge of all the attendees. Skype has considered it in its native tool and as soon as you will hit the Record button or anyone does the same, everyone in that meeting will get a prompt alerting that the session is being recorded. For those people who are using a 3rd party app, it’s important that you alert everyone, otherwise, it will be deemed illegal.
How to save the recording that is captured by Skype's native recorder?
For the minimalists out there who don't want to overload their computers with a lot of applications, Skype has made things quite easier. There is one thing that you need to keep in mind is that this integrated recorder will let you record only Skype-to-Skype calls. If you want to secretly record the conversation, you will not be able to do it. It's also one of the best ways to put a check on illegal recording. For the people who are trying to record the video, as well as audio, the Skype recording feature will make sure that you get everyone's video.
If you are not sure about saving the recorded footage, there is nothing to worry about as we are here to discuss. The confusion around the question ‘how to record audio on Skype Mac?’ must have been answered by now. Though we have tried to cover all the points, it's time to also share the steps you need to follow. This is needed to save the footage. Once the recording is done and it’s in the chat, you might need to share it with someone. Also, it could be outside of that group chat. It's quite simple and straightforward, let's go through the steps.
- Open the chat in which the recording is saved. Find the ellipsis icon to get to More Options.
- From the options, you will need to click on Forward.
- It will give you the list of all the Skype contacts; you can select the one with whom you want to share.
Conclusion
When you are searching for the right tool to record Skype calls, there is not a lot to research. The applications that you need to get the basics done will come included in Skype and also a separate tool will be provided from Apple to all its Mac users.
However, things aren't just limited to recording the conversation, but you will also need to record Skype audio calls Mac. To get it right, users will need to install a more advanced tool, e.g., Wondershare DemoCreator. Here, you will get a range of tools that are aimed to provide an easy interface. Moreover, you will also not seek any professional help.