How to Fix "OBS Camera Not Working" Problem [2025 Guide]

If you are a professional who is into content creation, there are high chances that you are already familiar with the Open Broadcaster Software. The settings and features that are available on this software application are quite advanced for a free open-source platform. Though the tool is highly feature-rich, there are still various issues that keep popping up. Among these issues, one that's quite common is the OBS Camera not working and if you are facing it; there is no need to panic. There is nothing wrong with your hardware and all you need to do is tweak a few settings and it will start working again.
In this guide, we are going to discuss a number of methods that will help you resolve the issue in no time. OBS Studio is basically a screen recording and streaming tool that is available to download across all the major operating systems. The setup process is also quite simple and all you need to do is follow the onscreen instructions to complete the installation. The tool will allow users to configure the settings based on their requirements and there will be no restriction for the recording length and resolution, as well.
Method 1. Restart OBS
As a first go-to method, users should try restarting the OBS Studio; there are high chances that it will fix the issue without any extra tweaks. If you have encountered the issue while setting up the Studio, it is quite rare that it will fix things on its own. What you should do as the first solution is close the app completely and launch it again. Try to follow the same configuration and it might end up fixing the issue without any other configuration tweak. If the camera is still not showing up and you are getting an error loading the feed, we would recommend restarting the computer.
Another reason the OBS Studio is unable to load the feed is due to your installed antivirus or the firewall system. These software applications might be the primary reason behind the OBS camera not showing up. Disable these tools for the time being and launch the OBS Studio again to check whether the issue is resolved.
Apart from these attempts to resolve the issue, you can also try completely removing all the installed packages of this tool and install it again. If the problem remains, we would recommend going through this whole guide as we are going to discuss a few advanced methods, as well.
Method 2. Change the resolution, FPS, video format
Moving to another method that you can settle for, we are going to recommend users tweak the output settings on their OBS application. There are times when these factors are the primary reason behind any camera-related issue on the OBS Studio. The resolution that you might have configured isn't supported by the webcam that you are using. In this section, we are going to discuss the steps that you will need to follow to tweak these settings in the app.
Launch the OBS Studio, and once it's fully booted up, you will need to click on File.
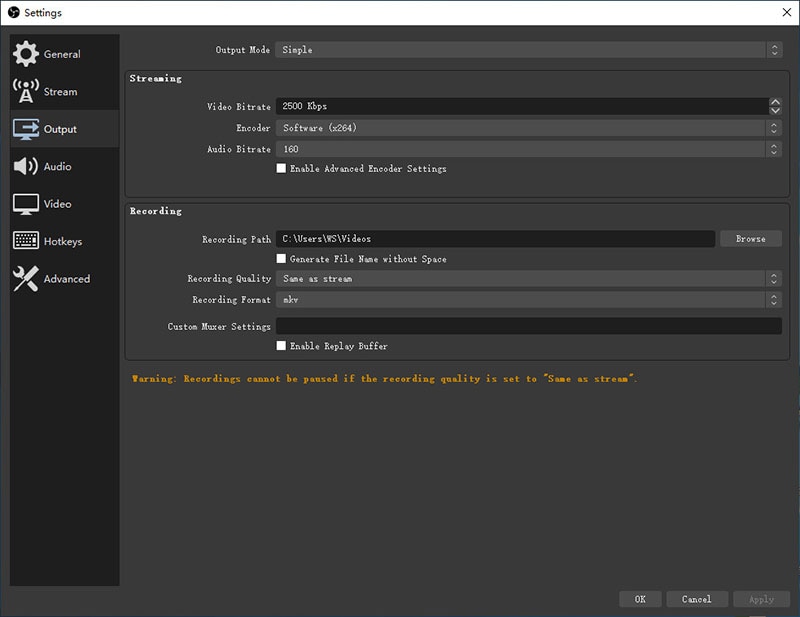
It will open up a new dialog box with a range of settings options. Here, you will need to navigate to the Output section. You will find it on the left pane.
Under these settings, you will need to click on the drop-down menu for the Recording Format. Change it to any other option and check whether the issue is resolved.
Though you will get the option to configure these settings post-installation, it's always better to get them set up while you are installing. The auto-config wizard will ask you to set the preferred resolution and FPS.
Also, keep the FPS to a fixed number. If you are leaving to switch between a range, it might cause some error, and you might still face the issue of the webcam not detected OBS.
Method 3. Reinstall Webcam
OBS Studio has certain bugs, but the issue that you are facing related to the camera might be something else completely. There are certain issues that keep occurring upon the Windows machines that are related to the drivers.
In this method, we are going to discuss a detailed guide where we will guide you on how the webcam on your computer can be easily reinstalled without any sort of hassle. The steps are quite simple and straightforward and can easily be completed in a couple of minutes. If you are an advanced user, you must have faced driver-centric issues more often. Let's dive into the steps.
Before diving into the driver settings, you should make sure that the privacy settings are turned on. Go to the Settings app and type Privacy in the search box. Here, you will get the option of enabling/disabling the "Allow apps to access your camera" button. Click on the Change button and turn on the toggle if it's disabled. Check whether the camera issue is resolved.

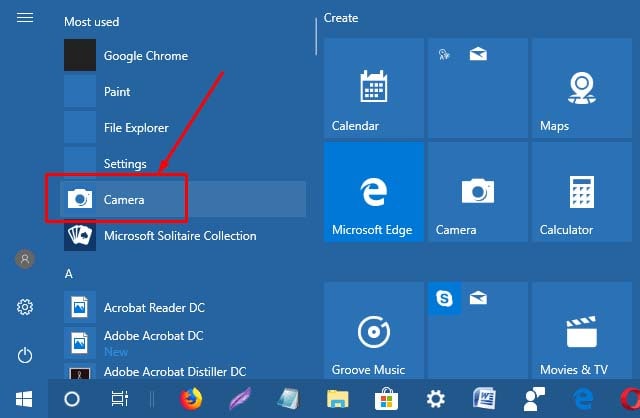
If the camera issue still remains to be present, you will need to go through the uninstallation process. Click on the Start button and search for Device Manager. Once opened, navigate to the Camera button and click on it to expand. Right-click on the Integrated Camera option and hit the Uninstall Device button. It will ask you for a few confirmations, and you will be able to successfully uninstall the camera drivers from your device.
Now, to get it back, you will need to get to the top section of the Device Manager window and click on the Action button. You will need to click on Scan For Hardware Changes. Once it scans the system, the camera drivers should be installed, and you will get the Camera option again in the list. However, it might require you to restart the computer.
There is also a chance that you will need to update the driver for the camera. Right-click on the Integrated Camera option and click on Update Driver. Click on the Search Automatically button, and it will find any available updates for your camera drivers.
Method 4. Check OBS Updates
When you are using any software application, there is a high chance that the developers will keep offering you updates. These updates are highly crucial for the proper functioning of all the features. When it comes to facing certain issues with OBS, it might be due to some updates that you might have missed. Also, a majority of times, the developers keep offering key features through these updates. If you want to check for any available updates, we are going to jot down a guide here.

Launch the OBS Studio app, and once it's booted up, you will need to click on the Help button present at the top. Go to the Check for Updates button.
It will take a few moments, and if there is any update available, a fresh dialog box will appear. Here, you will need to click on the Update Now button, and it will ask you for the necessary permissions to make changes on your computer. Based on your internet connection, it will take a few couples of minutes to download and update the Studio. Once the update is installed, the app will boot itself. You must check whether the installed updates have been able to fix the problem.
Method 5. Run OBS as an administrator
If you're encountering the problem of the OBS camera not working, consider another solution: running the application with administrator privileges. Right-click on the OBS Studio shortcut located on your desktop. Then, navigate to Properties, access the Compatibility tab, mark the "Run this program as an administrator" checkbox, and conclude by selecting Apply > OK to confirm and store the modifications.

Method 6. Start Virtual Camera in OBS
Look to the bottom right corner of OBS for the "Start Virtual Camera" option. If it's not visible, it indicates you're working with an outdated version of OBS Studio. If you want to address this issue, you can refer to Method 4 and update your OBS to the latest version.

Method 7. Use the best OBS Alternative
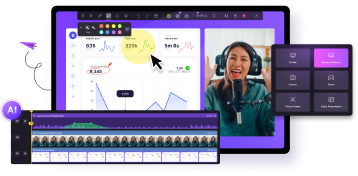
If the camera is running properly in its native app but the webcam not showing in OBS, there might be some bug that is behind it. You should report it to the OBS, and meanwhile, you can go for a third-party application that has the potential of offering highly advanced features. Wondershare DemoCreator is a paid tool that is packed with top-notch features. Users will also get an integrated editor that will let them tweak the recorded footage with precise details. Here's how to use it.

 Secure DownloadSecure Download
How to record the screen using DemoCreator?
Step 1. Launch the app, and it will greet you with a compact dashboard. It will give you two options; Capture and Video Editor.
Step 2. As you are going to record a new project, click on Capture. It will open up a new dialog box with a range of features and tweaks that you can make. Right next to the Record button, DemoCreator will let you choose the resolution, and you can use the drag & drop tool to select the recording area.
Step 3. Users will also get to enable the mic, webcam, and system sounds right from this dashboard. Once every setting is configured, it's time to hit the Record button. The video will start to record after giving you a buffer time of 3 seconds.
No matter which device you are using, there are certain bugs that will keep popping up, and you will have to keep finding ways to fix them. However, before you start blaming the developers, it's always recommended that you go through the app settings and make sure you haven't ended up disabling any particular toggle.
The webcam issue with OBS is a common one, and we hope that this guide must have helped you to fix it. For users who are looking for a more advanced tool, we would recommend going for Wondershare DemoCreator. This tool has a wide range of features, along with an integrated editor to give your recorded footage a professional look.
Secure DownloadSecure Download


