Detailed Steps about FFmpeg Trim/Cut Video

“I recently recorded a show on Television, but I just realized that it’s bombarded with tons of commercials. How can I do a quick FFmpeg trim video."
It is a common phenomenon to do away with some parts of a video for obvious reasons. Perhaps you want to scale it down to only the important parts, or you want to make it shorter. The notable point is that you need to accurately cut your video without losing its quality content. You can achieve this via various video compression modes. This article walks you through how to cut videos with FFmpeg.
Part 1. What is FFmpeg?

FFmpeg is an open-source video and audio converter that works at high speed. Use it to accomplish numerous tasks of decoding, encoding, transcoding, multiplexing, streaming, among others. Nonetheless, it is command based hence you have to correctly work out the command line arguments.
FFmpeg can also be a thorn in the flesh! It doesn’t support testing hls and it does not contain any second layer of commands over its commands. This makes it hard for non-professionals to work through it. It works by reading from an arbitrary number of inputs notified by the “-i” option. It then writes this on an arbitrary number of outputs as well. You get your results only after you refer to input files in options. In this case, you must use the files’ – 0 based – indices with the first input file as “0” while the second as “1”. Let’s now shift our focus to things to know in FFmpeg trim video.
Part 2. 5 Things You Should Know in FFmpeg Trim Video
1. FFmpeg cut video by time
You should correctly specify the “Start time” and end time. Identify when you want to start the video extraction process. Then tell FFmpeg to seek that exact time. Use the “-ss” parameter in the FFmpeg command line. The time is specified as “HH.MM.SS.MILLISECONDS” Below is the syntax:
. / FFmpeg –ss <time> -i <inputvideo>
Likewise, you have to specify the “End time” using the “-to” parameter. That’s the time your video cut will end. However, you must also specify the duration of your video clip. Use the “-t” parameter to instruct FFmpeg on what duration of the video is to be cut between the start and finish.
Use the instructions below to specify a fixed duration to cut your video from start to finish.
FFmpeg -i input . mp4 -ss 00:01:100 -t 00:01:05 -c:v copy -c:a copy output.mp4
This will cut a one-minute and 5-seconds indicated at the “-t” flag, which is the duration. The process begins at 1 minute, 10 seconds as indicated by the “-ss” flag.
2. FFmpeg cut video without re-encoding
You can use the “Copy and Input seeking” to FFmpeg trim video without re-encoding. Note that using the seeking operation, you’ll experience a jump of the frames. Hence, it may not accurately stop on the specified time frame that you earlier requested. It will find the nearest “ i-frame” to commence the copy operation at. Use the below command line.
FFmpeg -ss 00:00:02 - i inputVideo.mp4 -to 00:00:05 -c : v copy -c : a copy trim_ipseek_copy.mp4
Here, you just instructed FFmpeg to cut 3 seconds from the 2nd second and end the session at the 5th second on the video named “inputVideo.mp4
3. How to deal with the black screen
The black screen at the beginning of your video is bound to spoil this lovely story. Here’s how to avoid a black screen
Use the “-avoid_negative_ts make_zero” parameter
What you do here is to pass that part that reads “zero” to avoid any negative section. i.e “make_zero” to “avoid_negative_ts”
Hence, the video timestamp will be shifted to “0”. So, if the time you specified didn’t fall into the rightful place, it will automatically be corrected to begin at the “start” point.
4. Remove multiple segments from a video
You can also cut several segments from the same video. If you want to use FFmpeg cut video twice from your file, trim the first and second segments and then combine your videos. The below example shows how to cut segment 15 – 25 seconds, which is 10 seconds: and 30 to 40 seconds, which is 10 seconds. Finally, merge them into the “out1” stream, with the “concat” filter.
The “setpts” is also needed as trim doesn’t modify the picture display time. The decoder counter won’t see any frames for the cut “10 seconds”.
FFmpeg - i in.ts -filter_complex \
“[0:v]trim=duration=15[a]; \
[0:v]trim=start=25:end=30, setup=PTS-STARTPTS[b]; \
[a] [b] concat [c]; \
[0:v]trim=start=40, setup=PTS-STARTPTS[d]; \
[c] [d] concat [out1]” -map [out1] out.ts
5. FFmpeg cut video by frame
You can also FFmpeg trim video by frame. But you first need to convert some frames to the “ss.ms” syntax to facilitate the start at a specific frame. Calculate the timestamp first and then determine at which frame to start. So, for a video that is at 30 fps, and you wish to start at 138 frames, divide the frames with the fps to get the timestamp.
That would be 138/30 = 4.6
Next, encode a specific number of frames, using the “-frames: v”. Then run it as follows;
FFmpeg -ss 4.6 - i input.mp4 c : v libx264 -c : a aac -frames : v 60 out.mp4.
Part 3. Cut Video without Losing Quality with FFmpeg
It is possible to achieve lossless quality with FFmpeg. The secret is to evade any re-encoding as this automatically produces quality loss. This is where FFmpeg comes in. This command-line program processes your video losslessly. Use the below command.
FFmpeg -ss 0:10 - i “not _cut.mp4” -codec copy - t 0:05 “cut.mp4”
“-ss” is the processing starting time, –i is the input file, “-codec copy” instructs it to just copy and not compress the fragment. And “-t” here specifies how long the end product should last.
Part 4. An Easier Way - Cut Video with Wondershare DemoCreator
FFmpeg is a command-based tool that may appear complex to most users. The easiest way to cut your videos lands us at the Wondershare DemoCreator app. It has an intuitive user interface, enabling both novices and professionals alike to scale through in simple steps. Check out how to cut videos using Wondershare DemoCreator.
Step 1: Download and install the program
The first step is to dive into the “Wondershare DemoCreator” website and install the program on your computer. This app supports Windows and macOS devices. Choose the suitable operating system option for your device, then hit the “Free Download” button.

The All-in-One Screen Recorder & Video Editor
 Secure DownloadSecure Download
Step 2: Import video files
You have the option to import videos or record a new file. To record a file, hit the “New recording” button and kick-off. Otherwise, if you opt to use a pre-recorded video, click the “Open File” option and choose the video.

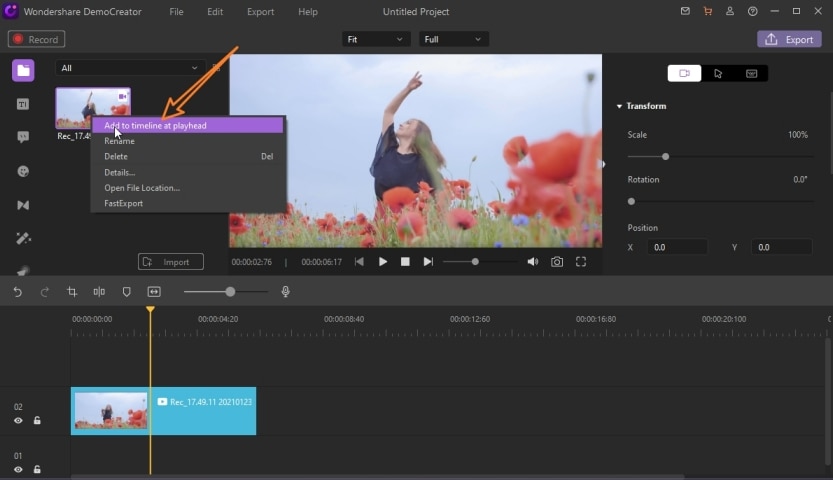
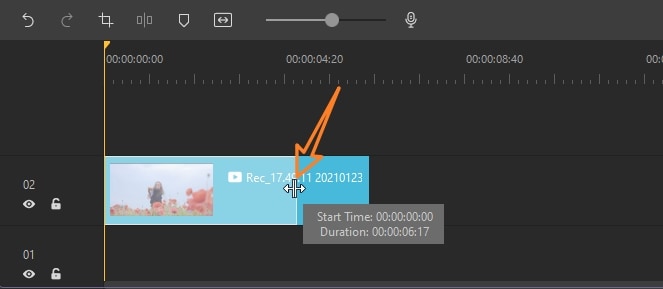
Step 3: Drag and drop your video into the timeline
Once you settle on which media files to import from your computer, it’s time to add them to the DemoCreator timeline. You can perform the editing from this point on.
Step 4: Select the audio track and cut it as desired
Right-click on the video file that you want to cut and select the “Cut” option. You can also press the “Ctrl+X” option as a quick shortcut.
Determine which section you want to be the start cutting point, and then place your playhead before it. Then click on the “Scissors” icon. This should split your video into two. Likewise, place your playhead at the cut endpoint section and click the “Scissor” tool. The middle section is the portion to retain. So, select “Cut” and you would have cut your video to the desired portion.
Conclusion
You have to trim your video to the perfect end product. We have tackled two ways - how to cut video with FFmpeg and how to use Wondershare DemoCreator. Despite FFmpeg showcasing some drawbacks, you can still pull this through if you are a pro and keen to detail. But being that most users can’t stick to command lines without typos, Wondershare DemoCreator has become a simpler option. It has an intuitive interface and as simple as 1-2-3 steps for a quality cut video.


