Cutting Video with After Effects in Three Easy Steps

“My graduation ceremony video is quite bulky and encompasses repetitive sections. I want to trim it and retain only the important parts. Is it possible to cut video clip in after effects?”
After Effect is quite a flexible tool even though some people are hesitant to perceive it as a video editing tool. That’s the turning point for me wanting to know how to cut videos in After Effects. This tool is multipurpose, primarily focuses on motion graphics, effects, and video production as a whole. But it also fits well as professional video editing software. Beginners may crack their heads here! But worry less. This Do It Yourself article offers help at bay.
Part1. How to Cut/Trim Video in After Effects [cc2020/2019/2018 Supported]
You can’t control much, especially during a video shootout. You may later realize that you just captured unnecessary clips that add no value to your video. This is where video trimming comes in. Yes! Trim it for quality viewing. Let’s first focus on how to cut video in After Effects. Follow these steps.
Step 1. Load your video
Once you download and install After Effect to your computer, launch it and open a new project. Here, you can choose a new composition. This will open up the “Composition” menu.
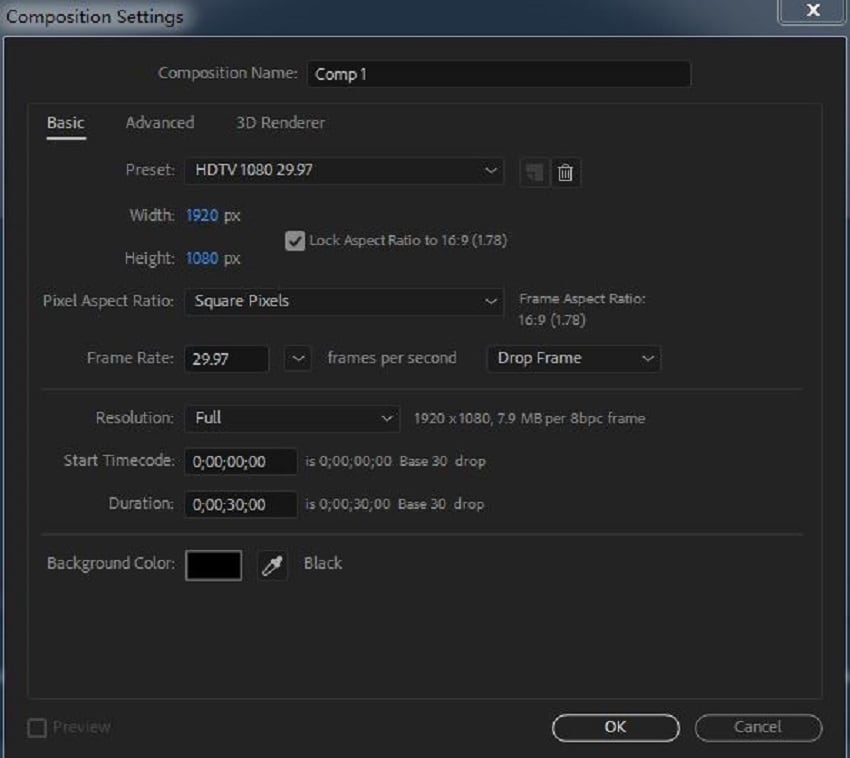
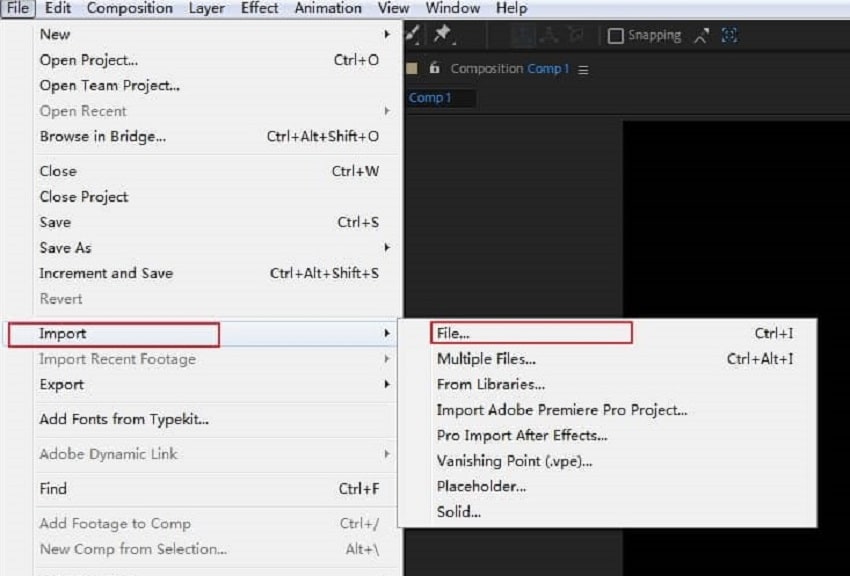
Choose your desired resolution, time code, background color, among others. Then add your video. Use the “File/Import” menu then select a video from your collection.
Step 2. Add video to Timeline
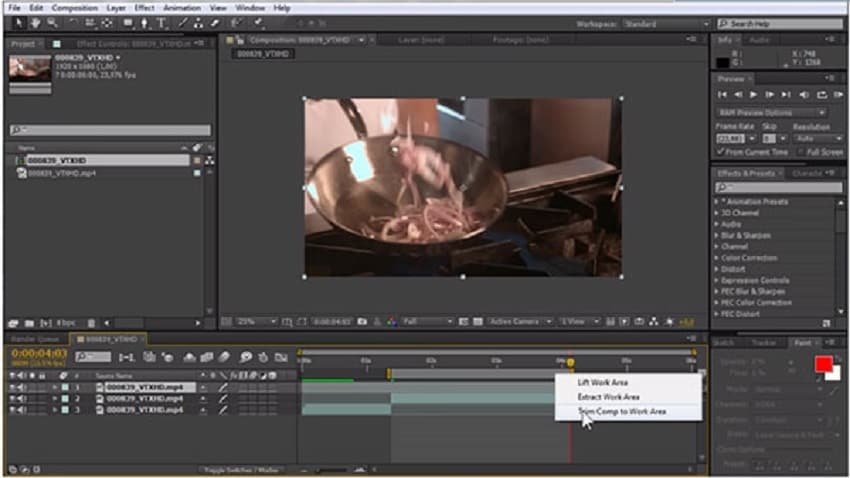
Next, drag your video to the timeline, ready for trimming. Make use of the “Zoom” feature if you feel the video is pretty small.
Step 3. Trim video
With the help of the “Zoom” feature, check well the start and end of your video. Then select your video track and move the guide to the positions of the track that you wish to cut. You can either use the “Edit” menu > “Split” layer or use the shortcut option “Control+Shift+D” to trim your video. Finally, add in any transition effects you so wish, to the video for added value.
Pros
- It facilitates easy reordering of files.
- You can add transition effects.
- This tool is highly rich in features like 3D and motion graphics.
- Easily use existing assets like Adobe Stock, InDesign, etc. Just bring them from other portfolios and projects.
Cons
- It’s heavyweight.
- It is rather complex for beginners.
Part2. Cutting Video with DemoCreator in 3 Easy Steps
The complexity of the After Effect drives users to peruse other possible options. The Wondershare DemoCreator fits that space. It is a one-stop-editing platform, with over 100 built-in editing resources. Among them is the ease at which you trim your videos to accommodate only essential content. Follow these steps to easily trim your videos.
Step 1. Download and install Wondershare DemoCreator
Visit the Wondershare DemoCreator site to download and install the app on your computer. It supports both Windows and macOS versions. So, hit on the downloadt icon and install the “.exe” file on your computer.

The All-in-One Screen Recorder & Video Editor
 Secure DownloadSecure Download
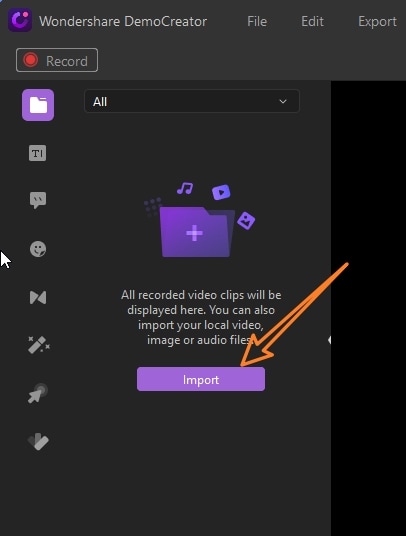
Step 2. Import your video
In this step, you can create a new project or import an old project from your computer. To create one, hit the “Record” button on the screen. While using a pre-recorded file, click the “Import Media Files” option. You’ll be re-directed to your saved files. Choose the video you wish to trim/cut and add it to the timeline. Just click the “Add Files” option or just drag and drop your video to the timeline.
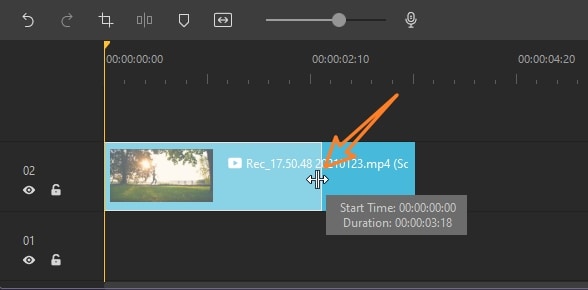
Step 3. Trim your video
You first need to select the clip to be trimmed. Then set your cursor to the clip you have selected and drag the clip in any direction to cut off the unwanted part. Use a marker to guide you where the clip starts and ends.
Step 4. Save and export
Save your trimmed video and export it in any format. You can also set the frame rate, bitrate, resolution, etc before exporting it to other platforms.
Part3. Tips: Another 5 Skills to ImproveYour Editing Skills in After Effects
Easy Motion Tracking
With After Effect, you can track the movement of an object in your video. This feature helps you to come up with dynamic graphics such that you follow the motion of environmental effects, cars, people, and many others. You can add text that moves, turn clip art into visual effects, and just take full control of every detail with 3D motion tracking. Check the steps on how to add motion tracking elements.
![]()
- First, import the file or type the text that you wish to add to your footage.
- Place the text or graphic within your video.
- Specify where you want to begin tracking. Go to “Windows” > “Tracker” then move the playhead to your preferred starting point.
- Click the “Track” motion, select track points on the graphic or text, and begin tracking.
- Lastly, go to the “Tracker” menu and click “Edit Target”. Then select which layer to be tracked by the text or graphic you earlier chose. Click “OK”
Export Transparent Background Videos
Use this feature to add complex effects to your video. Besides, you don’t need too much time to make a perfect video when you encompass the “Export Transparent Background”. One advantage is that you can save it for other projects. Don’t mask objects now and then.

- To create an Export Transparent Background, add a layer or multiple layers to your project.
- Then add various elements like text and images, so that you have a background layer. This is the layer that you want to make transparent. You can also modify the background layer opacity at this point.
Learn how to Float Yourself
If you are thrilled by Superman’s actions, you probably would love the effects of this feature. “Float Yourself” keeps you on air, showcasing that magic like a real magician.

- Arrange your layers in 3D and then move your camera.
- Then add some upward and downward movements to every layer in the Y-axis. Make different movements for each layer. This will enable the layers to float in relation to the ground, X Z plane. So as you move the AE camera, it will be like you are moving a real camera and the layers are your actors.
- Next, move the camera, and let the actors stand still. So, you can easily direct attention to where you want it to be – by camera movement.
- Finally, move the actors and move the camera.
The “Glitch” Effect
The glitch effect makes your image appear distorted or broken into various pieces. This happens for a short while before it returns to its original position.

- To make this flickering movement, you require two images or footage of different pixels.Next, launch “After Effect” and import your images.
- Then create a composition using the two different pixel values. Drag and drop two images to your Timeline.
- Next, create a rectangular layer. Click on the arrow allocated next to the “Add” option and then select the “Zig Zag” option.
- Go to “Size” and create the first and last keyframes. The last one should be at 0.0 while the first keyframe can take any digit.
- Then on “Ridges Per Segment” create a keyframe at a lower rate than the earlier one. The last frame should, however, be at 0.0.
- Then on “Scale” put the first keyframe at 0 and the last one at 100%
- Next, select the second image and add “Alpha Track Matte” The shape layer should be hidden at this point.
- Finally, press the “Play” button. You’ll see a glitch transition animation from your first image to the second image.
Text bounce effect
This is another cool effect that you should try your hand at. Follow these steps to make wonderful bouncing letters.

- Once you launch After Effect, go to the “Text Tool” and type the text that you want to bounce.
- Then toggle the animate button.
- Next, select the “Position Parameter”.
- Check for the “Animation Controls” for the “Add” option. Click it to avail the “Property and Selector”.
- Scroll down and click “Selector” then choose the “Wiggly” option. You should now see the “X and Y” coordinates. It’s on the “Y” axis that the bouncing should occur. So, increase its number to a low figure of about 20.
- Hit the spacebar and preview your text. You’ll find it already bouncing. You may also opt to customize it further. You can change the speed, decrease or increase the Wiggles or Seconds or even change the correlation among other options.
Part 4. How to Choose between DemoCreator and After Effects?
We have tackled the two editing tools at length. DemoCreator lets you have full control of your videos from start to finish. It comes with rich annotations to facilitate the editing process of your video. If you want to trim in simple steps, DemoCreator got you covered. You’ll do fewer and simpler clicks for a perfect video trim. It is perfect for personal use and simpler projects.
On the other hand, After Effects comes with tons of special effects for advanced video editing. So, if you are in the 3D animation arena or want to compose motion pictures, After Effect is good for you. Use its hundreds of effects for imagery manipulation in film production, web video creation, and other complex projects.
Conclusion
Video trimming is vital for a perfect output. Many are times when you do video coverage but realize it’s bombarded with noise and other distorting effects. Trimming it to a specific fit gives you a quality match. You, therefore, need a reliable tool to help you in this process. We have deeply covered the two tools and are at your disposal. You now know how to cut videos in After Effects and in Wondershare DemoCreator alike.
Again, it all goes back to your mission. If you want to keep it simple, then go for DemoCreator. But if you want it complex, After Effect puts all the features at your disposal and its only the professionals who pull it off with AE.


