How to Split Video in Adobe Premiere Pro and Useful Tips

How do I split clips in Premiere Pro CC 2018? This is a common concern for many Premiere Pro users. You may want to learn how to split video in Premiere Pro for several reasons. Too long or too large videos are not conducive to transmission. They drag along or are just too cumbersome to edit. They use the splitting function and have different ‘In’ and ‘Out’ points. When you split your clips, you shorten them into smaller and easily manageable portions. Likewise, you may wish to apply different effects or titles to separate portions of your clip. Learn better ways to split your videos into these simple steps and gain better control of your media.
Part 1. How to Split a Video Into Clips in Adobe Premiere Pro
Adobe Premiere Pro comes with the creative tools necessary to craft any footage into wanting videos and films. Also, you can apply various effects and transitions for a polished finish. Nonetheless, splitting your video cannot be overlooked whenever you set foot to edit it. Follow these steps to quickly split your video into Premiere Pro.
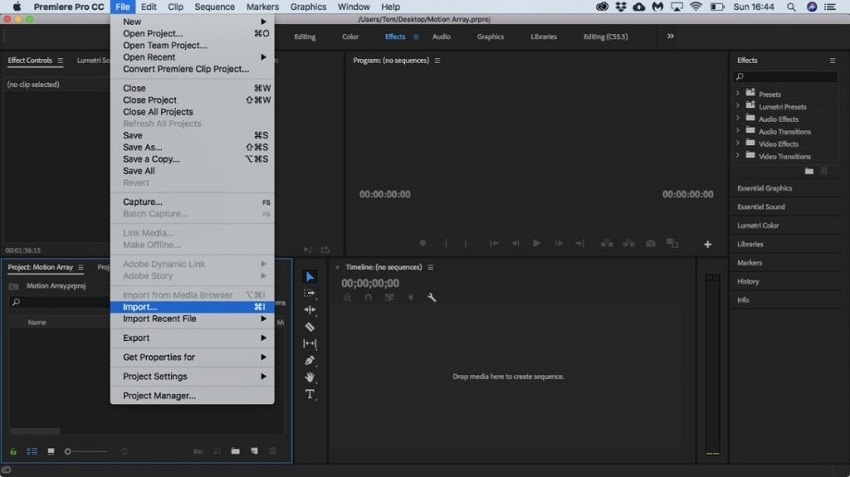
Step 1. Import your video into Premiere Pro
Get your video from your computer to the app. Go to the ‘File’ > ‘Import’ options. You can also drag and drop your video into the timeline in case you already have an existing sequence.
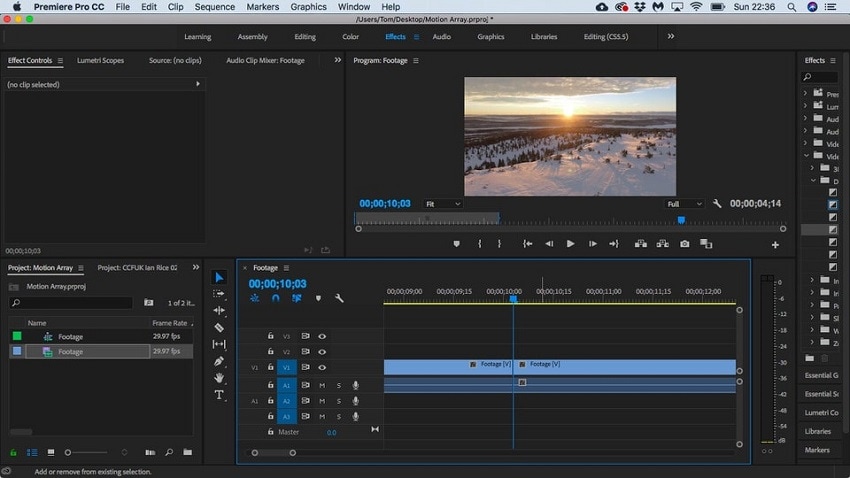
Step 2. Move the indicator
Next, move the Timeline’s current-time indicator to the position where you wish to split your clip. Then click the ‘Sequence’ > ‘Razor’ at the Current –Time Indicator.
Step 3. Highlight the video channel
Highlight the video that you wish to split. Just go to the ‘Toolbox’ and select the ‘Razor’ tool. Mouse over the point to where you want to split your video clip and then left-click it.
Step 4. Split your video
Split your video into separate sections. Hold the ‘Shift’ key and click the set portion with the ‘Razor’ tool. You can also lock any clip that you don’t intend to split. To do so, click the square to the right of the ‘eyeball’ in your video.
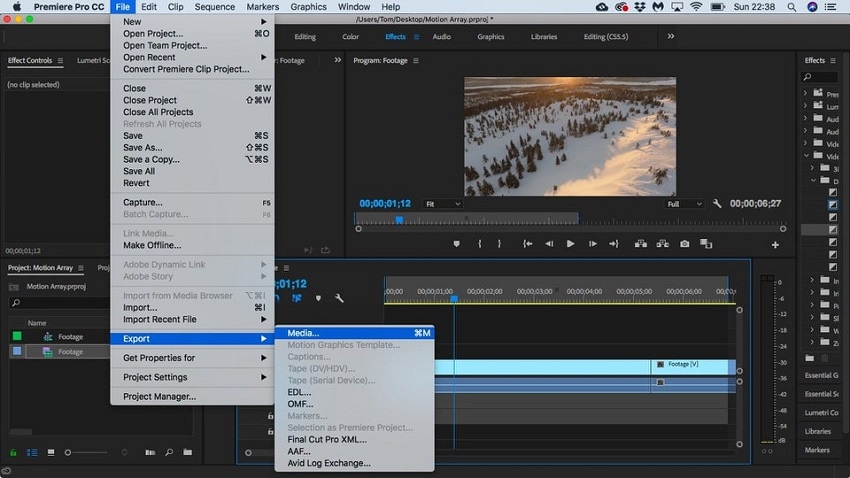
Step 5. Add effects and export
Your split clips are now separate entities. You can add effects, change the speed individually, or add titles. Once set, you can now export your clips and create a single video file.
Part 2. Useful Tips You Should Know for Splitting a Video
Knowing how to split a video in Premiere needs more than meets the eye. You need both a mix of creativity and some technical knowledge. Make your video splitting process easy with these techniques.
1. How to split audio from video
To split audio from video and preserve the original audio, select the video clip that contains the audio. Choose ‘Clip’ > ‘Audio’ > ‘Options’ > ‘Extract Audio’. Premiere Pro will generate new audio files containing the extracted audio file.
2. Delete unwanted footage
Use the ‘Lasso’ tool to delete any unwanted footage in Premiere. Click the ‘Clips’ option to select the ‘Lasso’ tool. Then click on either the ‘Track Select Forward’ or ‘Backward’ Tool to select the unwanted part of the footage. It will select either the front or behind the chosen clip depending on your choice. Then select the ‘Clip’ option and press the ‘Delete’ option to remove the chosen part.
3. Make videos side by side
As you edit your video, you may wish to place two video clips together in the timeline. To do this, select a clip. Go to the ‘Effect Controls’ and change the number position in the box. This ranges from 960 to 1920. The screen will be split and you’ll now have two different screens within the same video.
Part 3. An Easier Way to Split Video than Premiere
Premiere is quite a powerful tool, encompassing more advanced editing features. To some extent, these powerful capabilities contribute to its downfall when compared to its peers. This means that you need adequate storage space in your computer hard disk to manage and run the program. Also, Premiere is quite complicated for users, suiting only professional video editors. Beginners find Premiere complicated to use. The best alternative – Wondershare DemoCreator – works in as simple as 1-2-3 steps to split your video and cut any unwanted clips in a click. Follow these steps to split your video easily with DemoCreator.

The Best Video Spliter & Video Editor
 Secure DownloadSecure Download
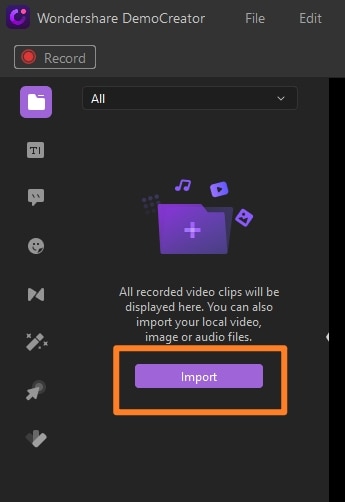
Step 1. Import video to DemoCreator
Once you have downloaded and installed the DemoCreator app on your computer, install and launch it to start the splitting process. Then add the video you wish to split. Locate the ‘File’ option from the ‘Menu’ bar. Select the ‘Project Media’ to extract the video you want to split from your computer to the DemoCreator timeline. You can also drag and drop the files to the Timeline after importing them.
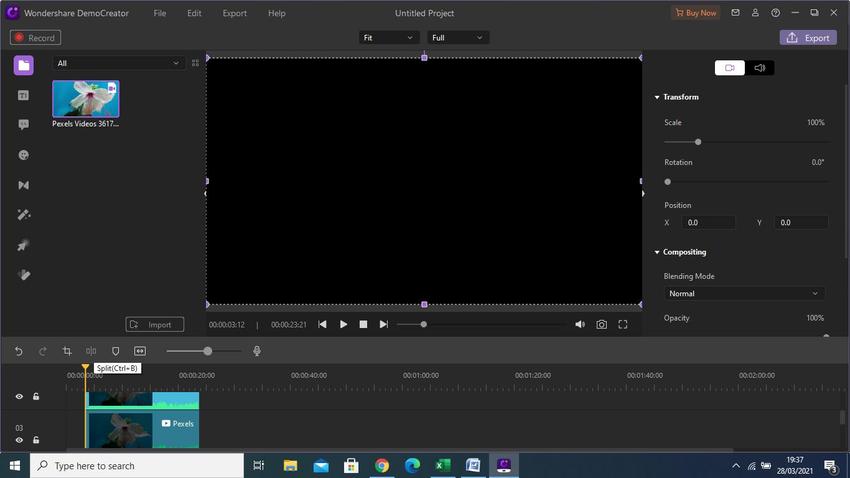
Step 2. Split video
Start by marking the video part that you want to split. While on the timeline, move the ‘Play head’ to the part of the video where you want to split. Next, click the ‘Split’ button to easily split the video into two.
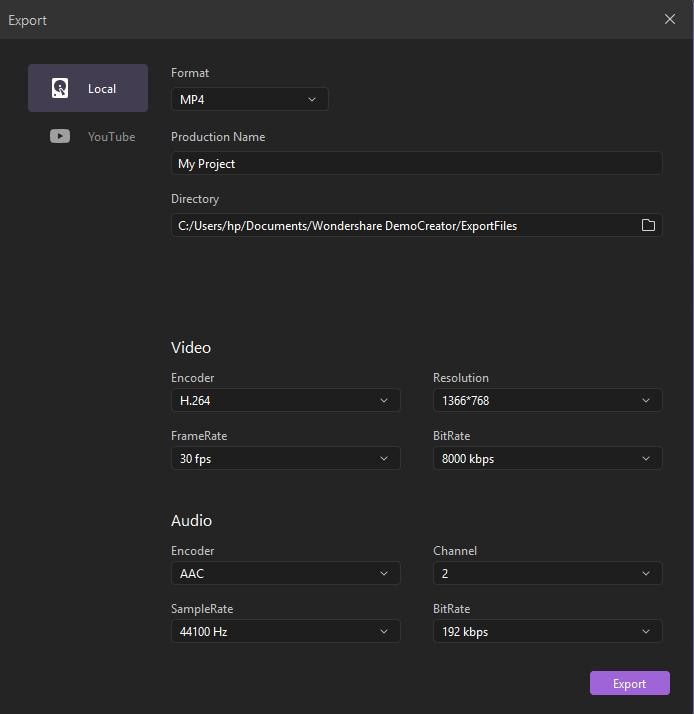
Step 3. Save and Export Video
The final step is to save your split video clips in whatever format of choice. DemoCreator supports output formats like MP4, MOV, TS, GIF, WMV, AVI, and more. Just click the ‘Export’ button to open the ‘Format’ tab and select an output format. Then save your split video to your computer. You can also share externally to YouTube, Vimeo, Facebook, Instagram, and other media platforms.
Part 4. More Advanced Editing Features in Premiere
1. Quick Motion Tracking
This feature helps you track moving objects in your video clip. With Quick Motion Tracking, you can attach several cliparts like video clips and graphics to these moving objects. Among the effects it can achieve include;
Stabilization – it will help to bring out a non-shaky video.
Make visual effects – you’ll achieve appealing visual effects with Quick Motion Tracking.
Blur objects – it will help you blur other people’s faces whenever you create videos in public places.
Mask – you can use it to hide a portion of an image with various shapes.
Track – it moves an effect based on the movement of an object in the frame.
2. Smooth Slow Motion
When you shoot your video, don’t slow down the standard frame rate. Instead, shoot your video at a high frame rate then play it back at a lower frame rate. Effects of Smooth Slow Motion include the addition of extra frames to emulate perfect slow motion, composed video, balanced speed, and frame playback with no frame blending.
3.Animate in the Essential Graphics Panel
The Essential Graphics Panel is a quick means to add texts, graphics, animations, among others to layers. Once you add the animation effects, you can easily export them as Motion Graphics templates. Effects of Essential Graphics Panel;
- This feature makes the graphic workflow 10 X easier when handling a project.
- It allows easy linking of After Effects projects to Premiere Pro.
- You can also edit and customize After Effects templates without prior app knowledge.
4. Motion Blur & the Transform Effect
This effect is best used when you want to create a sense of movement in your images. It will give your image a streaking effect. You determine the speed of the movement by moving your camera either faster or slower. The effects of your image include;
- A blurry image from a slower shutter speed or a freeze motion from a fast shutter speed.
- The size of the aperture you use will determine the amount of light that your camera lets in. The wider the opening of the aperture, the more light will reach your camera’s sensor.
- Also, stabilize your camera to avoid an undesirable camera shakes.
5. Bezier Keyframes
Bezier keyframes are vital when working with a motion that has defined starting and ending points. Bezier will smooth the curve of the motion and the transition’s pacing. Effects of Bezier keyframes;
- Use it when working with audio tracks when you are changing decibel levels.
- Bezier lets you make manual adjustments to the shape of the curve and rate of change on the side of your keyframe.
 Related FAQ
How to combine 2 video clips?
You can also combine two videos into one clip easily with Premiere. If you split a video into Adobe Premiere Pro but wish to combine it, just follow these steps:
- Create a sequence first, then drag and drop the two video clips that you want to merge into Premiere workspace.
- Create another sequence by selecting another video clip and dropping it onto the ‘new item’ button. Rename the new sequence that you just created.
- Next, drag and drop the first sequence that you created onto the ‘new sequence’ to create your required to be nested sequence.
Conclusion
This tutorial shows both how to split video into Premiere Pro and DemoCreator. Premiere Pro comes with advanced features, suiting professional users. This may be a drawback to beginners who want to edit their videos in several ways. If you are a beginner, then DemoCreator maybe your quick alternative. It has simple steps that are easy to follow for any user.


