How to Make Split Screen Video

Have you ever stumbled upon a situation where you are told to demonstrate some activities from multiple videos simultaneously? For instance, showing what each person in a group of three is doing at exactly the same time. Or have you ever wondered how two people conversing over a phone call in movies can be seen on the same frame side-by-side?
The answer is simple. This effect is called ‘Split Screen’. A Split Screen video is different from splitting footage wherein the former enables you to see multiple clips on a single frame at the same time, while the latter is a tool in post-production software that allows you to cut a single media clip into two or more parts, so the unwanted portions could be removed with ease.
With that said, here you will learn all about Split Screen, along with learning how to make a split-screen video using some efficient desktop and web-based tools.
Part 1: The Best Software to Make a Split Screen Video [Windows/Mac Supported]
When it comes to adding a split-screen effect, an efficient post-production tool is needed. Even though there are several programs available in the market, they are either too expensive to be bought or are not robust enough to serve the purpose well.
However, there is one app called DemoCreator by Wondershare that breaks all the barriers. Wondershare DemoCreator, available for both Windows and Mac platforms, is not only easy to use, but it also offers several advanced features that many other industry-standard apps fail to provide.

The Best Split-Screen Maker & Video Editor
 Secure DownloadSecure Download
Furthermore, with the built-in screen recorder, you can even capture your computer screen, edit the footage with the integrated editor, and make a split-screen video to demonstrate how a window or instances of software look from different aspects when observed simultaneously.
To learn how to make a split-screen video with Wondershare DemoCreator, you can follow the steps given below:
Step 1: Import Media Clips to DemoCreator
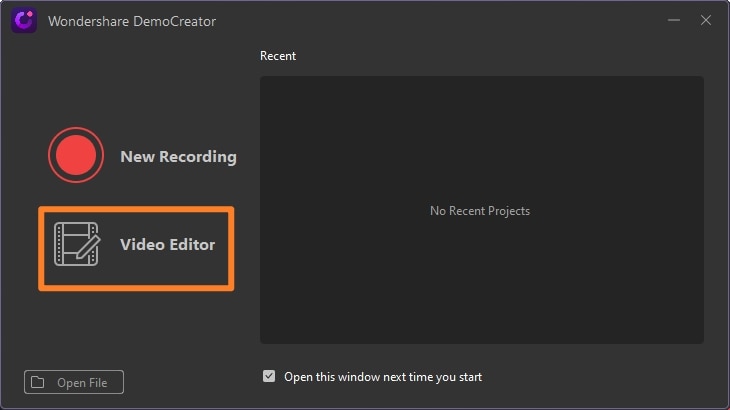
Launch Wondershare DemoCreator, and click Video Editor from the welcome screen. On the main window, click Import from the Media pane in the upper-left area, and import the source clips to the program.
Step 2: Add Clips to Timeline
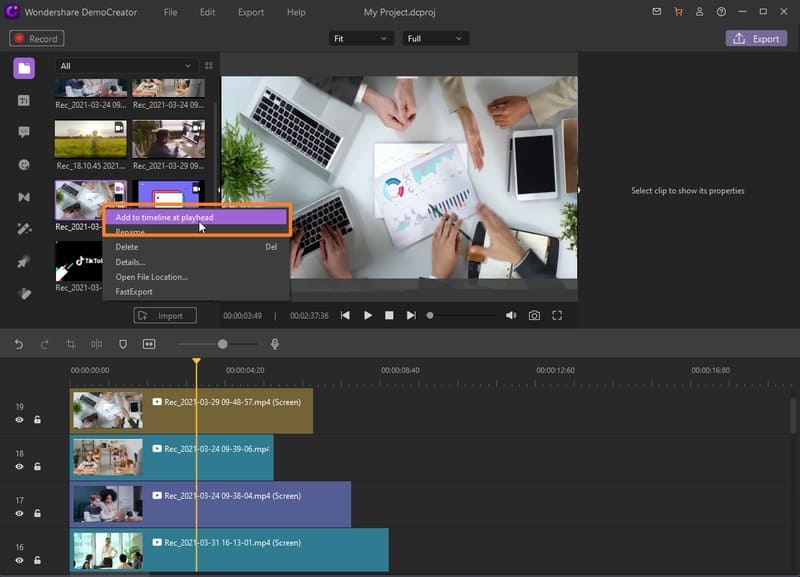
Drag the first clip from the Media pane to the Timeline. Then drag the second clip, and place it on track 02 of the Timeline, right above the first clip. Repeat this process to add more clips if need be. Note: You may have to trim the lengthy videos to match the timeframe of clip with the shortest duration.
Step 3: Create Split Screen Effect
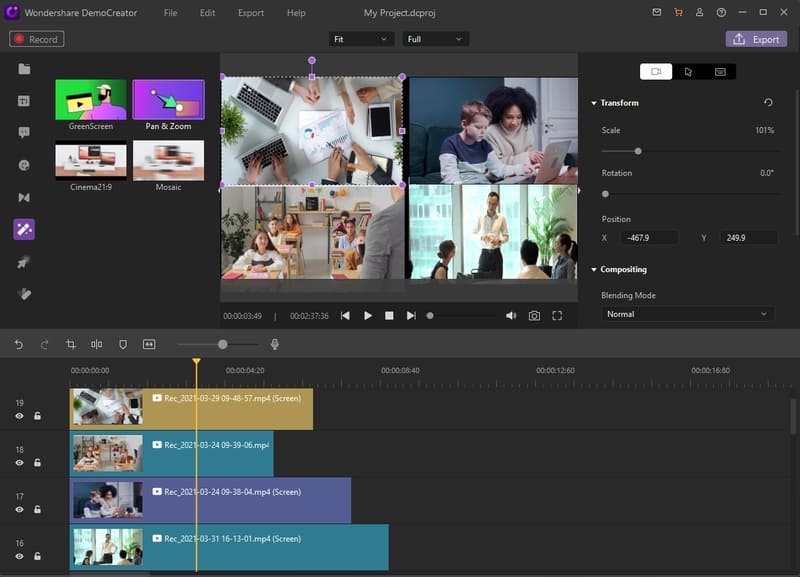
Click to select the topmost clip in the Timeline, and use the scaling handles in the Preview window to reduce the size of the frame. Now, drag and position the resized clip to your preferred location. Repeat this process for all the clips you added, and make sure to position each clip at a different location so all the videos are clearly visible. Optionally you can also use the toolbar in the left to add other effects and elements to the video.
Step 4: Export the Video
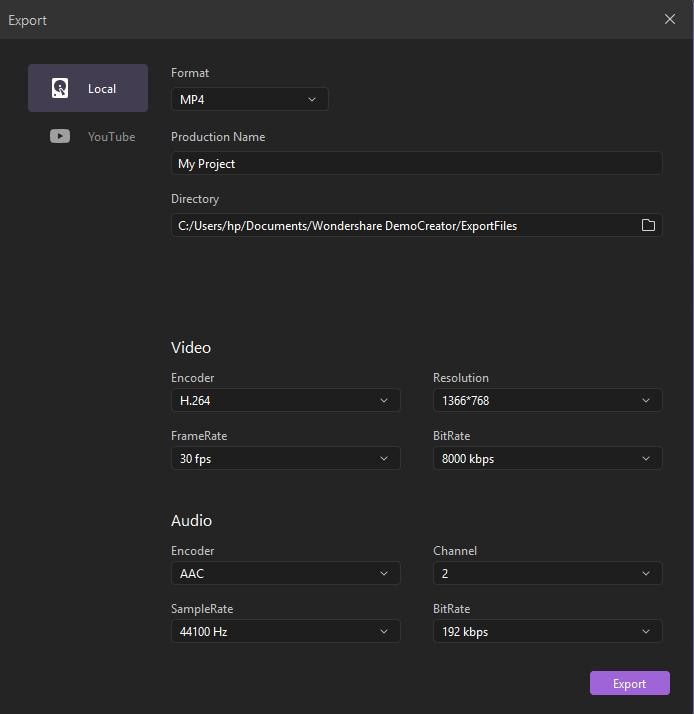
Click Export from the top-right corner of the interface. On the Export box, ensure that the Local category is selected in the left pane. From the right window, use the available options to define an output format, name of the produced file, and set other export preferences to produce a split screen video.
Part 2: Making Split Screen Video with Filmora
Filmora is another product developed by Wondershare. Wondershare Filmora X (latest version) is used by many video editing professionals because of its simple and intuitive interface, and the ease by which it allows the editors to create industry-standard outcomes. Features like screen, webcam, and microphone recording, along with split screen templates allowing the integration of up to 6 clips are a few merits that make Filmora X kind of unique when compared to other mainstream and globally recognized applications like Adobe Premiere Pro, DaVinci Resolve, Final Cut Pro X, etc.
It is easy to make split screen video with Wondershare Filmora X, and the process to get this done is explained in the following steps:
Step 1: Import Source Clips to Filmora X
Launch Wondershare Filmora X on your Windows or Mac PC. Click anywhere inside the Media box, and select and import two or more source video clips to the application.

Step 2: Create Split Screen Effect
Go to Split Screen from the standard toolbar at the top. From the available presets, click and drag the one of your choice to the Timeline. Next, drag the first clip from the Media box to the first screen placeholder in the Preview window. Likewise, drag the second clip to the second screen placeholder. Repeat this process to add more videos as per the selected preset. Click OK from the lower-right area of the Media box once you are done.

Step 3: Preview and Export
Click the Play button from under the Preview window to see if the split screen effect has been created correctly. Click EXPORT from the top-center area of the main interface. On the Export box, go to the Local tab if not already there, choose your preferred format from the left list, make other necessary changes in the right window, and click EXPORT from the bottom-right corner to make split screen video in Wondershare Filmora X.

Part 3: Split Screen Video Editor Online – Kapwing
Kapwing is an online tool for video editing enthusiasts. The web app allows the professionals and amateurs to edit their videos and add effects to them via Internet browser, without installing any application on the PC. The best thing about using Kapwing is that the local hardware resources of the computer don’t get much overhead as all the processes are done on the website’s server, and the users receive a download link of the finished outputs.
The method of creating a split screen video with Kapwing is explained below:
Step 1: Choose a Template to Start
On your computer, start your favorite web browser, and go to https://www.kapwing.com/collage. From the available templates, choose the one you prefer to use as per the number of participating videos and their visibility orientation.

Step 2: Upload Videos
Click REPLACE on the first screen placeholder, on the Choose a replacement page, click, Click to upload, and select and upload the first video to Kapwing. Repeat the process to populate the other screen placeholders as well.

Step 3: Edit, Preview, and Export the Split Screen Video
Use the tools present in the right pane of the webpage to make the required adjustments to the uploaded video(s). Next, click the Play button from the upper-left area of the Timeline to see if the split screen video would look acceptable after exporting. Finally click Export Video from the top-right corner of the page to make split screen video with Kapwing.

 Related FAQ
Q1) How to publish the split screen video to YouTube?
A1) A split screen video is a normal media that is treated as a regular clip, and therefore it can be uploaded to YouTube in the same way the other videos could be. Simply put, it is merely the method of adding the split screen effect that varies. After exporting a split screen video as MP4 or any other acceptable format, it can be uploaded to any social media or streaming platform naturally.


