
Top 10 Video Editor with Captions or Subtitles Function

Most people nowadays use the phrases "captions" and "subtitles" interchangeably, assuming that they both refer to the same thing because of the proliferation of internet video content. The notion of captions first arose in the early 1970s. Their goal is to make television, movies, and internet media more accessible to hearing-impaired persons. This implies that subtitles don't only record a movie's dialogue. There are various methods and software solutions available, but which is the best method for adding captions to a video, and how can you learn how to do so? It's simpler than ever to get started, whether you've worked with captions or subtitles before.
Part 1. Why You Will Need Video Editor with Captions or Subtitles?
Video editing software such as may be used to add subtitles to videos. Follow along with this guide to learn how to add subtitles to video in the simplest method possible. As consumers resort to their social media on the go, more and more videos are being seen on mobile devices. So, catering to such audiences makes it logical, right? Even if you're only producing a short video for your pals, it's worth the effort to design it so they can view it on the train in the morning. This is where subtitles come in helpful, not to mention ensuring that your material reaches viewers that are deaf or hard of hearing. They also keep track of who speaks what lines and provide a textual explanation of any audio cue that isn't a conversation. In this straightforward course, you'll learn how to create material that everyone will appreciate.
Part 2. Top Video Editors
1. Wondershare DemoCreator
DemoCreator is a professional captioning program that may be used to create, edit, and repair external caption documents for recordings in a variety of businesses. Not only can you generate captions for a movie by applying a text file comprising exchange lines with this apparatus, but you can also operate on existing captions in recordings. It's one of the most innovative caption creators, highlighting graphic sound waveforms to let you repeat sections of a video. You may zoom in and out of the sound wave to concentrate on the captions' timestamps. Moment evaluation, programmed subtitle timing and modification, and so on are some of the features. Furthermore, the most astonishing feature is that it has several captioning options and allows you to add a caption to a video that already has one.
Subtitles: How to Add Them:
DemoCreator Video Editor has a simple interface that allows you to add subtitles to your video projects quickly and easily. More information may be found here...
- Download and Install DemoCreator
You must first download and install DemoCreator Video Editor before you can begin adding the subtitles files to your video.
 Secure DownloadSecure Download
- Add your media files to the program:
Launch this toolkit from your desktop after you've installed this video editor, and you'll see the plain, easy interface of this video editor. You'll be prompted to start a new project or open one of your existing video projects as soon as you begin this video editor. Choose the one that is best for you. Now that you're logged in, you can see Import Files as the primary area of the UI. You'll be directed to your system explorer after pressing this button, where you can add your media files and subtitle word file (if any)
- Add Subtitles to your Video Project
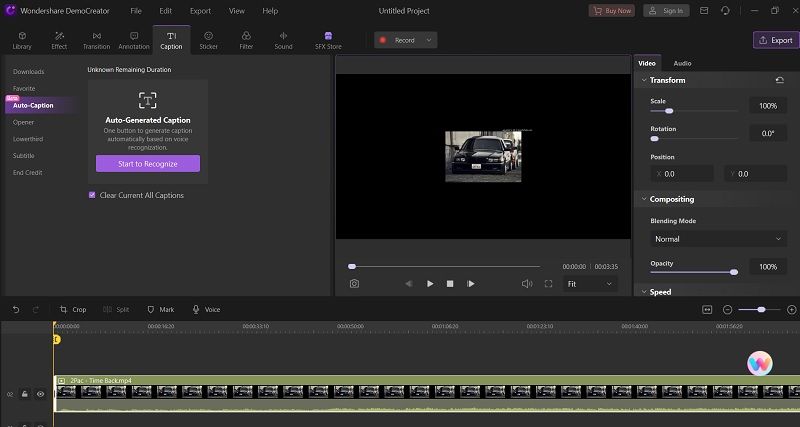
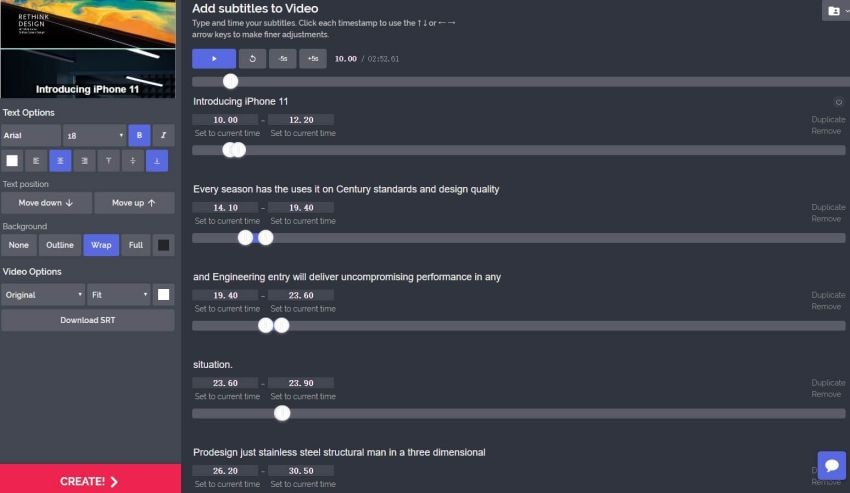
In this step, we'll show you how to add substiles to your video in the simplest way possible. Add your media files to the timeline below, where you can edit and improve them as needed for the video project. Then, on the top menu bar of the program interface, go directly to the Text menu like follows:

There are many different subtitle templates from which to choose for your video clip. As mentioned above, you may preview the text templates before applying them to your video production. After you've chosen your decision, modify the file with your text and video material to ensure that it synchronizes with the flow smoothly.
- Export your Project:
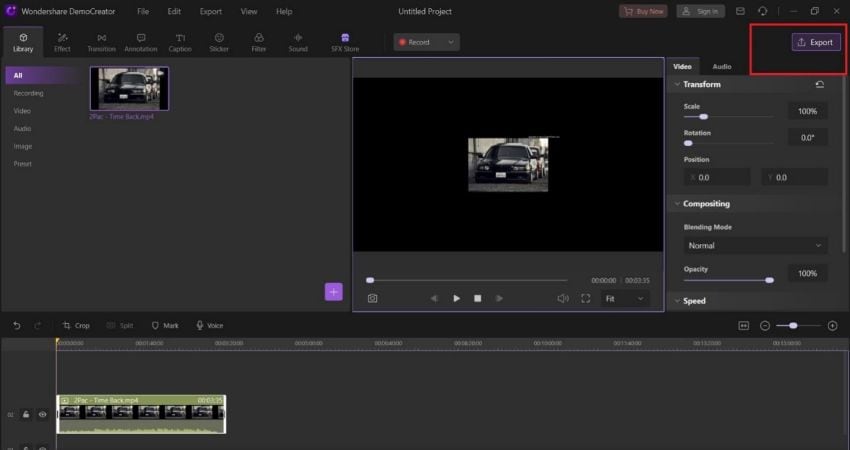
Finally, we'll show you how to save your project file to the place of your choice. Stick to the steps. To export your creation, go to the top of the program screen and press the Export button like follows:
2. Camtasia
Camtasia should be at the top of your list if you want to automatically add subtitles to your videos. Camtasia's state-of-the-art software accurately transcribes the voice in your video. It then transforms it into subtitles, allowing you to optimize your video for social media in a matter of seconds. Camtasia may also be used to add eye-catching top border headlines, beautiful progress bar animations, watermark your videos with your brand, and resize/crop your films to make them social media-friendly.
Camtasia is more than simply a subtitle generator. The ideal method is to use an automatic subtitle generator. Fortunately, there are several excellent solutions available. Using Camtasia to auto-subtitle your films may save you time and money while also relieving you of the frustrations associated with sophisticated software. You may add captions to movies in widescreen, square, and vertical formats. You may also obtain transcription files in Txt and Srt formats.
Steps to Add Subtitles with Camtasia:
- Camtasia should be used to upload the video you wish to caption. To add your video to the editing timeline, click the Add button on the first frame.
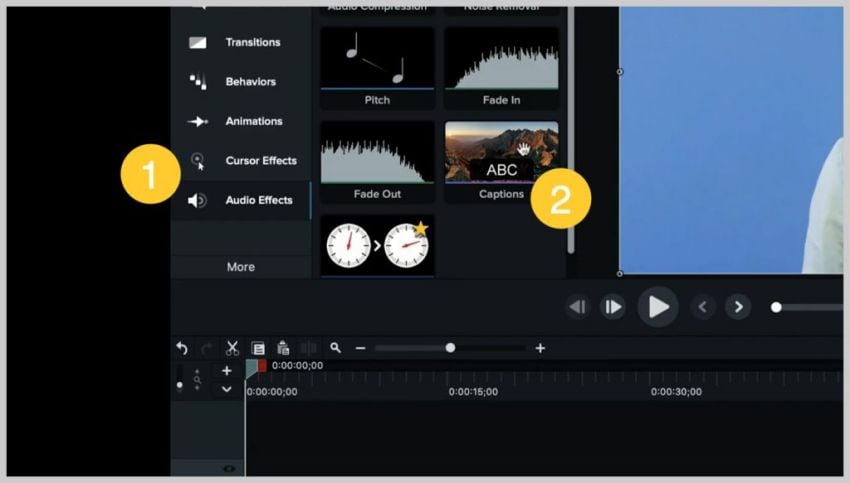
- To add text to the slide, click the Plus button. Use the Layout tab or drag text to where you want it. After you've finished editing, you may resize your video with a single click to suit various social media sites.
- Its editor also allows you to change the font, size, location, and color of your subtitles, as well as add your logo and brand colors. You may also store the design you make as a template to use in future videos. Download the captioned version of your video.
3. Kapwing Auto-Subtitle Maker
Kapwing has published a new beta version of their subtitle creator, which includes a subtitle auto-generation capability. To test out this new function, paste the video URL or upload it from your computer, or try a video sample. Once you've converted all of your video's narration or conversation to text, go to the Kapwing platform, which allows you to upload a subtitle file to a video. Simply choose the Auto-Generate option and Kapwing will begin generating subtitles. As previously said, this program is currently in beta, and the produced subtitles are not entirely accurate. You may transcribe the text in the Editor interface at any moment and change it afterward.
Kapwing Subtitle Maker allows you to submit the SRT file, in addition, to automatically generating subtitles. Kapwing is a well-known and well-liked online video editor with a broad range of features. You may make a video that is more attractive and engaging, as well as one that has various significant characteristics. Kapwing has recently published a new beta version of their subtitle creator, which includes the ability to auto-generate subtitles. Experience this new highlight by simply copying the video URL or uploading it straight from your PC. You must save the video for which you want to make a subtitle file online to connect to it. If you don't have a web server where you can upload the video file, you may save it online using a video hosting site like Vimeo.
Method to Add Captions with Kapwing Editor:
When you choose the Auto-Generate option, Kapwing will begin creating the subtitles. As previously said, this program is currently in beta, and the produced subtitles are not perfect. You may modify the content by typing it on the time in the Editor interface. Kapwing Subtitle Maker enables you to submit the SRT file, in addition, to automatically producing subtitles.
4. YouTube Automatic Caption
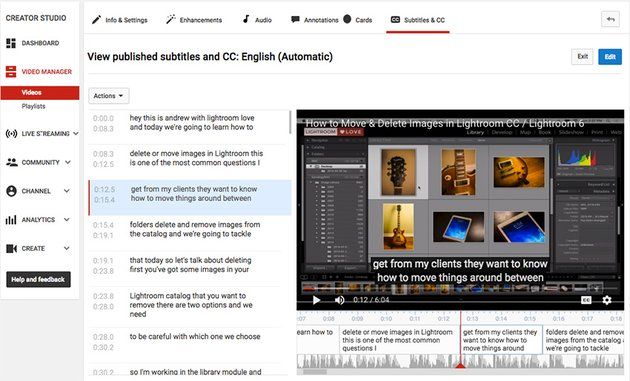
It's simple to make subtitles on YouTube. The service includes automatic transcription, which may be altered via the Video Manager. YouTube's transcription is famously (and occasionally comically) poor, even though the service seems to be constantly improving. You do, however, have the option of manually adjusting them. To access the subtitle settings, go to Subtitles & CC and then click on the subtitle file you wish to change. That is English in our instance (Automatic). Because you must post a fresh video to create automated subtitles on YouTube, it is quite straightforward. After the upload is complete, the video should appear in the Video Manager.
Creators of video material who already have a YouTube channel may use the platform's voice recognition technology to automatically produce subtitles after uploading a new video. In certain important languages, it is feasible. If your YouTube videos aren't in one of the languages on this list, you'll have to use traditional methods to create subtitles. Select the Subtitle/CC option from the Edit drop-down box that appears next to your freshly uploaded video. Then, before adding subtitles or CC, configure the video language.
Steps to Add Captions with YouTube Auto Caption:
- It's easy to generate automated subtitles on YouTube since all you have to do is post a new video. You should be able to locate that video in the Video Manager after the upload is complete. Select the Subtitle/CC option from the Edit drop-down menu that appears next to your newly uploaded movie.
- To begin modifying them, hit the Edit button. The transcription that YouTube generates automatically may be seen on the left side. You may fix any of the inaccurate subtitles by typing over them. Work your way through the video using the linked video player and intervene as required. When you're ready, click Publish Edits to save the updated subtitles.
- Click the Actions menu and choose the file type you need to export and download a subtitle file. The SRT format is extensively used (including Facebook video). Google makes saving subtitles from other people's movies difficult, but there is a solution.
- Other issues with YouTube's service exist. There is no way to contribute to the subtitles, for one thing. Alternatively, maybe your films are for a course you're creating and you don't want to upload them to YouTube. Perhaps you're Irish, and YouTube has utterly ruined your accent.
5. Facebook's Automatic Caption Feature
This capability is only accessible to marketers in the United States and Canada, but it might be quite valuable for Facebook users who often submit videos in this language to their pages. However, Facebook's automated caption tool isn't always accurate, so you'll have to double-check all of the subtitles it creates. It may be quite useful for Facebook users who publish videos in this language regularly. However, Facebook's automated caption tool isn't completely trustworthy, so you'll have to manually fix all of the subtitles it generates.
This Facebook feature is only available to marketers in the United States and is only available in English. It's really simple to use this functionality. Simply go to your profile page or Facebook's main page and pick the Photo/Video option from the Create Post menu. Find the video you want to post to your Facebook page, give it a title or a remark, and then click the Share button when it's done. It will appear on your profile page after that, and you should click the Generate button at the top of the post. If you can't see the Generate button, click the Edit Post button, look for the Subtitles and Captions (CC) option, and then choose the Video Language.
Steps to Add Captions with Facebook Caption Feature:
- Go to the Facebook home page or your profile page and choose the Photo/Video option from the Create Post menu. Locate the video you want to share on your Facebook page, add the video's title or a remark about it, and then click the Share button when it's done.
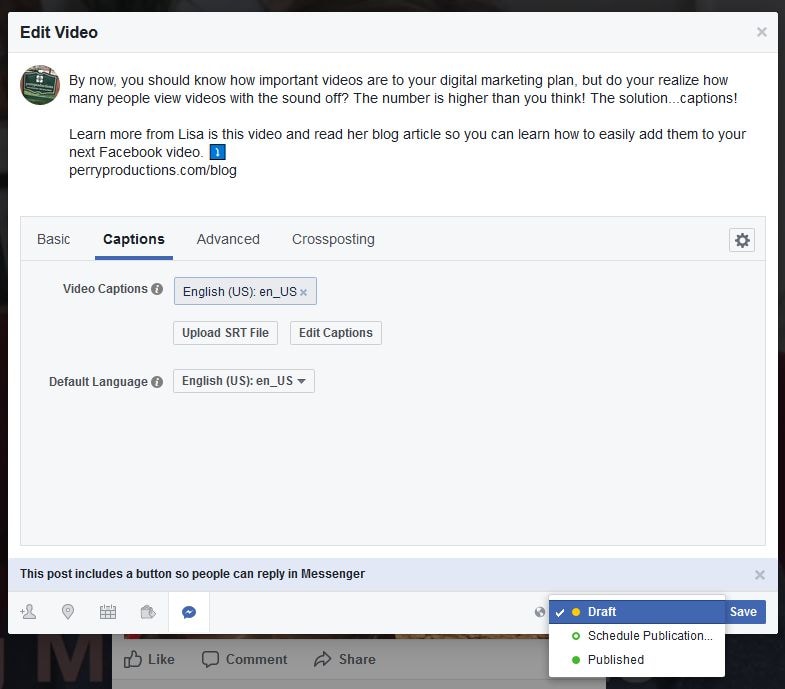
- The video will appear on your profile page, and you should click the Generate button at the top of the post to start the process. If the Generate button isn't visible, click the Edit Post button, locate the Subtitles & Captions (CC) option, and then choose the Video Language.
- Examine the captions you've just created to ensure they're free of errors, and then click the Save to Video option after you've made all of the required changes. Subtitles will then be added to your video.
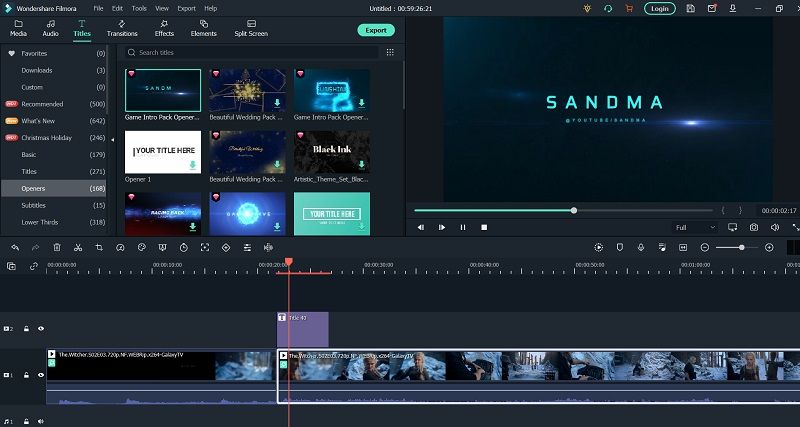
6. Wondershare Filmora
Filmora has a well-designed user interface, a good balance of control, and consistently produces high-quality output. Because of its unique and professional-looking subtitle creations, it is better suited for professional videographers and online content providers. It supports all modern video formats, as well as video editing and output in HD and 4K. It has a wide range of easy-to-use features that may help you create educational films, edit action camera footage, and create viral videos for social networking sites, among other things. You can chroma key a source many times if you have different shades of green, each time specifying a different shade of green. Simply using the subtitle editor without any modification will almost certainly look terrible. However, there are several choices for fine-tuning the chroma key removal. As a result, Filmora is better suited to short films and provides the most value for your money. How to use Wondershare Filmora to add subtitles to a movie:
Step 1: Download and install Wondershare Filmora, then open it, choose 'New Project,' and then 'Import' to add the video file that needs the subtitle insertion procedure.
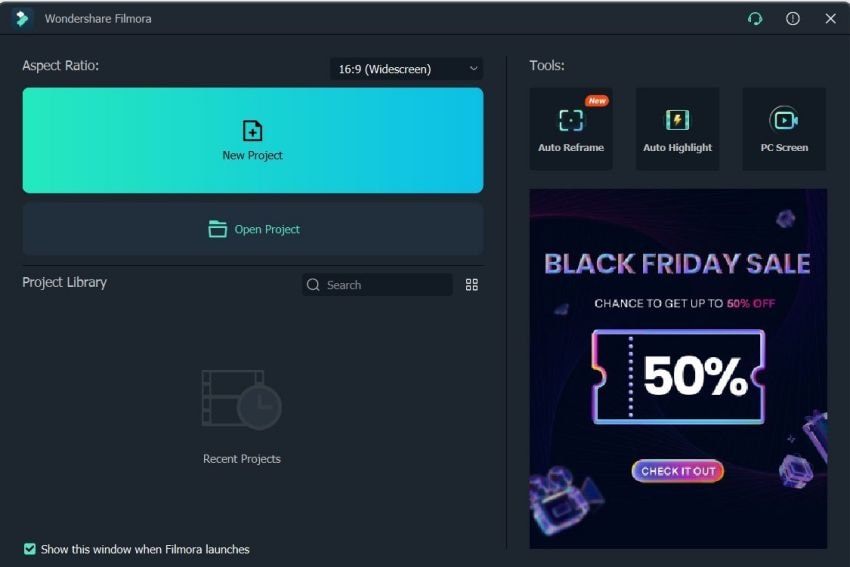
Step 2: Select the preferred format from the 'Titles' menu, which is accessible through the 'T' icon. You must now double-click the symbol to adjust the font size, color, format, and other features.
Step 3: Click the 'Advanced' option to add animations, effects, font fill, and shadow to your title. Finally, press the 'Export' option to save the changed title. You may customize the final file output format, storage location, and other options in this window and save it to your computer for future use.
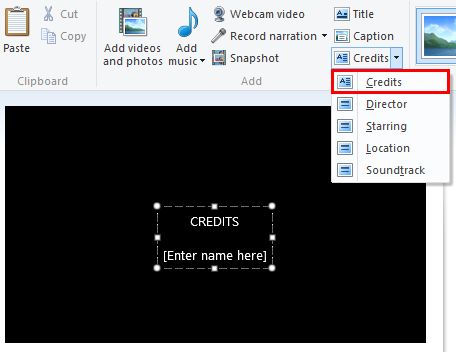
7. Windows Movie Maker
Windows Movie Maker is a movie editing program included with Windows operating systems that allows you to edit and make movies with special effects, transitions, and timeline narrations. Subtitles, which are any text placed over a video clip, may also be added. If you wish to explain the footage more or add another language to it, subtitles might help your video reach a larger audience.
Step 1: Import the video
To begin, launch Windows Movie Maker and import the video to which you wish to add subtitles. All you have to do now is find the video file on your computer's hard drive or your digital video camera. The video will be available in the collections folder after it has been imported.
Step 2: Drag and drop the video file into the timeline.
After that, drag the video to which you wish to add subtitles. When you open Windows Movie Maker, you'll see three horizontal timelines running across the bottom. Video is the one at the top. Audio is the one in the middle. The Title Overlay, on the other hand, is the one at the bottom. Drag and drop the video file from the collections folder into the Video timeline. The video will play within the timeframe you choose.
Step 3: Put the Overlay on the Subtitles
On the left side of the window, click the Titles and Transitions button. Then pick Title on Selected Clip from the drop-down menu. Put the subtitles you wish to add to the movie in the section where you're prompted to enter the title text. Then go to the Change the title animation option and look for the Subtitle overlay.

Step 4: Complete the Task
Repeat the procedures until all of the subtitles you wish to add to the movie are added and positioned correctly. Then save the movie file as a Movie Maker Project on your PC. You may also opt to export the video as a Windows Media Video file, which you can then share online along with the subtitles you've added.
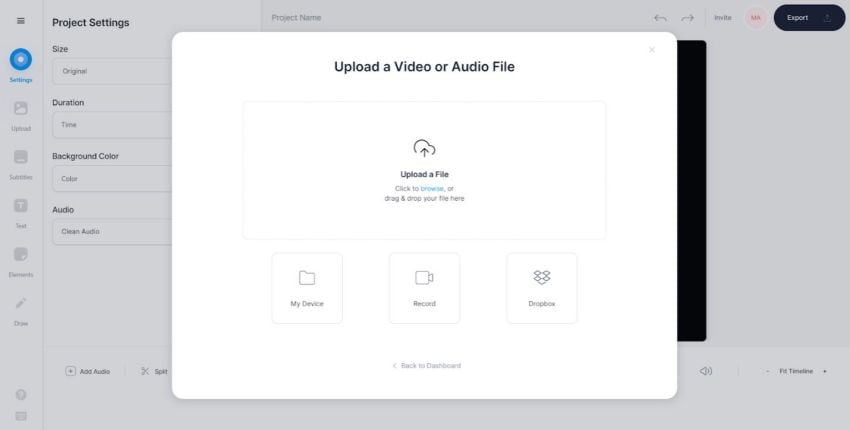
8.VEED.IO
With a single click of a button, VEED adds subtitles to your videos. This is both great for your budget and wonderful for your company since it is free! To be honest, adding subtitles will still take you a few minutes. However, creating content that expands your audience and company is difficult. VEED is a web-based video editor that is both easy and powerful. It has a low learning curve, making it ideal for novices as well as professional content makers that need to generate content quickly for themselves and their customers. That additional investment of a few minutes for editing might go a long way if you want to create exceptional content that gets results.
Steps to Add Captions with VEED.IO:
- Go to VEED.IO
First and foremost, you must submit your video to VEED. You may effortlessly upload a video from your computer or phone, through Dropbox, local files, or by entering a YouTube URL. Alternatively, you may use VEED's screen recorder to capture your video directly!
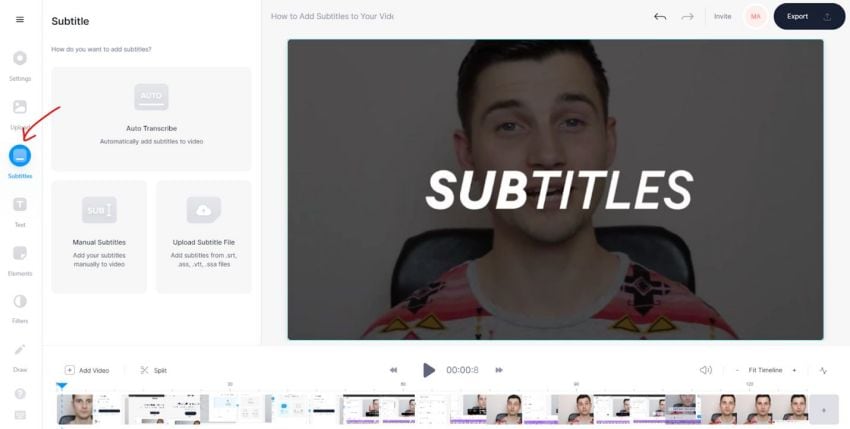
- To Add Subtitles:
Click the subtitles button to display the choices. All you have to do now is access the Subtitles tab in the VEED editor once you've submitted your video. You may opt to have VEED add captions to your video automatically, submit your SRT subtitle file, or manually enter subtitles.
- Subtitles May Be Edited and Customized
VEED's subtitle function is 95% correct, but regardless of whether your video was subtitled by AI or a person, it's always a good idea to double-check. You may also divide subtitles in the video timeline by right-clicking on a subtitle and hitting S or clicking on Split. People usually do this because a line is too lengthy and has to be divided. Your video editor should resemble the one below, but with a different video.
- Save Your Video to Your Computer
Simply click the Export icon in the top-right corner of your screen to download your movie. In the left-hand corner of your screen, you may immediately adjust the subtitles. You may also use the timestamps to control when and how long a subtitle appears. You can also quickly shift and rotate your subtitles so that they don't get uncomfortably chopped out on whichever platform you're posting to. This will bring up the Export Options menu, where you may tweak your video's defaults. Before exporting your movie, remember to activate the Burn Subtitles option. If everything seems to be in order, choose Export Video.
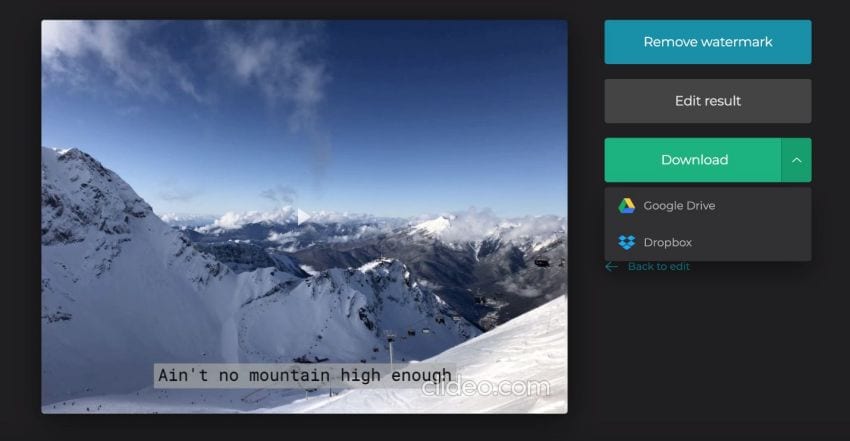
9. Clideo
Clideo's free video editing software will take care of you. Follow this quick instruction to easily add subtitles to a YouTube video or a social network ad. To cater to the growing consumer habit of users viewing videos with sound off in their timelines, you may add subtitles to your YouTube video or video marketing ad. Several users view videos in public, at work, or late at night, and some social media sites play videos without sound automatically. Muted play viewers will be able to grasp the information inside the video without having to switch on the sound. Your viewers will be able to enjoy your video regardless of their surroundings.
Step 1: Open a Video Editor or Create an Account
Log in with your Clideo username and password, or create a new account. If you're a new user, create a complicated password to reduce the chances of someone guessing it and getting unwanted access to your account in the future.
Step 2: Begin New Project and Import Files
On the left sidebar, click the purple + Create a video button. Select the video format you want to use by clicking on it. Once you've chosen a ratio, the editor will launch immediately. For the sake of this video lesson, we've chosen the 16:9 Widescreen format. Drag and drop your video file into your library, or click Add Browse Files and choose a file if you're uploading your video clip. If you wish to utilize stock footage, go to the left sidebar and choose Stock, then explore the video library. You may use the search bar to look for a certain video by typing its name into the box. When you've discovered the clip, you wish to utilize, select it and click the tick button to save it to your collection. To return to the editor, click Close.

Step 3: Customize and Add Subtitle Text
Your video has now been added to your collection. Drag and drop your video onto your timeline by clicking on it. It's time to start adding subtitles to your video. Scroll down to the Captions / Lower Third section by clicking Text. Drag & drop the Subtitles text into the timeline above your video clip after clicking on it.
To change the subtitle, go to your timeline and click on the purple subtitle. At the top of your editor, you should see three choices. Color, Transform, and Text Select Wording and enter your text. Drag the white circle pointer back and forth to modify the size of the subtitle by clicking on Transform. Change the text color or add a backdrop color to make the text easier to read. Click on your current subtitle, then click Duplicate to add another subtitle and continue the dialogue. To modify the second subtitle, choose Text from the drop-down menu. Drag the left green sidebar towards the left to make this subtitle shorter.
Step 4: Save the Captioned Video to Your Computer
When you're satisfied with your video, click Export in the video editor's upper right corner. A sidebar with a save option will display. For the greatest video quality, choose 720p or 1080p resolution, and choose Maximum compression for the fastest uploading. To begin the saving procedure, click Continue.
You might get a quick pop-up message. Please take the time to complete the survey; it will much assist us! Click the X in the upper right corner if you don't want to. Your movie will be stored on your computer automatically, or you may share it immediately to social media or through email following the on-screen prompts.
Part 3. Video Captions Editor for Pro-Level Editors
Adobe Premiere Pro CC
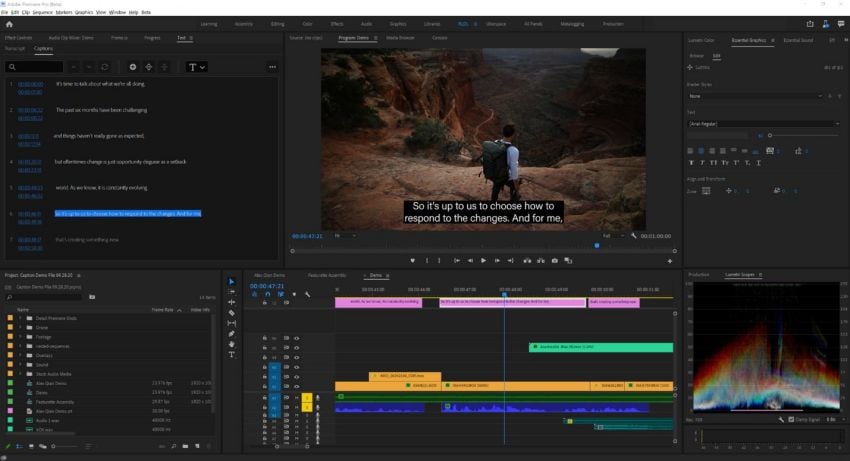
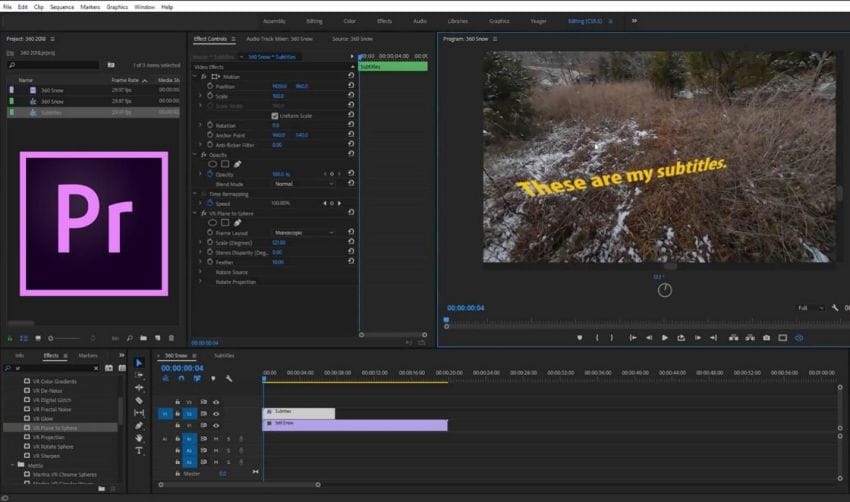
To add captions to your next video project, Adobe Premiere Pro provides an easy-to-use interface. To begin working with it, choose File > New > Captions from the File menu. It doesn't matter whether you're using Adobe Premiere Pro CC to add subtitles; the procedure may be simpler than you believe. Subtitles and captions add time to the creation of your video. However, it exposes your material to new audiences and increases the likelihood that your video will be watched. Let's get started learning how to use Adobe Premiere to add subtitles.
How to Add Captions with Adobe Premiere:
- Opens the Captions editing window by going to Window > Captions
- Enabling captions in your Program Monitor (Wrench icon > Closed Captions Display > Enable)
- Ensure that captions are included when you import media files with embedded captions.
- When it's time to export, make sure the Captions tab of the Export Settings window has either Burn Captions into Video or Create Sidecar File selected.
How to Add Subtitles with Adobe Premiere:
- Click the (+) icon to add a new caption section while keeping the Subtitle format chosen. Manually type in the dialogue and add more parts as required for the following captions. Take a look below after you've started producing your manual captions, and you'll see that the captions have their dedicated track! Adjusting your subtitles is a breeze with this track since you can slide them around like video clips on your timeline.

- When you have an SRT file ready to upload, the Import option will come in handy. Premiere Pro will be ready to accept your SRT file, whether you produced it via Facebook or by engaging service to write your captions for you.
- Return to Premiere Pro and choose the third option as indicated above, then select "Subtitle" from the Format pop-up menu, then "Timeline Start" from the Start Point option box. If you need to realign the caption track, double click on segments to modify or select all segments and drag the whole caption track to another spot on your timeline as the timeline changes with your caption track and the Text Panel shows your imported captions.
- When you're through with your manually produced captions and wish to export them as an SRT file to utilize on your YouTube or Facebook video, pick "Export to SRT file" from the ellipsis menu.
Part 4. How to Choose?
DemoCreator Subtitle Editor is a caption editing program that includes all of the necessary features for quickly creating and editing caption documents in ASC, SRT, SSA, SUB, TXT, PSB, RT, JPS, and other formats. You may embed caption lines and specify the starting and finish time, or term time, for each caption line when you import a video into the manager. With this video caption maker, creating captions is a piece of cake. You must fundamentally incorporate caption lines according to different timings and casings. From there, you may carefully customize your captions, such as checking to spell, interpreting captions, and setting up the size, shading, and the framework of textual styles. Here are some of this SRT subtitle editor's major insights:
Features:
- DemoCreator makes it simple to add personalized subtitles to your movies.
- It also enhances the impact and structure of your SRT subtitles.
- DemoCreator allows you to distribute the finished product in the format you choose.
- It has a YouTube sharing capability built-in.
- With its extended effects gallery, you can now apply effects to your captions.
- Watermarks, subtitles, effects, captions, and animated captions may all be edited.
Part 5. Conclusion
There is a plethora of caption proofreader software on the internet that claims to be able to provide you with exceptional video captioning capabilities, but not all of them can deliver the quality you deserve. In light of this, stick to our list of the 6 best free caption generators for a smooth voyage. You may also suggest more interesting video editing topics that will help you improve your skills. There is a substantial distinction between closed and open inscriptions since they are powered by different technologies and provide different benefits. DemoCreator is only focused on this capability. Captions are usually available in SRT design. While looking at captions on a scratchpad is straightforward, changing them is a whole other story. Viewers benefit from captions on recordings in a variety of ways. With the help of captions, it is possible to understand an unknown dialect film.


