How to Edit Audio in DemoCreator?
It just doesn't happen by default. That fine-tuned recorded audio file in a broadcast, musical arrangement, or film soundtrack has gone amazing makeovers. Audio editing involves a series of events, from changing the clip's position in the timeline, reducing any noise, and even slicing some clips from audio. You probably may be asking what steps to follow in how to adjust the video sound.
Well, that is what this article is all about. We'll walk you through the steps to refine audio using the best editing tool – Wondershare DemoCreator.
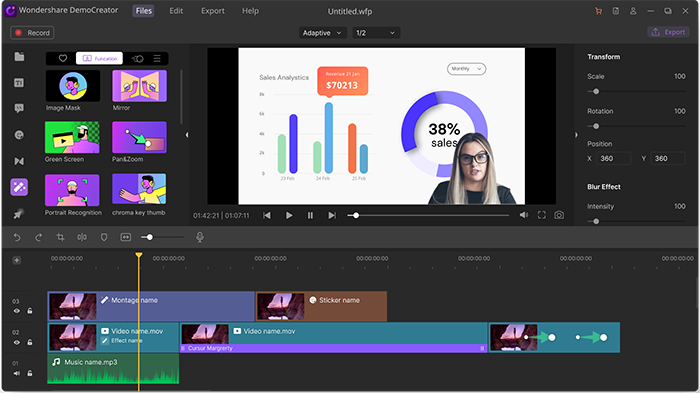
DemoCreator video editing is a two-in-one flagship tool that lets you record your screen and edit your videos and audio. It boasts over 100 built-in editing resources to create and edit videos and audio with much ease. Whether it's changing the video's speed, detaching the audio, incorporating fade in or face out feature, adding annotations and captions, it's all in a flip of a mouse. Besides, you can record with your camera or the Microphone and still get explicit quality output. Among the audio editing functions on DemoCreator is batch fades, split, denoise, mute, detach, among other effects.
A step-by-step guide to editing audio in DemoCreator
Here is a step-by-step guide about how to edit audio in Wondershare DemoCreator.
Step 1: Download and install the Wondershare DemoCreator program.
To edit audio in DemoCreator, firstly download and install Wondershare DemoCreatore program to your computer. Choose whether your device's operating system is Windows or macOS and click the corresponding 'Free Download' button.
 Secure Download
 Secure Download
Step 2: Record or import the music files
If you are starting audio from scratch, you can record a new file using your Microphone or any other system sound. However, if you have a pre-recorded audio, click the 'Open File' option to add audio.
Step 4: Drag and drop the audio file into the timeline
Once you settle on which media file to import from your computer, it's time to add them to the DemoCreator timeline. Drag and drop the audio to the timeline and head on to edit your file.
Step 5: Select the audio track and right-click to choose the "Edit Audio".
Select the track by hovering your mouse over the thumbnails of the audio. Then right-click the audio and choose the 'Edit Audio' option from the drop-down list.
Step 6: Drag the mouse over the music track to adjust the fade-in and fade-out duration
Fade-in and fade-out are paramount when editing your audio. Adjusting the fade-out makes the sound progressively softer while fading away until it's no longer heard. Set it, drag the mouse over the music track, push the slider bar to either the right or left, mark the start time and the duration you want it to take.
Step 7: Adjust the audio speed, volume.
You can choose faster/slower speed or high/low volume. In this case, use the right audio panel to adjust the volume. Go to the 'Editing Properties' of the audio file and choose the 'Audio panel' of that specific audio clip. Then select the 'Volume' settings. It is set to 50 by default. Adjust it to the right to raise the volume, or to the left to lower the volume of your audio. That is also how to adjust the video sound.
The 'Time Stretch' feature in DemoCreator is responsible for the speed control. You can either stretch or contract the audio as you wish. Likewise, you can click the 'Speed settings' and specify the speed percentage. Meanwhile, ensure you indicate the duration at which you want that particular setting to be applied.
Step 8: Export and share.
The editing process is accomplished, and now the next thing to do is to export your file. Name your audio and choose a location to store it as an exported file. Likewise, you can adjust the sample rate, bitrate, and channel as per your preferences. Lastly, click the 'Export' button at the bottom of your screen and save the file to your computer. You can now freely share your audio file to YouTube and other channels.
Conclusion
When it comes to editing your audio, you need to factor in numerous factors. An editor that makes it easy for the less experienced will save you unnecessary panics. Wondershare DemoCreator has all it takes when it comes to both video and audio editing. More so, the steps are simple, enabling you to edit your audio quickly. Apart from adjusting your audio speed and volume, you can spice it more with the audio fade-in and audio fade-out ability to bring a soft variation in the track sound. And it doesn't end there! Share your joyous audio with friends via other forums in numerous output formats.


